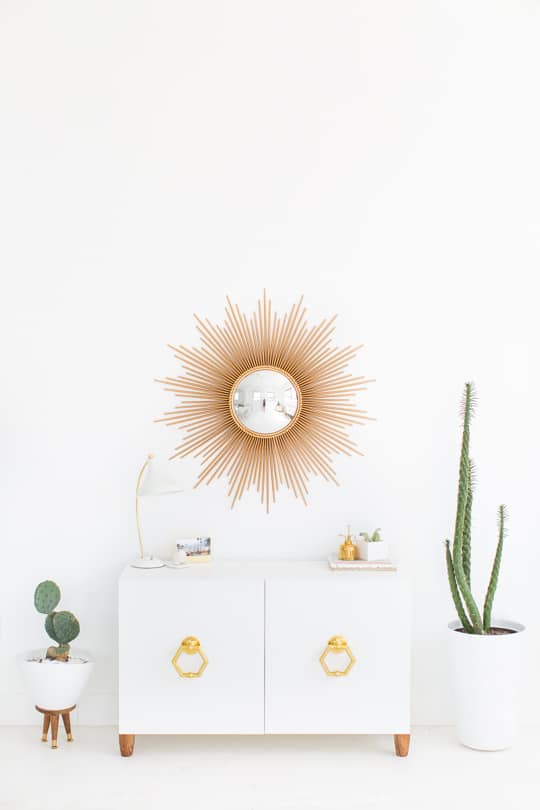
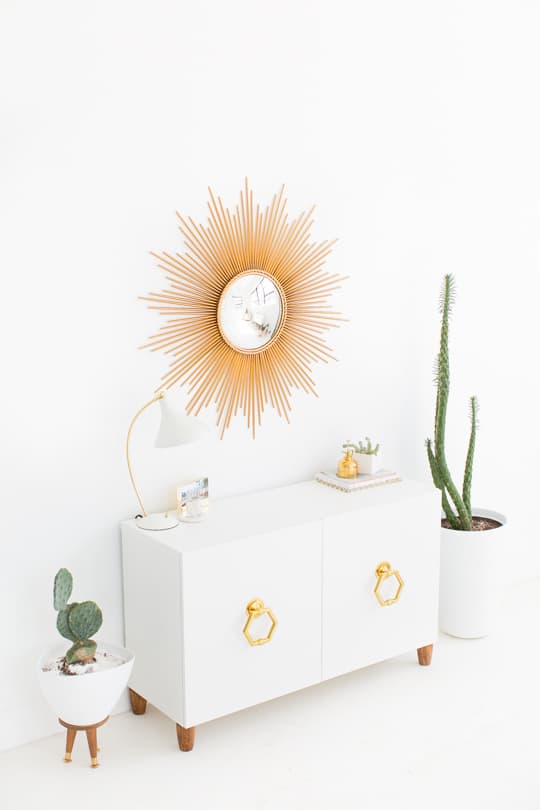
Ikea Hack Retro DIY Sideboard
This retro DIY Sideboard is making hallways, foyers, and living rooms cuter one room at a time! Did I mention it’s also an IKEA hack!?
I’m going to be totally transparent here. And tell you that I technically have no idea what a sideboard actually is compared to any other piece of storage furniture.
All I know is that after some very strategic Google image searching and several misspelled words, I’m now informed that there is a difference between a dresser, credenza, sideboard, and storage cabinet.
While we all resonate on that mystery for a bit, I’m going to teach you how to make said DIY Sideboard!
Without making things anymore confusing, you can also consider this an Ikea hack, so I hope you’re stretched and ready for some Swedish furniture building!
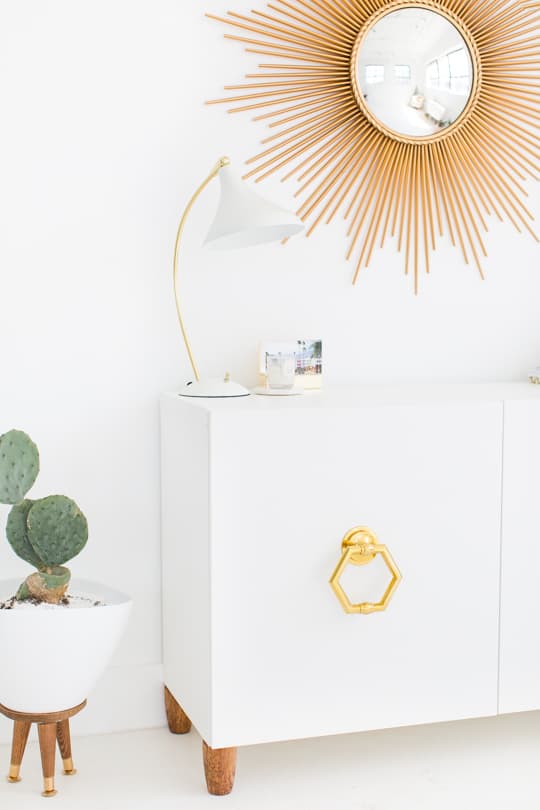
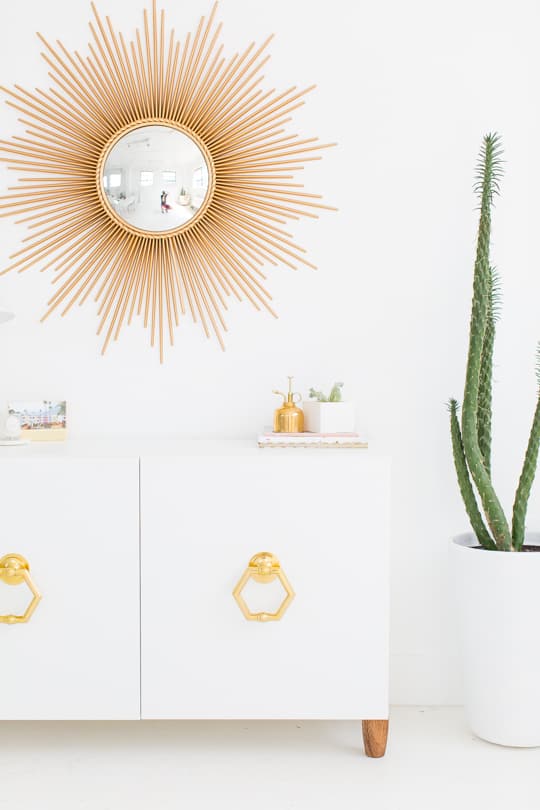
To make this even weirder, I actually repurposed front door knockers to be the giant hexagon handles, so there’s always that…
DIY Retro Ikea Hack Sideboard | DIY Retro Sideboard Cabinet
- Ikea Besta Shelf and coordinating white doors — Or any cabinet of your choice
- Four – 4″ wood table legs
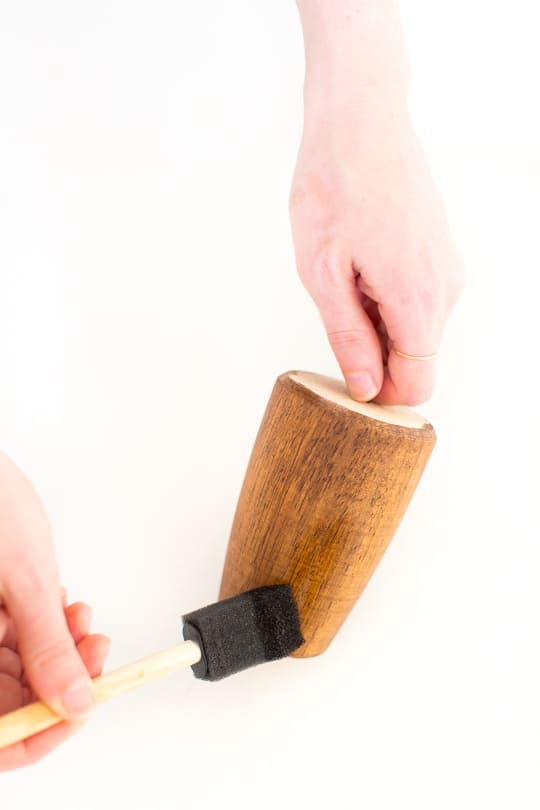
- Wood stain — Ours is from Minwax in Early America
- Foam brush
- Two – Hexagon door knockers — Ours are from Rejuvenation, but we are also loving this solid brass door knocker.
- 3/4″ screw — To replace the standard screws that the knobs come with. Any length is fine.
- Drill
- Pencil
- Measuring tape or ruler
How To Make A Retro DIY Sideboard
First, you get the honors of building your Ikea Besta shelf with doors! I know you’re all loving that…
Next, stain the table legs with the foam brush and wood stain.
Instead of leaving the stain on to soak in darker, I simply brushed on the color and then immediately wiped the excess back off with a paper towel.
Leave the finished legs to dry while you build the rest.
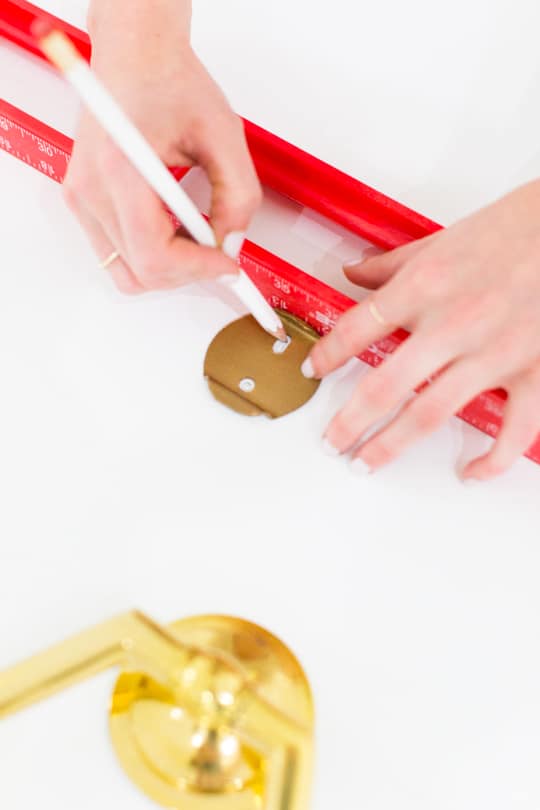
Lay the shelf on it’s backside, with the doors facing up and measure out where you want the hexagon handle to be placed.
We placed ours just above center by marking 11 1/2 inches from the edge of the shelf, and 14 inches up from the bottom of the shelf.
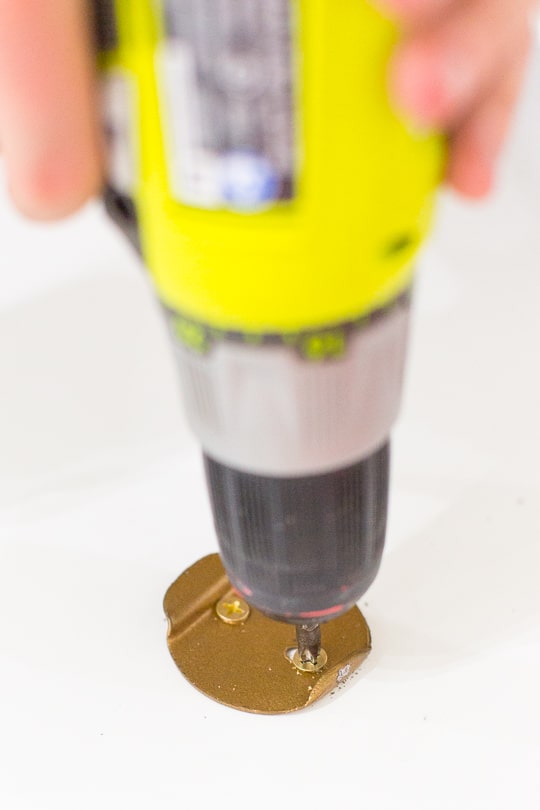
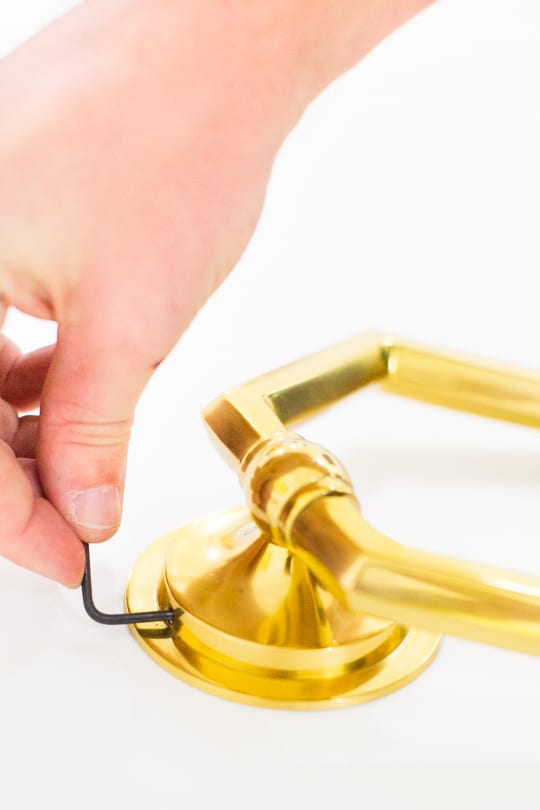
Drill the plates that come with each knob in place, and then tighten the knob down onto the plate with the allen wrench that it comes with.
We didn’t install the stop that comes with the knockers because we weren’t using them for that purpose, but feel free to if you think it’s safer for your furniture!
Screw the finished legs into the bottom of the shelf where the standard Ikea adjustable legs would go in the pre-drilled holes.
The handles can definitely get pricey when you’re buying two of them. But I think the fact they hang makes a really cool statement, don’t you?
I also like the idea of just two oversized hexagon knobs too. Basically what I’m getting at here is that I can’t be left alone when it comes to brass and decisions!
So there you have it! A DIY Sideboard that will transform all spaces alike!
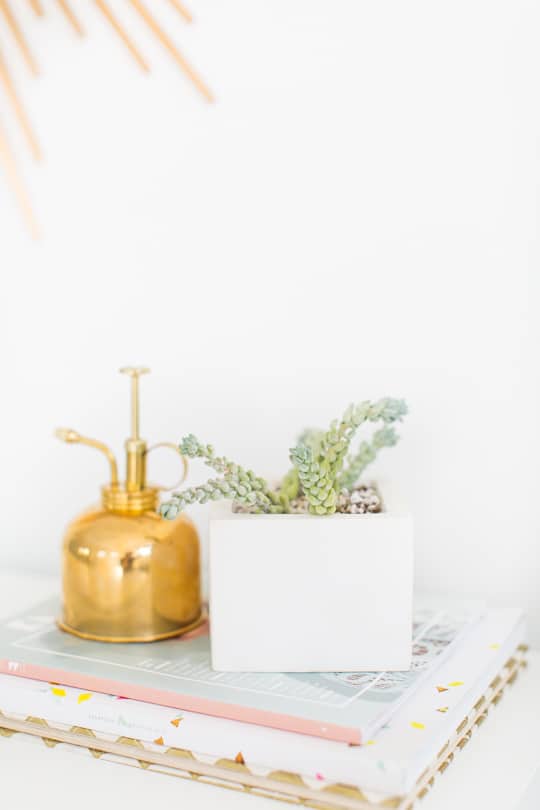
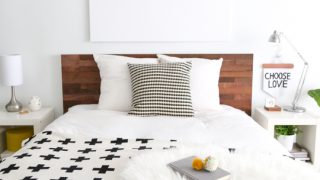
Living Room Sources
Sunburst Mirror from Rejuvenation
Lynwood Single Task Lamp from Rejuvenation
Patterned pillows from Darci Towns
Gold plant misting can from Amazon

Please note that we may earn a commission for some of the above affiliate links. However, products featured are independently selected and personally well-loved by us!
When you say a 3/4 screw what length should it be?
Hi Alexandria! Any length is fine as long as the screw is 3/4″ wide and as length doesn’t protrude from the board. We will update the text so it’s more clear!
Awesome!! I’ve included a part of your post in my article: https://www.stackedstonetile.com/8-incredible-furniture-makeovers-you-need-to-pin/
Thanks, Jennifer for including us in your post. The Ikea headboard post seems to be a huge hit with everyone.
Hi! I love this hack! The legs you used- did they screw right into the ikea holes? I know the ikea legs and other US made legs can be different sizes. Are the ones in your link the correct size? Thanks!!
I love the look of this sideboard so much! I was looking forward to making this sideboard. I bought the table legs and stained them only to realize that the IKEA shelf is too small for my space. Bummer….But if someone is interested in purchasing the stained legs from me, please email me at katsoneakim@gmail.com. It’s the same stain color.
I’ve wanted to replace the legs on my besta, but since it is European and in metric, I’ve been having a hard time. You found M8 size legs, or do you have to do any altering?
Love love this. Please tell me the brand of the door knockers you used. I’m in Canada
Thank you so much.
So in love with this sideboard!
I am in the process of recreating it and just wanted to confirm the color of the door knockers. Are they a “Gold” color, the only color I am seeing that is close is the “Lacquered Brass” on the Rejuvenation website. I have a feeling they maybe sold out! The project is beautiful and will be worth the wait, but I’m not seeing a gold option on their site.
Thank you for sharing all of your amazing designs and ideas!
I’m also a Lindsey B. and I’m having the same debacle–I can’t find the bright brass hexagon knockers on the website. do you have a recommendation? Thanks!
They may no longer offer them! They should be under the hardware category, so I’m thinking that particular finish is sold out now!
I love everything about this! Where did you find the doors?
Hi Brandon,
The Doors can be purchased separately from the Besta shelf at Ikea.
Eep! This is so cute. Love the handles
xo, Kait.
http://www.teacupsandthings.com
So clever!! I love how this turned out!! And I, too, have no clue when it comes to the differences between a credenza, sideboard, etc…I’m an “equal furniture purchaser,” I guess ;) ;)
Hi ashley,
Ikea hacks always make me happy. This piece of furniture is so stunning compared to what it were before. The legs and the hexagon handle has added that chimera that makes it opulent. Well done with the sideboard DIY.
Ah! I adore this sideboard! The handles are so gorgeous!
this is really great. thanks for sharing.
Girl. This is seriously beautiful!
Amazing! Love that you used door knockers for the pulls. Very clever.
I don’t know what makes me happier- the sideboard, the fact that I learned the word sideboard, or that killer starburst mirror behind the sideboard.
This is a wonderful DIY! The sideboard looks very cool with a hint of poshness. Those handles are really gorgeous. Love this!
xx Jia, honeyandgazelle.wordpress.com
awesome work dear
I dont care what its officially called (no offense to anyone out there that might)..I just know that Im loving it. Great job! And thanks for starting my morning with your witty narrative, got me to laugh which is always a good way to start the day :)