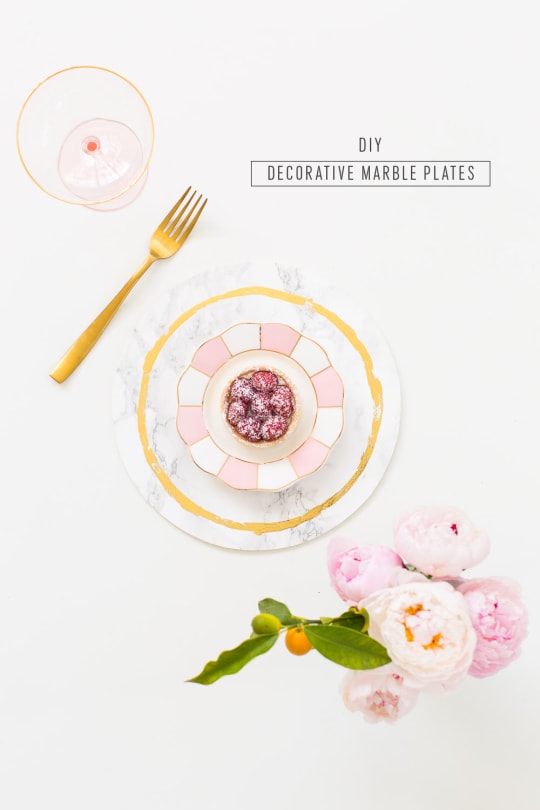
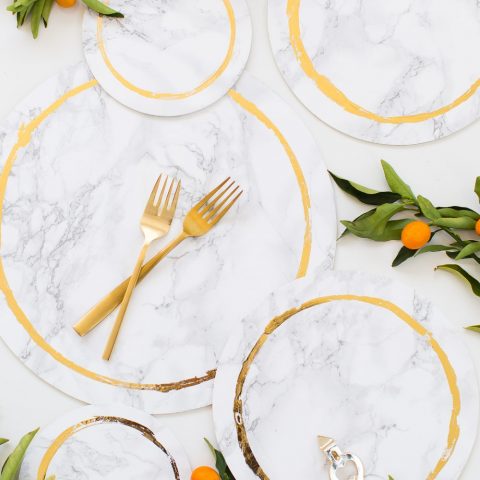
How To Make A Decorative DIY Marble Plates
These Decorative DIY Marble Plates are super inexpensive to create, are really easy to cleanup to reuse, and have just the right amount of gold.
I don’t know if it’s marble season in my soul or what, but I have a slew of marble projects coming up for you all. So I hope you’re prepared!
I came up with these Decorative DIY Marble Plates while I was trying to find cool chargers for an upcoming shower I’m hosting for a friend.
And I couldn’t find anything that wasn’t WAY out of my budget (which was like $5 per plate maximum, by the way), and that’s if they even made them at all.
Naturally, I decided to do what I do best (aside from my uncanny talent to consume sugar), which was to make them myself.
Of course, these aren’t real marble.
But they are super inexpensive to create, are really easy to cleanup to reuse, and have just the right amount of gold…
Materials and Tools Needed To Make Decorative DIY Marble Plates
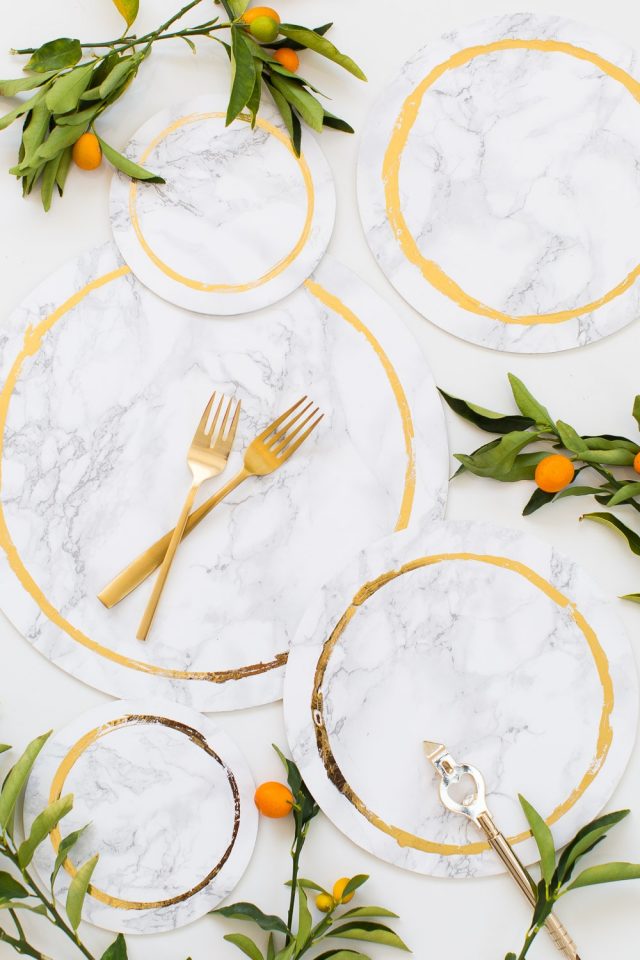
Wood plywood circles — I used these 10-inch, 8-inch, and 6-inch versions.
Decorative marble contact paper
Scissors
Transfer adhesive — Make sure to use something non-toxic.
Thin paint brush
White craft paint and brush
How To Make Decorative DIY Marble Plates
This project is actually SUPER simple.
But because I’m really particular about the little details, I added a few extra steps to make them look juuuuuust so!
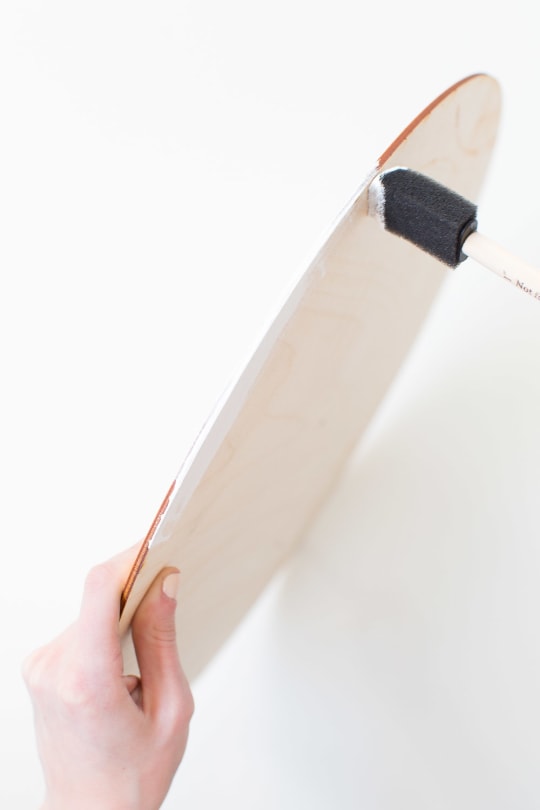
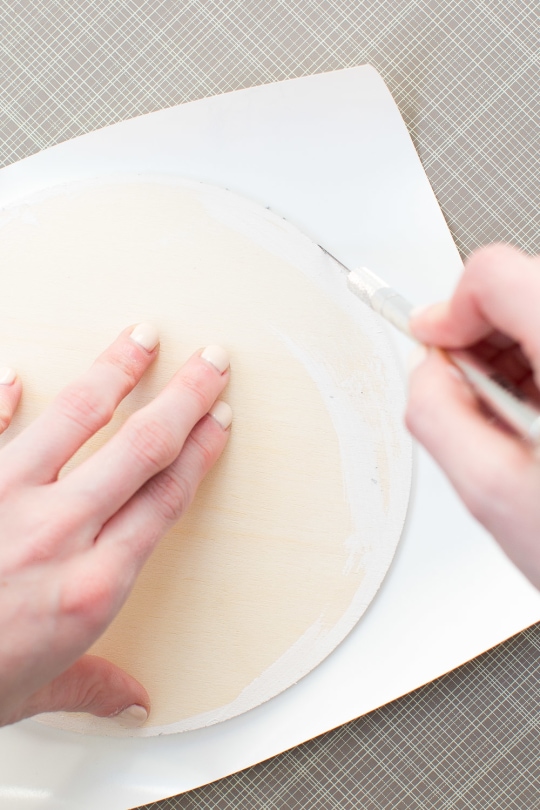
Step 1 — Because I wanted the raw wooden edges to match the marble tops, I quickly painted the sides of the wood circles with white craft paint and let them dry.
Step 2 — Now, peel a section of the marble contact paper backing off, and lay the wood round onto the sticky side.
Trim very closely around the edges to make sure the contact paper has clean edges, and you should have a perfectly placed and cut marble side.
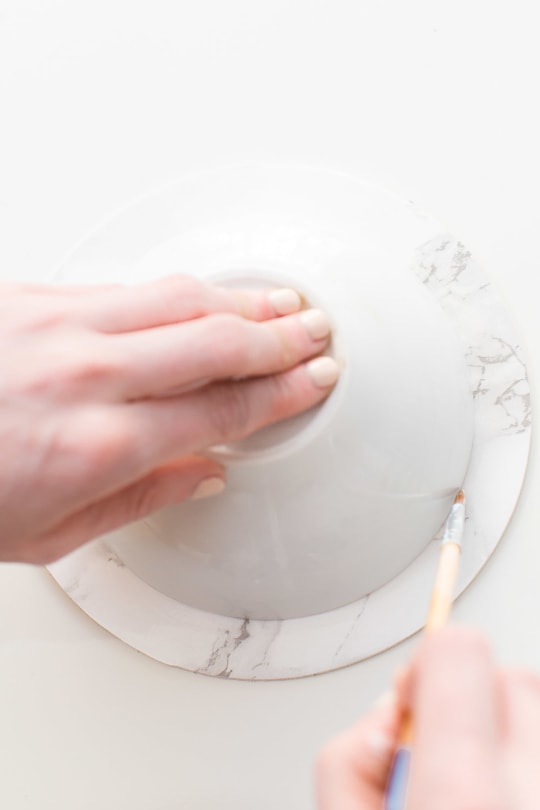
Step 3 — Once the marble contact paper is cut and in place, you can messily brush the foil adhesive around the edges of a bowl or paper plate (if you want to be exact, but it doesn’t have to be perfect).
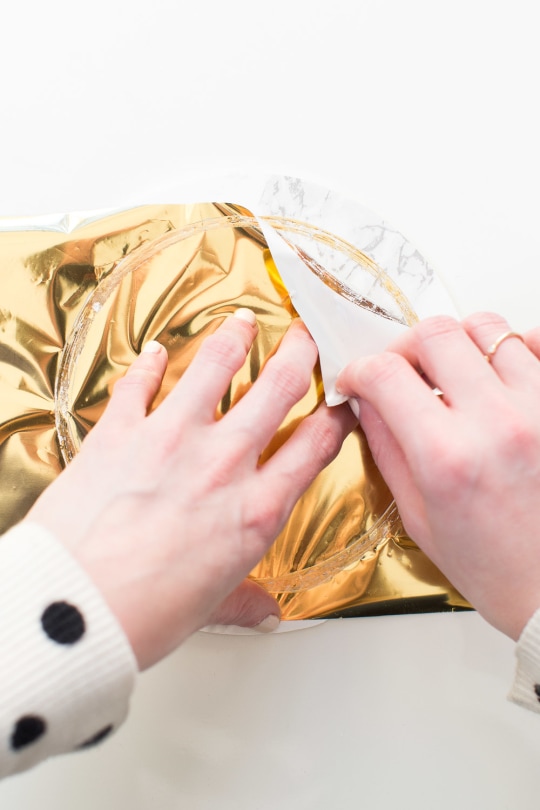
Step 4 — Let the adhesive dry completely, and then place the gold foil paper over top and rub your fingers across it to make sure the foil really transfers well.
Then, peel the foil paper away and you’ll have a pretty gold foiled circle left around the edges!
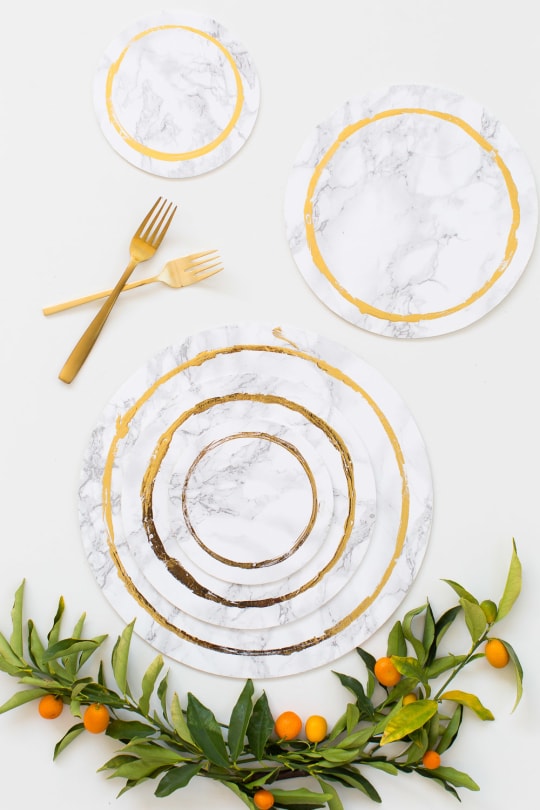
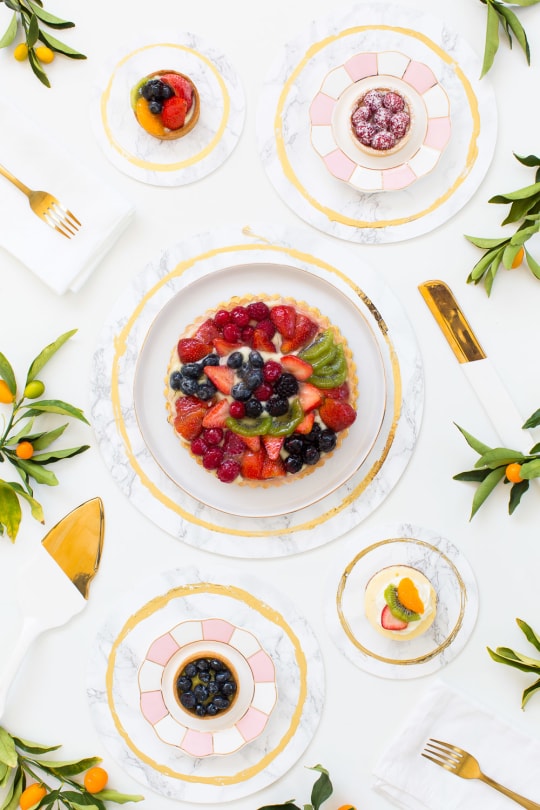
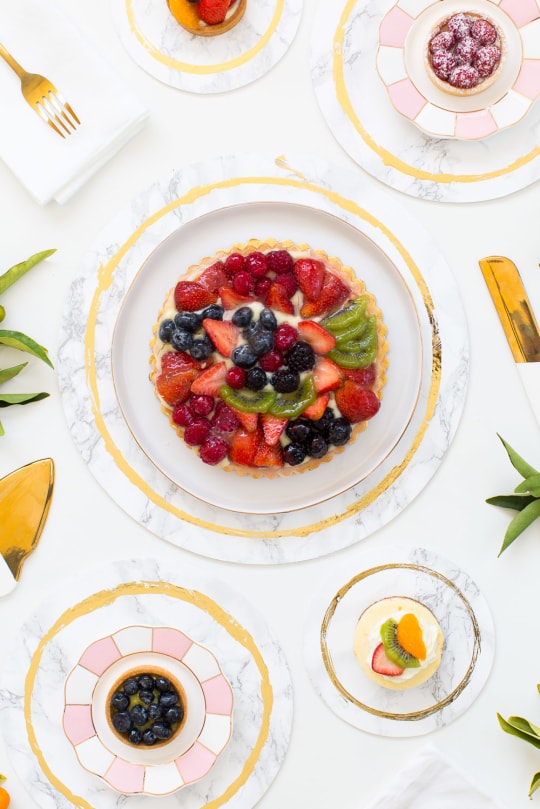
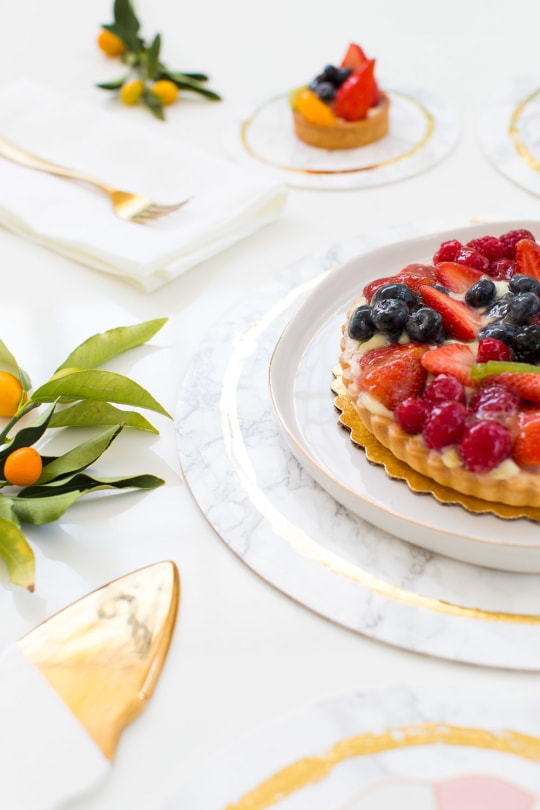
I’m now convinced I need a million of these marble beauties for every dinner party…ever. They’re also really convenient to stack and stow out of the way easily, so it’s a win/win!

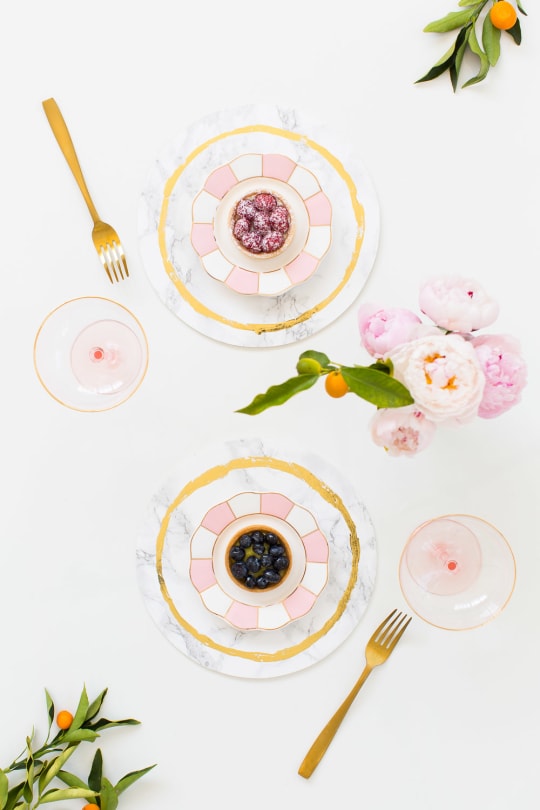
What do you think?! These would be perfect for a wedding or party dessert table if you didn’t want to make one for every person attending a dinner.
That said, you can never really have enough marble and gold, so the sky’s the limit really!
Be sure to tag your photos with #mysugarandcloth and #sugarandcloth so we can follow along with your projects, too!
Related posts:
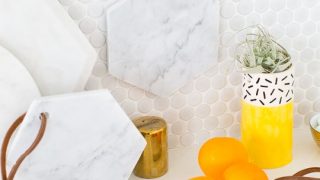
- DIY Marble Table Top With Gold Accents
- DIY Marble & Gold Serveware
- Easy DIY Sofa Table: How to Make a C Table
- DIY Hanging Marble Serving Board For Under $5
- DIY Gilded Marble Hexagon Serving Boards
DIY Marble Plates
Equipment
- Scissors
- X-Acto knife
Materials
- Wood plywood circles I used these 10-inch, 8-inch, and 6-inch versions.
- Decorative marble contact paper
- Gold foil paper
- Transfer adhesive Make sure to use something non-toxic.
- Thin paint brush
- White craft paint and brush
Instructions
- If you want the raw wooden edges to match the marble tops, quickly painted the sides of the wood circles with white craft paint and let them dry.
- Peel a section of the marble contact paper backing off, and lay the wood round onto the sticky side.Trim very closely around the edges to make sure the contact paper has clean edges, and you should have a perfectly placed and cut marble side.
- Once the marble contact paper is cut and in place, you can messily brush the foil adhesive around the edges of a bowl or paper plate (if you want to be exact, but it doesn’t have to be perfect).
- Let the adhesive dry completely, and then place the gold foil paper over top and rub your fingers across it to make sure the foil really transfers well.Then, peel the foil paper away and you’ll have a pretty gold foiled circle left around the edges!


Please note that we may earn a commission for some of the above affiliate links. However, products featured are independently selected and personally well-loved by us!
These are amazing! Also, where did you get the dinner plate with the raised rim and the gold trim?
Aw, thank you! Those are from Hobby Lobby! xo
Oh my gosh! I must do this! They look so expensive!
The ultimate trick to play on guests, ha! So glad you like them :)
These are beautiful! This might be a silly question but, how do you avoid wasting the foil? or does it look fine if you use several pieces to complete the circle?
Simply gorgeous!! How would clean them up? Should I just use them as chargers?
Yes, they’re definitely to be used as chargers and just wipe clean with a damp cloth :)
What a brilliant idea! These would be perfect as plate chargers for our outdoor wedding! Luckily I already have loads of marble contact paper — totally doing this. Thanks for the wonderful idea!
No problem, Shannon!
I love this site’s aesthetic and content! Although this post isn’t completely down my road, yet, I still have great interest here!
http://www.thejuliakim.com/
Thanks, Julia! :)
I’ve been obsessed with marble contact paper recently, and these are perfect! The touch of gold really steps them up a notch.
Alexandra Adams | X Height Ment
So beautiful! Love the marble and gold combo!
Thanks, Eden!
Oh my goodness – love the simplicity of this project and yet so fancy! Perfect for a shower. Love em!
Definitely, Sara! These are perfect for a shower! Budget friendly and SUPER easy to make!
These the most gorgeous marble plates ever! Great hack I must say
Thanks, Marwa! You’ll be obsessed with marble contact paper after this project!
Holy smokes, these are absolutely GORGEOUS!
Thanks, Rachel!!
These are adorable!! So inspired!
Hope you don’t mind – but I blogged about you on my INSTA-CRUSH post the other day!
Big fan of your work.
-Libby
http://www.libbylivingcolorfully.com/
Thanks so much for thinking of us!! Love the accounts you chose for that post :)
These plates are so fun and cute! I love them!
Paige
http://thehappyflammily.com
Thanks, Paige!
Brilliant Ash! I love this idea.
Thanks B!! Your ice cream recipe today looks so good! Hope you have a great week! xx
WOW! Those plates look absolutely stunning, I do love me a bit of gold and marble, I mean you can’t go wrong! I really want to make something using marble contact paper: maybe some miniature versions of the plates for my room for display, or even a marble bedside table top. I love the idea of transforming one thing into something so dainty and pretty. Loved this post!
– Olivia Xxx
http://www.oliviaxalesha.com
I didn’t even think about them as room decor, but they would be so cute on a wall in different sizes!
Oh my goodness you have opened a world of possibilities! There won’t be a roll of contact paper or wooden boards safe around me. Sending you a hug for this one they are beautiful!
Sending hugs right back! xoxo