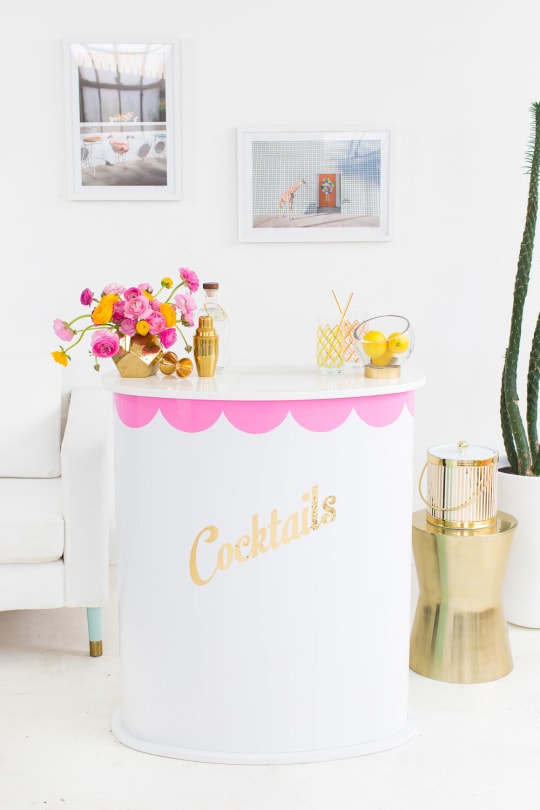
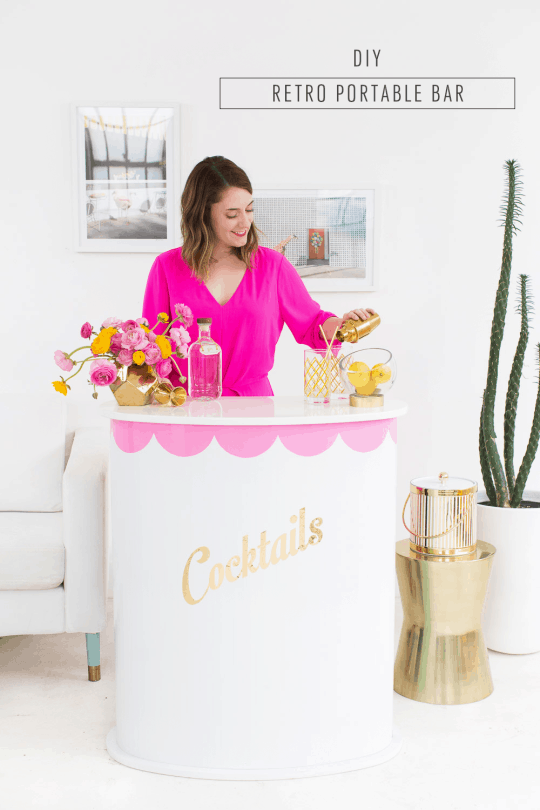
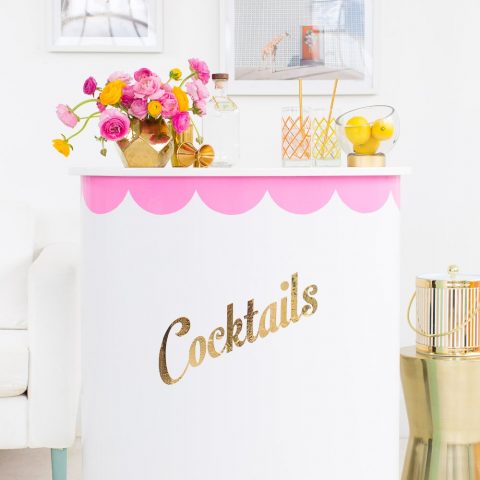
How to Make a Retro DIY Portable Bar
With the number of events and entertaining that we do in the studio, it was only an amount of time before we made a Retro DIY Portable Bar.
We throw so many events at the Sugar & Cloth studio!
So it was only a matter of time before we broke down and made a bar cart that was easy to move around while also being able to serve lots of cocktails.
Of course, it couldn’t be any old design.
So we had the grand idea to make this Retro DIY Portable Bar after some serious internet product stalking.
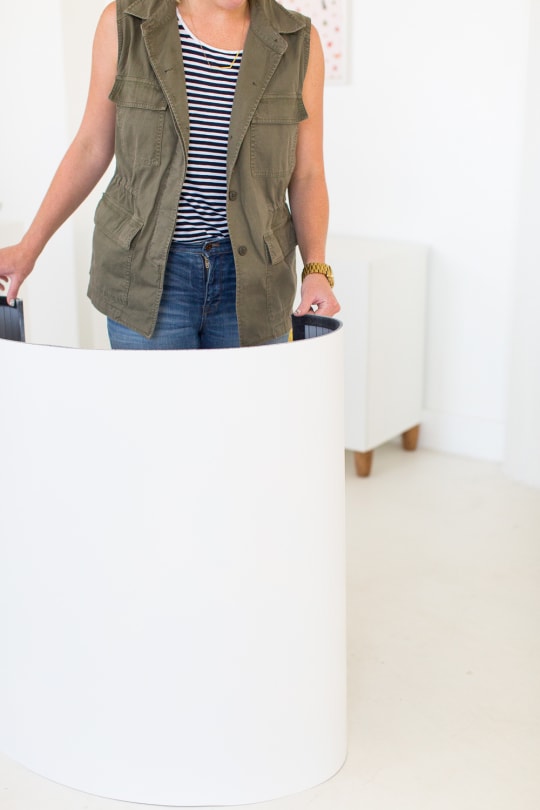
You’ll actually be super shocked at how easy this is to make. And it’s legitimately portable enough to fold back up into a carrying case.
For real. You can thank us after your next evening soiree.
In fact, this project is so simple “to make” that we almost feel bad calling it a DIY.
Technically it’s more of an… aesthetic twist if you will.
Here’s why…
Materials Needed to Make a Retro DIY Portable Bar
Portable pop-up podium — This is a similar counter table that we are basically hacking.
High gloss plastic spray paint — In the color of your choice. White is always a neutral color.
Optional: Vinyl retro cocktail decals — Or cut your own.
Clear spray Shellac high gloss coat — Your sealant.
How to Make a Retro DIY Portable Bar
So we’re basically revamping a portable conference podium. It’s true.
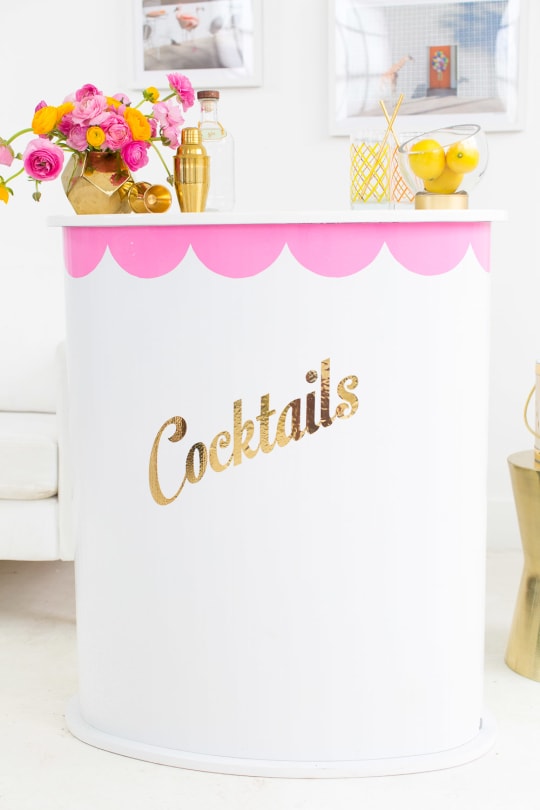
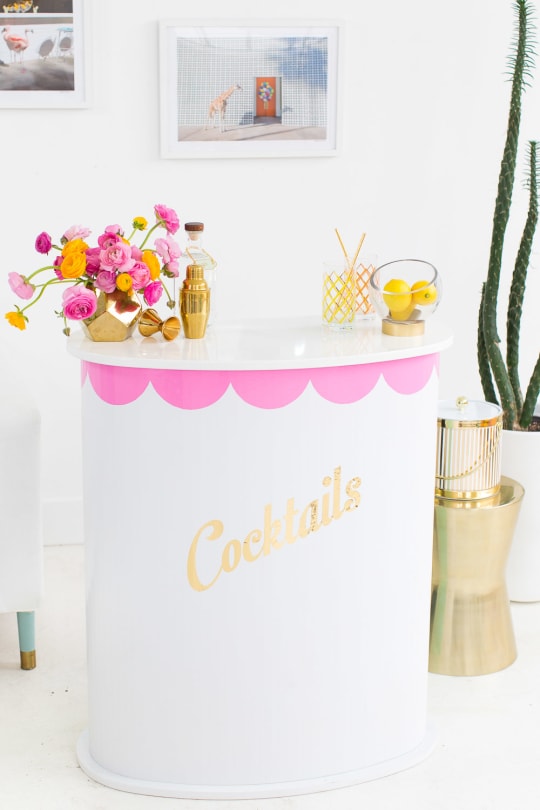
It has a really cool kidney bean shape, which makes it the perfect retro cocktail stand and super easy to customize.
In fact, you don’t even need to change the base and high gloss white countertop.
Step 1 — All we did was paint the foldable podium wall with the BIN shellac primer first.
Then, let it dry completely.
Step 2 — Next, we painted two coats of white plastic spray paint over the entire side panel.
Let it dry completely, and then put a clear shellac high gloss top coat over that.
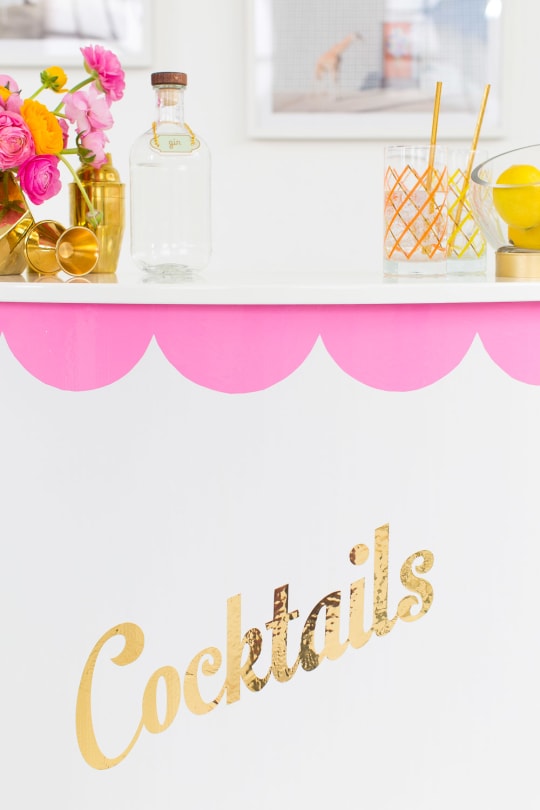
Step 3 — Now, you can customize it with adhesive vinyl decals.
We cut a pink scalloped trim from pink adhesive vinyl and then a metallic gold decal from vinyl as well using a Cricut machine.

Tips on Applying Decals
Just be careful when you’re applying the decals that they’re the permanent adhesive kind if you’re planning to have it, whether some temperature or humidity.
Originally we had the temporary decals, and it didn’t like being maneuvered much at all after that.
On the other hand, once you have the permanent vinyl in place, it doesn’t like to move either, so heads up!
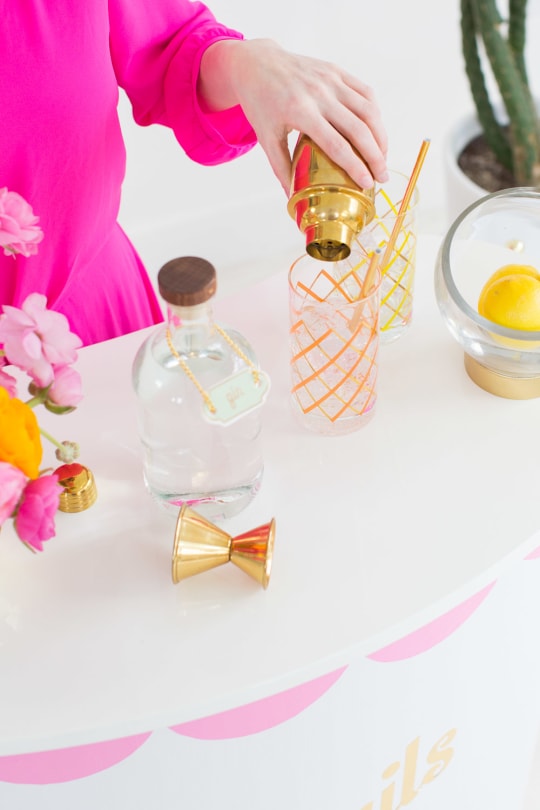
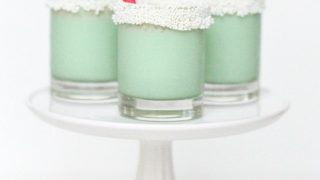
Bar Top Styling
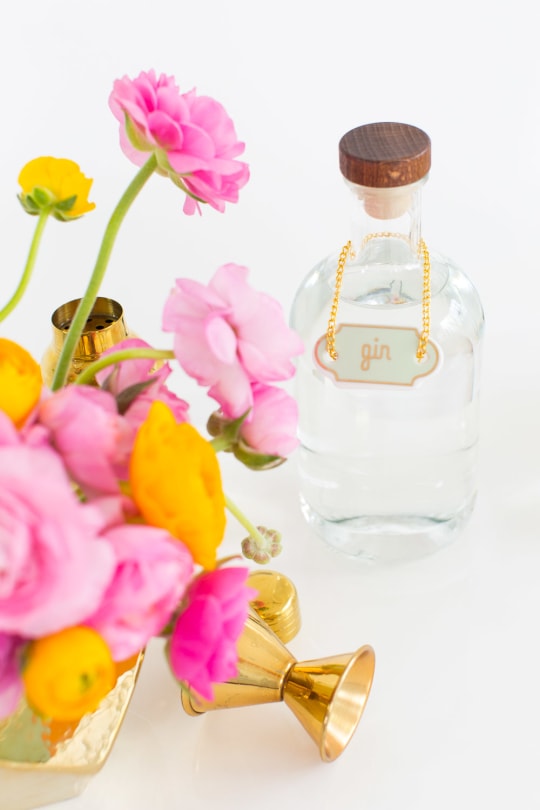
I hadn’t thought about how you identify the beverages after they’re decanted.
Hence, we created these DIY decanter tags so everyone knows what’s what.
Our lemons were displayed in a DIY Footed Display that we made from a glass terrarium.
And those drink stirrers can be found in our easy tutorial on how to make DIY Reusable Gold Drink Stirrers!

It seems like an investment of around $150 for the whole bar.
But it’s actually a super budget-friendly option for how customizable and modern it can be.
We had THE HARDEST time trying to find anything that was under $100 and didn’t look like reclaimed wood before this!
So what do you think?!
Pretty interesting use of a token conference product, right?!
You know us, we don’t like to do things inside the box.
More Easy DIYs for You Bar
For more DIY projects like this, you might want to check out our favorites below —
- Custom Leather Bar and Drink Tags
- Clay DIY Decanter
- Mid Century DIY Drink Stirrers
- Personalized Recipe Cocktail Napkins
Equipment
- Spray BIN primer
- High gloss plastic spray paint
- Clear spray Shellac high gloss coat
Materials
- Portable pop-up podium
- Vinyl retro cocktail decals or cut your own
Instructions
- Paint the foldable podium wall with the BIN shellac primer first.Then, let it dry completely.
- Next, we painted two coats of white plastic spray paint over the entire side panel, let it dry completely, and then put a clear shellac high gloss top coat over that.
- Now, you can customize it with adhesive vinyl decals. We cut a pink scalloped trim from pink adhesive vinyl and then a metallic gold decal from vinyl as well using a Cricut machine.

Don’t forget to share your Retro DIY Portable Bar Cart with us on Instagram using the hashtag #sugarandclothloves. We always love seeing all of your creations! Looking for more interior design inspiration? You can find them all of our home decor tutorials and ideas right here!


Please note that we may earn a commission for some of the above affiliate links. However, products featured are independently selected and personally well-loved by us!
Can you tell me when its time to pack it up can you put it back in the carry case or will that make the paint crack and peel?
I love love love this! I have a gold bar cart that i definitely love, but being able to take this to different venues–and being able to hide things behind the counter–makes me want this one too! (How many bars is too many to own before someone stages an intervention?)
haha! Well versatility is a better way to look at it than hoarding, haha ;)
Im new to your site…is there a resource for the podium? Im unable to click thru
So sorry you’re having trouble! We’ll have to link into that! In the meantime you can find the podium right here http://bit.ly/21Szplq
That is too cool! i’d love to use that for a craft show!!
I didn’t even think of that! It would be perfect for shows!
This is so adorable!!! Omg perfect for parties!!
it really is! there’s even storage on the backside!
Oh wow! It’s such a great idea! Love this!
THanks monique! xox
Holy Moly! i want one for my home! I love the pink scallop bunting and the gold letters! Interesting indeed!
I can’t resist adding a little touch of pink ;)