DIY Paper Plants
Don’t have a green thumb? Do not fret because these DIY paper plants need absolutely no TLC!
Hi, I’m Corrie and I’m excited to be sharing how to make paper plants with ya’ll today!
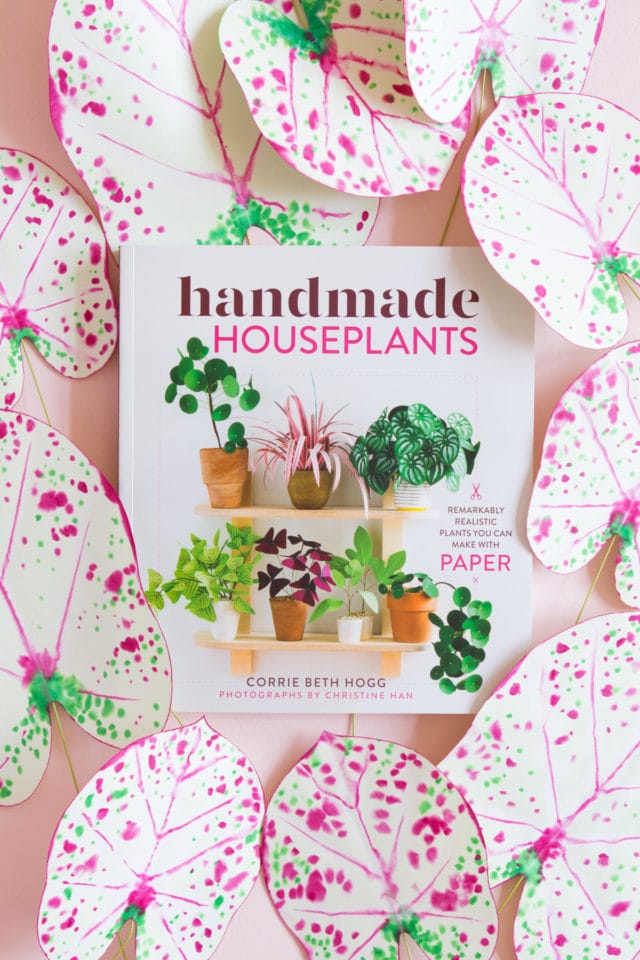
We’re announcing the launch of my new book, Handmade Houseplants. And to celebrate, I put together this DIY Paper Caladium tutorial just for you.
What are Caladiums?
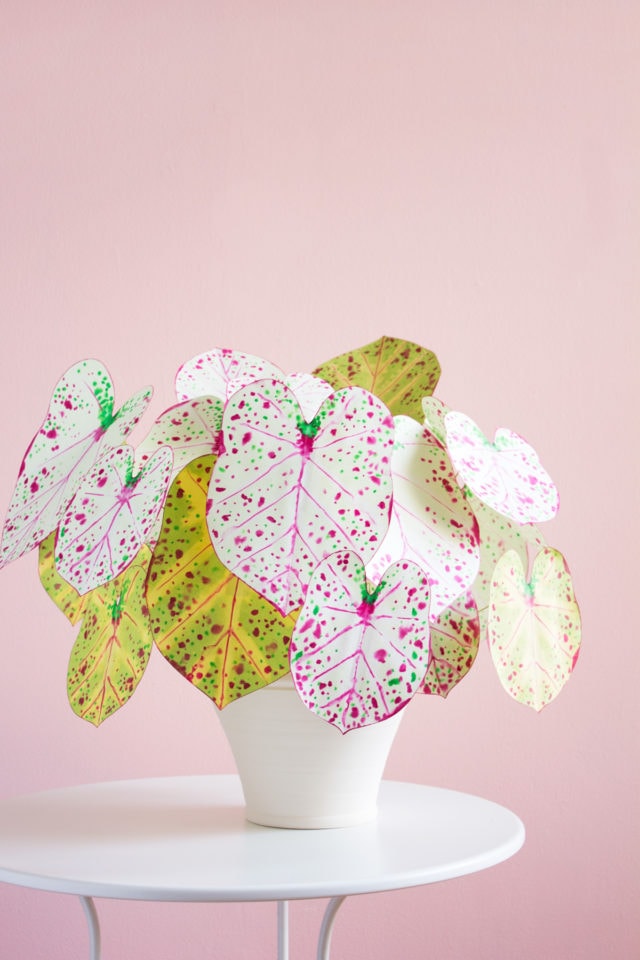
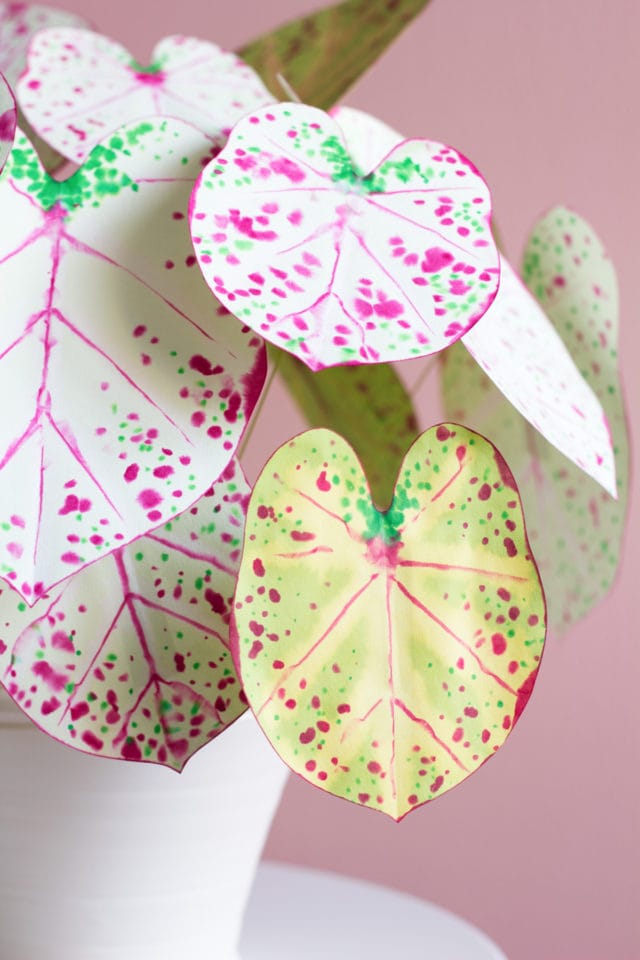
I am in awe of all the diverse varieties of caladiums … there are over 1,000! These showy plants can be found in nearly every color of the rainbow.
I love their big, heart-shaped speckled leaves. These beauties don’t typically survive indoors… which is why a paper version is essential!
I created a large plant. But you could also craft just a few stems and place them in bud vases. Or, make a single leaf and use it to adorn a gift box in lieu of a bow.
The instructions that follow are inspired by a cultivar often called “Miss Muffet”. No amount of googling has informed me why it’s called that, but I just LOVE the pink and green combo!
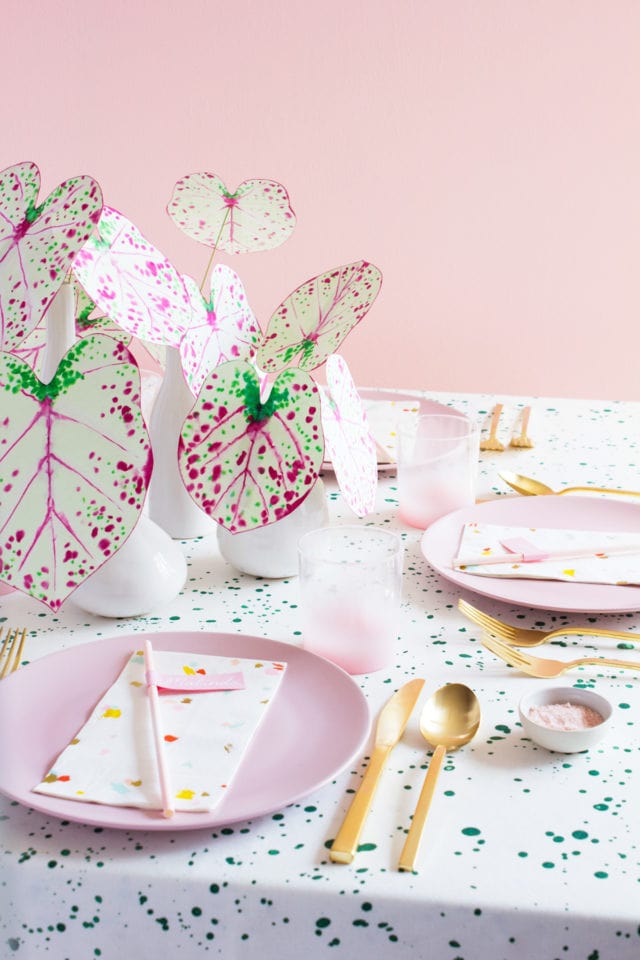
Of course, I loved the idea of styling it with the Sugar & Cloth shop party supplies. So they were the perfect tabletop pair…
Materials and Tools Needed to Make a DIY Paper Plant
PDF templates from the Handmade Houseplants book
Text-weight matte paper in citrus and spring green
Pencil, scissors, craft knife, bone folder
Regular household bleach and newsprint or a drop cloth to work on
Isopropyl alcohol (just like in a first aid kit)
Cotton swabs and containers (empty yogurt or take-out containers work well)
Spray bottle filled with water (dollar store find!)
Pink and green alcohol markers
20-gauge light green floral wire and wire cutters
Aleene’s quick-dry tacky glue and small paintbrush to apply it
How to Make Paper Pants | DIY Paper Caladium
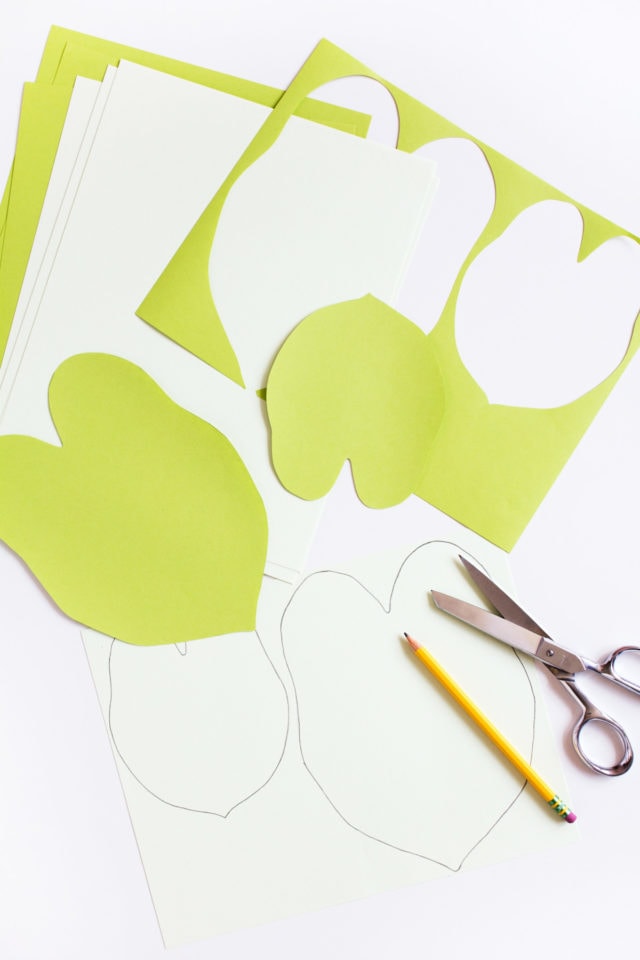
Step 1 — Using the templates provided, trace and cut out each leaf. Keep the scraps … we’ll use them later.
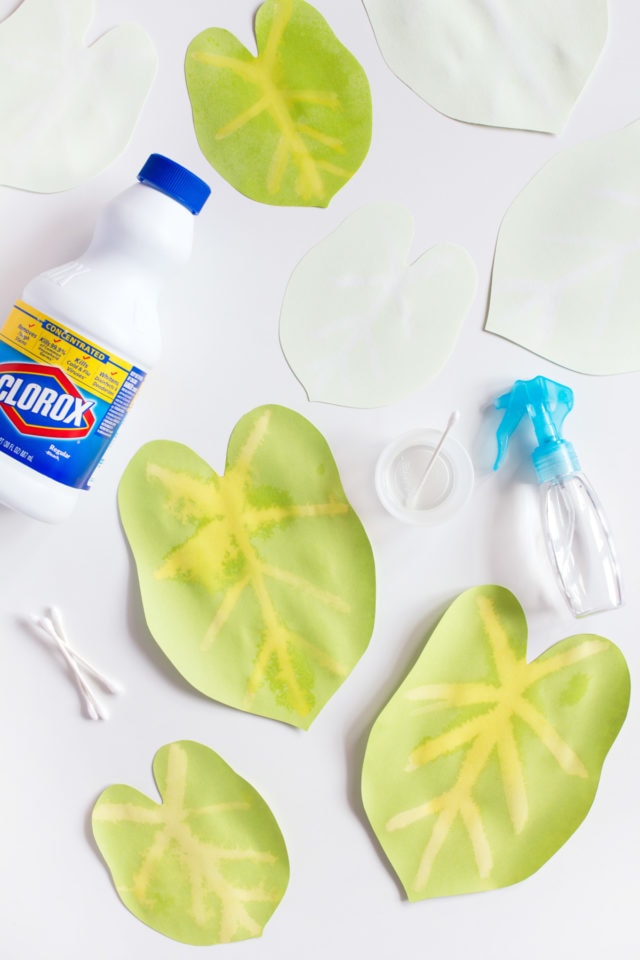
Step 2– In this step, we’re using bleach. So be sure to work on a safe (or covered) surface. Start by misting each leaf with water.
Using a cotton swab soaked with bleach, draw on the vein pattern. The vein should be a simple line down the center with approximately four sets of lines branching off.
No need to be perfect here. Because the water will allow the bleach to bleed in organic ways, which we want. I treated the pale-green paper this way as well, even though it is a subtle effect.
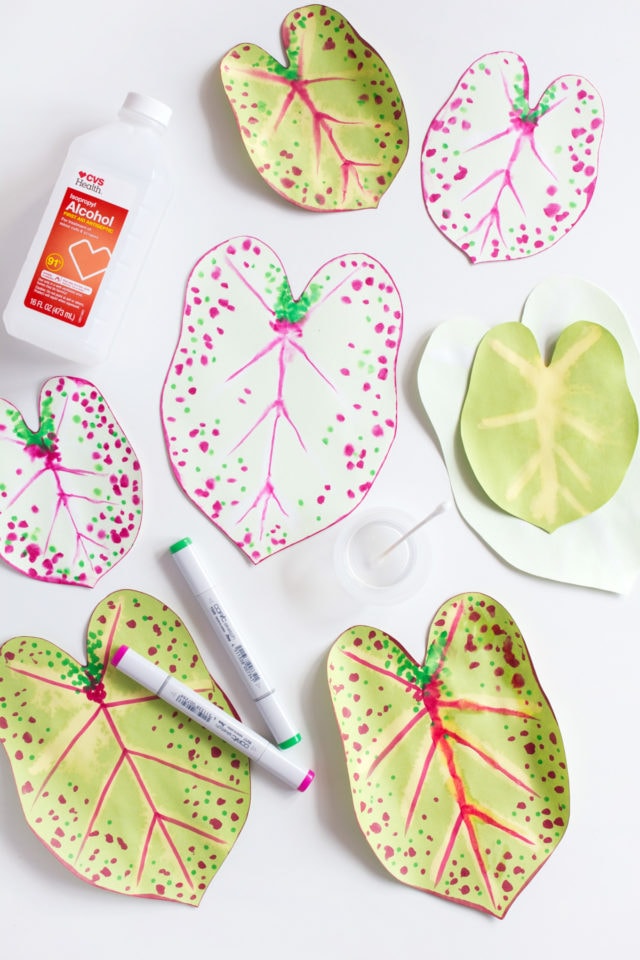
Step 3 — Once the leaves have FULLY dried, it’s time to work with the alcohol markers and isopropyl alcohol.
Using the lines you created with the bleach as a guide, draw on veins with the pink marker.
Trace the edge of the leaf with the pink marker and add a smattering of dots in various sizes.
Moving on to the green marker, add a dense area of green dots at the top center crevice of each leaf and a few green dots among the pink in the rest of the leaf.
Next, using a cotton swab soaked in isopropyl alcohol, trace over each mark you made with the markers.
Allow the ink to spread and further soak into the paper.
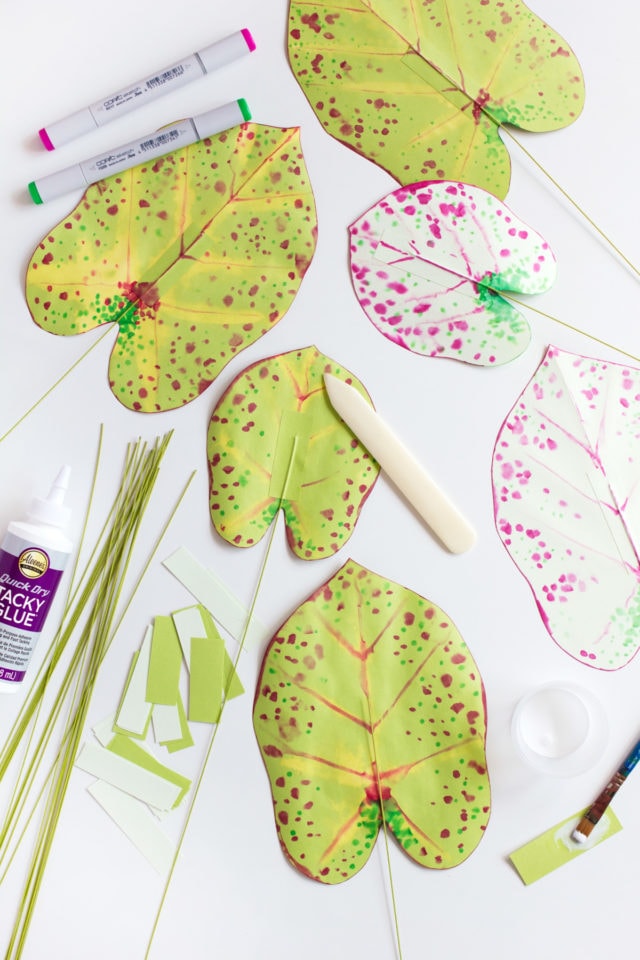
Step 4 — Using the scraps you created in Step 1, cut paper strips approximately 3/4” wide by 2” long.
Place a wire along the center of the leaf’s back and coat a strip with tacky glue.
Cover the wire with the glue-coated strip. Secure it in place by running a bone folder along the contours of the wire.
After the glue has dried, grab your markers again and connect the veins, drawing on the paper strip.
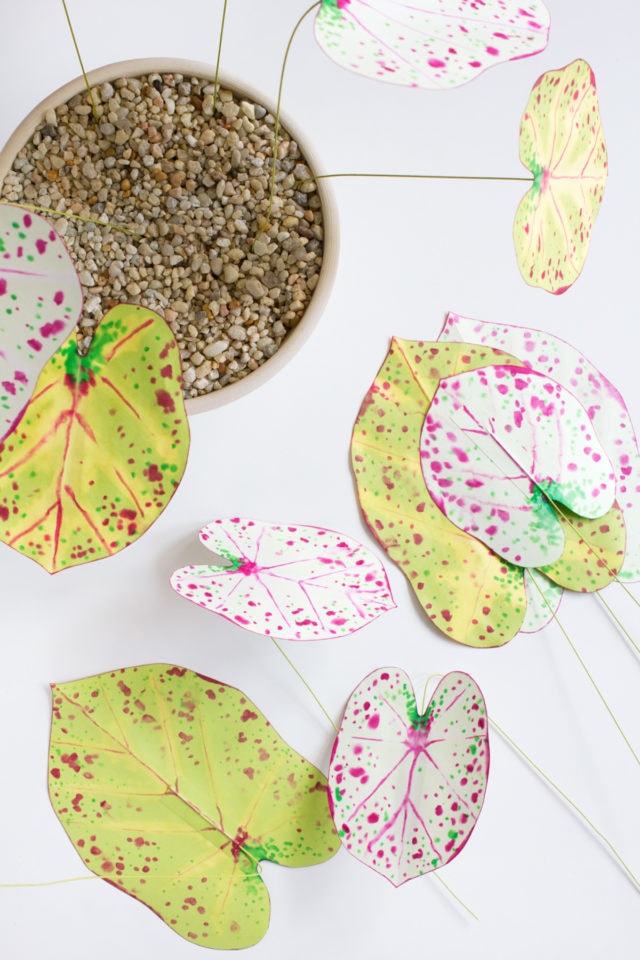
Step 5 — Bend the wire stems so the leaves are pointing down.
Next, fill your pot with foam. And cover the foam with the gravel you chose.
Insert the stems into the foam. Then carefully arrange your paper caladium so it’s balanced but not perfectly symmetrical.
Lastly, adjust the angle of the leaves to your liking.
More Homemade Paper Plant Tutorials
You can find 30 more paper plant tutorials in Handmade Houseplants: Remarkably Realistic Plants You Can Make with Paper!
DIY Planters & Vases For Your DIY Paper Plants
Please note that we may earn a commission for some of the above affiliate links. However, products featured are independently selected and personally well-loved by us!
ERES UNA ARTISTA!!! GRACIAS PIR TANTO!!!
Get Support for Quicken software from our quicken experts.Call +1-800-201-4179 Toll free. we provide support for windows and mac. Supported versions are Quicken deluxe, Quicken Home & business,Quicken premier,Quicken Rental & Property Manager, Quicken for Mac and almost all version for Quicken.
Thank you, sir
Thank you for sharing the important information we have shared with people and we hope from God that God will get your longevity. Awesome information and totally on point! It was exactly the information I was searching for and now have a clear understanding of how to start making money with you tube. I get easily frustrated when searching for needed information, I find that there are gaps in information or its not explained properly and for some reason I get the feeling that it has been told
like that on purpose with the intent to keep me searching and searching and searching only to get no real answers to my questions all the while spending way too much of my valuable time for nothing. But this information was real and I appreciated it so so very much, Thank you!
Loved making the paper plants. The instructions are really easy to follow and the photos help me to make this paper plant.
Oh I’m so glad ! They really are the best !
It is really a great idea and looks more attractive. I must try this. Thanks for sharing.
Please let us know how they turn out ! We love to see the end products!
These look really great and I relly want to make them! Can you please provide a link on where to purchase the text weight paper? Thanks so much!
Hi Mary,
I went ahead and added links to some card stock in the colors listed! Hope this helps ! SO glad you loved the DIY !