How to Carve a Pumpkin with Stencil
It’s the season for pumpkins and celebrating Halloween, so we’re gearing up with tips on how to carve a pumpkin using pumpkin stencils for your Halloween decor.

If you’ve ever tried to carve a pumpkin before, then you know it can truly be an art form! It’s not exactly the easiest form of pumpkin decor. But it’s definitely the messiest and most popular!
Unless you’re a true artist, you’re likely using pumpkin patterns or a pumpkin stencil for carving your pumpkin design and we’re here to help!
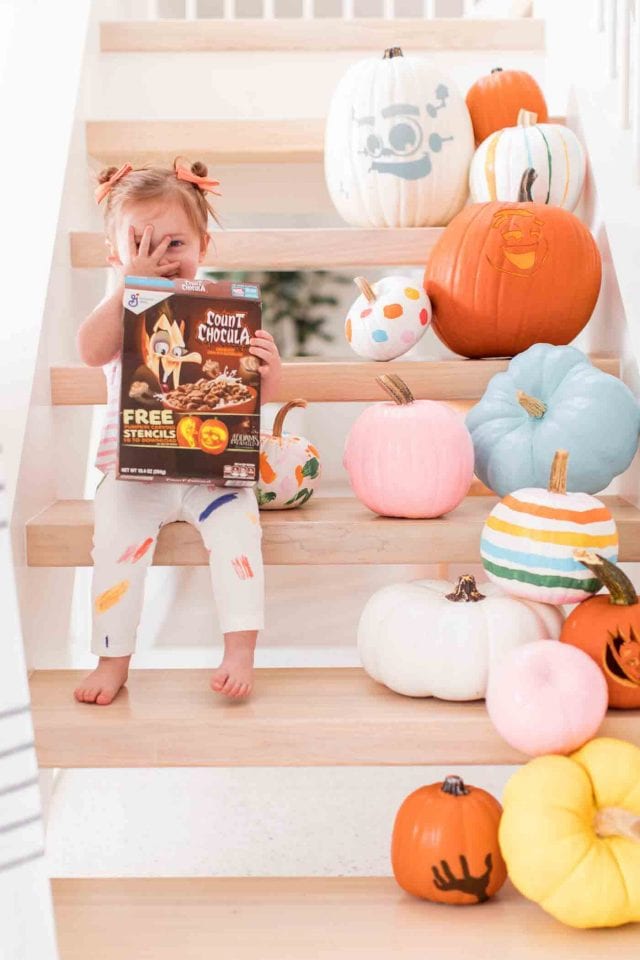
We’re a household of cereal lovers, so my friends at General Mills Cereal asked if we wanted to use their free pumpkin carving stencils. Obviously, I’m not one to turn down using Frankenberry, Booberry, and Count Chocula as our models.
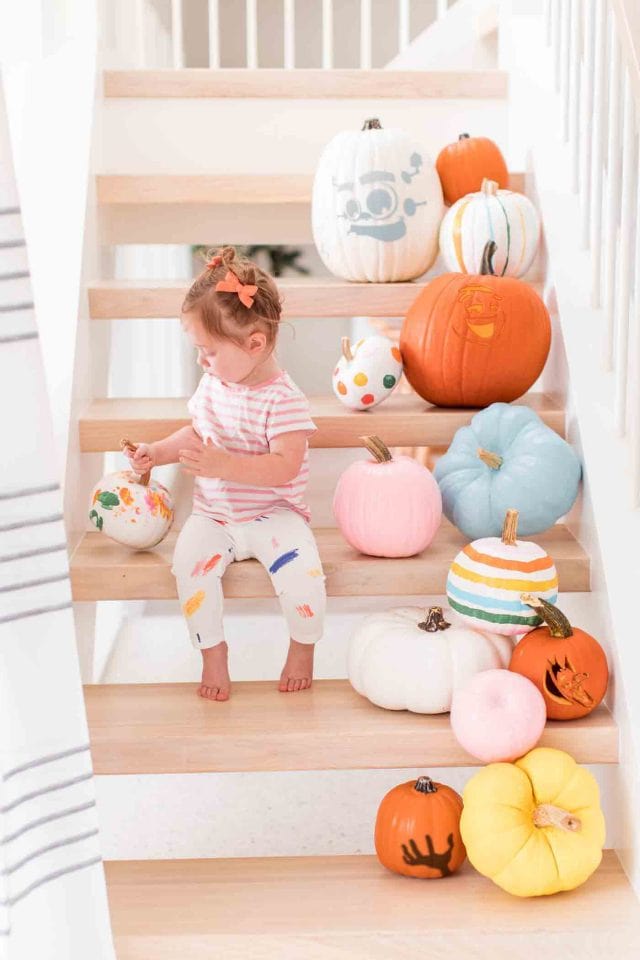
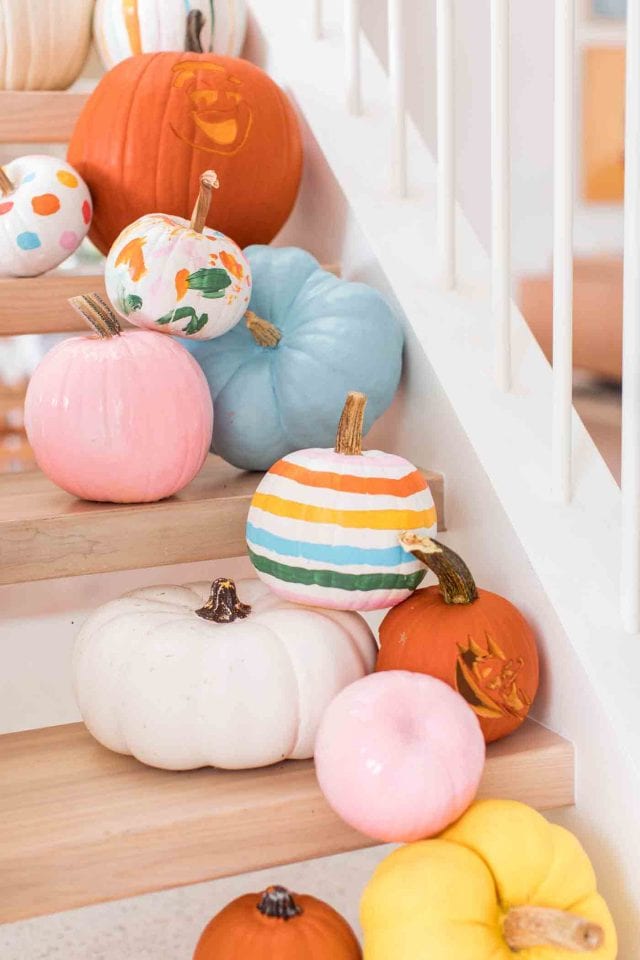
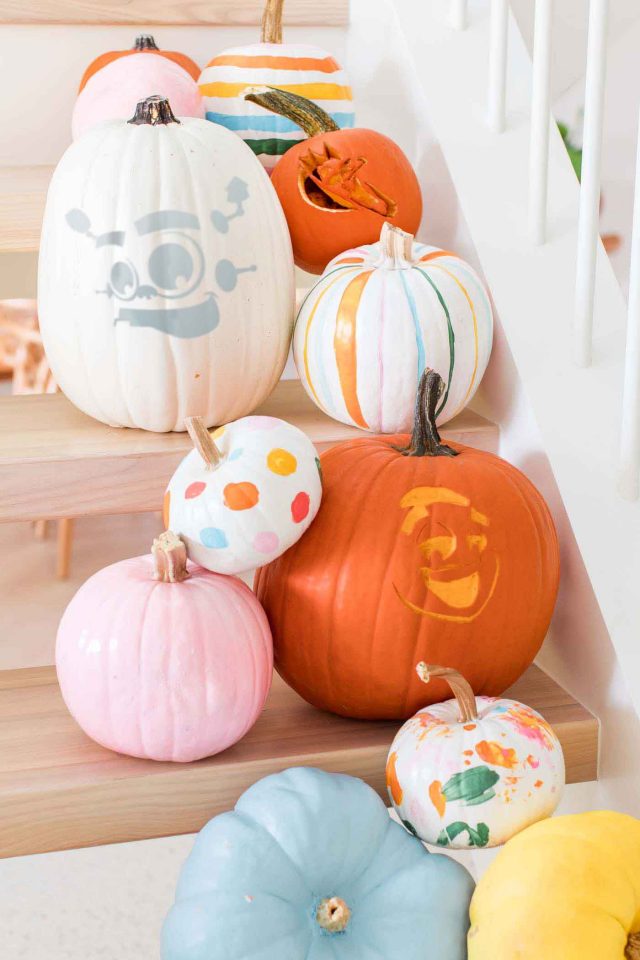
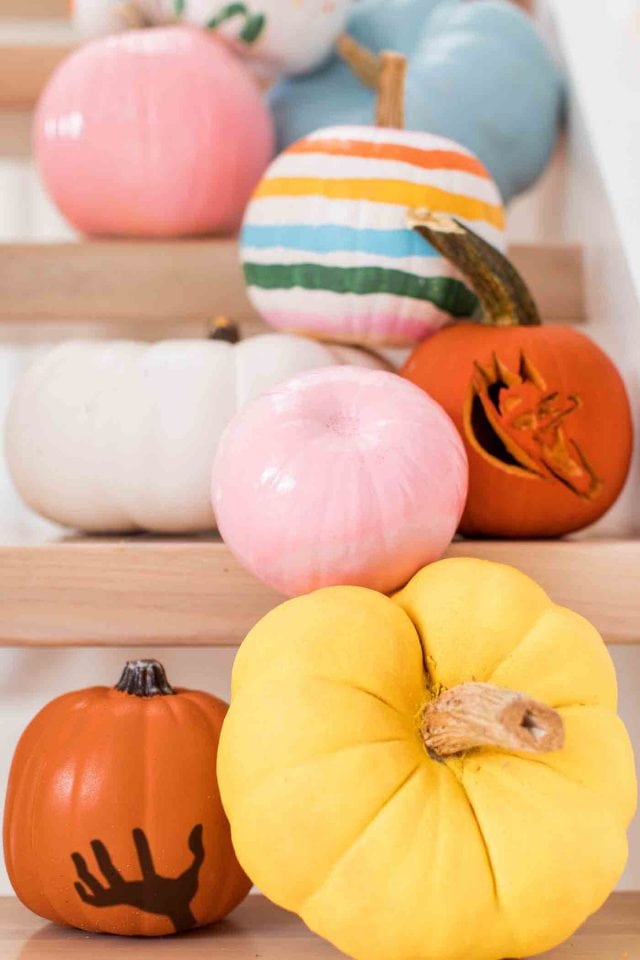
Since we have a toddler that likes to help run the holiday decisions in this house, we really went to town on the Monsters Cereal and The Addams Family theme pumpkins this year instead of regular jack-o-lanterns. I love how playful they turned out!
Plus our chocolatey and berry ghost cereal pieces with bat-shaped marshmallows cereal box inspiration just so happens to serve as a great carving snack, so it’s a win/win!
Tools for Carving a Pumpkin with a Pumpkin Stencil
Before I dive into the pumpkin carving tips and tools be sure that you have your choice of pumpkins and your pumpkin carving stencils on hand.
You can either go all out with your pumpkin carving tools, or you can simply find some household tools for your pumpkin carving kit that will get the job done. Whether you’re a hobbyist or you’re taking your pumpkin patterns very seriously, this is a good mix of tools for carving a pumpkin stencil—
- Complete pumpkin carving tool kit to reuse each year
- Household drill — For making perfect holes into your pumpkin
- Ladle spoon or a spoon with a serrated edge — To scoop the inside goop out of the pumpkin
- Xacto knife — A great alternative for carving pumpkin designs that you might already own
- Needle tool from your sewing or clay kit — For outlining your designs
- Ballpoint pin and push pins or painter’s tape — For transferring your pumpkin stencil design to your pumpkin

Tips for Carving a Pumpkin Stencil
Once you’ve chosen your pumpkin stencil, follow these essential tips to make the carving process easier and ensure your design really shines.
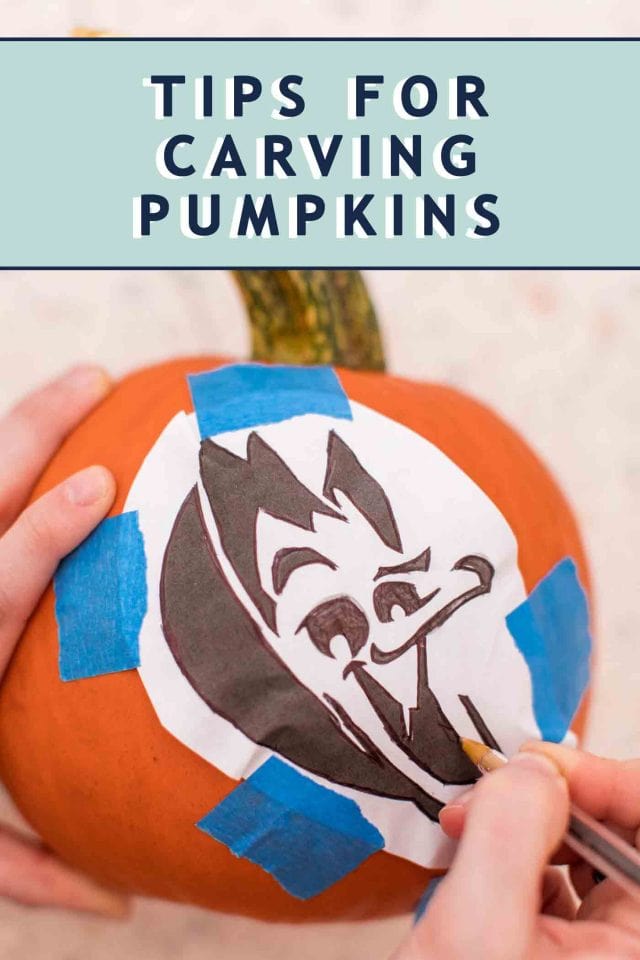
1 — Print and trim your stencil:
After selecting your pumpkin stencil, print it out and carefully trim away any excess paper around the edges. This makes it easier to position and secure the stencil onto your pumpkin.
2 — Avoid cutting the stem or top:
Never cut from the stem or top of the pumpkin. It’s what keeps the pumpkin fresh and helps it last longer.
3 — Cut an opening in the back instead:
Create a square or rectangular opening in the back of the pumpkin that’s just big enough for your hand. This makes it easy to scoop out the insides and place a candle or LED light inside. Save the piece you cut out so you can fit it back in afterward to help keep critters out.
4 — Scoop out the pumpkin thoroughly:
Remove all the seeds and pulp from the inside of the pumpkin so that your carved design glows brightly when lit.

5 — Clean the pumpkin surface:
Before taping down your stencil, wipe the outside of the pumpkin with an antibacterial wipe. Cleaning the surface helps remove dirt and bacteria, which can slow down the rotting process and give you a smoother area to work with.
6 — Secure the stencil:
Position your stencil where you’d like the design to appear, then use push pins or tape to hold it firmly in place.
7 — Trace the design:
With a ballpoint pen, press firmly as you trace over the stencil lines. Applying extra pressure will leave clear indentations on the pumpkin’s surface, making it easier to follow when carving.
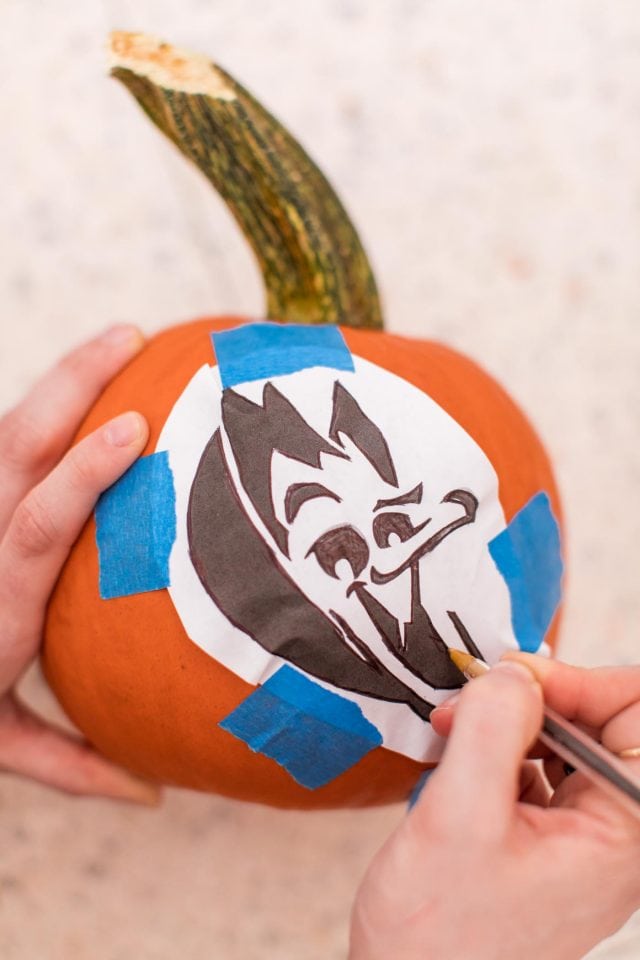
6 — Check your work and remove the stencil:
Gently lift one side of the stencil to make sure the design transferred. Once you’ve traced the entire pattern, remove the stencil completely and set it aside to reuse or keep as a reference while carving.
7 — Refine the design:
Go back over the traced lines with your pen to darken them, making the pattern easier to see while carving. If you prefer, you can also fill in parts of the design for extra clarity.

8 — Begin carving:
Using a small serrated carving tool, you can carve your design in 2 different ways. Take your time with detailed areas to keep the design clean and precise.
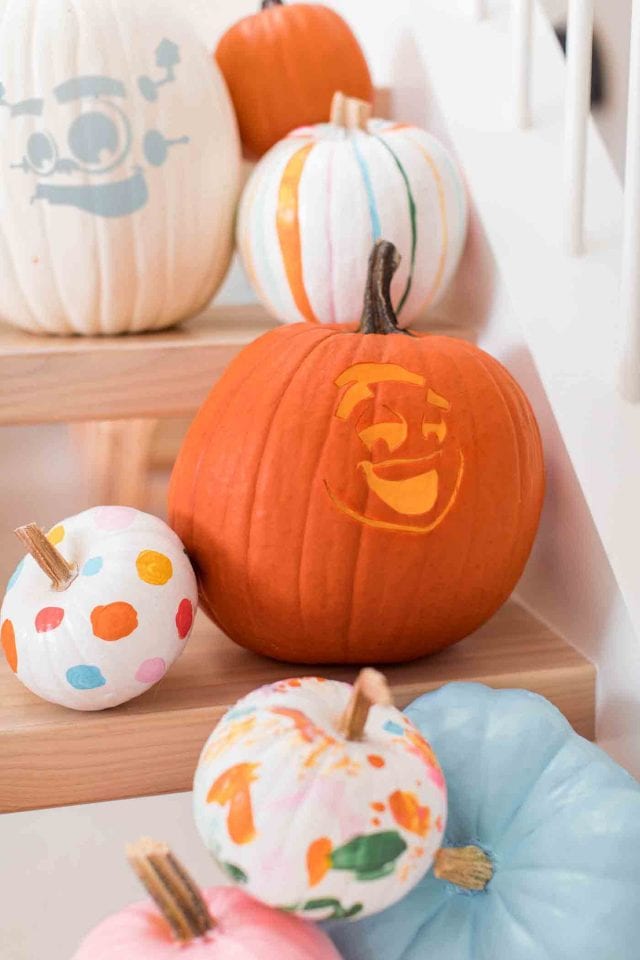
- Cut all the way through: This traditional method creates bold, dramatic cutouts that glow brightly when lit. However, cutting all the way through can weaken the pumpkin, making intricate designs harder to maintain.
- Chisel method: Instead of cutting, chiseling scrapes away just the outer layers of the pumpkin flesh. This technique allows light to shine through softly, almost like a glowing lantern, and works especially well for detailed or delicate designs. The downside is that it takes more time and precision.

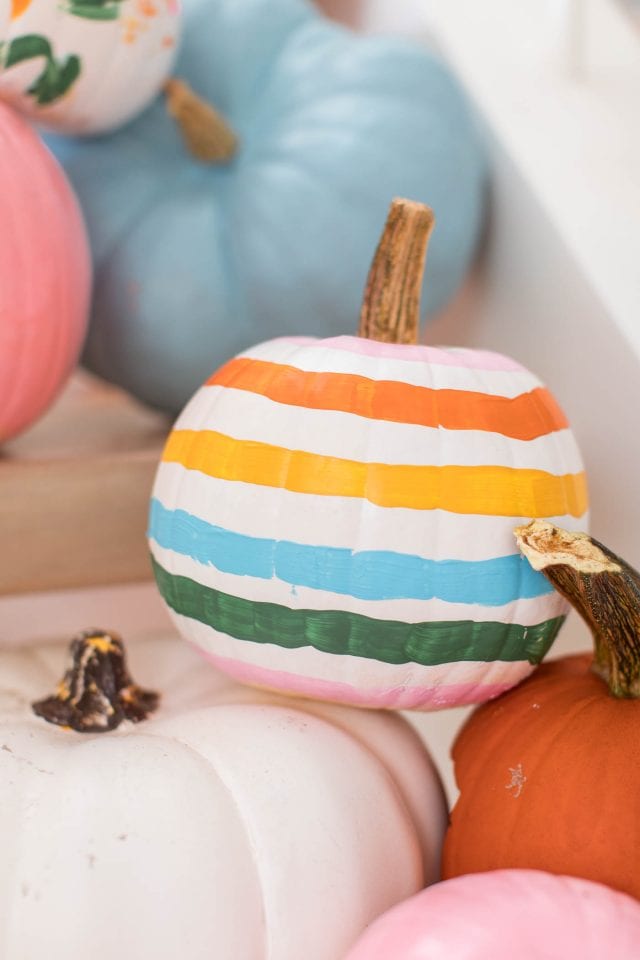
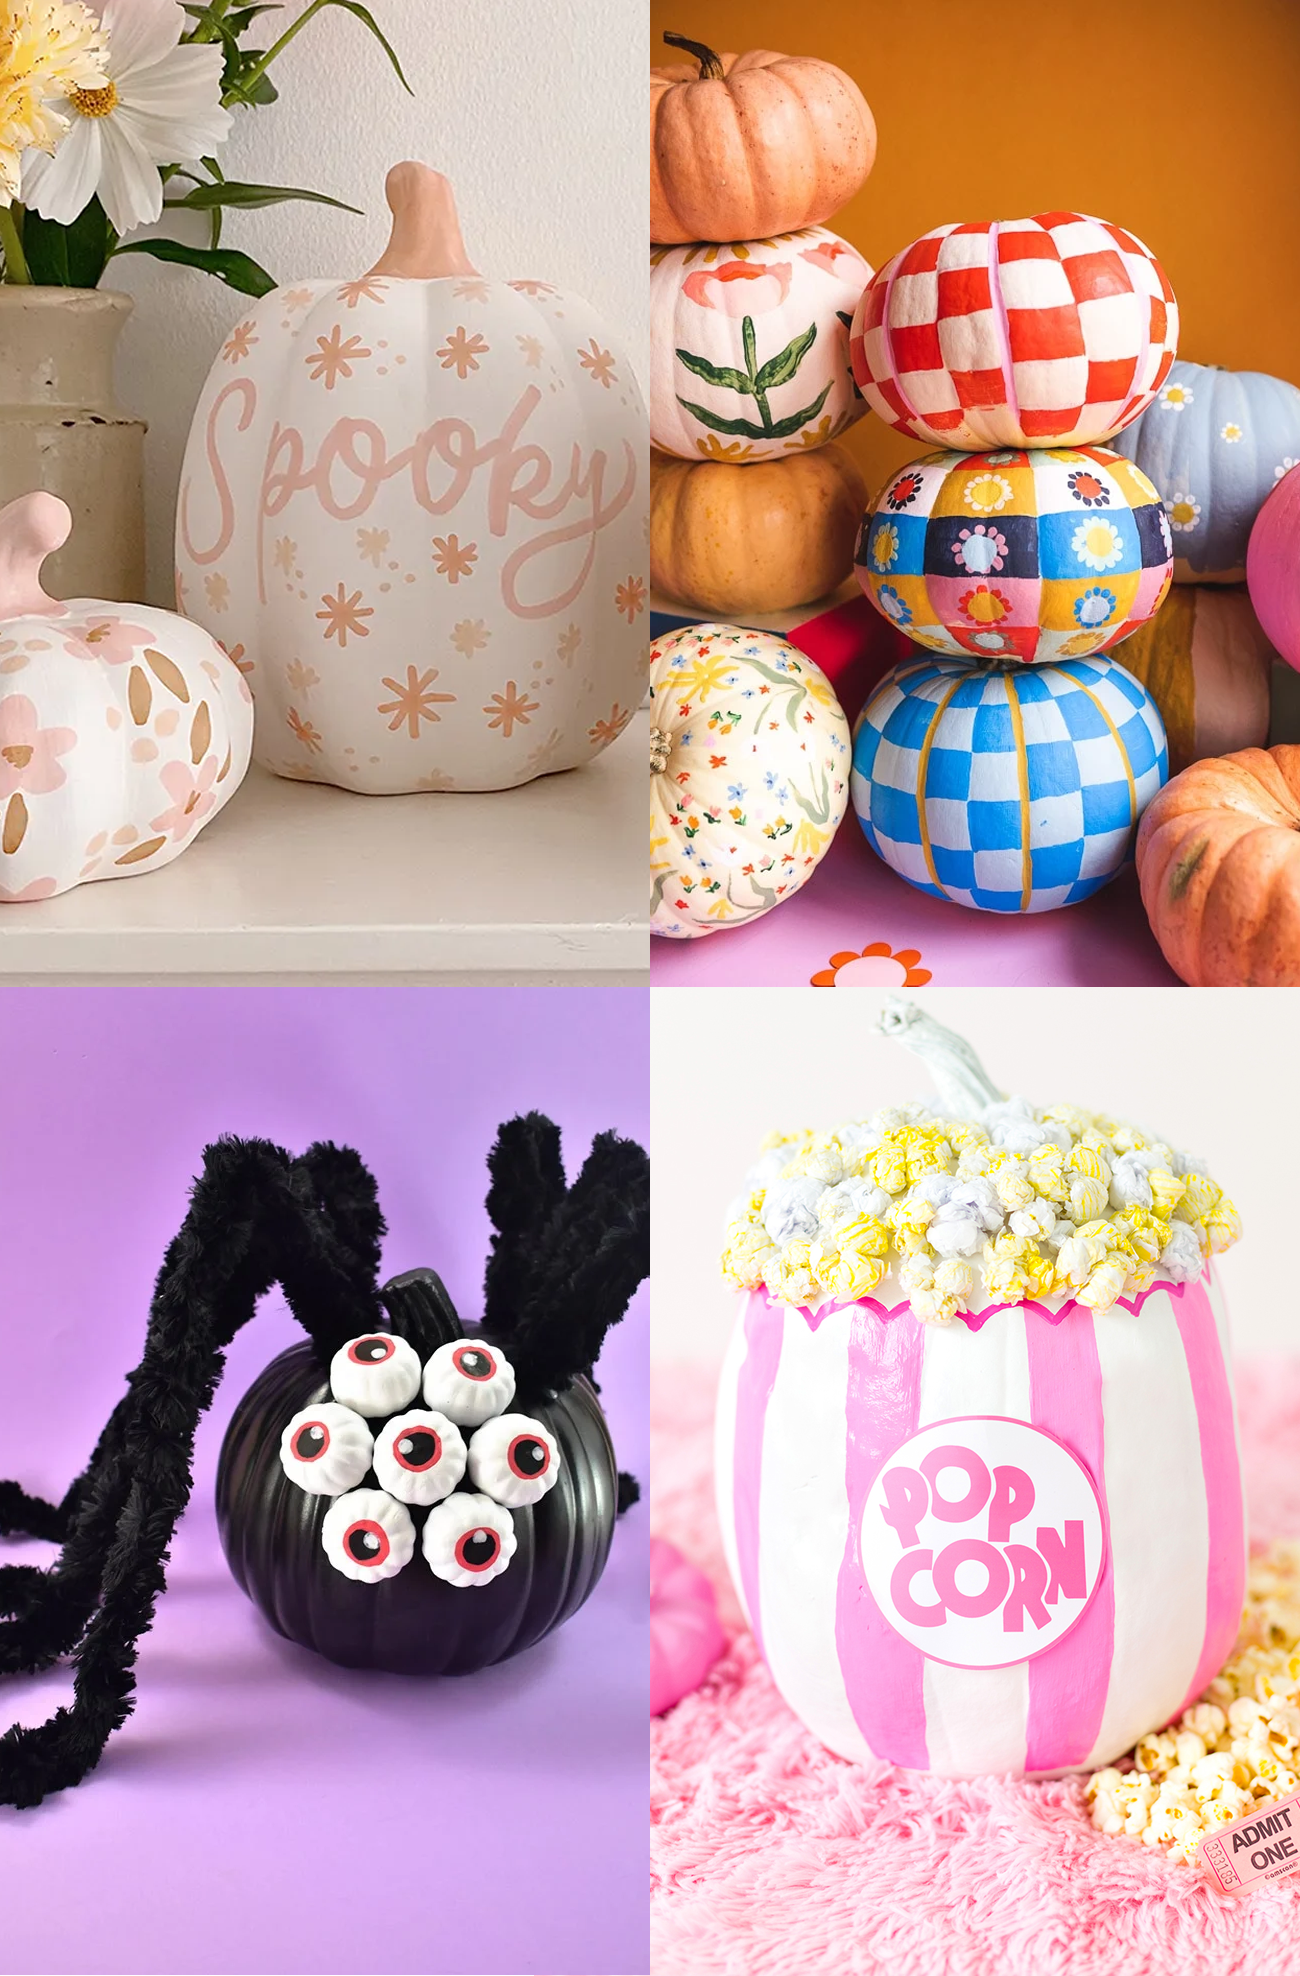
Using Stencils to Paint Pumpkins
If you have little ones around helping you decorate pumpkins, you can paint using the stencil instead. To so do, use the stencil method above but instead of carving the shape out of the pumpkin, simply color or paint in the design. Here are some other creative pumpkin painting ideas.

How to Make a Carved Pumpkin Stencil Design Last
If you’re wanting to make your design last as long as possible, here are a few tips to keep your carved pumpkins:
- Cleaning the surface: Before carving, you can soak your pumpkin in a solution of 1 gallon of water to 1 teaspoon of bleach. This will make sure the surface ready for carving and clear any bacteria.
- Seal with petroleum jelly: Once carved, you can rub the entire pumpkin with petroleum jelly to seal the cuts and surface. This will also help deter the squirrels and other critters from getting into your pumpkin.
- Sprinkle your pumpkin with cayenne pepper: This will deter the squirrels from getting to them.
- To really make your pumpkin stencil art last: Wrap it in a plastic bag and store it in the fridge until you display it.
More Halloween Ideas
I’d say a free pumpkin stencil makes for a pretty fun pumpkin pile, don’t you?! You can use them for classic Halloween front door decor, a haunted house entrance, or just for being a self-proclaimed pumpkin lady like myself! If you’re looking for other Halloween pumpkin decor or entertaining and party ideas, here are a few favorite DIY projects! —
- DIY Halloween wigs and lashes costumes
- Corpse reviver cocktail
- Simple DIY sequin pumpkins
- Easy DIY pumpkin decals
- Our favorite Halloween costume ideas
This post has been sponsored by General Mills Cereals, but all opinions are my own and we’re happy to work with them since they’re a platform we use regularly! Sugar & Cloth has chosen to donate 5% of all sponsored campaigns to charity, which you can read more about right here.

50 Best Halloween Food Ideas for a Spooky Party
Discover the best Halloween food ideas with spooky, fun, and…
Continue Reading 50 Best Halloween Food Ideas for a Spooky Party
33 Easy DIY Pumpkin Painting Ideas
Create festive and unique decorations with these pumpkin painting ideas…

45 Alcoholic Desserts to Liven Up Your Next Party
Who says desserts are for kids? Enter the world of…
Continue Reading 45 Alcoholic Desserts to Liven Up Your Next Party
Pumpkin Spice White Russian Recipe
Experience the cozy flavors of fall in every sip with…
Please note that we may earn a commission for some of the above affiliate links. However, products featured are independently selected and personally well-loved by us!
It was fortunate and fortunate that I came to this site and read a lot of interesting information. It is really useful to read. I like so much. Thanks for sharing this great information. https://novels247.com
Such great tips! The presentation is adorable!
Thank you, Anna! We had such a fun time doing this! XOXO
Oh my goodness, these pumpkins are just TOO good! Love the tips, can’t wait to implement them in my family!
Love the patterns! I will have to use them this year! We need a change from just the regular pumpkin face!
Thanks, Natalie! Change is always good! :)
Great tips and they look so cute!
Thanks, Melissa! XOXO
What great tips! I always struggle with carving intricate designs; I will have to give these a try!
We totally know what you’re talking about. Carving can seem a bit daunting but it really isn’t! Good luck!
If only I had read your tips before I threw out our moldy carved pumpkin today.😂😭 Oh well, I’ll have them when I host our families for pumpkin carving next week! Definitely printing these cute templates, too!
Well, at least this family pumpkin carving sounds like it’s gonna be so far! Let us know how it turns out, Ali! XOXO