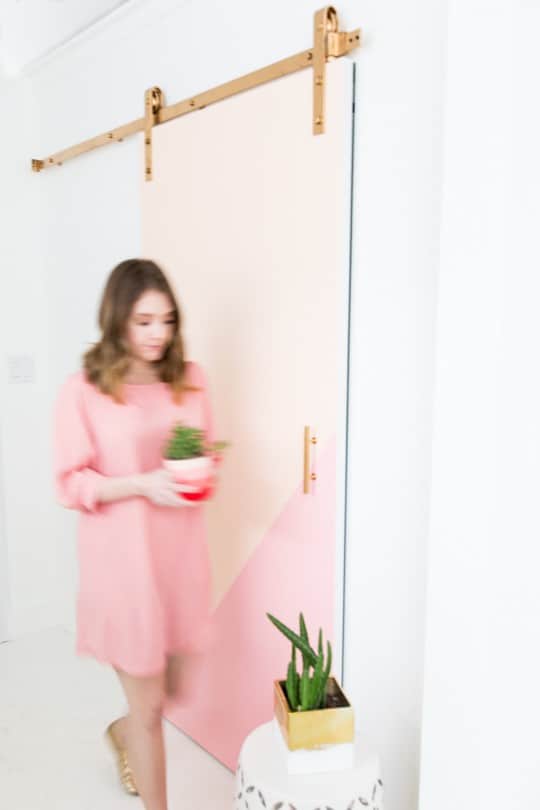
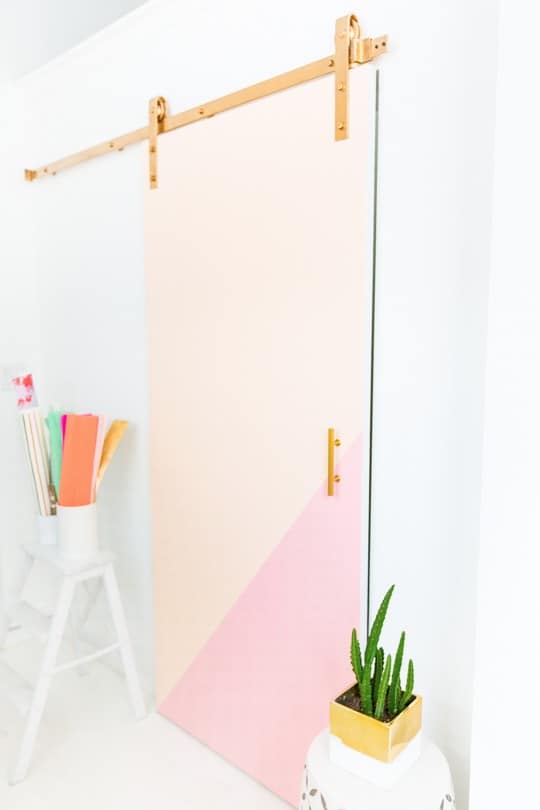
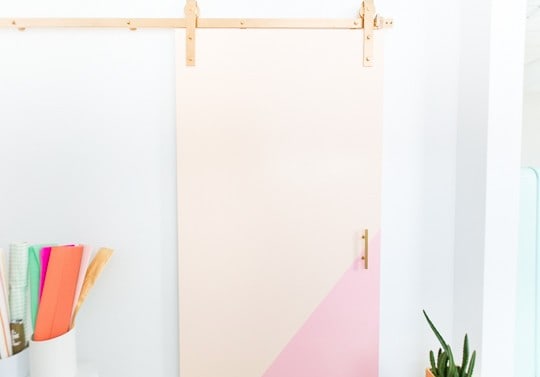
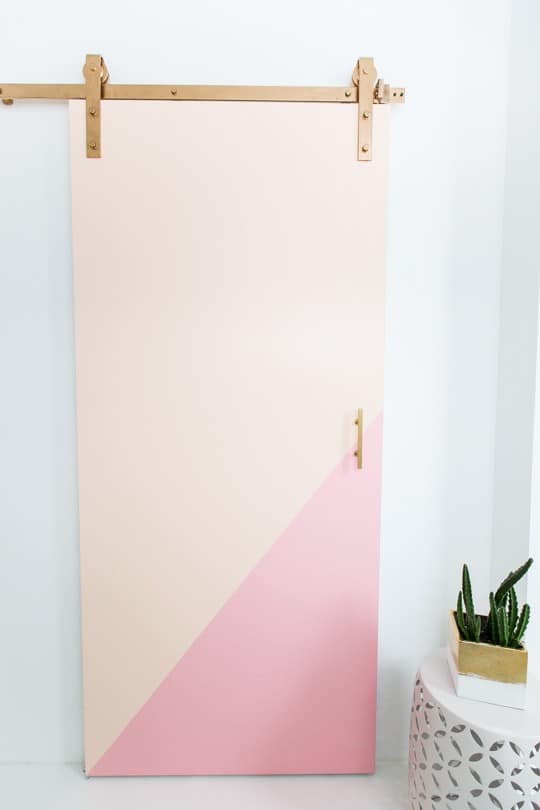
Color Block DIY Barn Door
This Color Block DIY Barn Door is a modern take on this well-loved sliding door trend!
Are you looking to add a splash of color and style to your place?
Look no further than the trendy DIY project of creating a color block barn door. Barn doors have become increasingly popular in interior design for their rustic charm and space-saving functionality.
But the barn door isn’t just for the farmhouse style. By incorporating vibrant hues and geometric patterns, you can take this trend to the next level and create a striking focal point in any room.
We’ve been imagining this awesome mod sliding door for our new studio.
Materials and Tools Needed
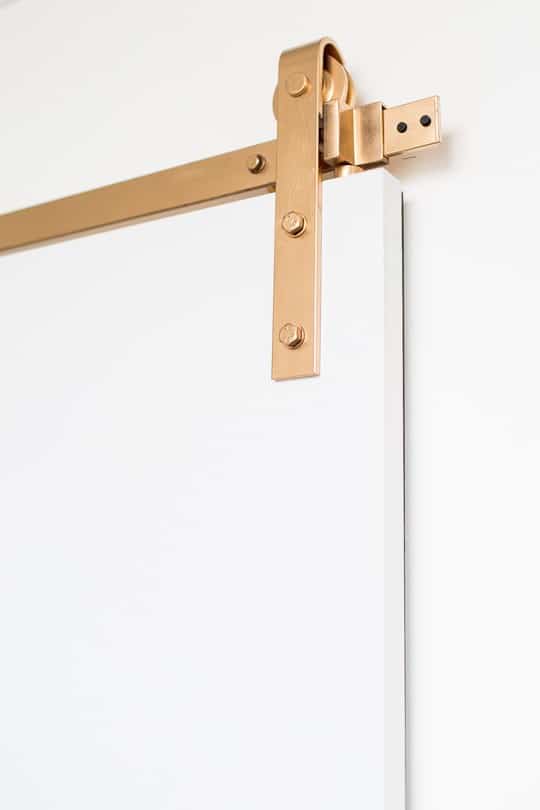
- Bent strap barn door roller hardware kit — Ours was a 78.75-inch matte black steel kit which included the track, rollers, and necessary hardware.
- Painter’s tape
- Medium sandpaper — We used a 120-grit sandpaper that is ideal for smoothing surfaces and removing small imperfections.
- 30×80-inch hollow core slab door
- Metallic gold spray paint — Optional if you want to paint your barn door hardware. At the time, our barn door hardware kit was only available in black.
- Mini paint roller brush
- Interior white satin paint — To paint the sides if you are using an unfinished slab like us.
- Satin paint in the color of your choice — We painted the door Nude Satin and Quartz Pink Satin.
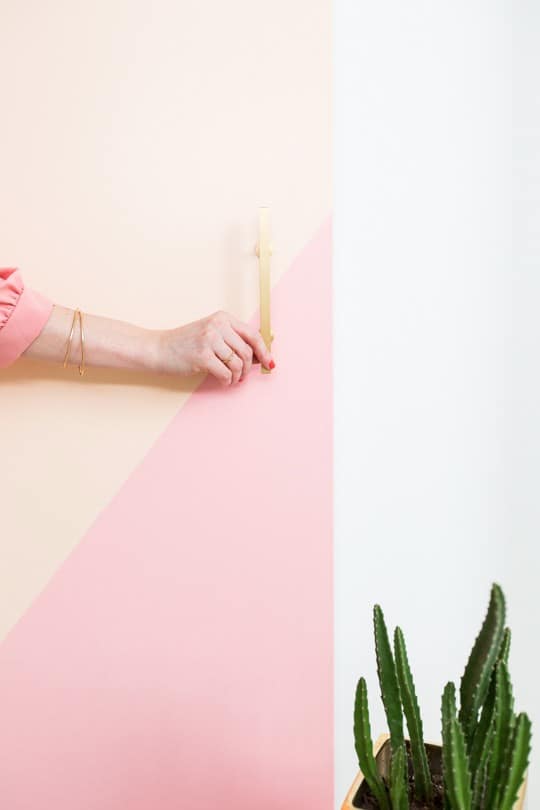
- Brushed brass pull bar — Our cabinet drawer pull bar measured 3-3/4-inches.
- Two #8-32 x 2in. round combo screws
- Drill and drill bits
- Measuring tape
- Pencil
Customizing Your DIY Barn Door Hardware
Some barn door hardware kits are available in black, nickel and gold. Because the particular hardware that we wanted only came in black (at the time), we knew that we wanted a pop of color. So here’s how we customized the hardware:
1 — Spray paint the barn door hardware gold (or color of your choice) prior to assembling any of the pieces. Make sure all the sides are painted when constructing the frame and attaching it to the slab door.
2 — Use the sandpaper to sand the rough surfaces of the slab door.
3 — Paint all the sides of the door a coat of white (or color of your choice). Even though you’ll be painting the face of the door, the other sides will still need coated since this is an unfinished slab door, which will make for a smooth final surface in the end.
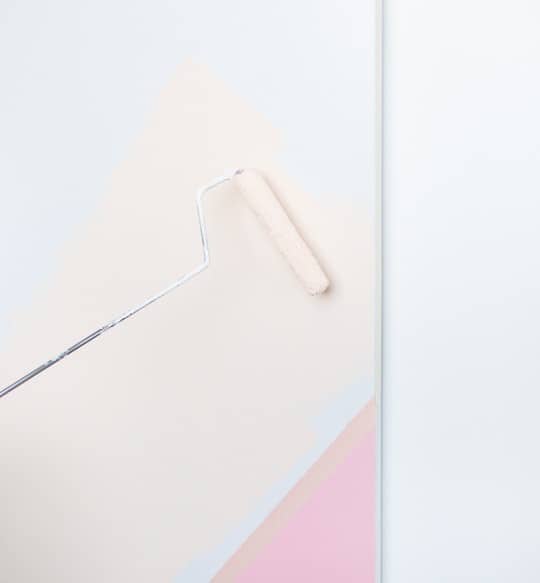
How to Color Block Paint a Door
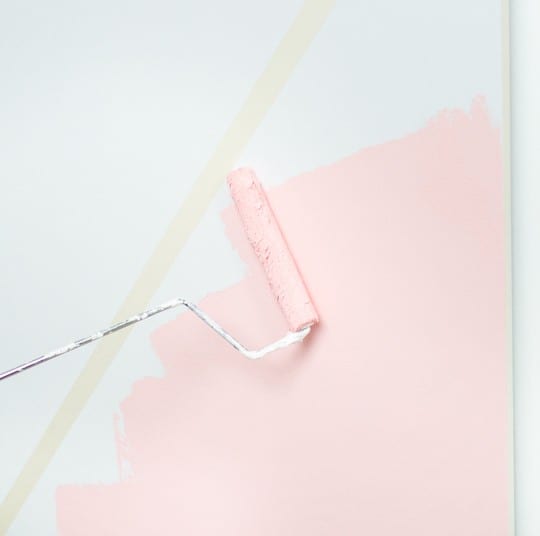
1 — At a 45-degree diagonal angle, section off the bottom left corner of the door with painter’s tape.
2 — Then, paint that bottom portion corner in the color of your choice. We chose Pantone Quartz Pink. Allow the bottom corner to dry and set for about 24 hours.
3 — Before you start painting the rest of the door, you need to protect the painted corner. To do so, tape along and over the same line on the painted corner.
4 — Paint the opposite side of the door in the color of your choice. We chose Pantone Nude. Once you’ve painted the second color, let it dry and set again for another 24 hours.
This will make sure it’s cured enough so it’s more durable for handling without getting marks on it as easily.
There are many other fun paint design ideas for your door. Check out our simple wall painting designs post for easy patterns that can be made with tape. Or our easy handmade wall painting designs post if you want to freehand a design on the door.
Tips to Installing Barn Door Track
Before we get started, we’re going to give you some info for installing the barn door without pretending to be a total professional at the process.
For installing the hardware, this is a great video tutorial on how to install a barn door track (plus a PDF version of the instructions here).
Our kit from Lowe’s actually gave really detailed instruction on how to install a barn door track properly as well.
You’ll follow the instructions included with the kit just as they are. HOWEVER, the height door may be different depending on your preference and the size of the wood slab door that you choose.
For the door to slide properly without hitting the floor, make sure that the height to which you’ll install the track will be the right distance from the ground.
You’ll need to add an additional inch to that measurement for this particular slab door to not rub on the ground.
As always, we highly recommended pre-measuring before drilling. That being said, even though we aren’t professional door installers, this is totally easy to do yourself at home!
How to Install a DIY Barn Door
1 — Measure the doorway to determine the size of the barn door needed. Choose a location that complements your overall design.
2 — Use a level to mark a straight line on the wall where the track will be installed. Attach the track to the wall using the provided screws. Ensure the track is level.
3 — Use a stud finder to locate and mark the studs along the installation line. Ensure that the track is securely screwed into the studs for stability.
4 — Follow the instructions to attach the rollers to the top of the barn door.
5 — Hang the door on the track.
6 — Adjust the rollers to ensure the door is level and slides smoothly along the track. Slide the barn door back and forth to test its functionality. Make any necessary adjustments to ensure it operates smoothly.
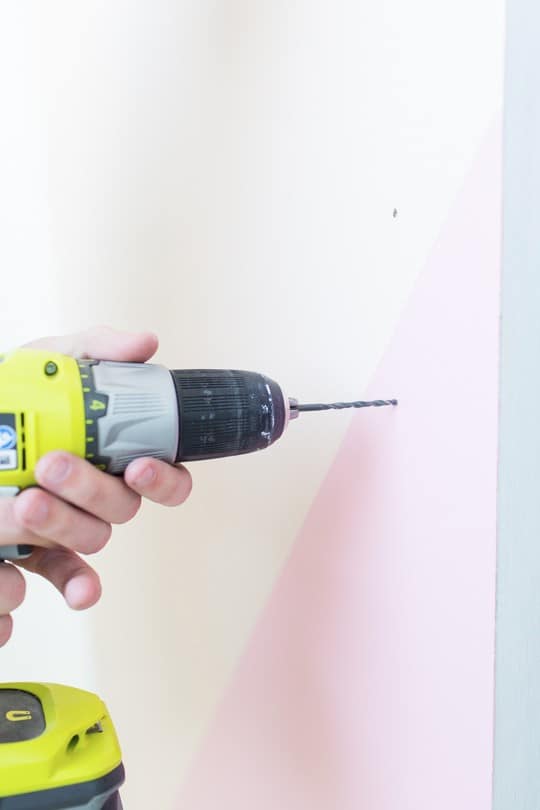
Installing a Door Handle on a DIY Barn Door
1 — Now you’ll install the handle. For this exact handle, you’ll measure 3 inches from the side of the door and mark.
From that mark, you’ll measure down 3 3/4 inches to be able to mark for the second hole, double checking that both holes are three inches from the side of the door (or equal distance if you’d prefer a different location).
2 — Next, drill two holes all the way through the door from the front (so that any excess wood pieces that get shoved through will be covered by screws in the back) where you measured and marked.
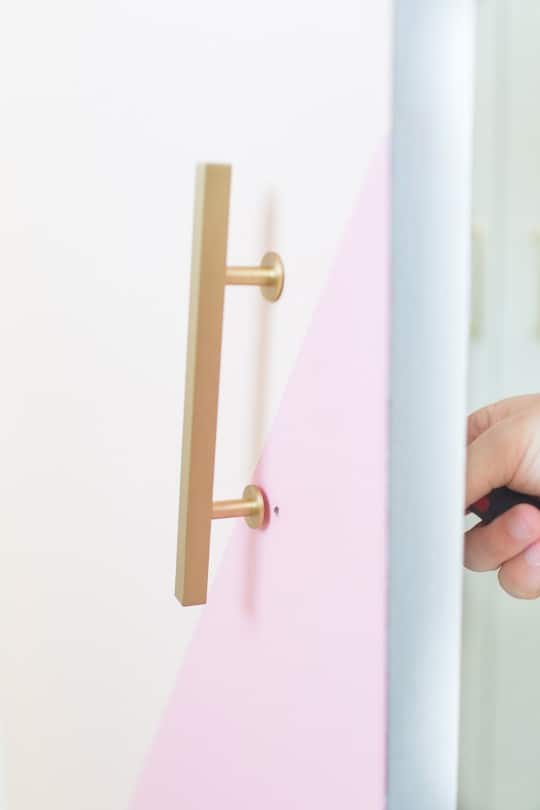
3 — Now install the handle (on the two outer most holes), using the #8 round screws instead of the ones the handles come with since the original. Included screws aren’t long enough to fit through the slab door.
Once your handle is installed, you’re ready to impress! I realllllly love the look of the solid painted slab door as opposed to the usual traditional textured doors that get associated with the barn door functionality.
More Decor Ideas
So what do you think?! Do like where we’re headed with the space so far? If you’re new to the #sugarandclothstudio renovating, you can see how it from the very beginning here, and our most recent update on the kitchenette.
- Ikea Besta Door Colors – DIY Color Block Storage Ideas
- Beautiful DIY Tassels For Your Door Handle
- 36 Modern Budget Door Mats We’re Loving
Please note that we may earn a commission for some of the above affiliate links. However, products featured are independently selected and personally well-loved by us!
Wow, love door… you may also like https://www.diytomake.com/diy-home-decor-crafts/
Hi Ashley – what Gold spray did you use for barn door track please? How has it held up? Thank you
Hey Zoe! Here is the link to the gold spray paint I used! It has held up perfectly, and I still love it!
Hi Ashley! I came across this door on pinterst and it’s lovely! I’m not sure how long ago you posted this, but how is the spray paint holding up? I’ve been looking for brass hardware and it’s impossible to find so I’m considering just painting the hardware. Thank you!
Hi Kyle! The door has held up almost perfectly! Have you tried etsy for more specific options? We used this one:
https://www.lowes.com/pd/Lew-s-Hardware-3-3-4-in-Center-to-Center-Brushed-Brass-Bar-Series-Bar-Cabinet-Pull/4365941
I wondered if you had any issues with the paint on the hardware now that you’re a year plus out.
thanks!
Hi Catherine! The door still looks good as new :)
This is GORG!! I am considering doing this for our nursery. QUESTION: Did you leave the other side white?
gorgeous!
Beautiful color selection! I love it
I’ve always wanted a barn door and this is just stunning!
OH MY GOD! What a beautiful door – lovely colours! This is a super great idea!
Thanks for being so inspiring! :)
It looks great! It seems like a bit of a undertaking (I’m not that handy!) But super worth it. Love what it adds to the room.
So cool, Ashley! I can’t wait to see your space.
Carrie
http://www.wearwherewell.com
What a beautiful way to glam up this style door. It looks amazing!
Love this!! Could you share what colour of white you have painted your walls?? So bright and beautiful!
Oh I absolutely love this! I think the color blocking was a great choice :) Can’t wait to see how this space comes together!