DIY Pom Pom Placemats & Tabletop
DIY Pom Pom Placemats And Tabletop — A quick and easy DIY for summer entertaining with these DIY Pom Pom Placemats and tabletop inspiration!
One of my worst qualities in life is not being able to keep surprises. I swear, the second I get excited about sharing something it’s over!
I should just apologize to all loved ones in advance for never actually having anything to open on Christmas or birthdays. (Sorry about tomorrow, Jared!)
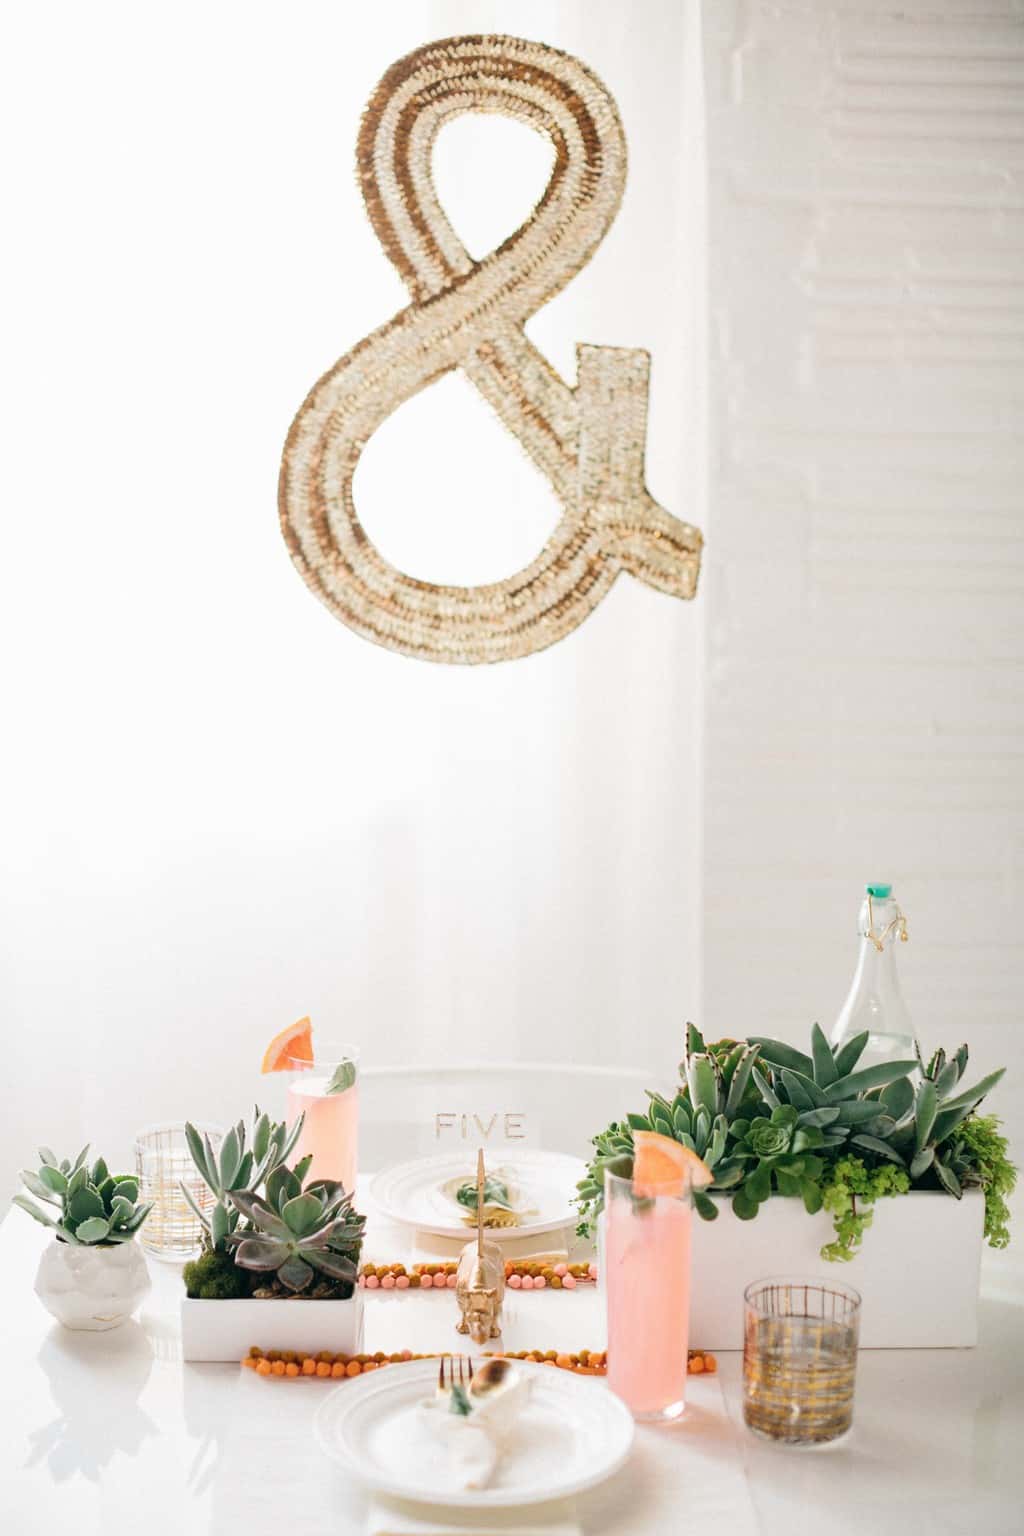
Fortunately, what I lack in keeping surprises, I can make up for with a whole bunch of pom pom trim loveliness… like this tabletop I styled with Kim a few months ago.
Per my token colors, I stuck with white, gold, and pops of color. I know what you’re thinking. I should get a gold chain necklace with that phrase on it by now!
But I can’t help it. In case, you loved the DIY pom pom throw that matched this setting, you can see this version of the pom pom placemats tutorial over on Rue Magazine!
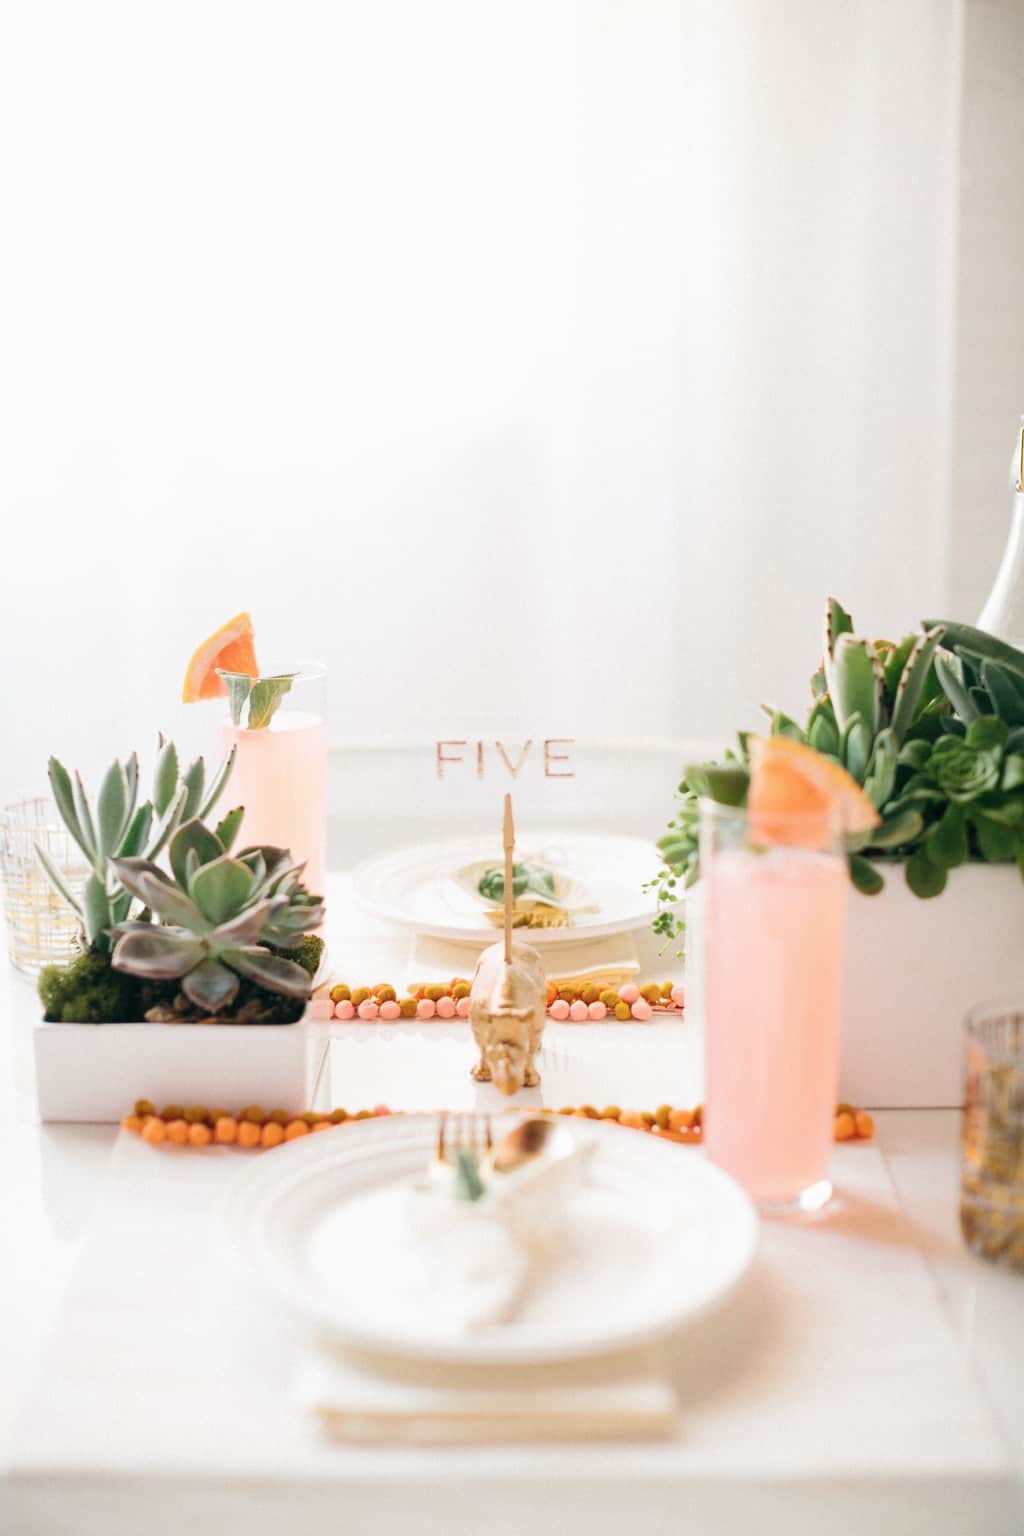
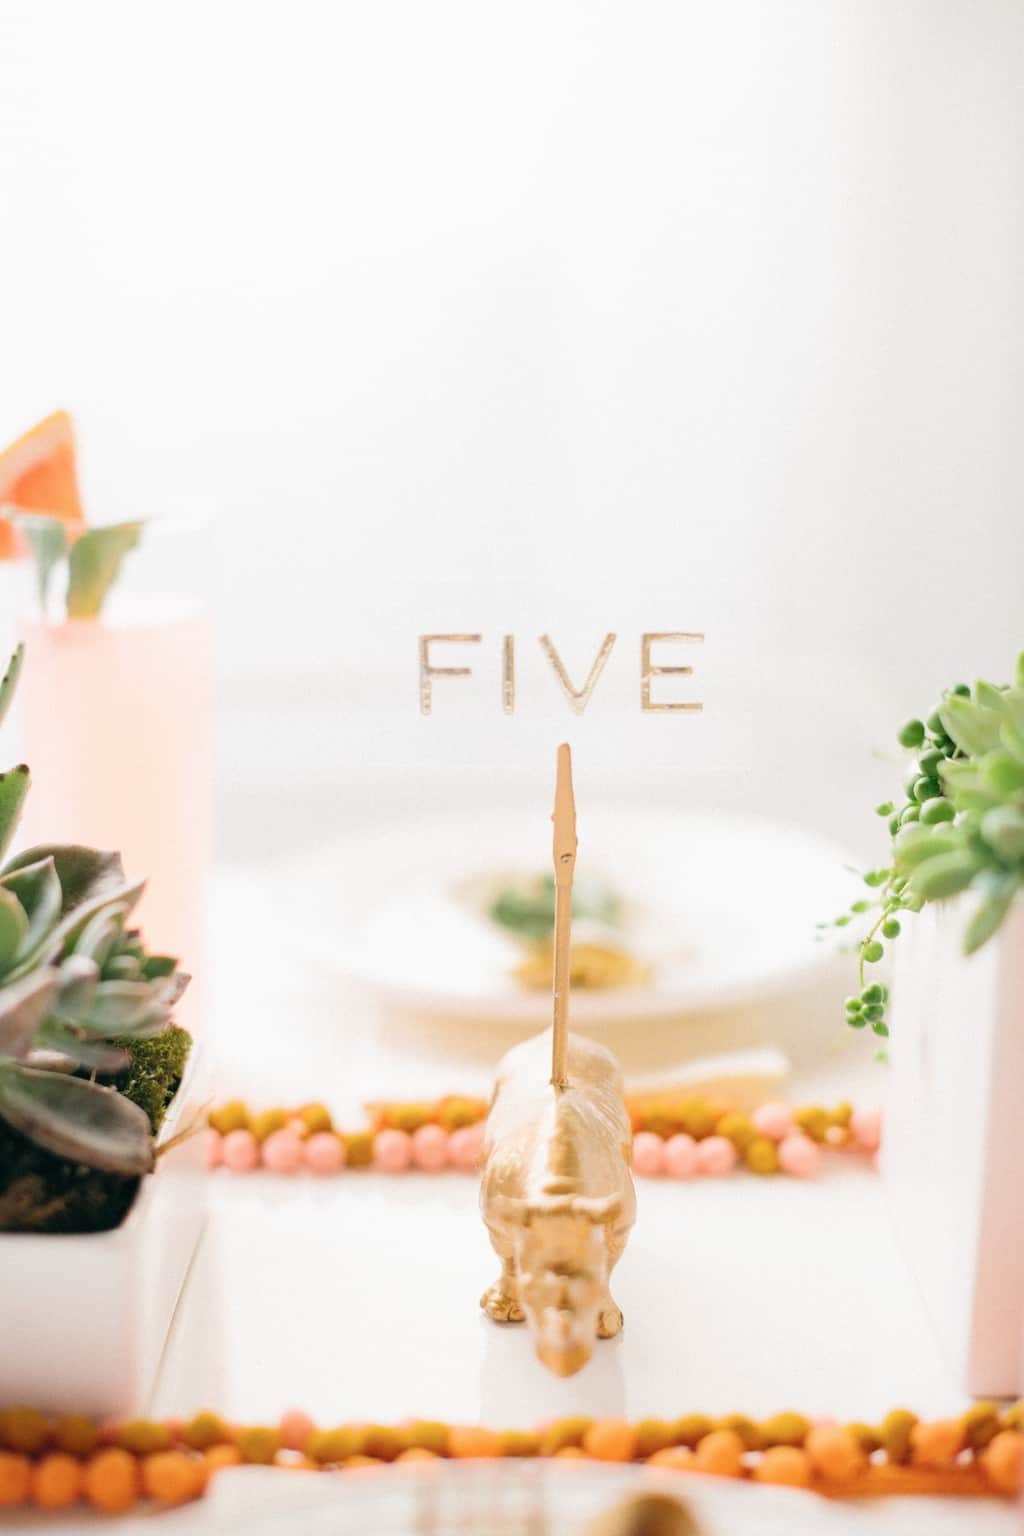
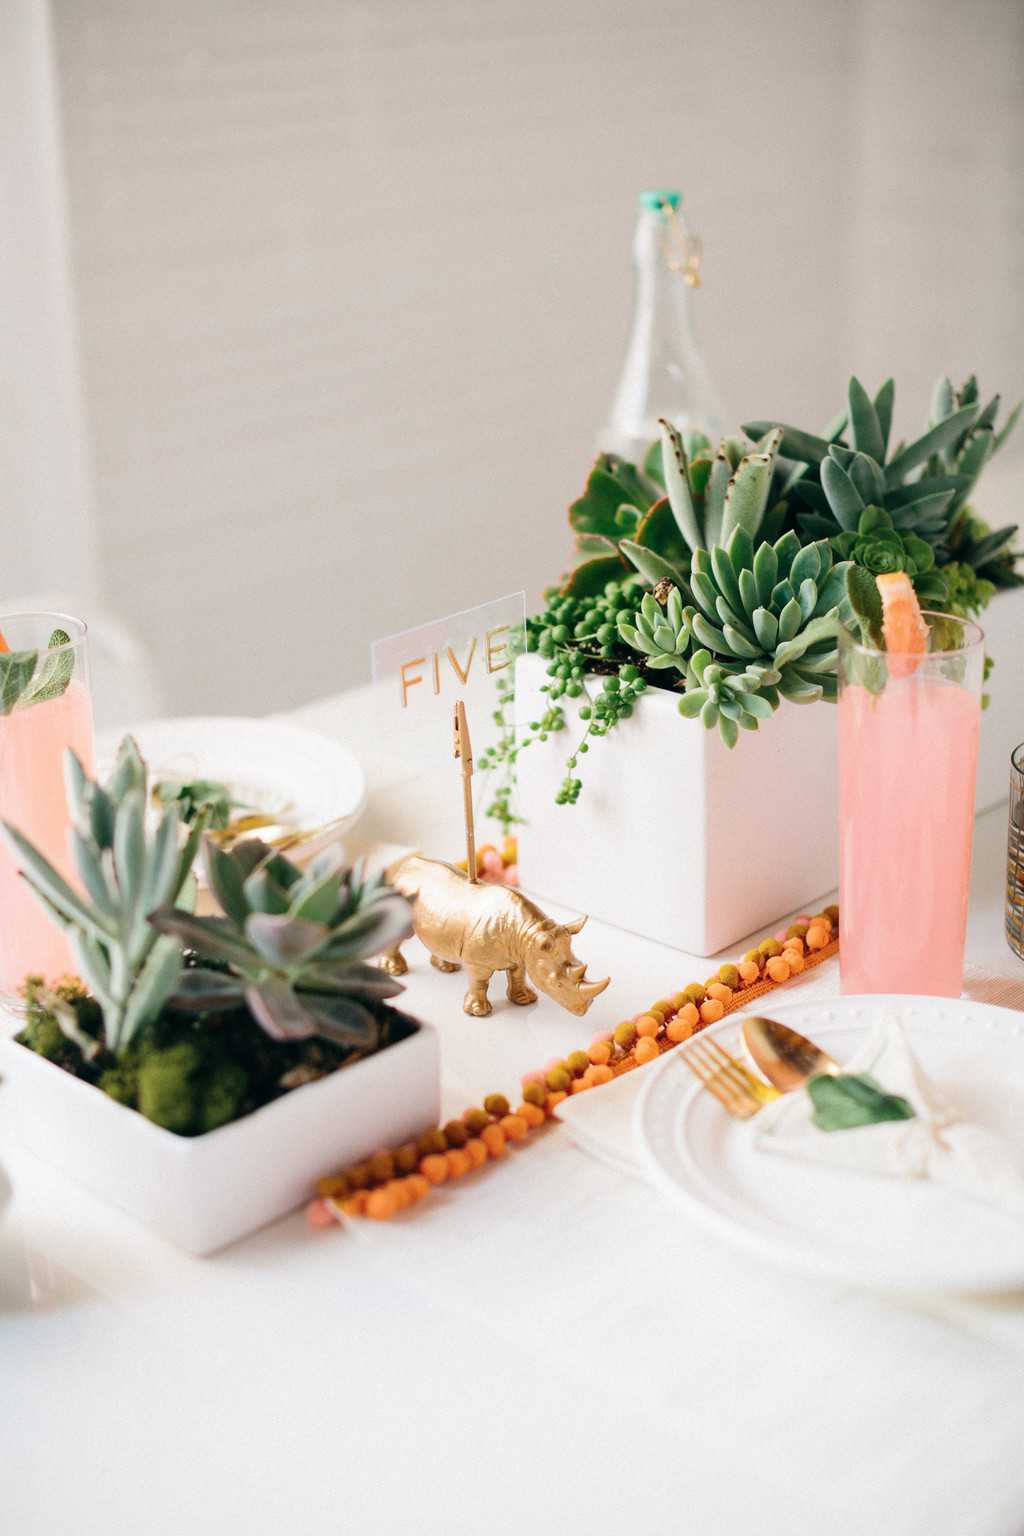
For the table numbers, we scoured every inch of the studio, until I remembered I had three dimensional gold stickers and stuck them on transparency paper held up by my DIY animal memo holders.
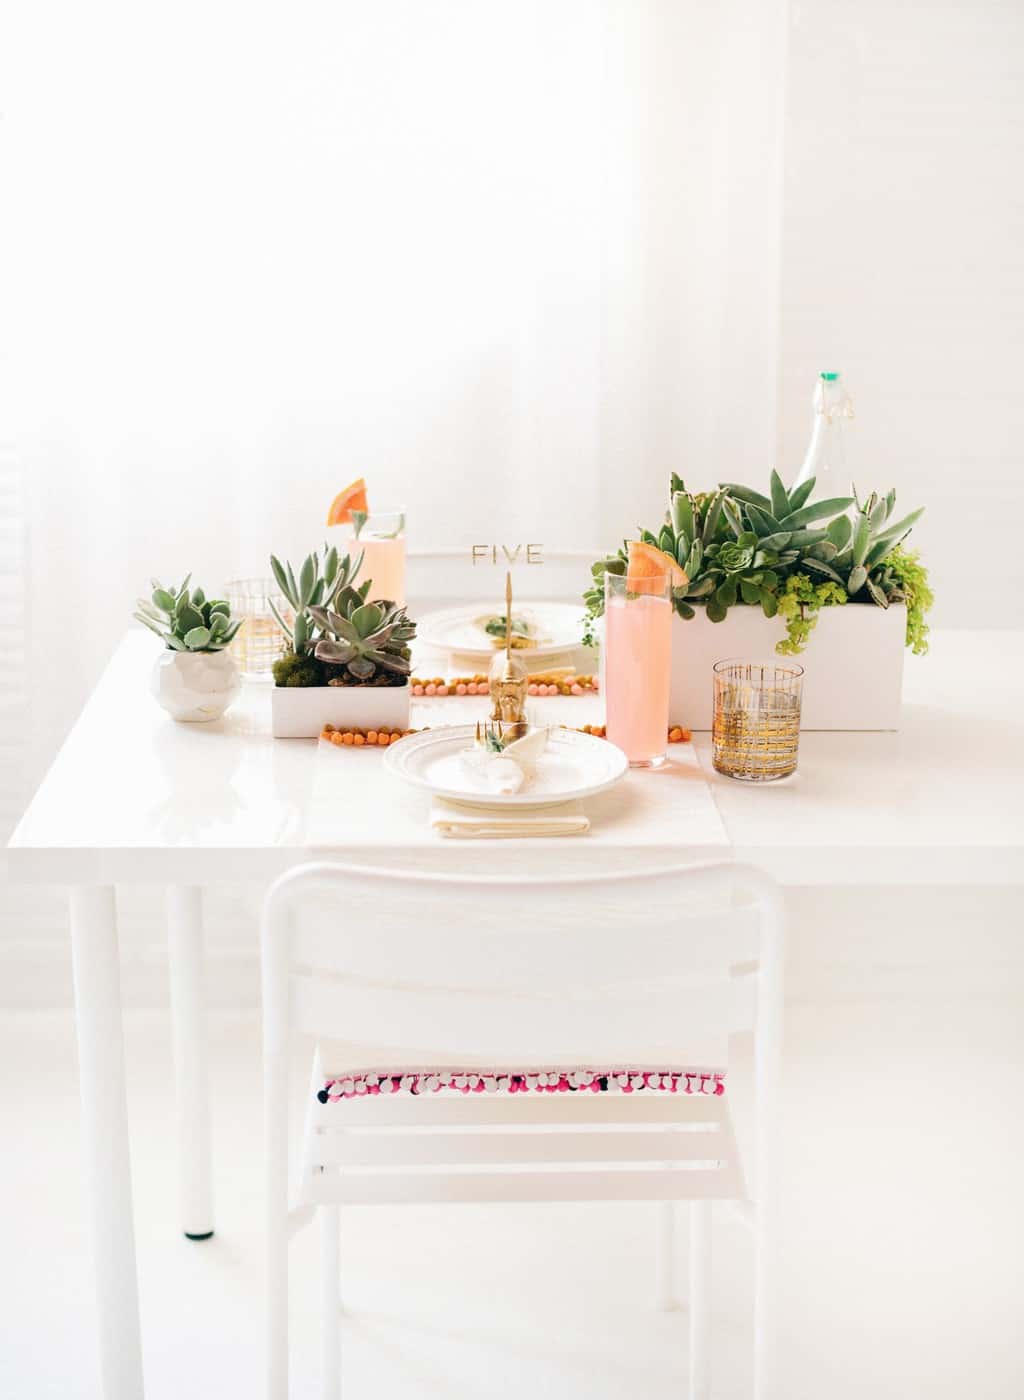
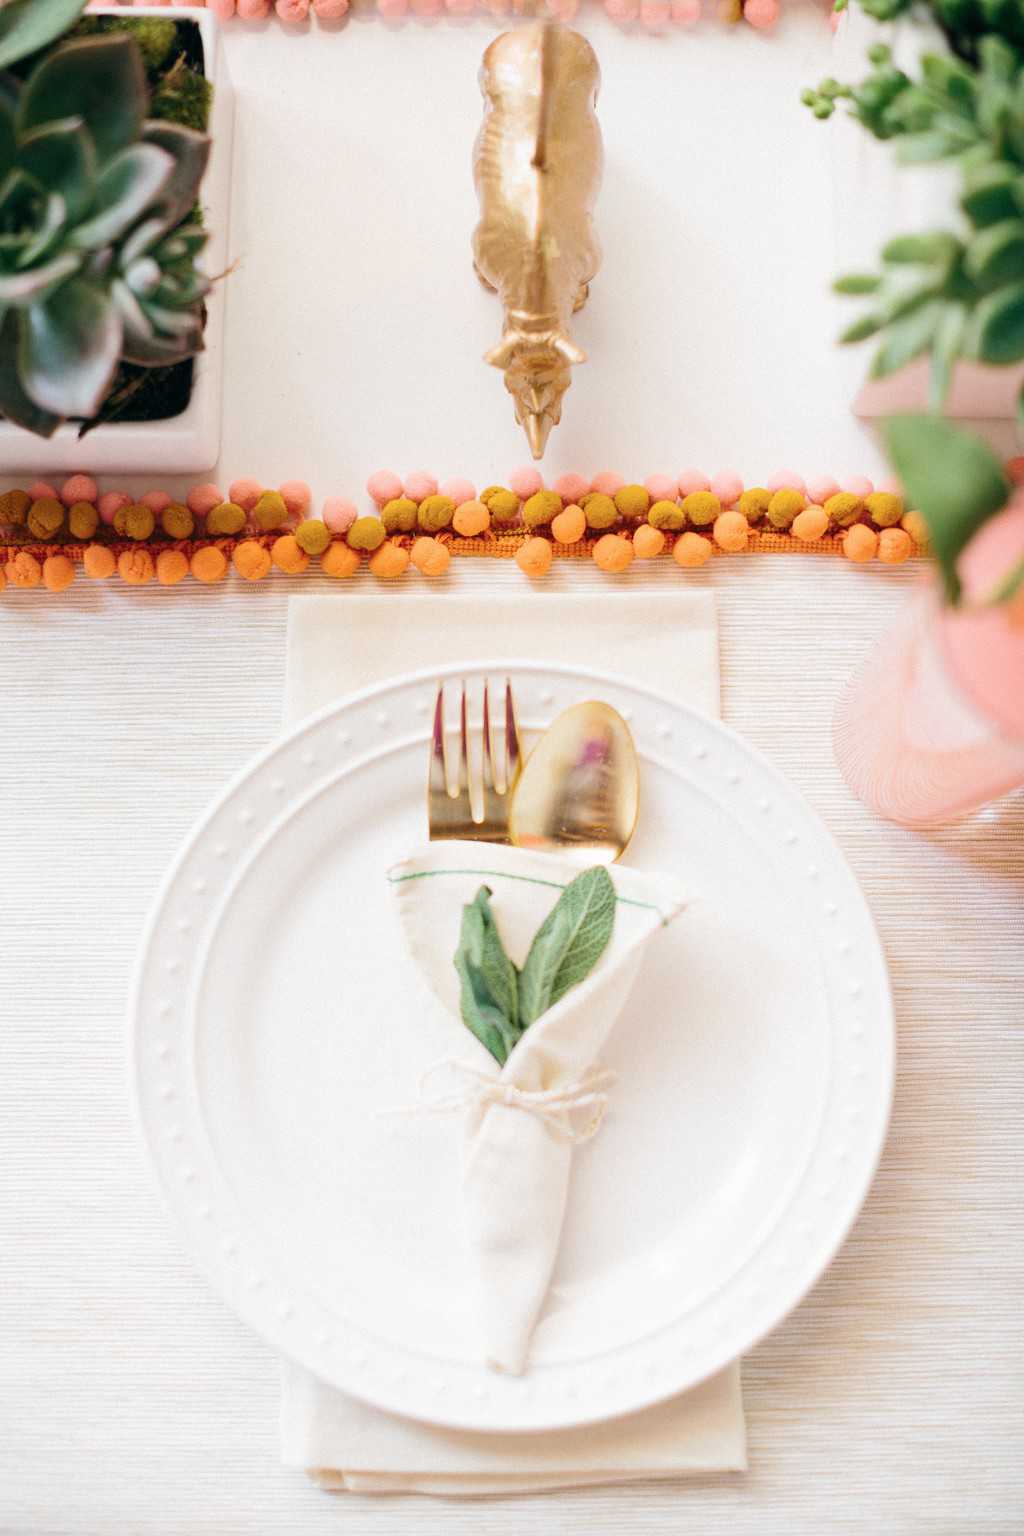
The placemats are actually done up on both sides with opposing color combinations, which looks really cute by placing them vertically off the table instead of horizontal.
Maria of Maxit Flower Design provided the lovely succulent centerpieces. And I now have a new obsession with what I’ve deemed “pea plant succulents”.
I have idea what they’re actually called. But clearly I try to stay highly educated with my plant naming!
Sources
- Styling and DIY by Sugar & Cloth
- Photography by Kimberly Chau
- How to make DIY Pom Pom Placements
- Succulent Arrangements by Maxit Flower Design
- Geometric vase
- Striped Glasses
- Dotted Plates
- Cream Napkins
- Mojito Glasses
- Figurine Table Number DIY
- Flatware
- Chairs
- Table
Please note that we may earn a commission for some of the above affiliate links. However, products featured are independently selected and personally well-loved by us!
Experience the best Abu Dhabi escorts service with our exquisite selection of high-class companions. Unforgettable encounters await you in the vibrant city of Abu Dhabi. Book now!
This excellent website certainly has all of the information and facts I wanted concerning this subject and didn’t know who to ask.
I quite like reading an article that can make people think.
Also, thanks for allowing for me to comment!
I LOVE how these turned out! I wish I could get away with something like this with my kids around!
I love the styling for this shoot! Plus the project is awesome… that helps ;)
Can we talk about that UH-MAZING ampersand in the background??
I love EVERYTHING about this DIY! Thank you for sharing it!
Do you have any details on the table numbers? I am getting married next summer, and the planning has commenced full force! I want to make sure that I have an amazing table set up like these!!!
Thank you!
So freaking adorable!! there’s something really about that combination of colours and the pom pons! <3
As always this is just so so lovely. I’m completely smitten with the same color palette so please keep sending it our way! And those succulents are called String of Pearl succulents. I have a huge pot of it in my backyard, adore!
This is adorable!! Love!
http://www.madeintheshadeblog.com
Thanks Rebecca!
These are amazing Ash. And I love the styling!!