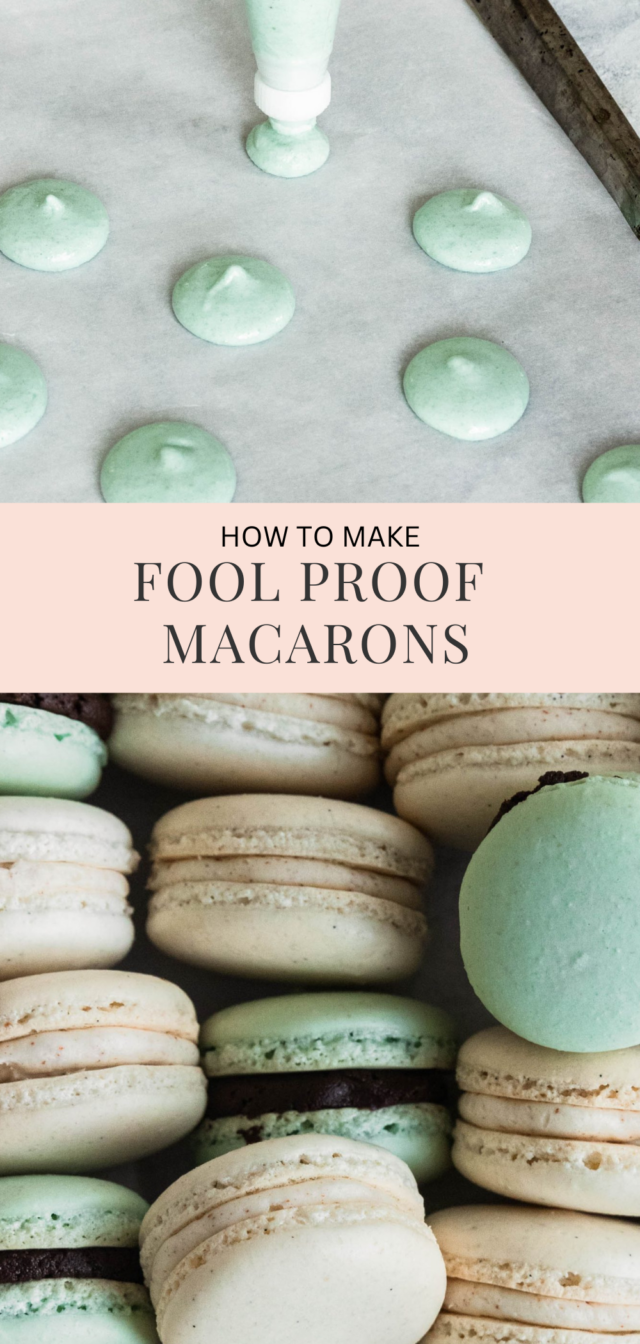
Foolproof Macarons Recipe
This is our foolproof, step by step recipe for how to make macarons easily! You’ll never be intimidated in the kitchen with these popular cookies again…
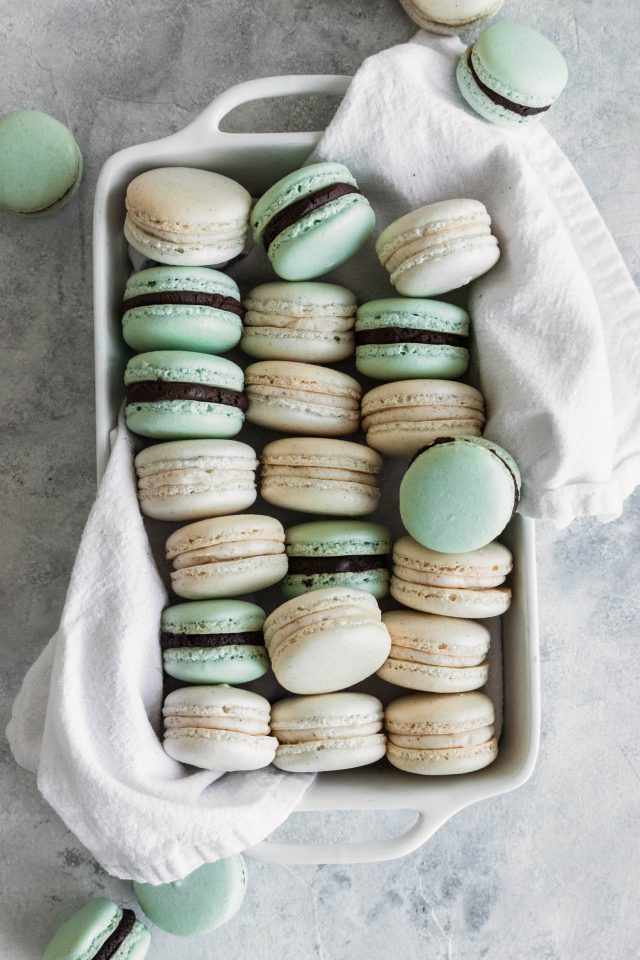
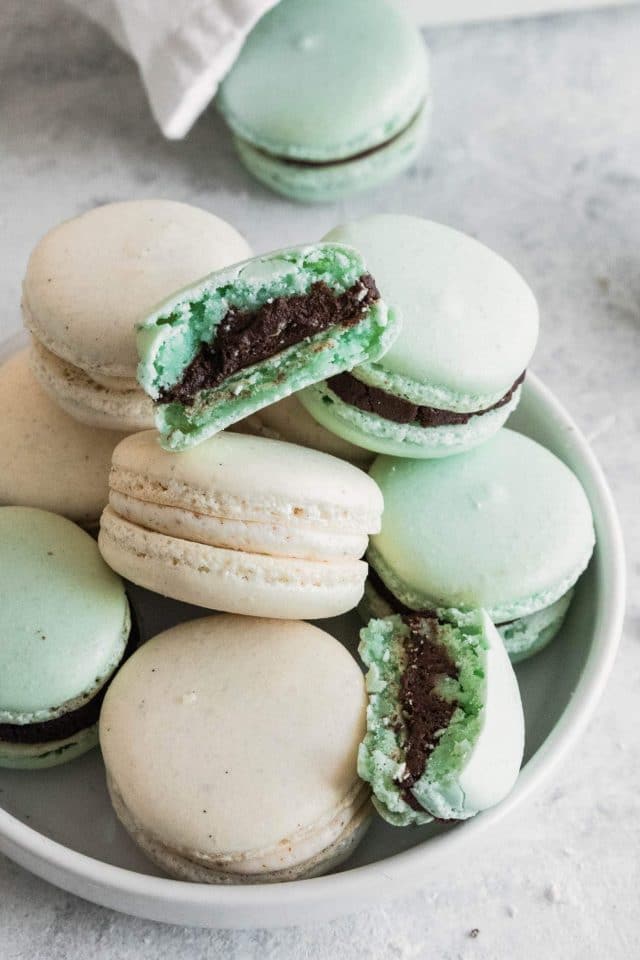
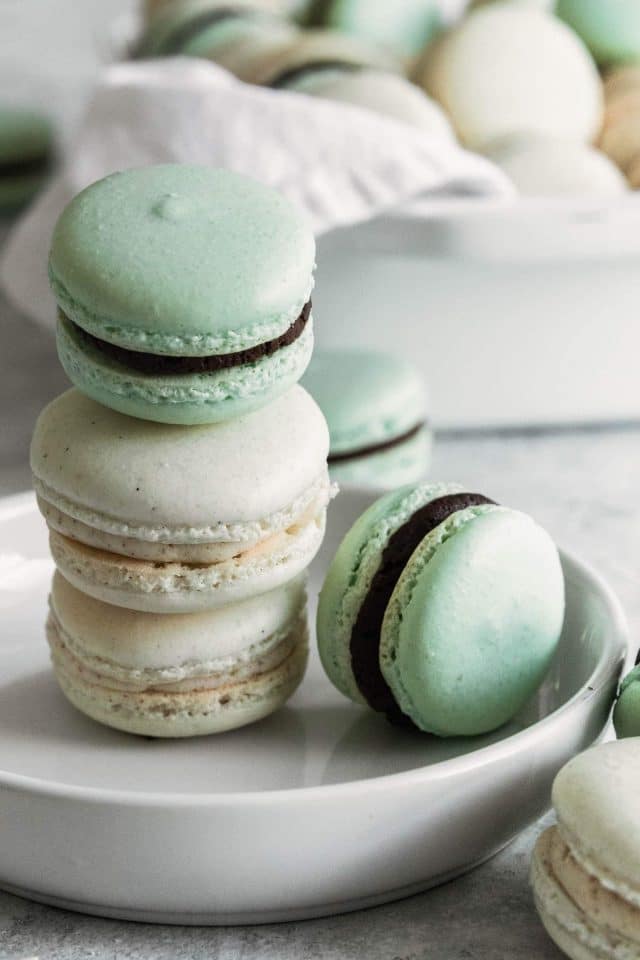
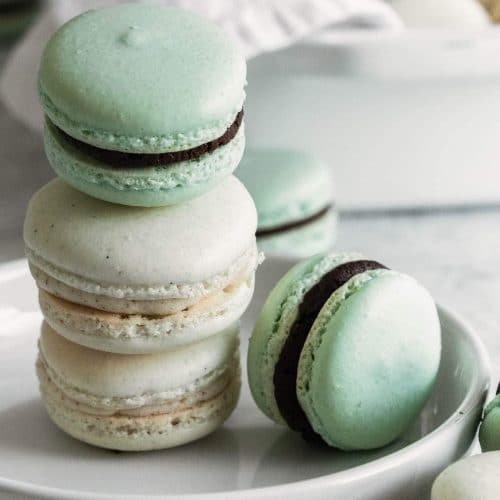
Macarons are so very popular and with good reason! With their endless color and flavor options, their smooth even shells and pretty ruffled edges… they’re a perfectly elegant pretty cookie.
They’re even gluten free! Macarons have a reputation for being difficult to perfect. But I, Rebecca have broken down the process for a macaron recipe that is virtually foolproof
There’s even a section on macaron troubleshooting to help you figure out the best solution to any macaron mistakes you might be making. Believe me, I’ve made all these mistakes too!
This recipe uses the French meringue method for making meringue, which I find the simplest and easiest to master.
There’s another way to make the meringue called the Italian method. But it involves cooking sugar syrup and meringue, and adds a lot of extra steps that you don’t really need to do!
The recipe at the bottom has all the information you need. However, I really recommend reading through the entire post for all of the extra tips, tricks, and a few photos that will give you a visual on some of the trickier steps.
Essential Tools Needed
- Kitchen scale: If possible, I recommend using weight measurements instead of volume (cups). Volume measurements can vary. So baking by weight gives you more consistent results every time.
- Parchment paper: Use parchment paper, not silicone mats. Parchment isn’t as slick as a baking mat, which gives the macarons more grip and the ability to rise up rather than spreading out.
- Piping bag: When you are putting the macaron batter into the piping bag, it can be helpful to place the bag in a large glass or a jar to hold it upright.
- Strainer: If you don’t have a strainer, you can use a food processor to thoroughly blend your dry ingredients.
- Electric hand or stand mixer
How to Make a Foolproof Macarons
1 — Start by lining 2 clean baking sheets with parchment paper. Cut the end off of a new piping pastry bag fitted with a clean frosting coupler.
2 — Separate the 4 egg whites from the yolks, then set them aside in a clean bowl to come to room temperature.
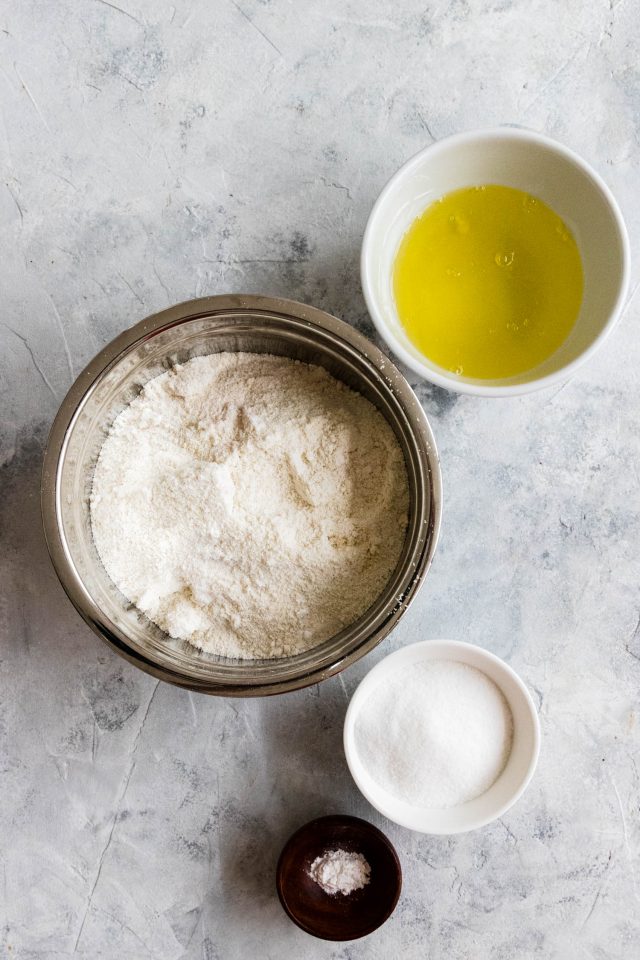
3 — Weigh out 240 grams (2 cups) powdered sugar and 168 grams (1 3/4 cups) finely ground almond flour. Sift them through a large sieve together in a clean bowl.
4 — Discard any bit of almond flour that is too large to fit through the sieve. Stir in a generous pinch of salt. And then, set the dry ingredients mixture aside.
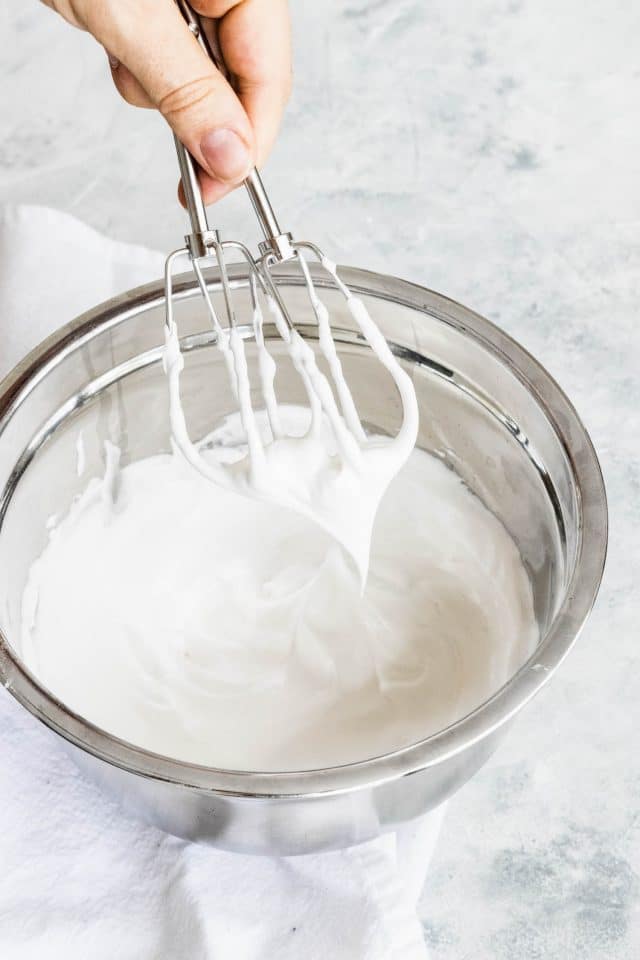
5 — Once the egg whites have reached room temperature, beat them on medium-high speed with a mixer. When they have become frothy and bubbly, add in 1/4 teaspoon of cream of tartar.
6 — Slowly add the 1/2 cup (100 grams) granulated sugar while beating the egg whites. Continue beating until you’ve reached the stiff peak stage. That means that when you lift the beaters out of the meringue, it stays stiff and straight on the beaters and the tips of the meringue don’t flop over at all.
7 — Add in the 1 teaspoon of vanilla extract and any gel food coloring you want.
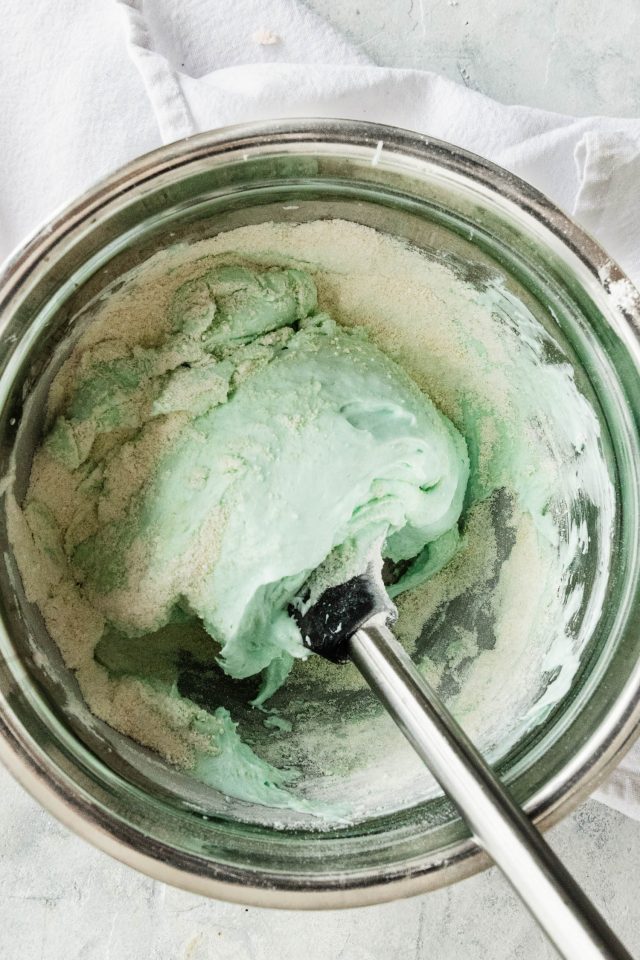
8 — Add about 1/3 of the almond flour mixture to the egg whites and mix with a rubber spatula until it is well combined.
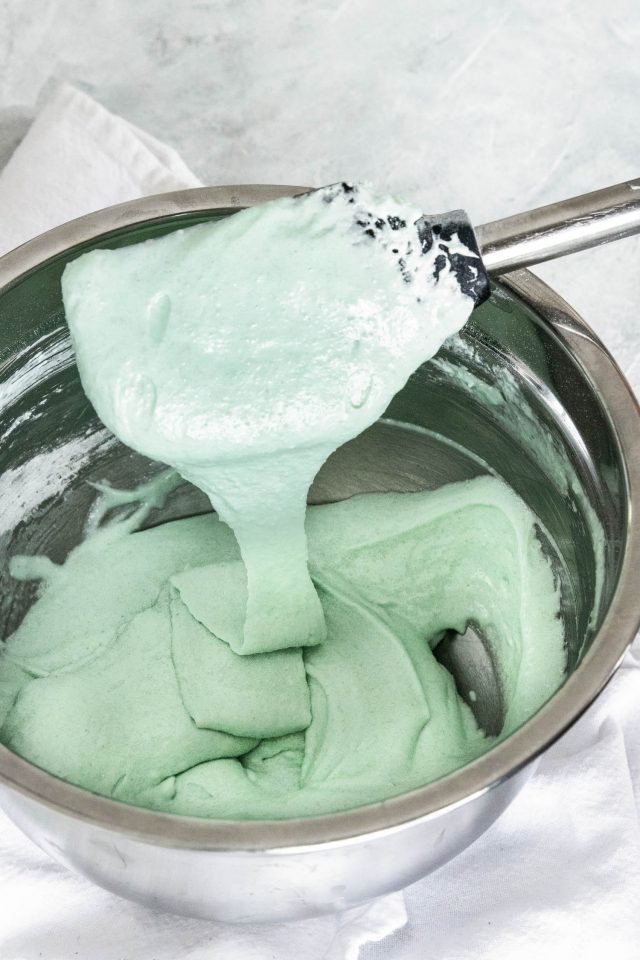
9 — Pour the rest of the almond flour mix in, then gently fold in with the spatula creating soft peaks until it is well combined and the batter comes off of the spatula in long, thick ribbons.
This step is called the macronage and is important for beautiful macarons. You should be able to draw a figure eight with the batter coming off the spatula without the ribbon breaking. If not, continue to fold a few more times before testing it again.
Another way to tell it is ready is to spread some of the batter is up the side of the bowl. If it immediately begins to slide back down into the bowl, it’s ready. If it’s too stiff, it will cling to the side.
Piping Your Macarons
1 — Once your batter is ready, fold down the top edges of the piping bag (this helps keep them clean) and fill it with batter.
2 — Pick up the bag, fold up the sides, and give the top a quick twist to prevent the batter from coming out the top. Place the twisted part of the bag in the joint of your thumb and wrap the rest of your hand around the bag.
3 — Repeat this step, as the batter won’t all fit in the piping bag at once.
4 — Holding the bag straight about an inch over the parchment paper, gently squeeze to a count of three, then stop squeezing and lift the bag away.
5 — Repeat all over the sheet, leaving at least an inch between each macaron. When the sheet is full, gently tap it on the counter several times to pop any air bubbles inside.

Baking Your Macarons
1 — Set the macarons aside while your oven preheats to 300°F. Let them sit out for about 30 minutes, or until the tops of the macarons have dried out a bit.
They’re ready when the tops look dull and aren’t shiny and wet anymore. This could take more or less time, depending on the temperature and humidity in your kitchen.
2 — Bake the macarons for 15-16 minutes, turning the baking sheet after 7 minutes. This part can be tricky since they need to be dry enough to not collapse when they come out of the oven, but you also don’t want to burn them!
Check for a very lightly bottom edge. They’ll also detach easily from the parchment paper and not stick at all.
3 — Remove the macarons from the oven to a rack to cool completely.
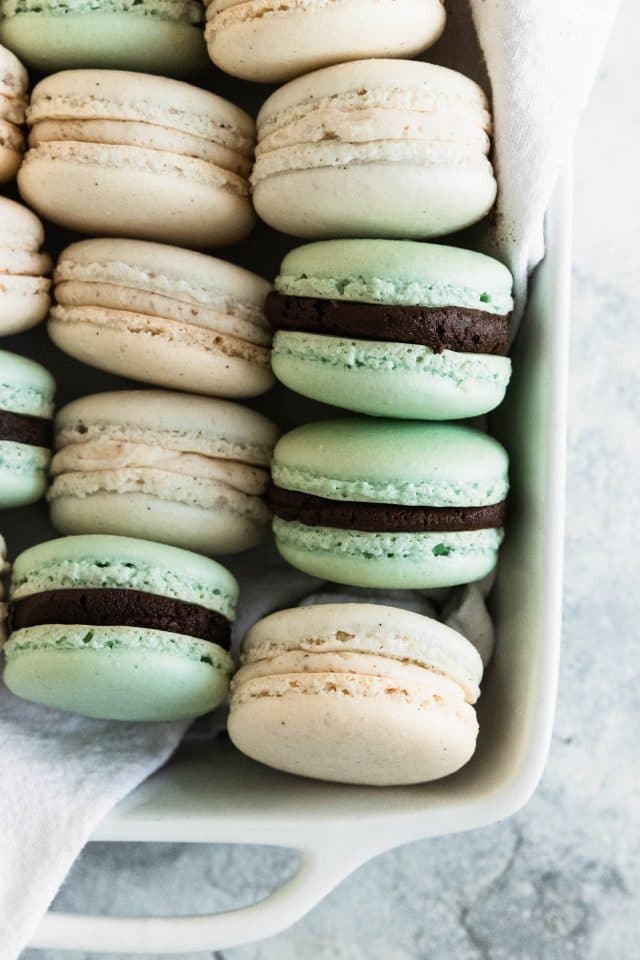
4 — Meanwhile, place the buttercream in a piping bag fitted with a large round or star piping tip. Twist the top shut just like you did with the macaron batter.
5 — Then, pipe the filling onto the flat sides of half of the cookies. Place another cookie on top and gently press the two sides together.
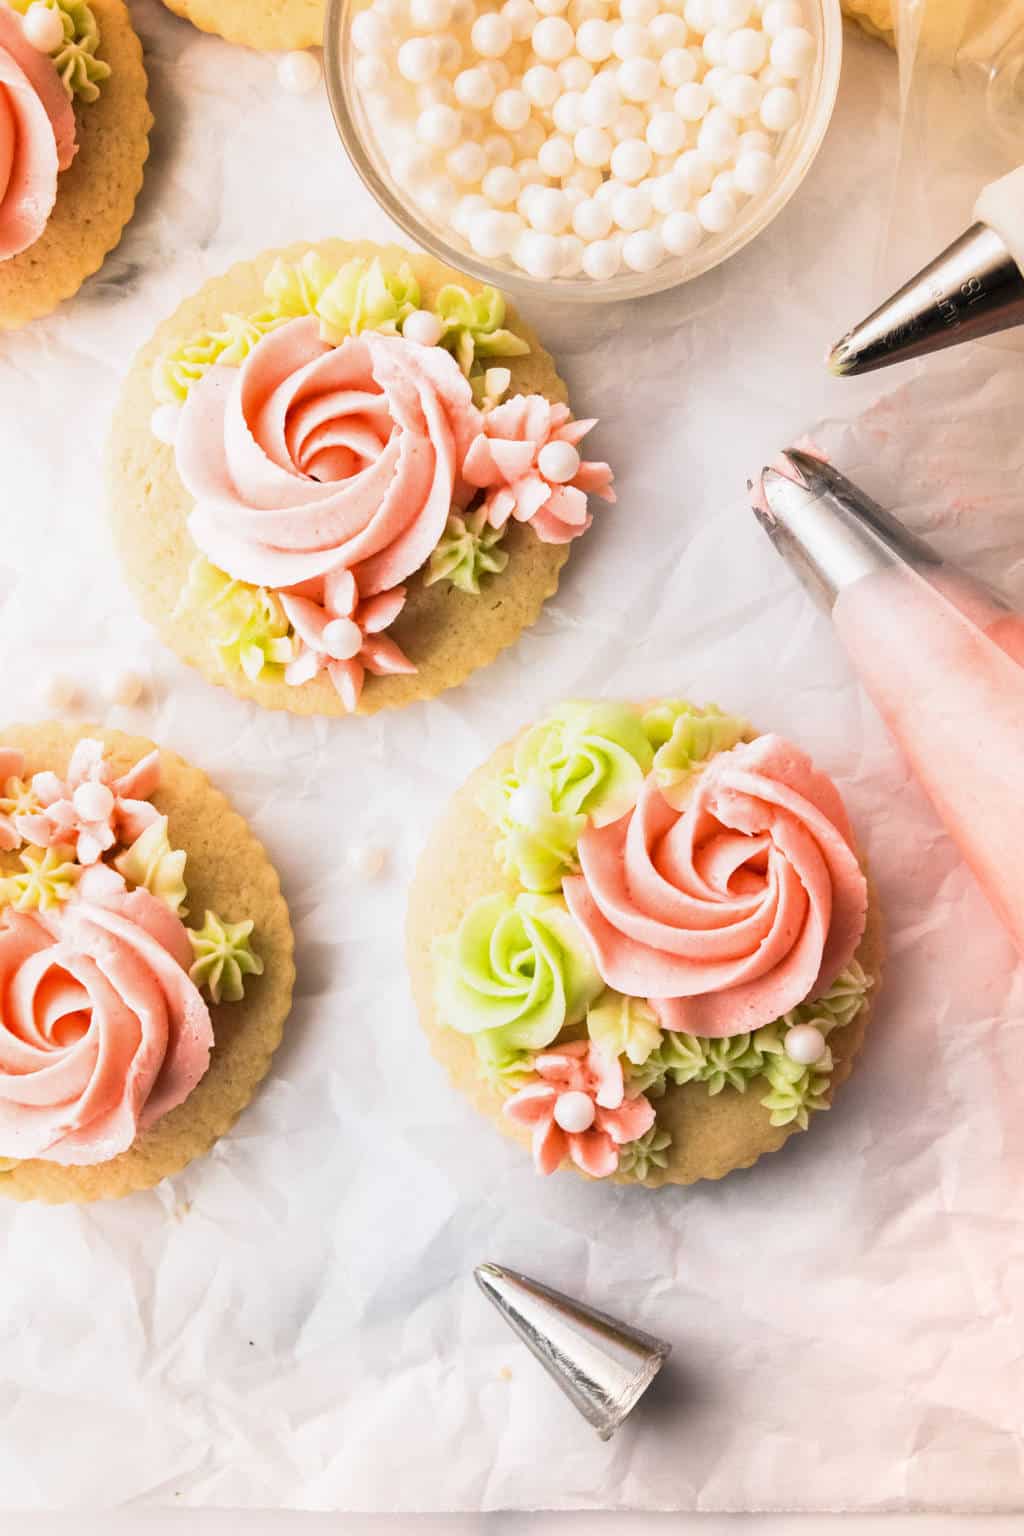
How to Decorate Macarons
Tips and Notes
- Avoid fats: Don’t allow any fat to get in the batter since it will make your meringue (the whipped egg whites) fall flat. Fat residue from oils or butter that stay on a bowl, spatula, or in a piping bag can cause the batter to break down and spread into flat pancakes.
- Tool prep: Give your tools and bowls a quick wash. I also recommend using a new piping bag every time. This can make the difference between macaron success or sadness.
- Avoid egg yolks: Any bits of egg yolk can also make your meringue not whip up. Try separating the egg yolks and whites while the eggs are cold. Then, let the whites come to room temperature before whipping. Egg whites that aren’t cold will give you a more voluminous meringue.
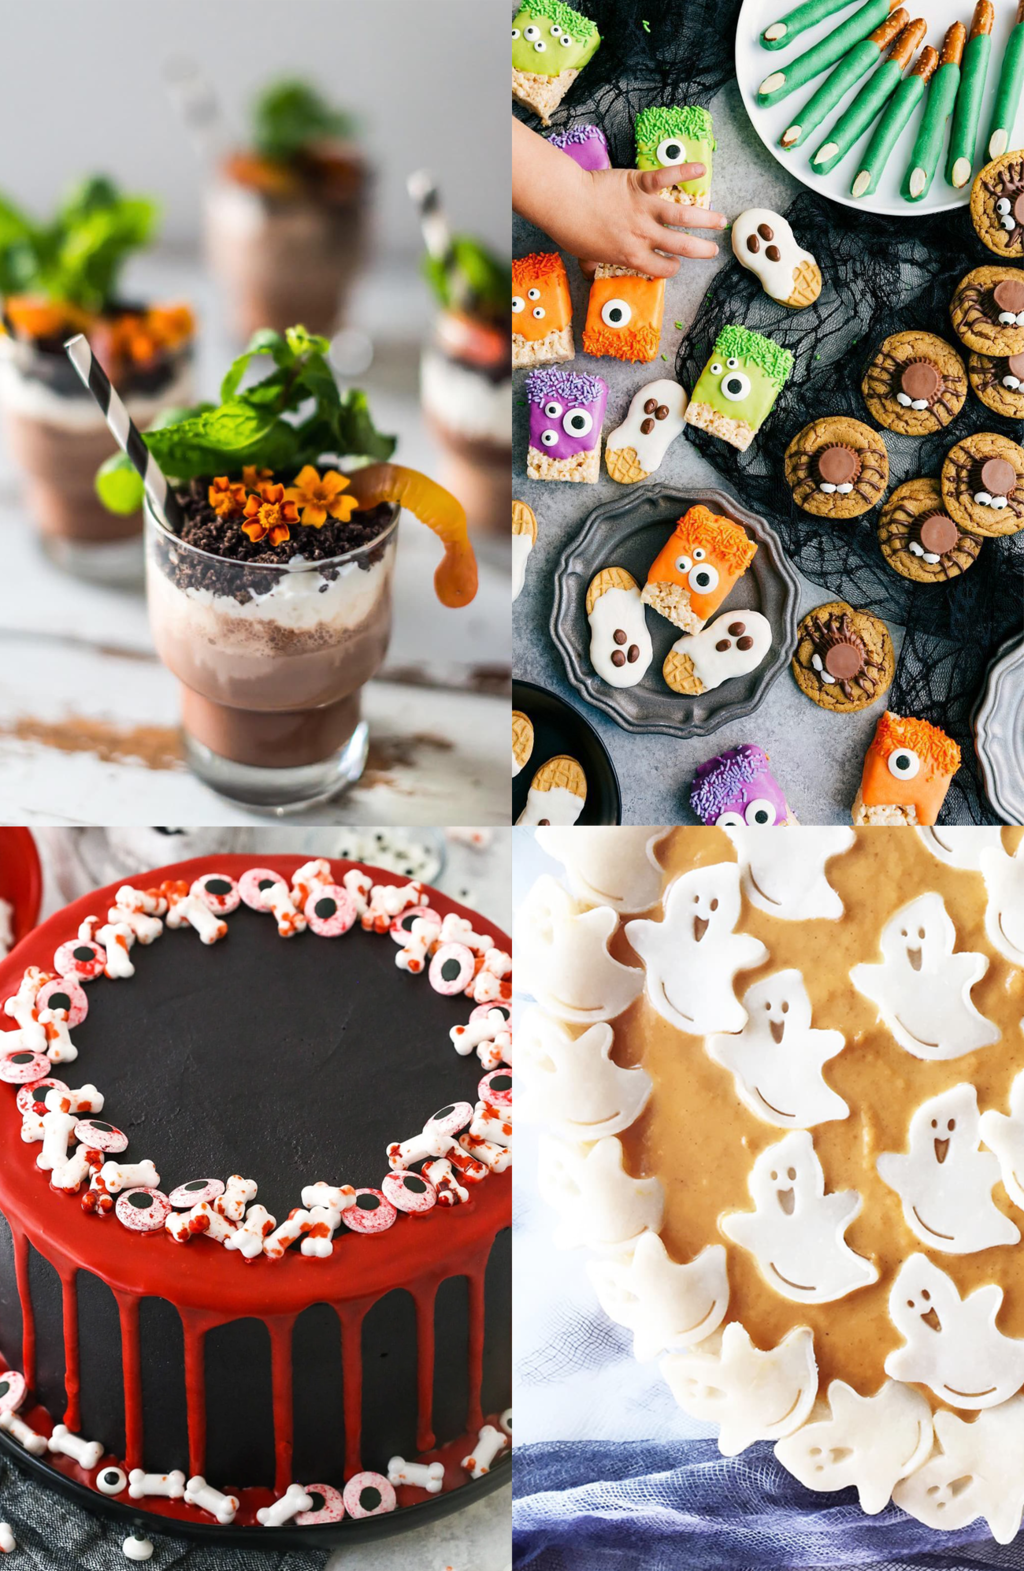
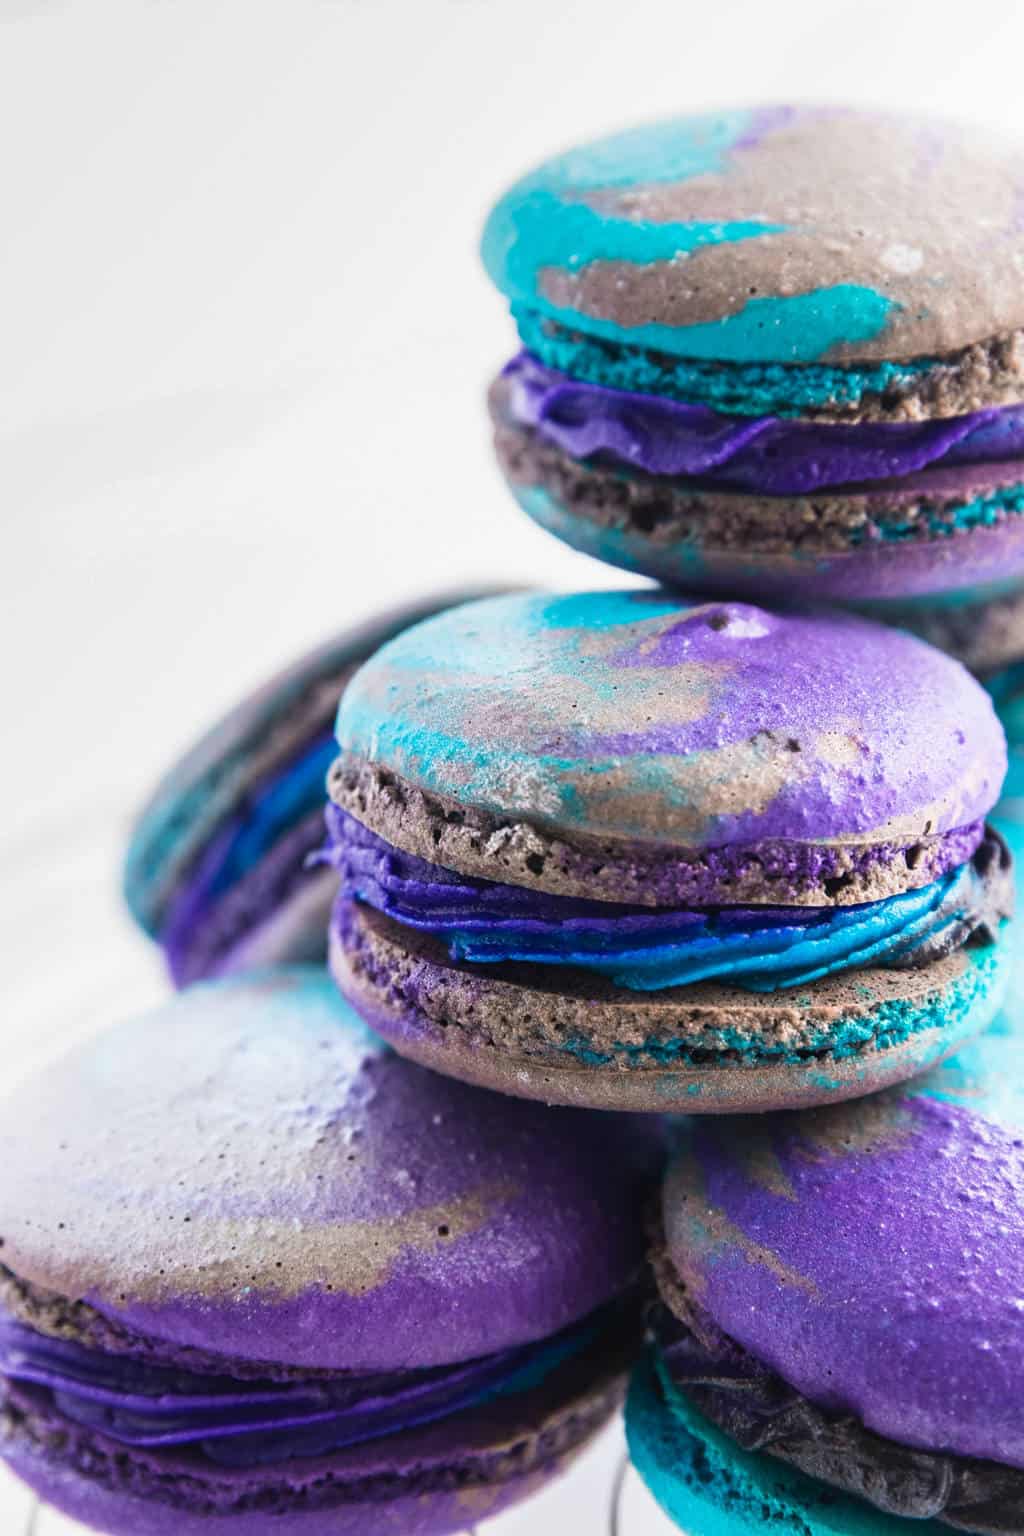
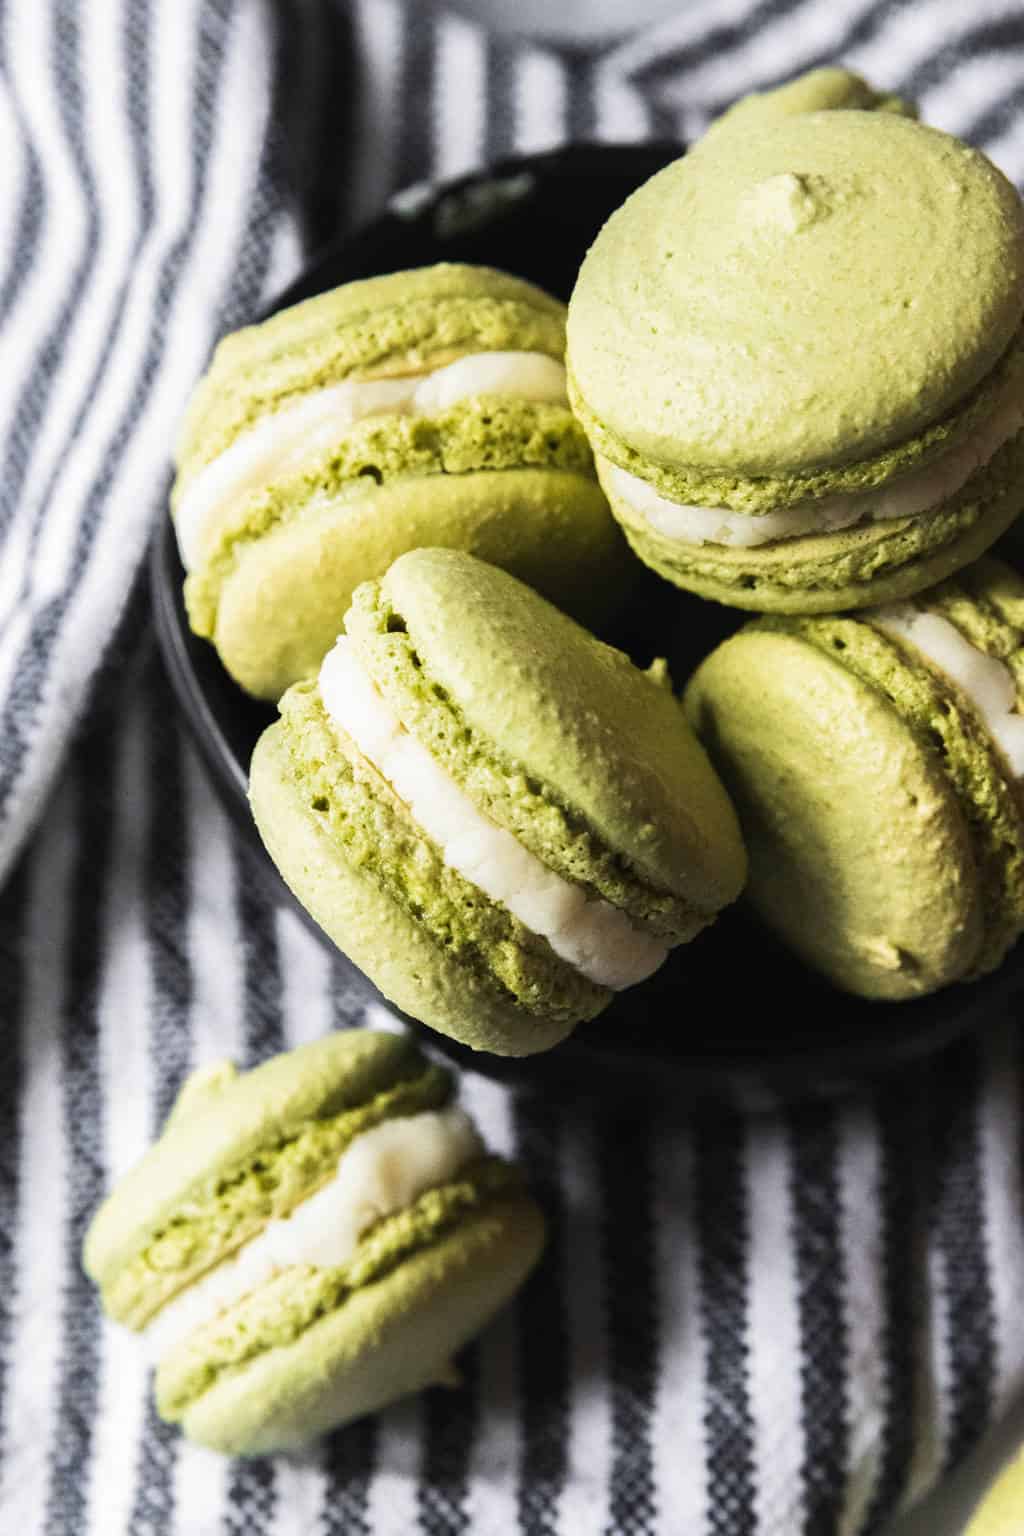
- Best food coloring: Gel food coloring works best since it won’t add moisture to your batter. It can also be used for decorating the outside of the macarons like in our marbled macarons tutorial.
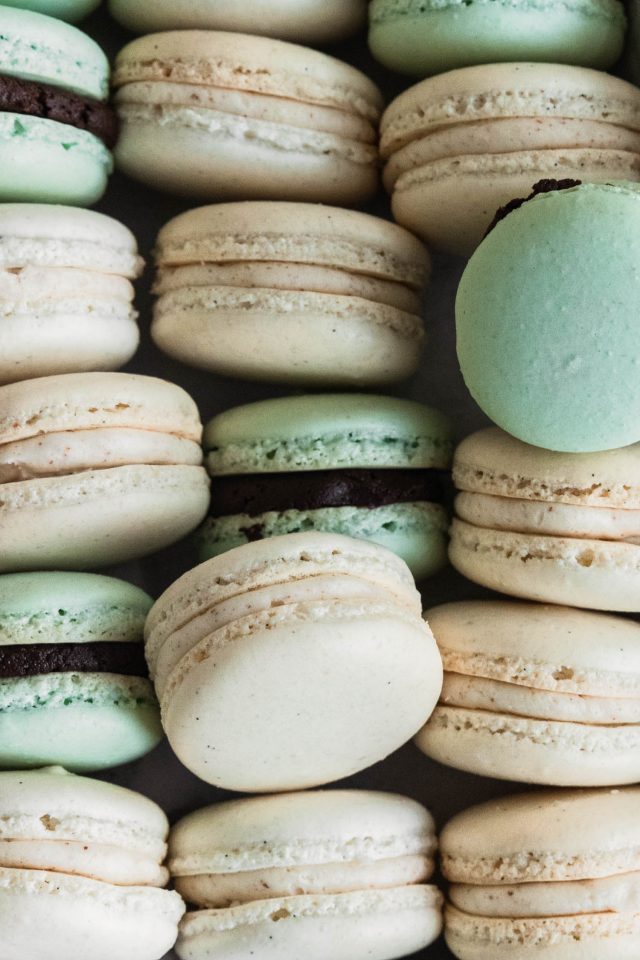
- Shapes and sizes: While the goal is to have perfectly even macarons, some may be a slightly different size and shape. I like to go through and match up shells that are most similar in size and shape before I start filling them. Just know that the perfectly round, identical macarons you find in bakeries and stores are made with the help of machines. So embrace the uniqueness of your handmade creations!
- Fillings: You can also use a chocolate ganache or a jam or curd for a filling. Both the bitterness of the chocolate and the tartness of the jam contrast nicely with the sweetness of the shells.
- “Ripen” the macarons: Macarons are best after they’ve spent a day or two in the refrigerator and the filling and cookies have had a chance to meld together a little bit.
Troubleshooting Your Homemade Macarons
Macaron shells can have a variety of little or big problems. Here are a few common ones with their causes and ways to fix them.
- Flat/spreading macarons: Batter was over-mixed at the macronage stage. Or some fat got into the batter.
- Cracked shells:
- Rap the baking sheet firmly on the counter several times after piping to remove large air bubbles that can cause cracks.
- The meringue didn’t reach stiff peak stage. I
- f you have any cracked shells, you can disguise the flaw by turning them into DIY Dirt Worm Macarons.
- No feet: The macarons didn’t develop a skin before baking.
- Macarons are browning too quickly on tops or bottoms: Try turning the oven temperature down 10°-15°.
- Flat/wrinkled tops: The batter is too wet and/or overmixed.
- Feet that spread out: Generally over mixed batter will cause your macaron shells to spread out instead of rising up.
- Hollow shell:
- Meringue may have been over whipped. Be sure to stop beating when you have reached stiff peak stage.
- The macarons were left too long after piping and the batter dried. Ort he shells may be underbaked and the wet batter inside deflates when removed from the heat of the oven while the shell stay firm.
- Enough air wasn’t deflated in the batter during the macronage (folding) stage.
- Lopsided macarons:
- Uneven piping — Hold the piping bag straight up when piping the cookies.
- A warped baking sheet or parchment paper — Cut your parchment to fit your baking sheet, and use a small dab of batter underneath each corner to hold them down.
- Too strong of a convection fan in the oven.
- Instead of discarding your lopsided shells, you can turn them into cheeseburger macarons.
- Peaked shells or rough texture:
- Not sifting the almond flour and powdered sugar together can create lumps in your batter.
- Undermixing during the macronage stage can cause unsightly points, bumps, or dips.
- Rap the baking sheet firmly on the counter several times after piping to remove air bubbles and flatten out peaks and bumps.
How to Store Macarons
Macarons keep for up to a week in the refrigerator, and are usually better after they’ve sat for a couple of days! A wetter filling (like a jam or curd) will shorten the shelf life to 3-4 days. You can store your cookies in the refrigerator in airtight containers or plastic bags.
Easy DIY’s To Decorate Your Macarons
To say we are obsessed with macarons is no exaggerated. We have a whole section dedicated on the blog for all things macaron decorating and macaron recipes. And the very first macaron project we ever shared were our fruit macarons that went viral!
And once you’ve mastered the technique of making macarons, here are a few fun DIY’s on how to decorate your macarons —
Equipment
- Baking sheet
- Parchment paper or silicone mats
- Kitchen scale (optional but highly recommended)
- Piping bag
- Sieve or strainer
- Mixing bowls
- Hand or stand electric mixer
- Rubber spatula
Ingredients
- 120 g large egg whites about 4 large egg whites
- 100 g white granulated sugar 1/2 cup
- ¼ tsp cream of tartar
- 1 tsp vanilla extract
- 240 g powdered sugar 2 cups
- 168 g fine almond flour 1 3/4 cup
- 1 large pinch fine salt
- Gel food coloring optional
Buttercream Filling:
- ½ cup butter softened, 1 stick or 114 grams
- 2 cup powdered sugar 240 grams
- 2 tsp vanilla extract
- 1-2 tbsp heavy cream
Instructions
- Begin by lining two clean baking sheets with parchment paper cut to fit them or silicone mats. Trim off the end of a new piping bag and fit it with a clean piping coupler.
- Separate the 4 egg whites from the yolks, weight them out to 120 grams, then set them aside in a clean mixing bowl to come to room temperature.
- Weigh and measure out the rest of your ingredients to have them ready, then sift the almond flour and powdered sugar through a mesh sieve to remove any lumps and combine them well. You can also pulse them together in a food processor until thoroughly mixed. Add in the salt and stir well.
- When the egg whites are at room temperature, begin to beat them with an electric hand or stand mixer using the beater attachment. Once they have become frothy, add in the cream of tartar and slowly pour in the granulated sugar while beating.
- Continue to beat the egg whites until they are at the stiff peak stage, meaning that the meringue stays in straight peaks when you lift a beater out of it. Mix in the vanilla extract and any gel food coloring you wish.
- Stir one third of the almond flour and powdered sugar mixture into the egg whites with a rubber spatula. Once it’s mixed in, add the rest of the dry ingredients and gently fold it into the egg whites. Continue doing this until the batter comes off of the spatula in thick ribbons–you should be able to draw a figure eight with it when it’s the correct consistency.
- Once your batter is ready, fold down the edges of the prepared piping bag and fill with the batter. Then, fold up the edges, twist the bag shut, and place the twist in the joint of your thumb. You will have to repeat this more than once as all of the batter won’t fit in a piping bag. Holding the bag straight over the parchment paper, squeeze gently to a count of three, then stop squeezing, pull the bag away, and repeat. Leave 1-1 ½” between each of the cookies.
- Preheat the oven to 300° and set the macarons aside to allow the tops to dry for about 30 minutes. Bake them for 15-16 minutes, turning the baking sheet halfway through the baking time. Once the tops look crisp and the lower edges look dry and set, remove them from the oven and cool completely.
- While the macarons are cooling and baking, make your filling and put it in a clean piping bag fitted with a coupler and round or star piping tip. Pipe a layer of filling onto the bottoms of half of the cookies, then place a second cookie on top and gently press them together.
To Make The Buttercream:
- Beat together the butter and powdered sugar, then add the vanilla extract and 1 Tbsp. heavy cream. If the consistency is thick, add a bit more cream until it’s a pipable consistency.
To Make Chocolate Buttercream:
- Replace ½ cup (60 g) of the powdered sugar with dark cocoa powder. Adjust the amount of cream to make the correct consistency.
Nutrition
Notes

Don’t forget to share your macarons with us on Instagram using the hashtag #sugarandclothloves. We always love seeing all of your creations! Looking for more quick and delicious recipes? You can find them all right here!

Please note that we may earn a commission for some of the above affiliate links. However, products featured are independently selected and personally well-loved by us!
Was a bit scared to try but turned out great
There was an error in the grams for the almond flour when I printed the recipe. Needless to say, all that money I paid went into the garbage because I couldn’t even mix it. Beware of careless recipes. I see now that the almond flour was changed to 168 grams (from 224) but I do not have the patience to try them again.
Hi Abby! We just switched the recipe to have grams as the main measurements (since it’s more precise). 168 grams is correct. The conversion to grams and cups was off so we are truly so sorry for that glitch. We made sure to do another check on all the measurements.
Ugh bummer I just tried for the 2nd time hopeful this recipe was a winner but again the batter was too thick so the ratio of the dry ingredients seems too much…how much am I supposed to mix it felt forever…I couldn’t get my batter to thin out enough and still thick where you see the flour grains and didn’t fall like a “ribbon” like others have mentioned. Any advice would be helpful.
Thanks.
Hi Val! Thanks for giving the recipe another try! A thick batter usually comes down to one of two things:
After folding the dry ingredients into the meringue, keep folding and pressing the batter against the sides of the bowl (“smear and fold”) until it loosens up. It should flow slowly off your spatula and form a ribbon that disappears back into the batter in about 10–15 seconds. If you still see streaks of almond flour, it just needs more mixing.
Make sure your almond flour is super fine—if it’s coarse, sift it well or pulse it in a food processor with the powdered sugar before folding. Coarse flour can make the batter feel too thick and grainy.
Be sure you’re beating them to stiff, glossy peaks before folding in the dry ingredients. If they’re under-whipped, the batter will stay heavy and won’t loosen properly.
Hopefully, this helps!
I’ve checked and I think the ratio of grams to cups in the almond flour are off.
This did not work out for me, unfortunately. But I’m glad others have found success with this recipe.
With my northern New England (mid-winter) climate, the wet to dry ratio just proved too dry. And the mixture was never able to thin down enough — even after multiple attempts to add more moisture & way, way too much time spent mixing (which only overworked the batter to death, even if it did eventually thin out).
I’m usually a successful macron baker, just giving different recipes a try. For novice macron bakers — there are a couple other first-time-to-success type recipes available which may prove much simpler to master……
Thanks for sharing this amazing recipe.my family loved it.will be sharing this recipe with my friends.they will like it.
It’s so crazy how expensive these little things are but they’re so easy to make! Delicious recipe. Definitely 5 stars in my book!! Yum.
I know, right?!? It really is an art to make macarons but it definitely is so easy if you are meticulous and really follow all the tricks!
Yummy! I love macarons! This helped me so much! Thank you for the helpful hints and tips!
Thank you, Beth! XOXO
You have all the best tips and tricks to make authentic macarons! Gorgeous and delicious all at the same time!
Thanks, Joanne! We really wanted to break down all the steps down to show how easy it really can be to make macarons!