Color Block DIY Ornament Garland
Rethink the average holiday decor tradition with this easy Color Block DIY Ornament Garland to dress up your home for the season!
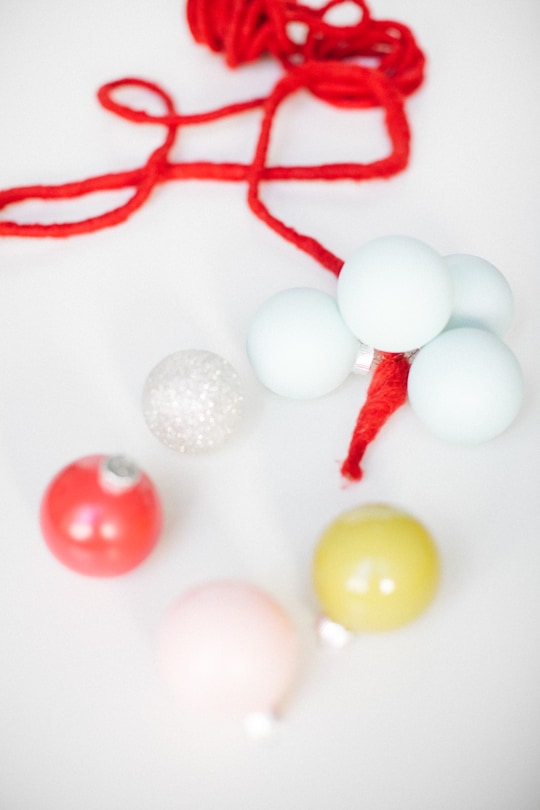
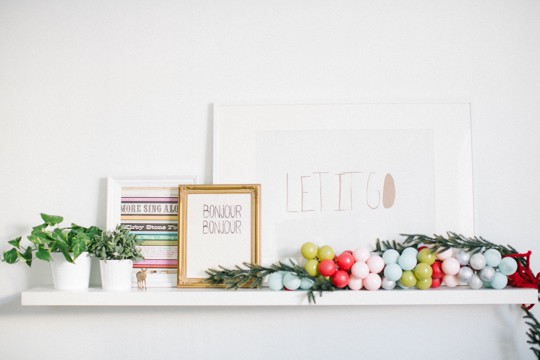
Bring a little extra sparkle to your holiday decor this year with a DIY ornament garland that’s as easy to make as it is eye-catching. Whether you’re decking out your mantel, staircase, or holiday party, this simple yet stunning garland will add a festive touch to any space. The best part? You can customize it to match your holiday color scheme, from traditional reds and greens to shimmering metallics or trendy pastel tones. Or opt for a color block pattern like ours!
Creating your own ornament garland is a fun and affordable way to add a personal touch to your seasonal decorations. Plus, it’s the perfect project to do with family or friends, turning crafting into a memory-making moment. We assembled our during our crafting party with Martha Stewart Living.
All you need are a few basic supplies and a little creativity to transform plain ornaments into a dazzling statement piece that’s uniquely yours. Fair warning though, this bad boy takes a TON of bulbs to make it full. So stock up beforehand! (Because even if you have leftover bulbs, you can repurpose them into a unique gift tag.)
Ready to get started? Follow our step-by-step guide to craft your own ornament garland in no time.
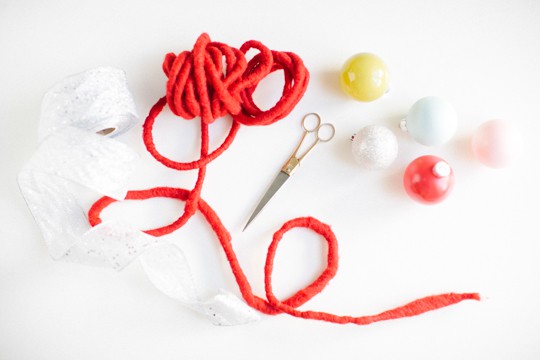
Materials and Tools Needed to Make DIY Ornament Garland
- Ornaments — Opt for plastic or shatterproof ornaments to avoid breakage, especially if you’re working with kids or plan to hang the garland in high-traffic areas. Ours are from Martha Stewart’s Holiday Frost Collection. We painted some of the bulbs since we wanted particular colors.
- Ornament hooks
- Wired ribbon or felted wool rope or cotton cord rope — We offered guests 2 options so that they could choose either a more sophisticated look with silver wired ribbon or a more playful look with the felted wool rope.
- Scissors

How to Make a DIY Ornament Garland
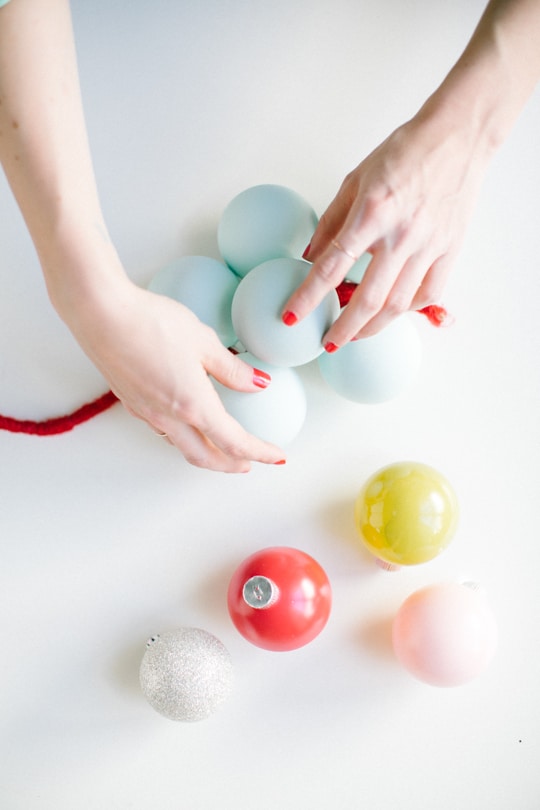
1 — Start by grouping 3 ornaments together on an ornament hook. This quick and easy method keeps things simple and speeds up the process.
2 — Twist the ornament hook securely around your ribbon or rope to attach the grouped ornaments.
3 — Repeat the process, grouping ornaments by color or design if desired. For this garland, we used 6 ornaments per color group, but you can adjust the number to fit your style. Continue adding groups until your garland reaches your desired length.

4 — Once all the ornaments are attached, clip the ribbon or rope and tie a secure knot at each end to keep everything in place.
5 — Hang or drape your finished garland wherever you’d like—on the mantel, stairway, or even the Christmas tree—and enjoy your festive, handcrafted decor!

Project Notes and Tips
- Add accents: Incorporate greenery, fairy lights, or small bows between ornament groups for an extra festive touch.
- Measure before you start: Plan the garland length ahead of time by measuring the space where you’ll hang it. This ensures you won’t run out of ornaments halfway through!
- Anchor the ends: Use command hooks, nails, or clips to secure the ends of the garland in place without damaging walls or furniture.
- Keep it lightweight: Don’t overload the garland with too many heavy ornaments, as it could sag or become difficult to hang.
- Experiment with patterns: Alternate colors or finishes in a pattern for a polished look, or go for a random arrangement for a playful vibe.
- Prep ahead: Sort ornaments by color and size before you start assembling to make the process smoother and more efficient.
- Test the hanging spot: Before finishing the garland, drape it in your intended location to check the fit and adjust as needed.

More Easy Christmas DIYs and Gift Guides
Looking for simple ways to add handmade charm to your holiday season? These easy Christmas DIYs are perfect for crafting beautiful decorations, thoughtful gifts, and festive home accents without the stress.
- 1 Minute Santa Drink Stirrers
- 33 Mason Jar Christmas Gifts
- Mini DIY Wooden Christmas Tree
- DIY Gold Wreath & Gold Garland

DIY Block Ornament Garland
Equipment
- Scissors
Instructions
- Start by grouping three ornaments together using an ornament hook. This quick and easy method keeps things simple and speeds up the process.
- Twist the ornament hook securely around your ribbon or rope to attach the grouped ornaments.
- Repeat the process, grouping ornaments by color or design if desired. For this garland, we used 6 ornaments per color group, but you can adjust the number to fit your style. Continue adding groups until your garland reaches your desired length.
- Once all the ornaments are attached, clip the ribbon or rope and tie a secure knot at each end to keep everything in place.

47 Affordable Gifts Under $10 for Everyone
Shop budget-friendly gifts under $10 that look way more expensive.…
Gingerbread Muffin Recipe with Lemon Glaze
Add a touch of spice to your breakfast or snack…
Funfetti Reindeer Cookies Recipe
Bake holiday magic with these Funfetti Reindeer Cookie Sandwiches. Soft…
25 Easy Christmas Cocktail Recipes to Try for the Holidays
Deck the halls with these delicious Christmas cocktail recipes! From…
Continue Reading 25 Easy Christmas Cocktail Recipes to Try for the Holidays
Please note that we may earn a commission for some of the above affiliate links. However, products featured are independently selected and personally well-loved by us!



Did you paint these ornaments? What color MS paints did you use? Love this!
Where did the blue, red & yellow ornaments come from? I google Martha Stewart Holiday Frost and found nothing! Did you make them yourself with the paint you mentioned?
About how many ornaments did you use?
Hi Ashley! What is the easiest way to paint the bulbs?? I’m having trouble getting the bulbs painted with out finger prints! Thanks, Emily
Just my two cents here, but usually with clear glass bulbs you can pop off the metal hanger part and pour a bit of paint inside, swirl it around until it coats the inside and then pour the extra out? That might help with the finger print issue.
sooo cute – I love the nontraditional color palette you’ve got going on!
Wow, this would be a great idea for decorating my classroom!
This is really delightful! I am curious about where you bought your felt wool rope, though.
Hi Stacia! The felted wool rope is actually from Hobby Lobby in the Christmas section. One roll is about $5 :)
I love this! Can’t wait to make it…where did you find the felted wool rope?
Hi Jess! I’m glad you love it! The felted wool rope is actually from Hobby Lobby in the Christmas section. One roll is about $5 :)
This is so cute! Could I also make this into a wreathe?
totally! I would use the thick wire branch style wreath as the base and then just wrap bulbs around that so it holds the weight!
Great, thanks, Ashley!
Never have I seen such a unique way to change it up, I am lovin this garland… Envy of the talent
Oh this would be so pretty on my mantle! Love it!
agirlandhersparkles.blogspot.com