Colorful DIY Mini Cheese Board
Learn how to make a stylish DIY mini cheese board with this easy step-by-step guide. Perfect for parties, entertaining, and personalized cheese board ideas.
Looking for a creative way to serve snacks at your next gathering? This DIY mini cheese board project is an easy and affordable way to create personalized serving pieces for guests.
These colorful boards are perfect for individual portions (like our chocolate fruit cheese cups) and make a stylish alternative to a traditional DIY cheese board. Whether you’re hosting a party or planning a cozy night in, a mini cheese board adds a fun, modern touch to your table.
Why Make a DIY Mini Cheese Board?
A mini cheese board is more than just cute. It’s practical and trendy.
- Perfect for individual servings
- Easy to customize colors and shapes
- Lightweight and budget-friendly
- Ideal for parties, holidays, and gifting
- Adds personality to your DIY cheeseboard setup
If you love entertaining like I, Anusha, making your own DIY cheese board pieces helps elevate presentation without spending a lot. Once you see the how-to, you’ll want to make one in every color (and shape)!
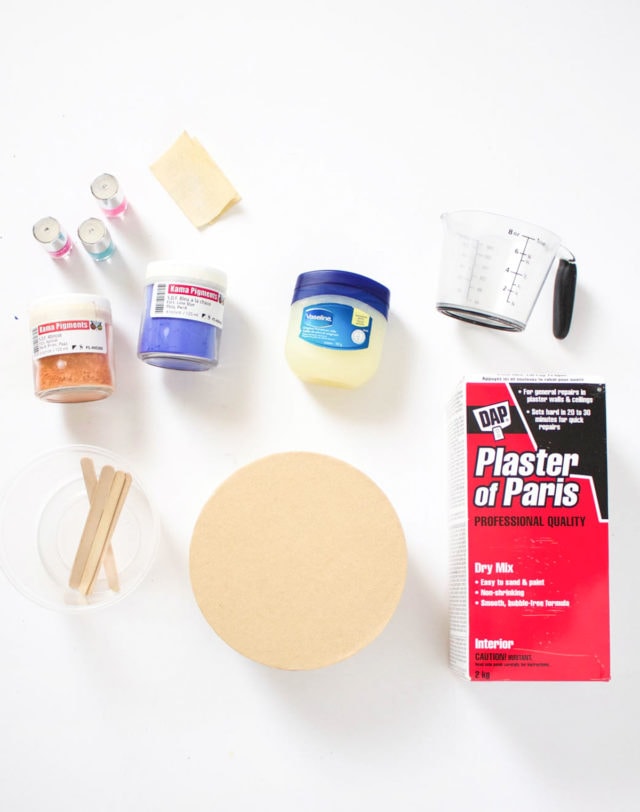
Supplies Needed
- Cardboard: For the molds in your desired shape (i.e. circle, square and rectangle shapes)
- Nail polish or bottle cap: To create the handle.
- Vaseline or petroleum jelly
- Plaster of Paris
- Powdered paint pigment
- Mixing container
- Measuring cup
- Fine sandpaper
- Optional: Suede cord: To hang your mini cheese board.
How to Make a Mini Cheese Board
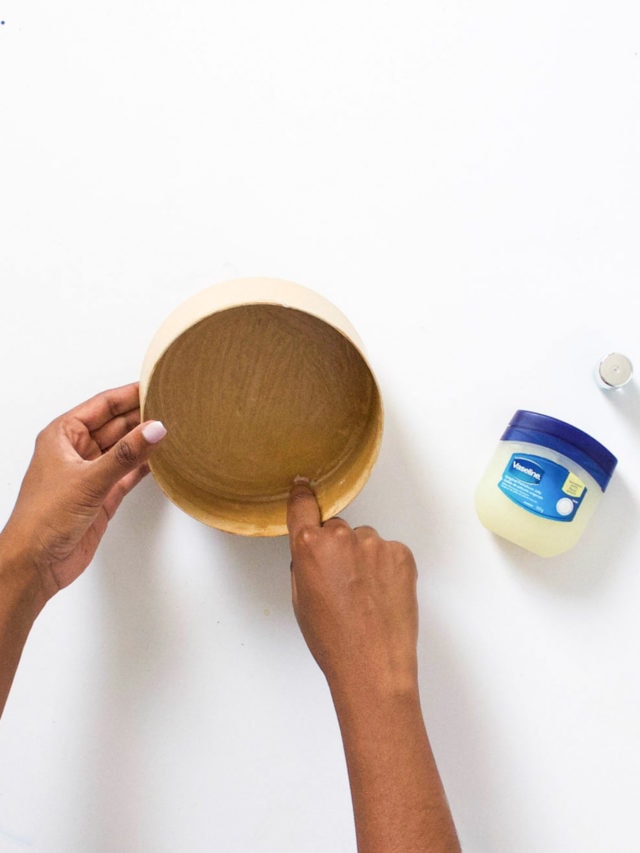
1 — Prep Your Mold
Coat the inside of your cardboard mold and bottle cap with Vaseline. This step helps release your DIY cheese board easily once it dries. Use a paper towel if needed to wipe off any excess Vaseline.
2. — Add the Handle Shape
Place a bottle cap where you want the handle hole on your mini cheese board.
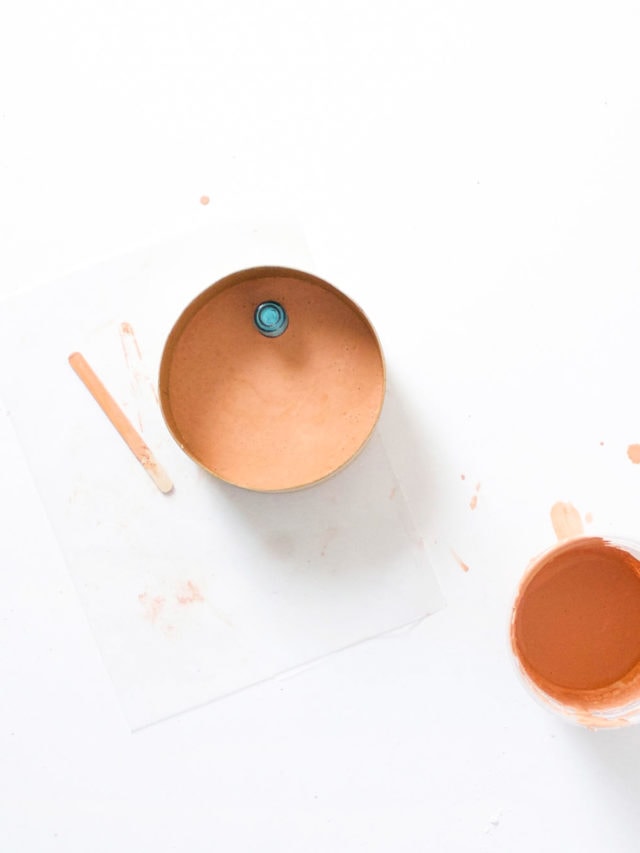
3 — Mix the Plaster
Prepare the plaster according to package instructions. Mix until smooth and pourable. (We used a popsicle stick to stir. The plaster should have the consistency of paint or slightly thicker.)
4 — Color Your Plaster
Combine.
- 1 cup plaster of Paris
- 1/4 cup pigment
- 1/2 cup cold water
Just a note: once the plaster dries, the color will appear much lighter, so be sure to add more pigment than it initially seems needed.

5 — Pour and Let Set
Pour into the mold and gently tap to remove air bubbles. Let your DIY mini cheese board dry overnight.
6 — Remove and Sand
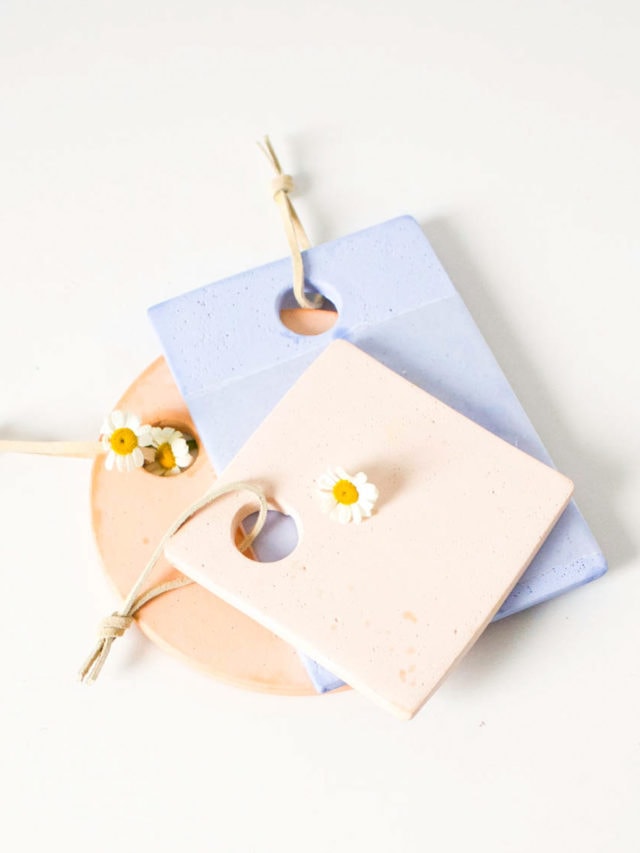
Gently, remove the bottle cap. Peel away the mold. To do so, tear the cardboard box apart or flip it upside down and tap it until the cheese board falls out. Then, lightly sand edges for a smooth finish.
7 — Finish Your DIY Cheese Board
Wipe away any dust, then add a cord if desired. For food safety, place a layer of parchment paper on top of the mini cheese board before serving.
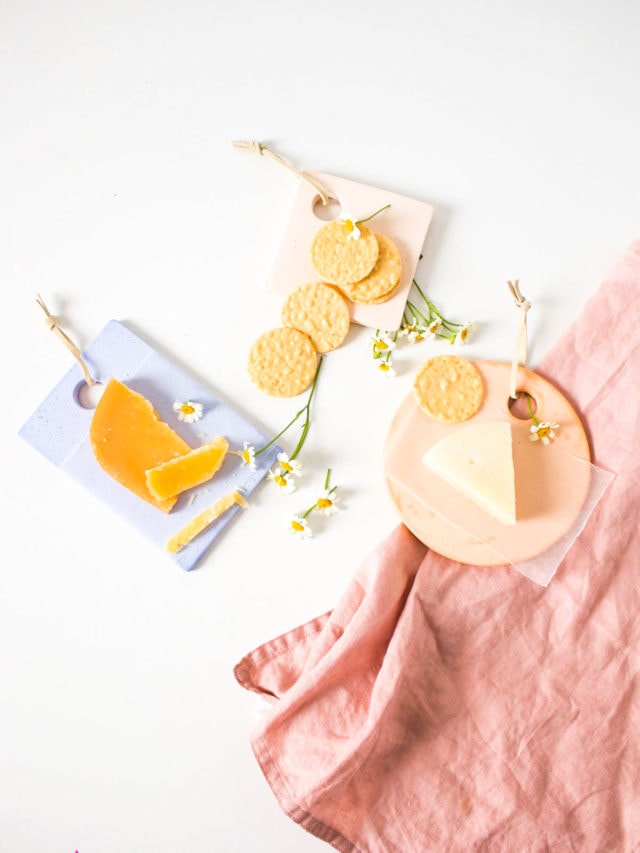
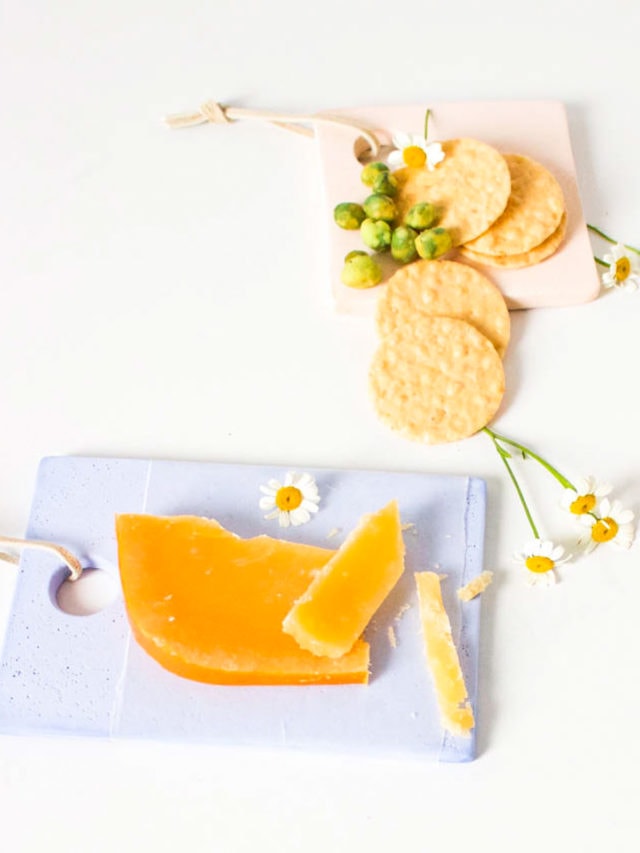
How to Style a Mini Cheese Board
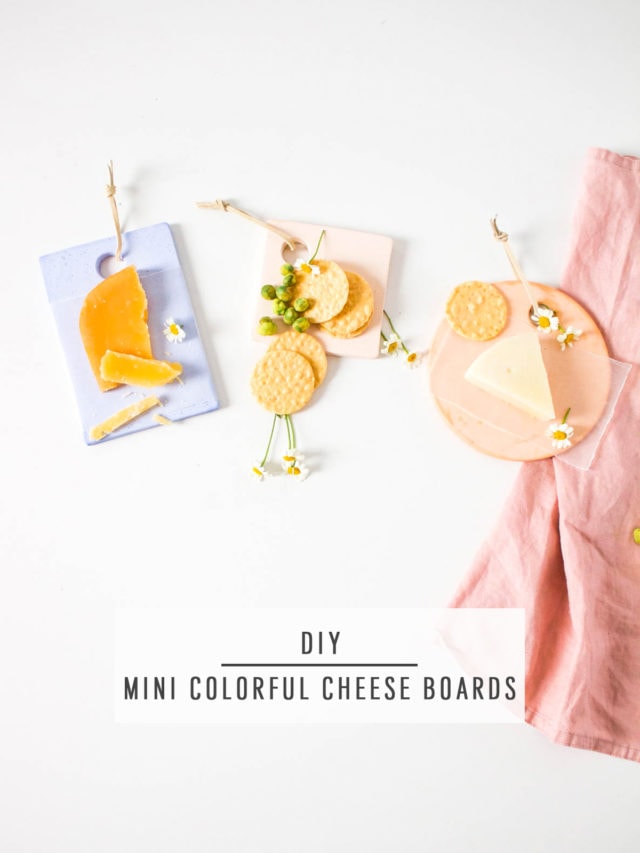
Once your DIY cheese board is complete, it’s time to build it. A well-balanced mini cheese board includes:
- 1–2 cheeses (soft + hard)
- Crackers or sliced bread
- Fresh fruit (grapes, berries)
- Nuts or olives
- Honey or jam
💡 Tip: Use parchment paper on your DIY cheese board surface to keep it food-safe.
When to Use a Mini Cheese Board
A mini cheese board works for almost any occasion:
They’re also great as handmade gifts. Everyone loves a personalized DIY cheese board.

DIY Mini Cheese Board
Equipment
- Nail polish or bottle cap To create the handle
- Mixing container
- Measuring cup
- Fine sandpaper
Materials
- 1 cardboard box for molds: Circle, square and rectangle shapes
- 1 cord optional for hanging
- Petroleum jelly
- Plaster of Paris
- Powdered paint pigment color of your choice
Instructions
- Coat the inside of your cardboard mold and bottle cap with Vaseline. This step helps release your DIY cheese board easily once it dries.
- Place a bottle cap where you want the handle hole on your mini cheese board.
- Prepare the plaster according to package instructions. Mix until smooth and pourable.
- Mix in your paint pigment by combining 1 cup plaster of Paris, 1/4 cup pigment, and 1/2 cup cold water.
- Pour into the mixture into mold and gently tap to remove air bubbles. Let your DIY mini cheese board dry overnight.
- Gently, remove the bottle cap. Peel away the mold. Then, lightly sand edges for a smooth finish.
- Wipe away any dust, then add a cord if desired. For food safety, place a layer of parchment paper on top of the mini cheese board before serving.

Don’t forget to share your cheese boards with us on Instagram using the hashtag #sugarandclothloves. We always love seeing all of your creations! Looking for more interior design inspiration? You can find them all of our home decor tutorials and ideas right here!
Please note that we may earn a commission for some of the above affiliate links. However, products featured are independently selected and personally well-loved by us!
Love those cheese boards! The round one is so cute!
So glad you love them, Jordan! It so is, we think we need it in every color haha! xo
So perfect and adorable color of cheese board. Love the post. Waiting for another one. Thanks.
These are so cute! You did an awesome job!
Paige
http://thehappyflammily.com
So happy you like them, Paige! :) Anusha nailed it!
I am going to get the supplies to try these!