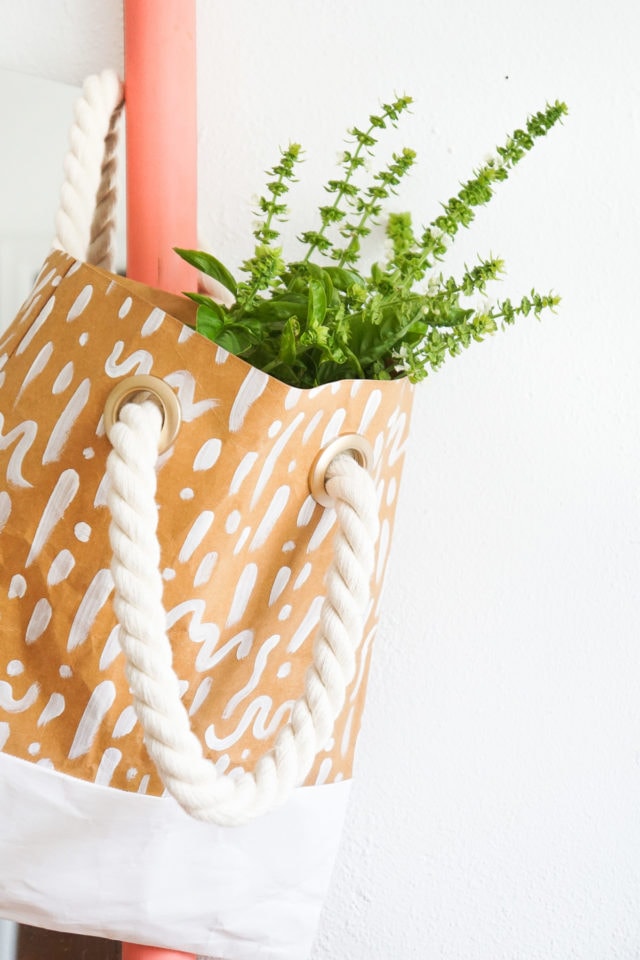
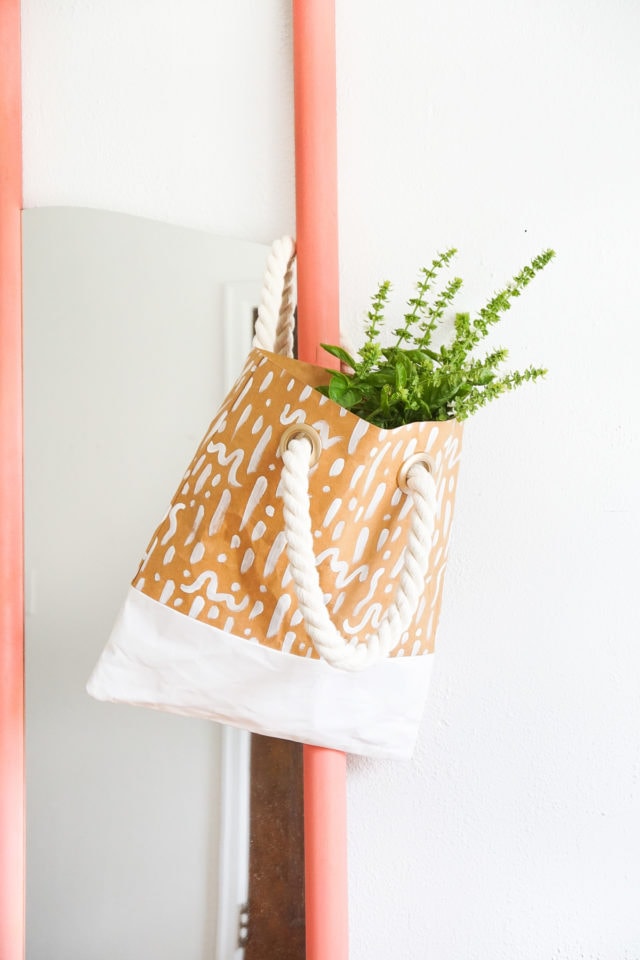
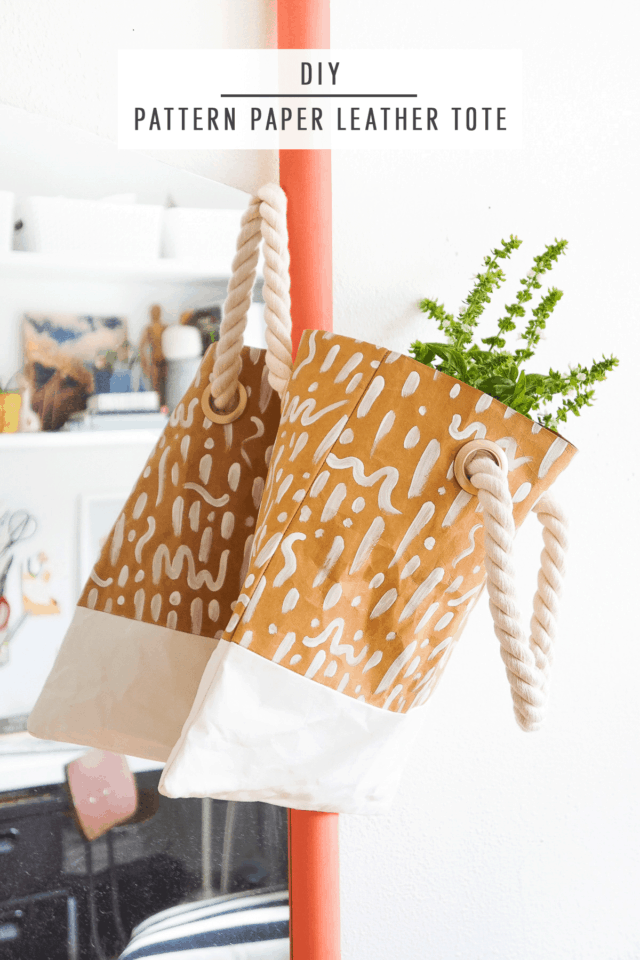
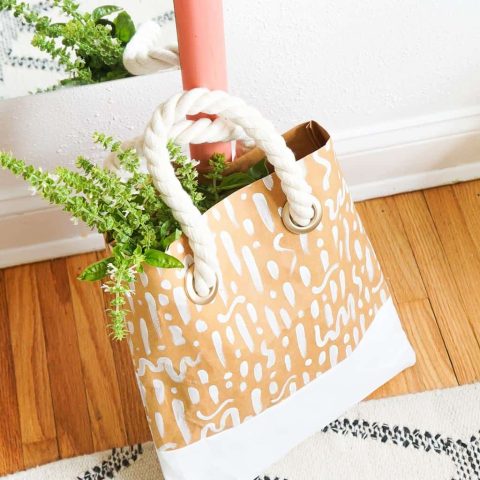
DIY Pattern Paper Leather Tote
Learn how to make your own DIY pattern paper leather tote with this easy tutorial. You’ll be able to customize the bag to your liking and have a new go-to piece for everyday wear.
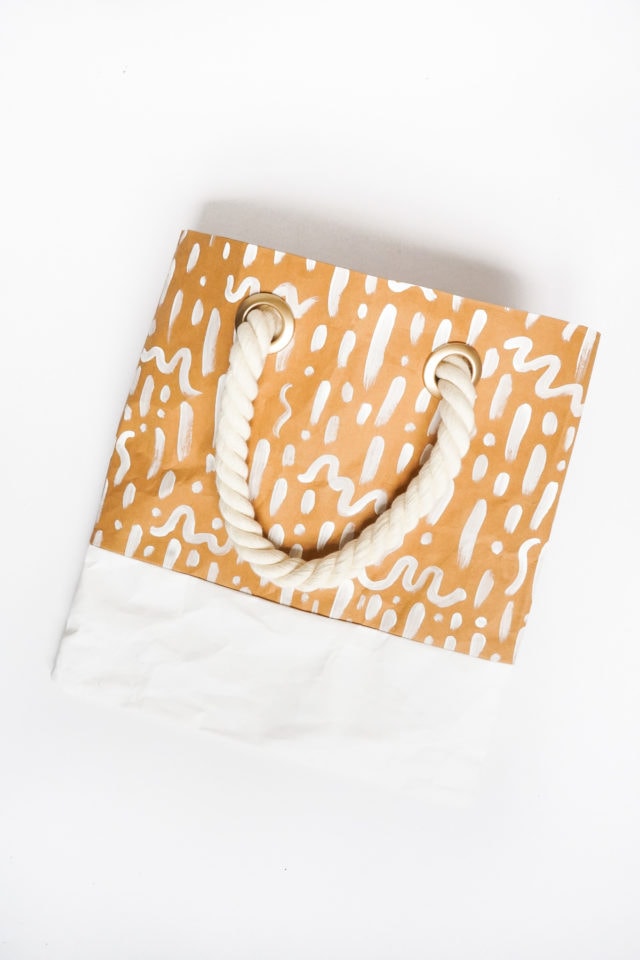
This DIY Pattern Paper Leather Tote lets you have the luxury look of a leather tote without all the hassle.
I love leather handbags. But sewing on genuine leather can be finicky. I’ve encountered one too many broken needles through the years.
And I just don’t have the patience for hand-stitching.
So I, Erin was super excited to discover a material that has the strength and looks of leather and the washability of fabric.
But it’s actually PAPER. Can you believe it? Yes, you read that right. Paper!
If you’re in the market for a new tote for back to school or even a reusable bag for all those Target runs, then check out this custom DIY Pattern Paper Leather Tote!
You can stroll around with it or bring it on a weekend trip.
Or this DIY Pom Pom Tassel Circle Pool Bag might be the right choice if you prefer to live in color.
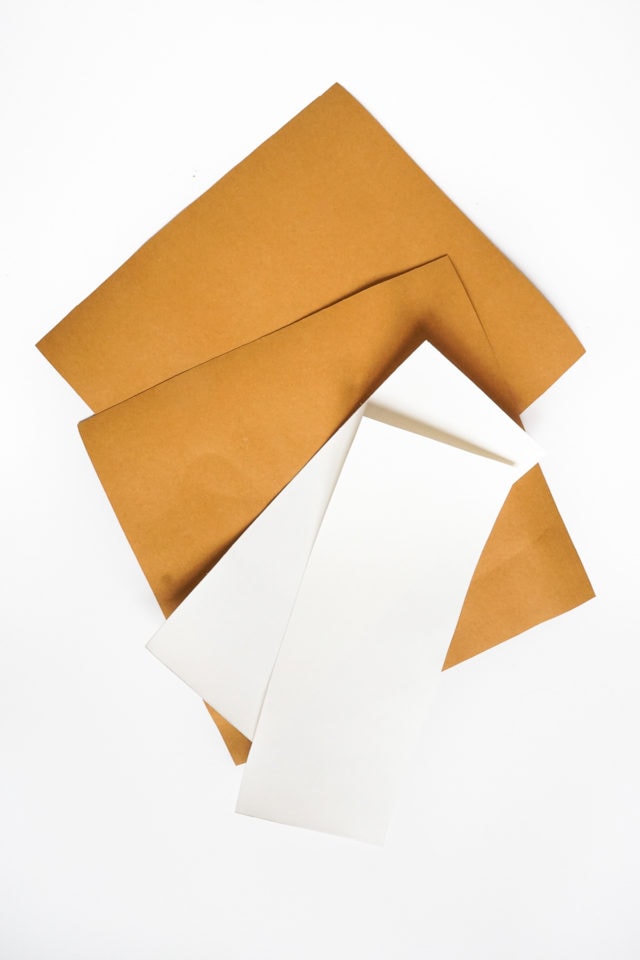
Materials and Tools Needed to Make DIY Pattern Paper Leather Tote
Kraft-Tex paper leather — In 2 colors (natural and white)
Scissors
White fabric paint
Paintbrush
Clothes pins and/or mini binder clips
Thread
Sewing machine
Ruler
Jumbo cotton rope — Sold at most fabric stores
1” curtain grommets in matte gold (or color of your choice)
How to Make DIY Pattern Paper Leather Tote
Step 1 – Cut out the following piece sizes:
Two: 5.5” x 14” pieces of white paper leather
Two: 10” x 14” pieces of natural paper leather
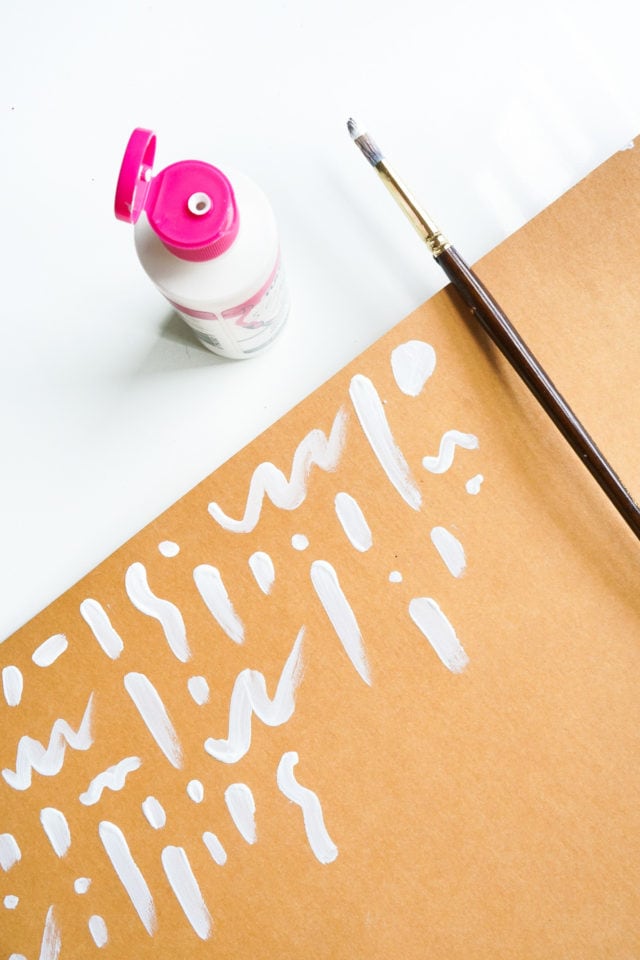
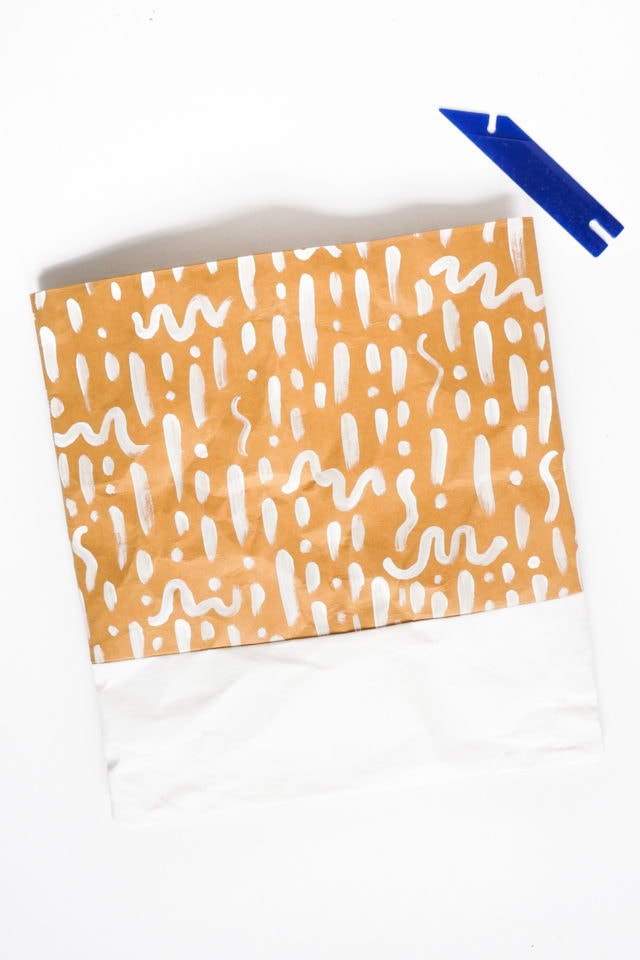
Step 2 – Paint white dashes and squiggles on the natural paper with fabric paint.
Allow drying.
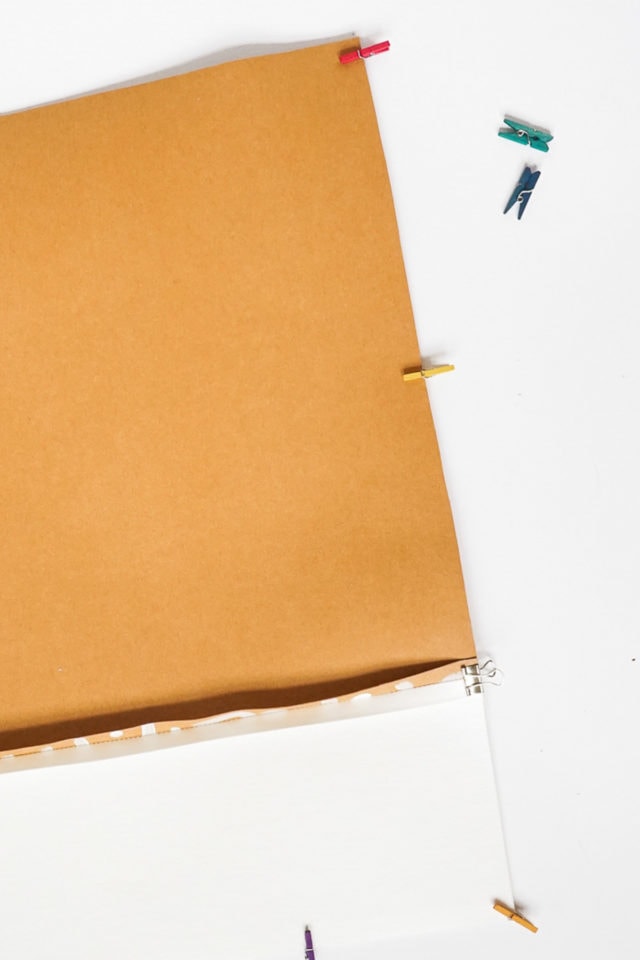
Step 3 – Use clothes pins or mini binder clips to pin the right sides of the natural and white pieces together to form one large rectangle. (Sewing pins leave unwanted permanent holes.)
Repeat with the back side of the bag.
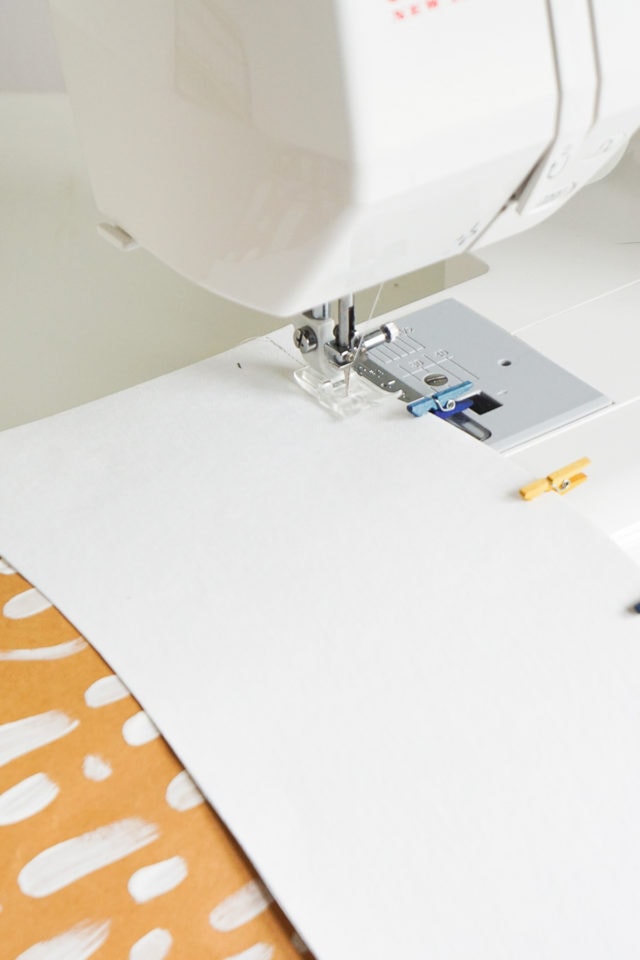
Step 4 – Then, sew the white and natural pieces to one another at 3/8” seam allowance. Use a ruler or any flat object to press open the seam.
Step 5 – Place the right sides of the bag so they’re facing each other and hold them in place with clothes pins or mini binder clips.
Step 6 – Sew the sides and bottom of the bag together and use a ruler to press open the seam.
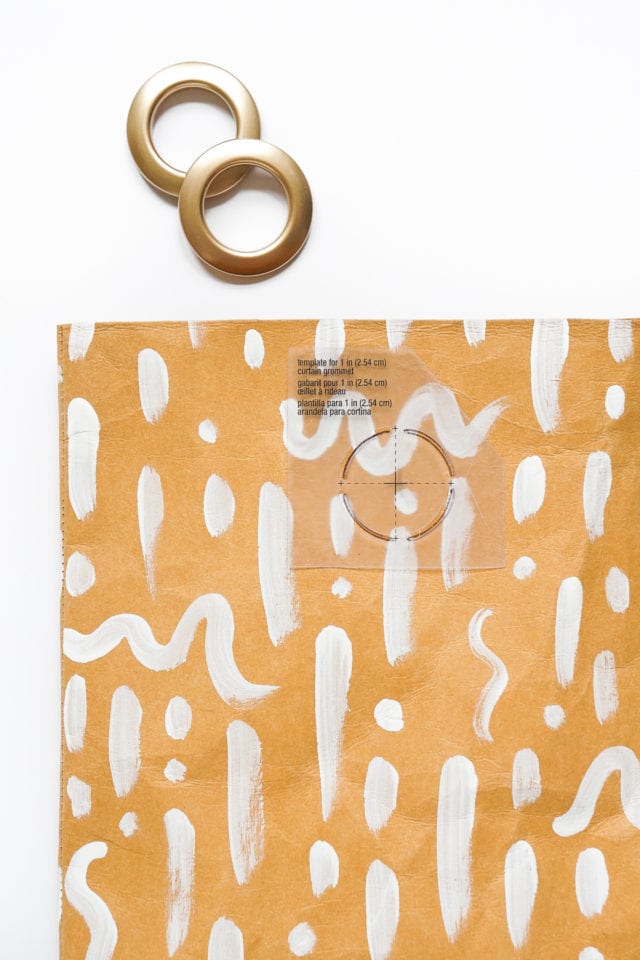
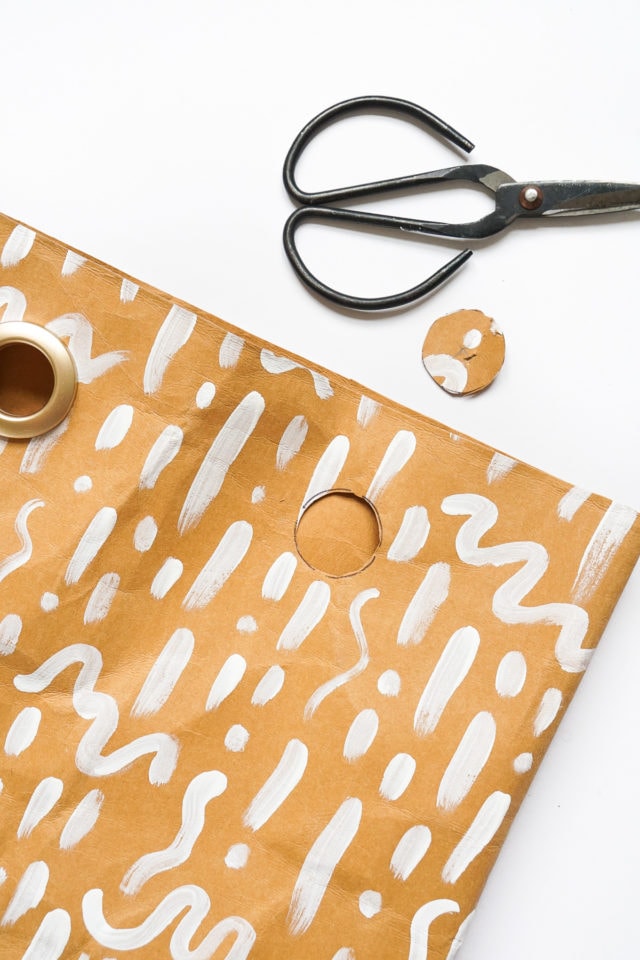
Step 7 – Turn the bag right side out and mark the grommet locations using the template that’s included with the grommets.
The grommets on my bag are 2” from the top and 4” from the outside edges.
Step 8 – Cut out the holes with scissors and snap the grommets together according to the package instructions.
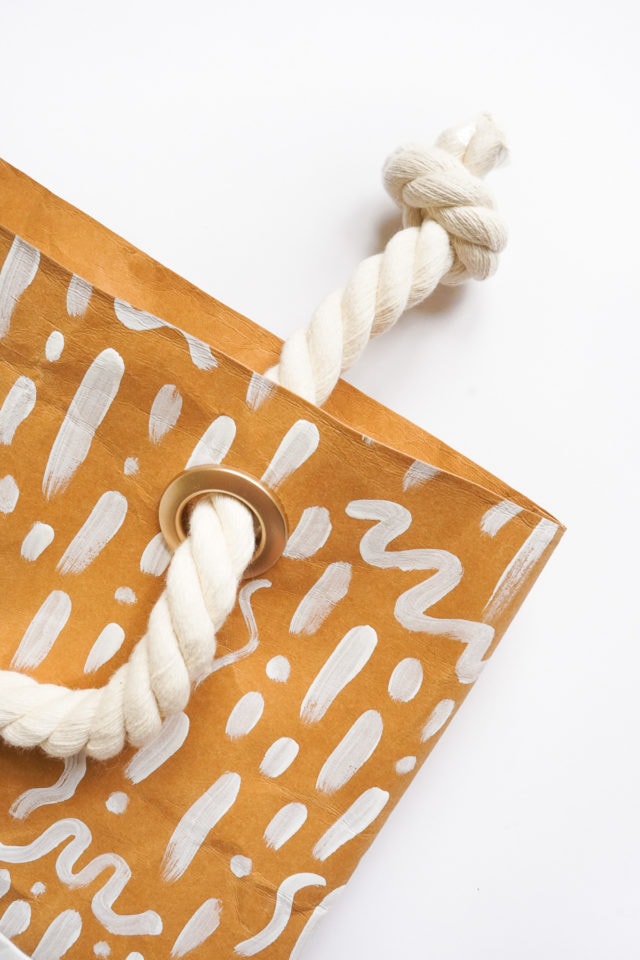
Step 9 – Thread the rope handles through the grommets.
Step 10 – Tie the rope ends in knots inside the bag and you’re all done!
The paper leather will crease and patina over time giving it a wonderfully weathered leather look!

More Easy DIY’s
I was so happy to discover this cool new fabric paper to play around with as it makes sewing leather-look pieces so much easier!
Have you discovered any life-changing new crafting or DIY materials lately? If so, spill the deets!
For more easy DIY’s for your closest, check out a few of our favorites from the archives below —
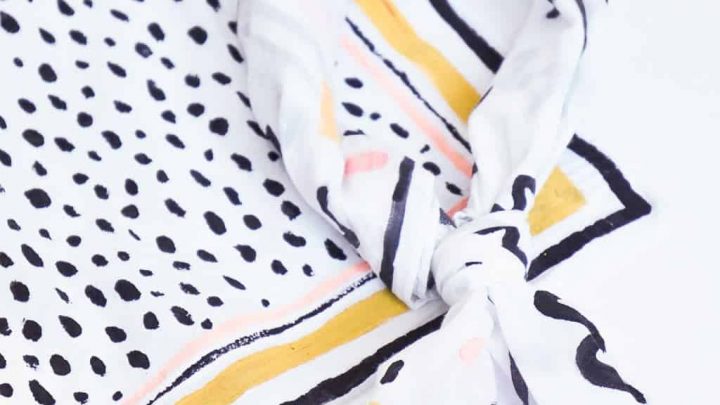
- Poolside DIY Pattern Kimonos
- Abstract DIY Umbrella
- DIY Pom Pom Tased Circle Bag
- How to revamp any bag with leather straps
DIY Pattern Paper Leather Tote
Equipment
- Scissors
- Paintbrush
- Clothes pins and/or mini binder clips
- Sewing machine
- Ruler
Materials
Instructions
- Cut out the following piece sizes:2 pieces of 5.5” x 14” white paper leather2 pieces of 10” x 14” natural paper leather
- Paint white dashes and squiggles on the natural paper with fabric paint.Allow drying.
- Use clothes pins or mini binder clips to pin the right sides of the natural and white pieces together to form one large rectangle. (Sewing pins leave unwanted permanent holes.)Repeat with the back side of the bag.
- Then, sew the white and natural pieces to one another at 3/8” seam allowance. Use a ruler or any flat object to press open the seam.
- Place the right sides of the bag so they’re facing each other and hold them in place with clothes pins or mini binder clips.
- Sew the sides and bottom of the bag together and use ruler to press open the seam.
- Turn the bag right side out and mark the grommet locations using the template that’s included with the grommets.The grommets on our bag are 2” from the top and 4” from the outside edges.
- Cut out the holes with scissors and snap the grommets together according to the package instructions.
- Thread the rope handles through the grommets.
- Tie the rope ends in knots inside the bag and you’re all done!

Don’t forget to share your DIY Pattern Paper Leather Tote with us on Instagram using the hashtag #sugarandclothloves. We always love seeing all of your creations! Looking for more interior design inspiration? You can find all of our home decor tutorials and ideas right here!


Please note that we may earn a commission for some of the above affiliate links. However, products featured are independently selected and personally well-loved by us!
Such an interesting DIY!, Lily, keep working and inspiring. This is truly useful and valuable. I personally love the design for the bag! If you ever make some more time, just design it!. I will definitely design this bag for me with Captain Marvel leather Jacket.
https://www.jacketsinn.com/captain-marvel-movie-leather-jackets/
Thanks, Sarah! Glad you liked it!
Oh my gosh this is lovely. I can’t wait to make one. This is so Amazing. The Bag is looking so good. Its Really Amazing. So have really shared something really helpful and great. That tote is so cute! Thank you for sharing.
Oh my gosh this is lovely. I can’t wait to make one😍😍😍thanks for sharing!
So glad you like it, Lily! Erin did such an incredible job. Let us know how yours turns out when you do! :)
That tote is cute! I totally need to get one!
Paige
http://thehappyflammily.com
Thanks so much, Paige! Erin did an amazing job. We especially love the pattern detail! xo