Confetti DIY Christmas Tree Cones
Get creative this holiday season with easy-to-make modern DIY Christmas tree cones, offering a unique alternative to traditional tabletop trees.
Not the traditional type? DIY Christmas tree cones have become a popular and contemporary alternative to traditional holiday decor. These modern twists on the classic cone shape offer endless creative possibilities and allow individuals to personalize their Christmas trees in unique ways.
From our mini wood Christmas trees, to our Christmas tree cactus, to our Pom Pom Christmas tree, we’ve done our fair share of alternative Christmas trees. And we’ve made another one to add to our alternative Christmas decor projects!
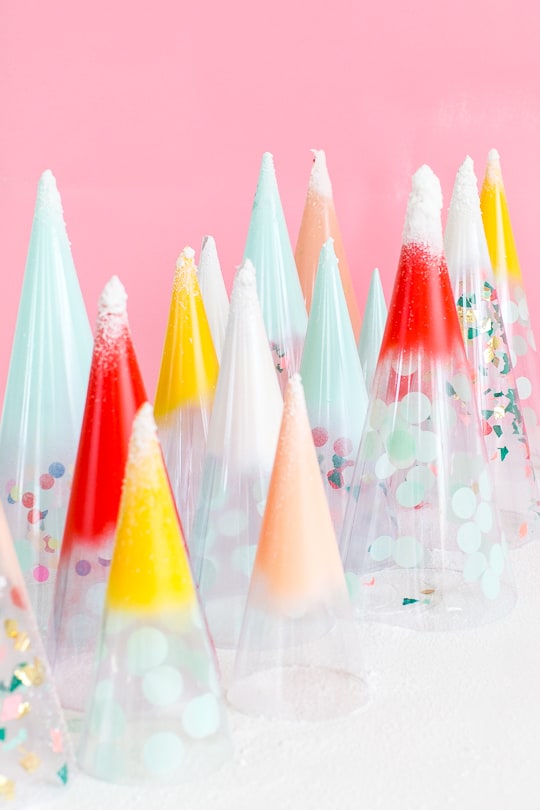
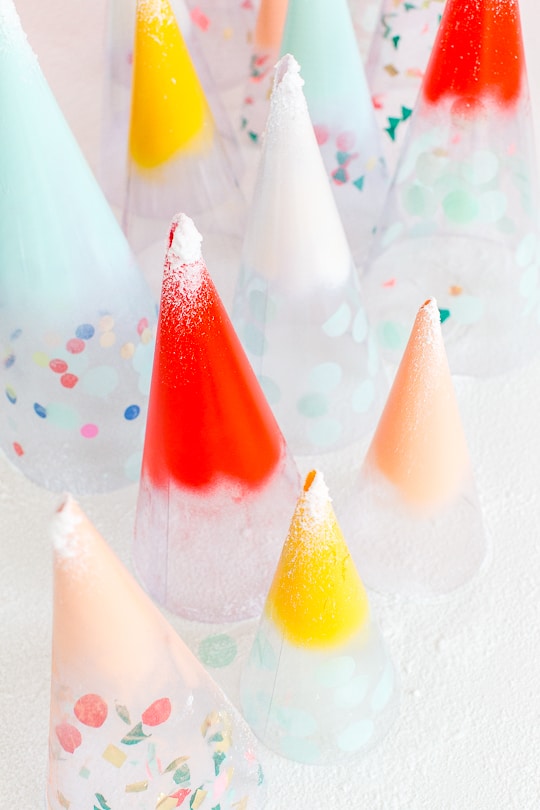
These confetti DIY tree cones are a bit abstract. You can add as much as little color as you want to suit your color scheme. Make a whole forest of these budget-friendly DIY Christmas Trees. And we can guarantee your pets won’t want to tear them! Plus, they’re easy to put up as they are to take down.
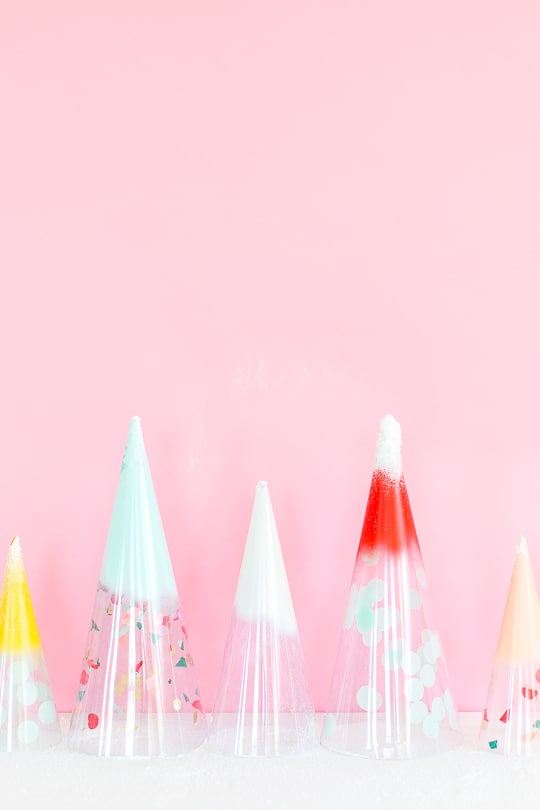
So whether you want to add a pop of color to your mantel, create a unique centerpiece, or simply enjoy a fun crafting activity, these modern confetti Christmas cone trees are the perfect choice.
Materials and Tools Needed
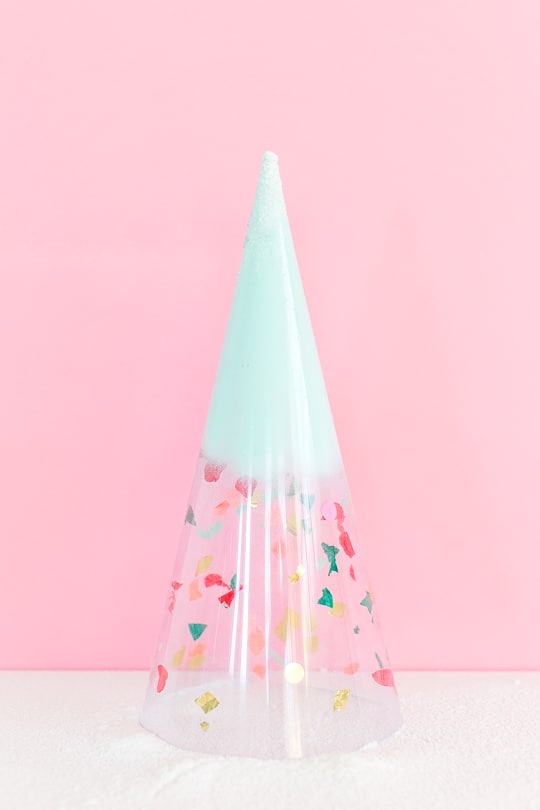
- Clear cones in various sizes — We used 12″ tall cones, 9″ tall cones, and 15″ tall cones. These cones are typically used to make lighted sea glass Christmas trees or commonly made to be used as doll bodies or angel tree topper bodies. They are also available on Etsy.
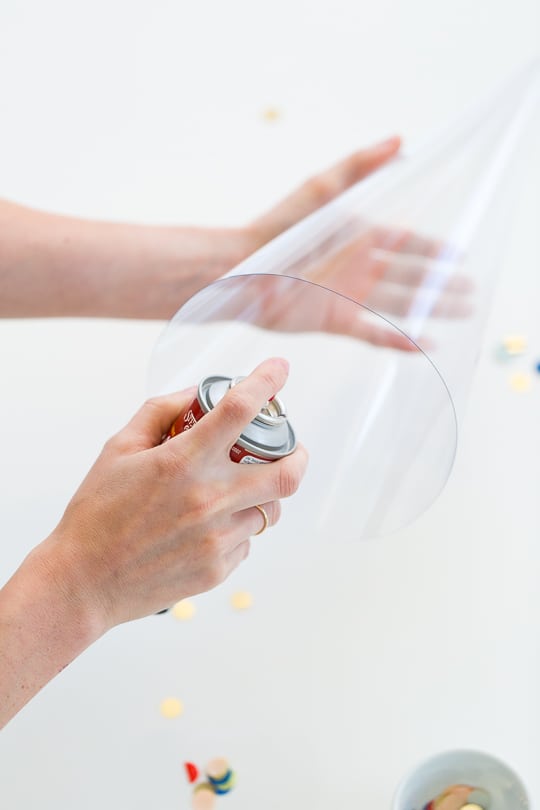
- Clear spray adhesive — Make sure to get a clear glue spray since the cones are also clear.
- Assorted confetti in different colors and shapes
- Spray paint in color of choice — Optional for the treetops. You could go with the traditional green or red. Or opt the colors to match your other beautiful Christmas decor for a cohesive look.
- Spray snow — Optional for the treetops.
How to Make Confetti DIY Cones for an Alternative Christmas Tree Idea
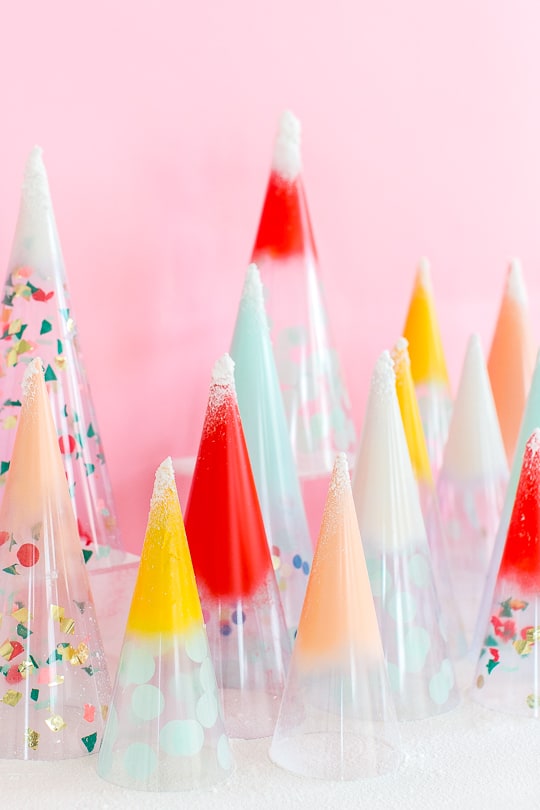
1 — Lightly spray the glue adhesive inside the cone. The confetti will naturally want to stick because of the static so no need to be heavy handed with the glue.
2 — Sprinkle in the confetti and roll the cone around so that the confetti spreads around evenly.

3 — Optional: Spray the treetops in the colors of your choice. Then, spray fake snow to the tops. Allow the glue, paint and snow to dry completely before displaying your modern cone Christmas trees. Once dry, you are all set to decorate!
Project Notes and Tips
- Prep your workspace beforehand: Cover your workspace with craft paper or newspaper to protect it from glue and paint. This will make cleanup easier and prevent any damage to your surfaces.
- A little bit of glue spray goes a long way: You’ll only need a thin layer of adhesive, especially if you’re using confetti paper.
- Experiment with different cone types: We love the minimal look of the clear cones. However, tree cones come in numerous materials which you can use like paper cones, cardboard cones or foam cones. Keep in mind that if you are not using a clear cone, you’re need to spray the adhesive and add the confetti on the exterior of the cones.
- Use these cones for other occasions: Because these tree cones aren’t your typical Christmas decor, they could totally work of other occasions and celebrations.

More Holiday Decorating Ideas
Love this post? For more Christmas decor ideas, check out a few of our favorites below —
- DIY Christmas Wreath Ideas — Our favorite traditional and alternative wreath ideas (with some that the kids can make with you too)
- DIY Ornament Garland — A colorful garland composed of colorful ornaments.
- Outdoor Christmas Garland with Wood Lights: One of our most popular DIY’s includes this front door decor idea.
- Gradient Christmas Tree Cones: Another modern tree cone idea.

Confetti DIY Christmas Tree Cones
Equipment
- Drop or rag cloth to cover surface when painting
Materials
Instructions
- Lightly spray the glue adhesive inside the cone. The confetti will naturally want to stick because of the static so no need to be heavy handed with the glue.
- Sprinkle in the confetti, and roll the cone around so that the confetti spreads around evenly.
- Optional: Spray the treetops in the colors of your choice. Then, spray fake snow to the tops. Allow the glue, paint and snow to dry completely.
Notes
- Cost dependent on how many trees you wish to make
- Estimated time calculated for one DIY Christmas Tree

Don’t forget to share your confetti DIY Christmas tree cones with us on Instagram using the hashtag #sugarandclothloves. We always love seeing all of your creations! Looking for more interior design inspiration? You can find them all of our home decor tutorials right here!
47 Affordable Gifts Under $10 for Everyone
Shop budget-friendly gifts under $10 that look way more expensive.…

Gingerbread Muffin Recipe with Lemon Glaze
Add a touch of spice to your breakfast or snack…

Funfetti Reindeer Cookies Recipe
Bake holiday magic with these Funfetti Reindeer Cookie Sandwiches. Soft…

25 Easy Christmas Cocktail Recipes to Try for the Holidays
Deck the halls with these delicious Christmas cocktail recipes! From…
Continue Reading 25 Easy Christmas Cocktail Recipes to Try for the Holidays
Please note that we may earn a commission for some of the above affiliate links. However, products featured are independently selected and personally well-loved by us!
They are cute and great for any party. But very pricey when you check out how much amazon wants for the cones. I think I will try it with acetate from Staples and form my own cones. Great idea though.
That’s a good idea too! Let us know how it turns out, especially with the Staples one!
Love these!! Gotta throw a bit of untraditional decorating into the mix.
So cute! :)
Obsessed with the colors! What colors were used to spray the caps? Thanks!
These cone trees are super cute! You did an awesome job!
Paige
http://thehappyflammily.com
I have done like 4 Christmas DIYS so far and not a single thing to my actual house yet… maybe this weekend! I love these fun colors for Christmas! I’m also going fairly nontraditional in my Christmas decor this year. I think the peach/coral trees are my favorite (no surprise there!)
This looks more like a DIY birthday decoration than a Christmas tree, but it’s cute.
Ah! These look so lovely!
These are abstract, but so lovely! These would be perfect to use as an accent on my new bar cart – which I’m hoping my guy will let me paint a soft shade of pink ;)
g.
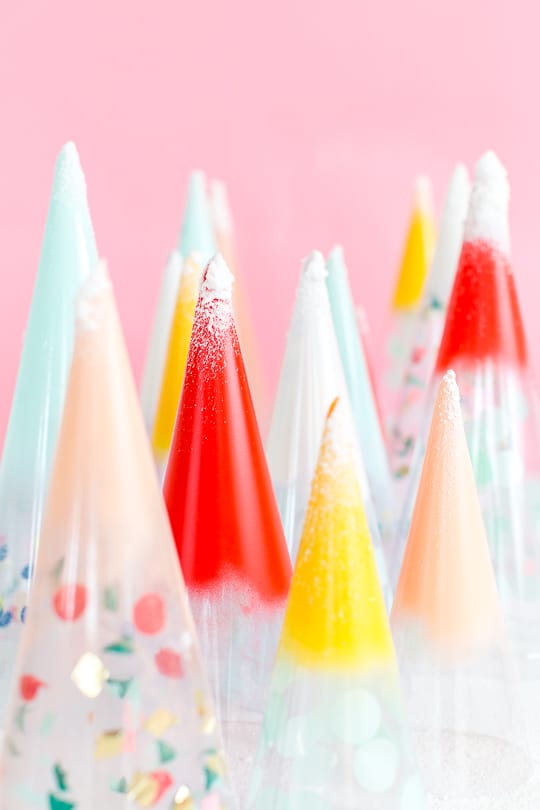
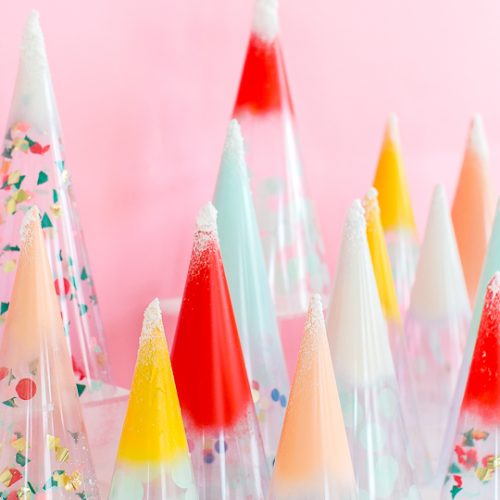
These are really trendy – love the dusting of “snow” on the tips and the confetti inside.