How to Make a Water Bath for Cheesecake
If you’re new to making homemade desserts, this step-by-step tutorial on how to make a water bath is the trick to getting a moist and crack-free cheesecake.
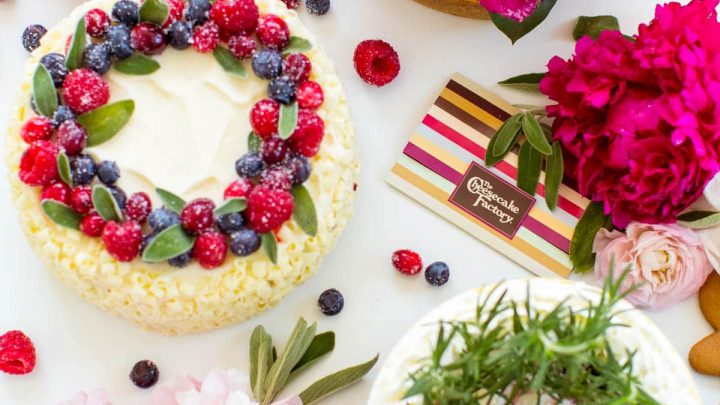
Who doesn’t love a rich, creamy cheesecake for dessert? It’s definitely one of my (Rebecca) favorite desserts!
And if you want a luscious, perfectly baked cheesecake without cracks or a sunken center, then baking it in a water bath is an absolute must.
But there’s really nothing worse than removing your beautiful, smooth cheesecake from the pan to find that water has seeped into the bottom, making the graham cracker crust soggy.
Even the nicest springform pan will allow some water to seep in, so I’ll teach you how to wrap your cheesecake pan so that no water can get into the pan while your cheesecake is baking.
Why Is It Important to Bake My Cheesecake in a Water Bath?
Cheesecake is more of a baked cream cheese custard than an actual cake.
The high amount of dairy and eggs in the cheesecake filling makes it delicate and prone to splitting or having a sunken center during baking.
Low, gentle, and moist heat is the best way to create the ideal cheesecake consistency, and a water bath is the best way to maintain those baking conditions.
Incorporating steam during baking is also helpful, and baking in a water bath is the best way to help you to end up with a perfect cheesecake.
If you bake your cheesecake in a dry oven, the edges will bake faster than the center. This makes them puff up, leading to an inconsistent texture and less appealing cheesecake.
When to Use a Water Bath
Any time you’re baking a full-sized, baked cheesecake, you should use a water bath.
Even if the recipe doesn’t specifically call for it, you can use these directions to get the best results.
You do NOT need a water bath for no-bake cheesecakes (like our No Bake Mint Aero Cheesecake), cheesecake bars, or mini cheesecakes (like our No Bake Mini Peanut Butter Jelly Cheesecake).
Tools You Need for a Water Bath
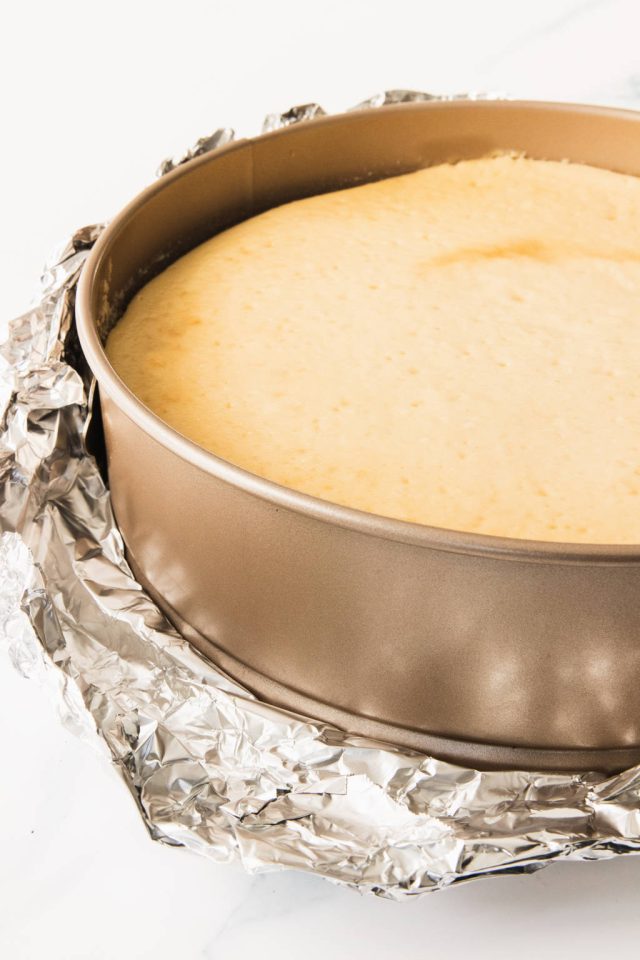
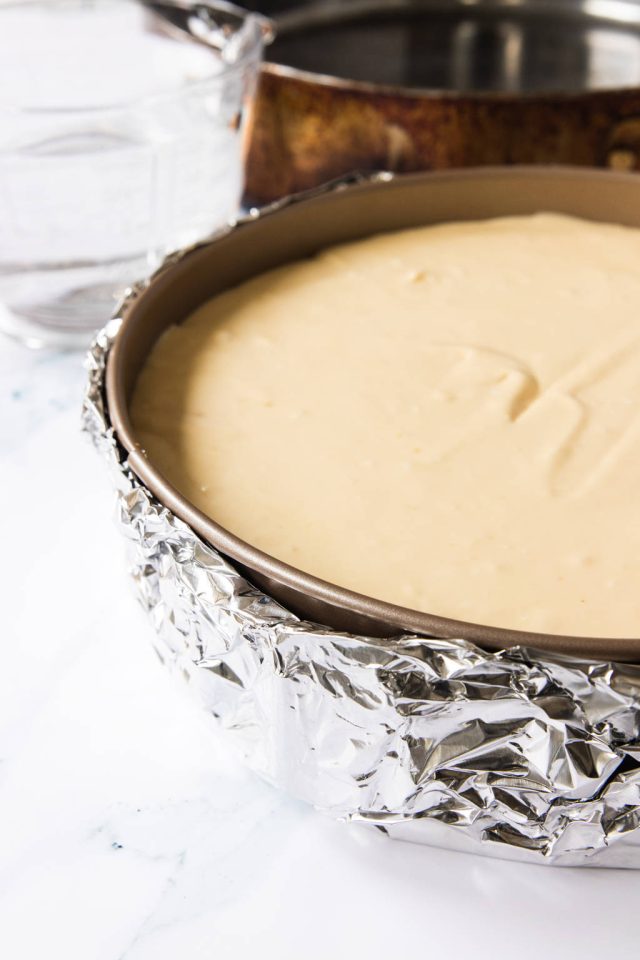
High-quality springform pan — while even the best springform pans aren’t going to be completely watertight, a well-constructed pan made of sturdy metal will be more leak-proof than a cheap or flimsy one.
Wide heavy-duty foil — You want to avoid water getting into the foil. Extra-wide foil wraps the pan in one sheet, so you don’t have to fold two pieces together and risk seeping.
Larger pan — This can be a large roasting pan, sauté pan, or a larger cake or baking pan. Just make sure it’s a couple of inches bigger than the springform pan so that its sides aren’t touching the cheesecake pan. It also needs to be at least 2-3” deep.
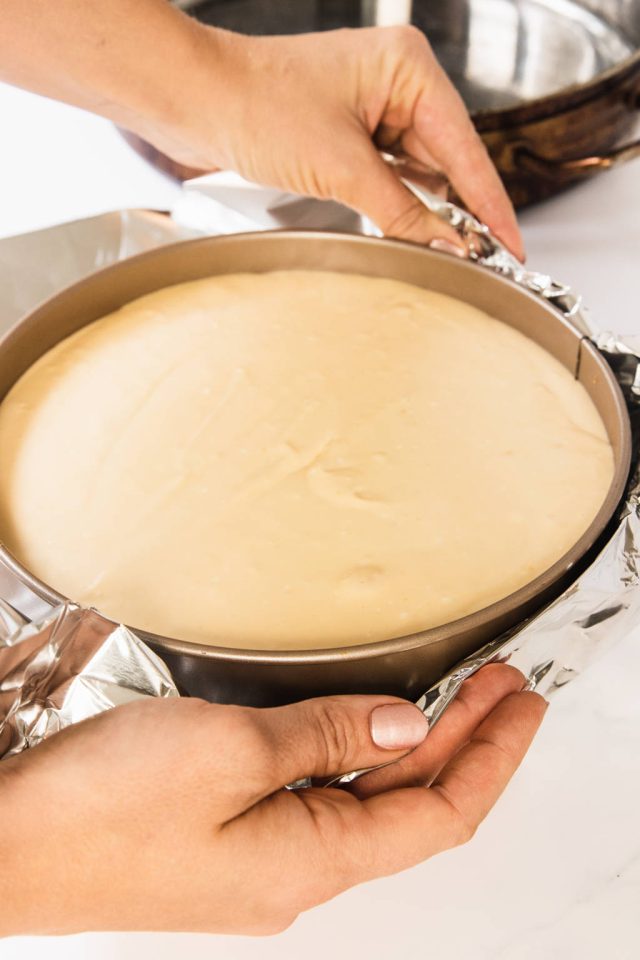
Wrapping the Cheesecake Pan Before Baking
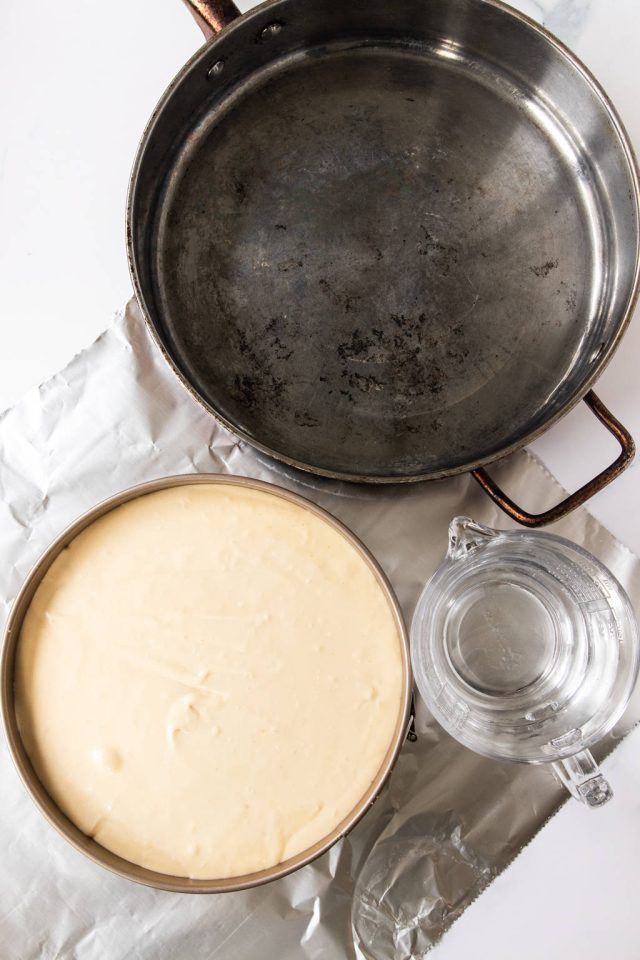
1 — Starting with extra-wide foil, cut a piece that is long enough to wrap several inches up the sides of your pan.
For a 9” pan, cut the foil at least 14” long, for a 10” pan cut it about at least 16” long, etc. Longer is fine, but you don’t want it to be too short.
2 — Once you’ve cut the foil, lay it out on a flat surface.
3 — Place the filled cheesecake pan in the center of it and wrap the foil tightly around the sides. Fold-down any extra foil that goes above the edges of the pan.
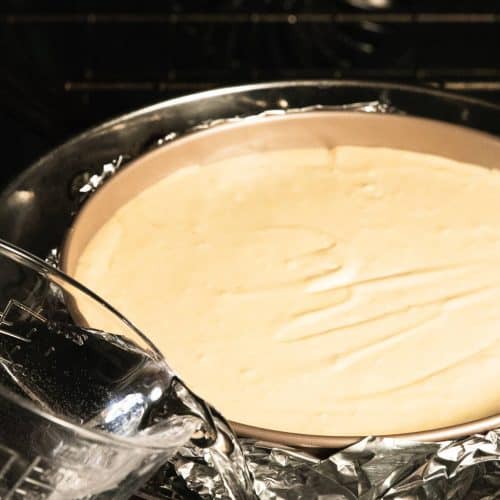
Baking the Cheesecake With a Water Bath
1 — Preheat the oven and place a rack in it according to your cheesecake recipe’s instructions. Most cheesecake recipes call for them to be baked at 350°F.
If the recipe doesn’t specify where to put the rack that the cheesecake will bake on, place it in the center of the oven or just below.
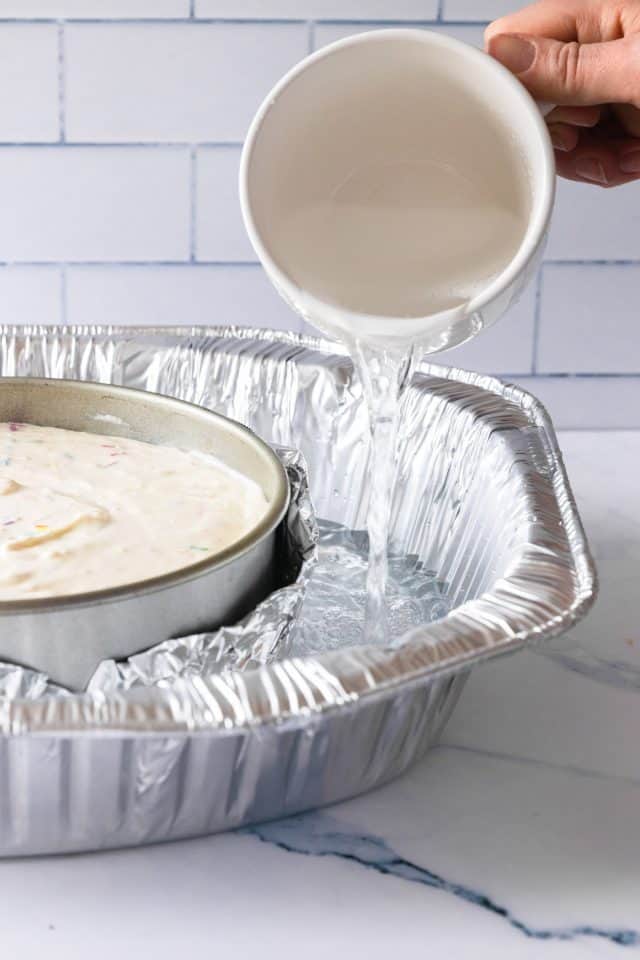
2 — Fill a measuring cup with very hot water. Put the wrapped cheesecake in the larger pan, then put it on the oven rack.
3 — Pour the hot water in the pan around the cheesecake until it’s about halfway up the sides of the pan. The amount of water you need will vary depending on the size of your large pan.
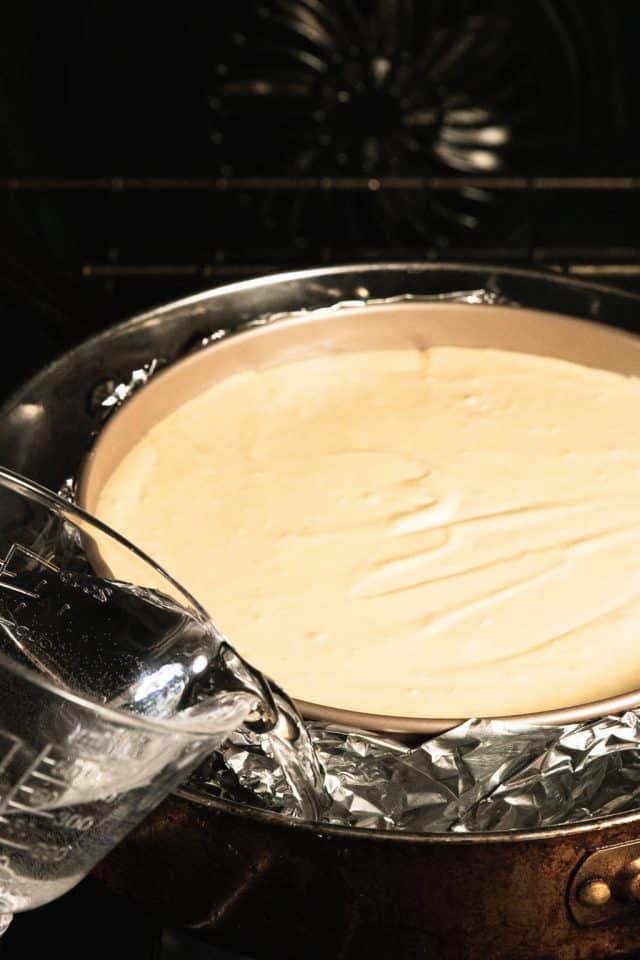
Try to avoid pulling the rack in and out of the oven after adding water, as it can cause it to splash around the sides of the cheesecake.
When you are sliding the pan in and out to add the water, move it carefully to avoid getting any moisture inside the foil.
You shouldn’t have to add more water during the baking, but occasionally check to make sure that the water bath hasn’t dried up.
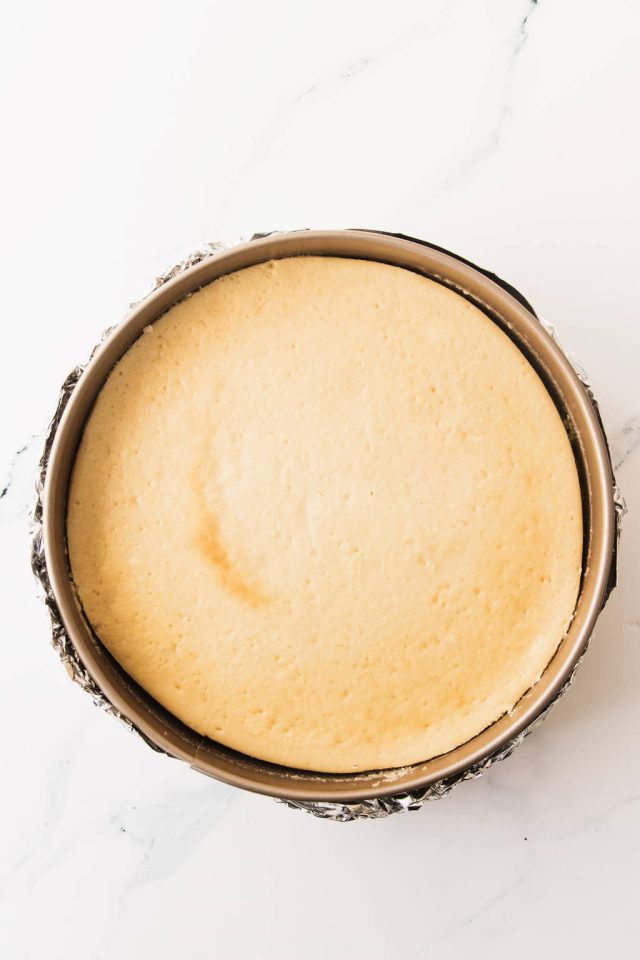
How to Know When Your Cheesecake is Done
Bake the cheesecake according to the recipe instructions or until it’s mostly set with just a slight jiggle in the center.
Don’t bake until it’s completely set, or it will be over-baked and dry.
Cooling the Cheesecake
Cooling the cheesecake is an important step, and doing it correctly can help prevent large cracks and splits in the top of your cheesecake.
Because it’s finished baking and setting while cooling, sudden or drastic changes in temperature can cause the custard to crack.
By avoiding quick temperature drops, the cheesecake has a chance to set completely without splitting.
After the cheesecake is finished baking, turn off the oven and open the door, leaving the cheesecake in the oven. After an hour, remove the cheesecake and allow it to cool to room temperature.
When the cheesecake is at room temperature, carefully slide a knife along the side and around the entire cheesecake to loosen it from the cake pan. The thinner the knife blade, the better.
Place it in the refrigerator to cool completely. Allowing it to cool gradually prevents sudden changes in temperature that can cause cracks!
Cheesecake only needs to be chilled for a few hours.
Ideally, it’s best to chill it overnight in the fridge, especially if you decide on cheesecake topper ideas.
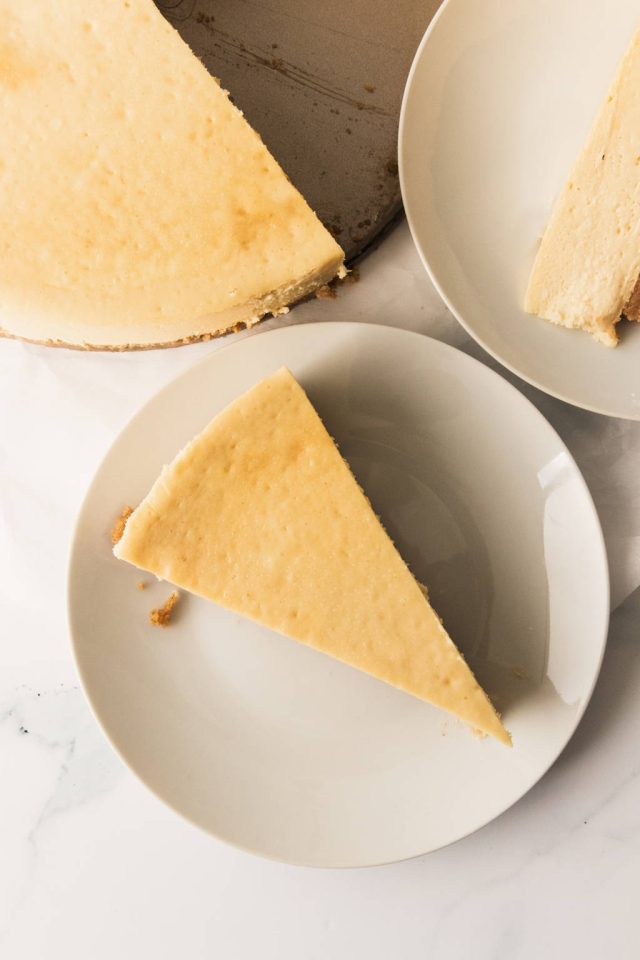
Cutting and Serving the Cheesecake
When you’re cutting a cheesecake, it can be difficult to get clean, pretty slices. But after all the effort put into making it, it really makes a difference to have perfect, clean slices.
The trick for perfect slices of cheesecake is to use a warm, clean knife.
Run a large, sharp knife under warm water for a couple of minutes, wipe it dry, then cut your cheesecake.
Repeat the warming and drying step between each cut for the cleanest slices.
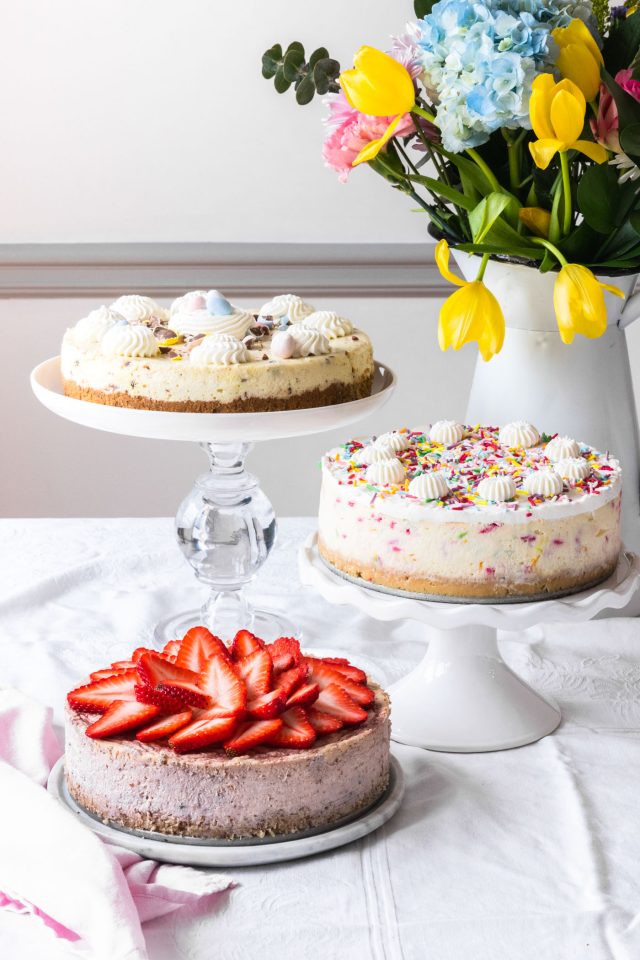
Cheesecake Recipes
And that’s all there is to baking a cheesecake in a water bath! Here are a few recipes to try out this technique —
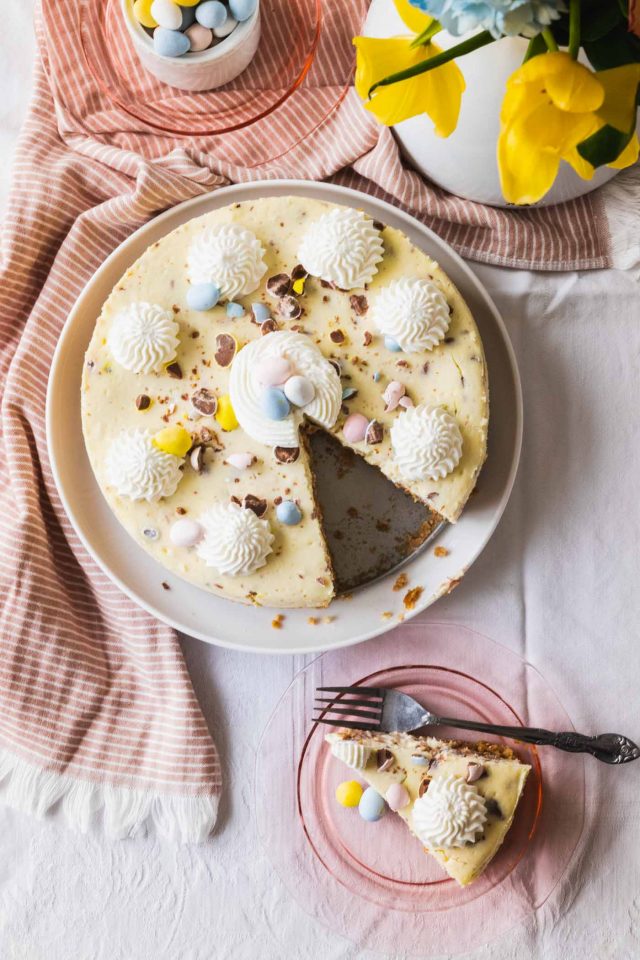
- Easter Egg Cheesecake
- Low Carb Cheesecake
- Strawberry Keto Cheesecake
- Caramilk Cheesecake
- Keto Pumpkin Cheesecake
- Funfetti Birthday Cake Cheesecake
- Pecan Cheesecake in a Jar
Cheesecake Water Bath
Equipment
- Measuring cup
Materials
- 1 springform pan
- 1 foil wide heavy-duty
- 1 larger pan large roasting pan, sauté pan, or a larger cake or baking pan
Instructions
Wrapping the cheesecake pan:
- Starting with extra wide foil, cut a piece that is long enough to wrap several inches up the sides of your pan.For a 9” pan, cut the foil at least at least 14” long, for a 10” pan cut it about at least 16” long, etc. Longer is fine, but you don’t want it to be too short.
- Once you’ve cut the foil, lay it out on a flat surface.
- Place the filled cheesecake pan in the center of it and wrap the foil tightly around the sides.
- Fold down any extra foil that goes above the edges of the pan.
Baking the cheesecake with a water bath:
- Preheat the oven and place a rack in it according to your cheesecake recipe’s instructions. Most cheesecake recipes call for them to be baked at 350°F.If the recipe doesn’t specify where to put the rack that the cheesecake will bake on, place it in the center of the oven or just below.
- Fill a measuring cup with very hot water. Put the wrapped cheesecake in the larger pan, then put it on the oven rack.
- Pour the hot water in the pan around the cheesecake until it’s about halfway up the sides of the pan. The amount of water you need will vary depending on the size of your large pan.Try to avoid pulling the rack in and out of the oven after adding water, as it can cause it to splash around the sides of the cheesecake.When you are sliding the pan in and out to add the water, move it carefully to avoid getting any moisture inside the foil.You shouldn’t have to add more water during the baking, but check occasionally to make sure that the water bath hasn’t dried up.
Notes
- Extra wide foil wraps the pan in one sheet, so you don’t have to fold two pieces together and risk seeping.
- Make sure your large pan is couple of inches bigger than the springform pan so that it’s sides aren’t touching the cheesecake pan. It also needs to be at least 2-3” deep.


Please note that we may earn a commission for some of the above affiliate links. However, products featured are independently selected and personally well-loved by us!