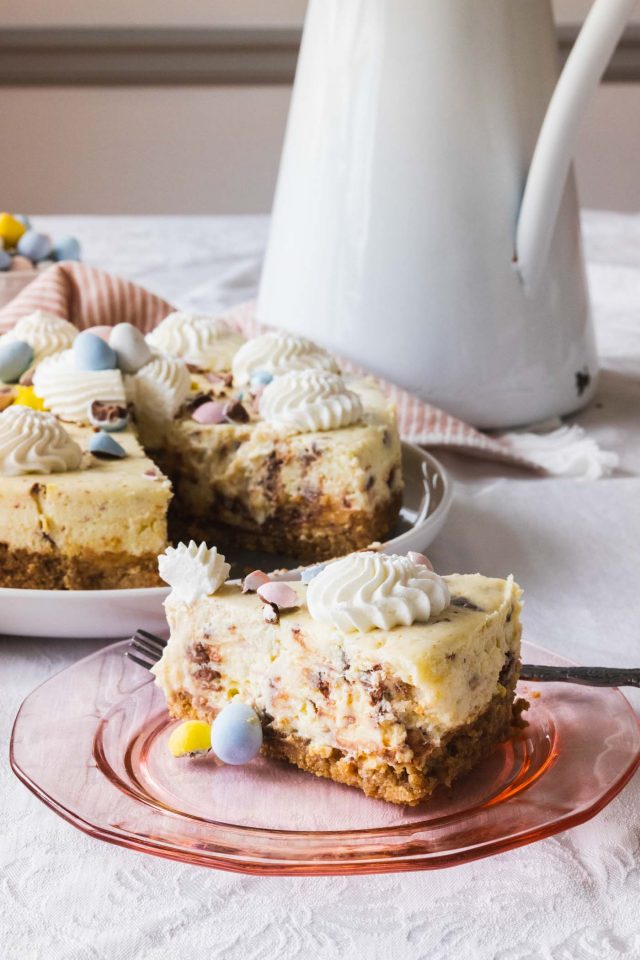
Easter Egg Cheesecake Recipe
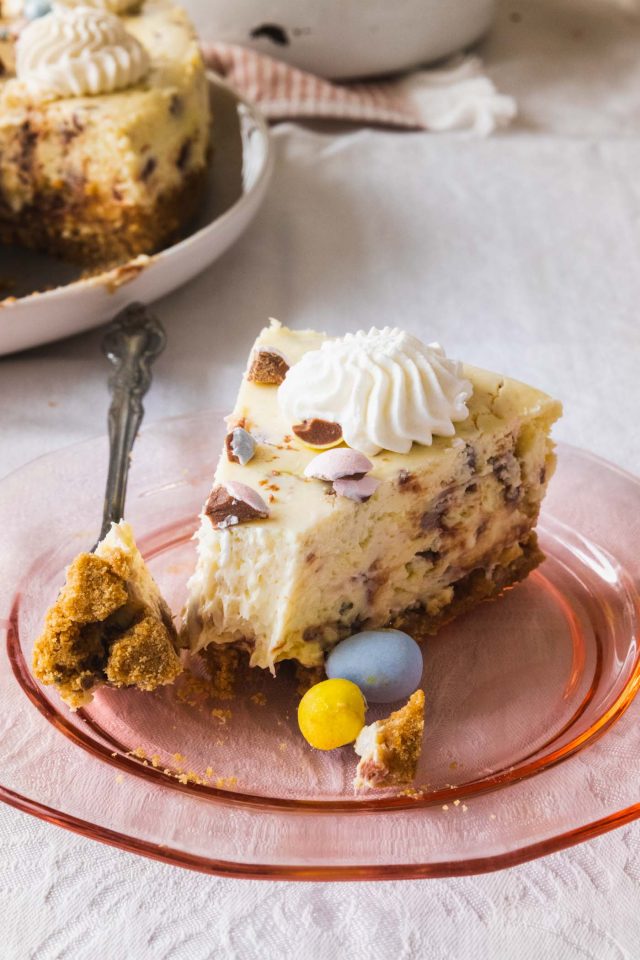
This Easter Egg Cheesecake recipe is for a classic creamy cheesecake but with a fresh, springtime twist. The addition of mini Cadbury eggs adds a nice chocolate flavor and texture.
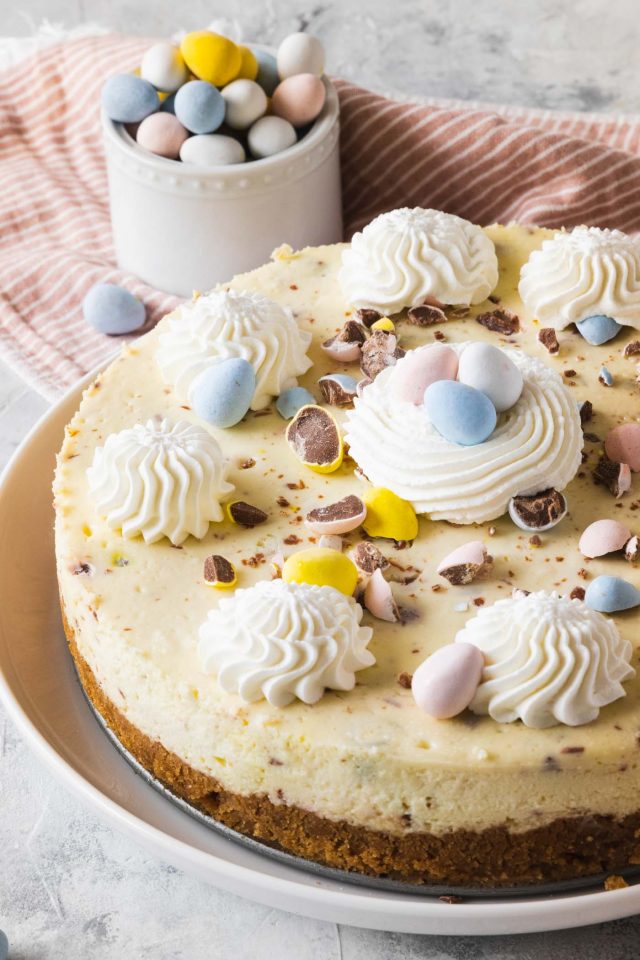
If you’re looking for a delicious, festive dessert for your Easter or spring celebrations, look no further than this Mini Easter Egg Cheesecake! This recipe is for a classic creamy cheesecake but with a fresh, springtime twist. The addition of mini Cadbury eggs adds a nice chocolate flavor and texture. And it takes only 30 minutes to prep.
I, Rebecca of Good Things Baking, think the pretty bright eggs are an easy way to make your mini egg cheesecake festive addition to your Easter feasts. And doesn’t it pair well with these Faceted DIY Easter Egg Place Card Holders on your table? You can also make our low carb keto cheesecake topped with Cadbury eggs for a healthier version of this festive cake…
What Kinds of Candy Can I Use in a Mini Egg Cheesecake
This recipe uses mini Cadbury Easter eggs, but you can substitute other candies if you prefer! Cadbury eggs come in many flavors. My favorite is milk chocolate.
Cadbury creme eggs would work too. But don’t over-mix the creamy centers into the cream cheese filling. Cadbury eggs are always fitting for Easter desserts, which is why we also used them for our Chocolate Birds Nest recipe too!
Chopped-up Reese’s eggs, Hershey eggs, or M&M eggs make for another great alternative.
How to Make an Easter Egg Cheesecake
Instructions to make the crust:
Bring all of the refrigerated ingredients (cream cheese, eggs, and sour cream) to room temperature.
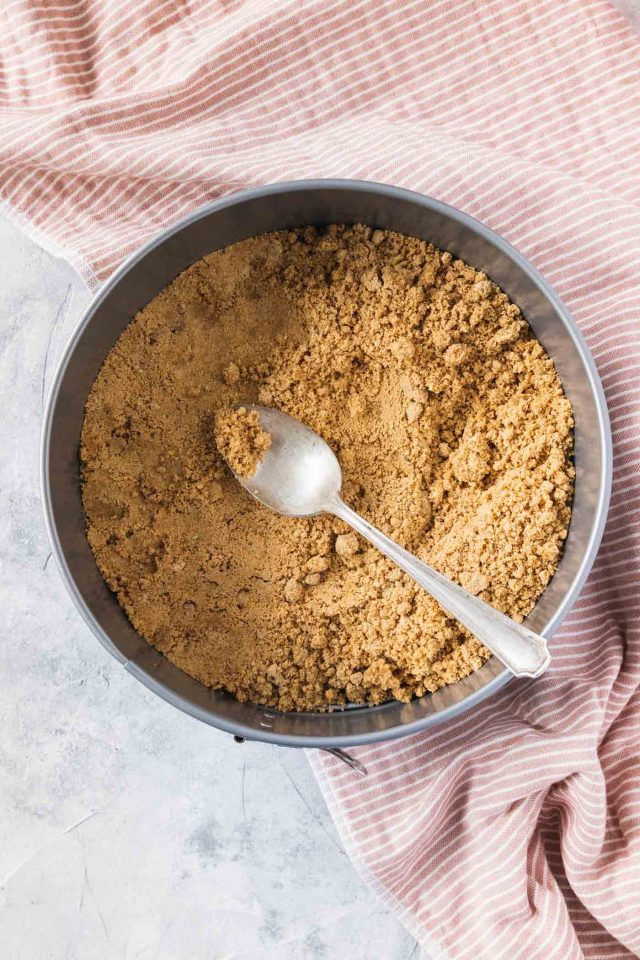
Step 1 – Stir together 2 cups of graham cracker crumbs, six tablespoons of melted butter, and two tablespoons of white sugar. The mixture should be crumbly and clumpy but not very wet.
Step 2 – Grease a 9” or 8” springform pan or a cake pan with a removable bottom.
Step 3 – Press the graham cracker crust mix into the bottom of it. Create an even layer (about 1 inch) of crust across, making sure to press the sides of the pan.
Step 4 – Bake the graham cracker crust at 350° for 10 minutes. Then, allow it to cool.
Instructions to make the cheesecake filling:
Step 1 – Using the paddle attachment on a stand mixer, beat the three blocks of cream cheese in a large mixing bowl until they are smooth and creamy.
Step 2 – Add in 1 cup of white sugar and 1 cup of sour cream.
Step 3 – Beat the mixture for a couple of minutes until thoroughly combined.
Scrape the sides of the bowl with a rubber spatula to ensure all ingredients are getting mixed together.
Step 4 – With the mixer still running, add three eggs, one at a time, until they are thoroughly mixed in. Add 1 tbsp. Of vanilla extract with the last egg.
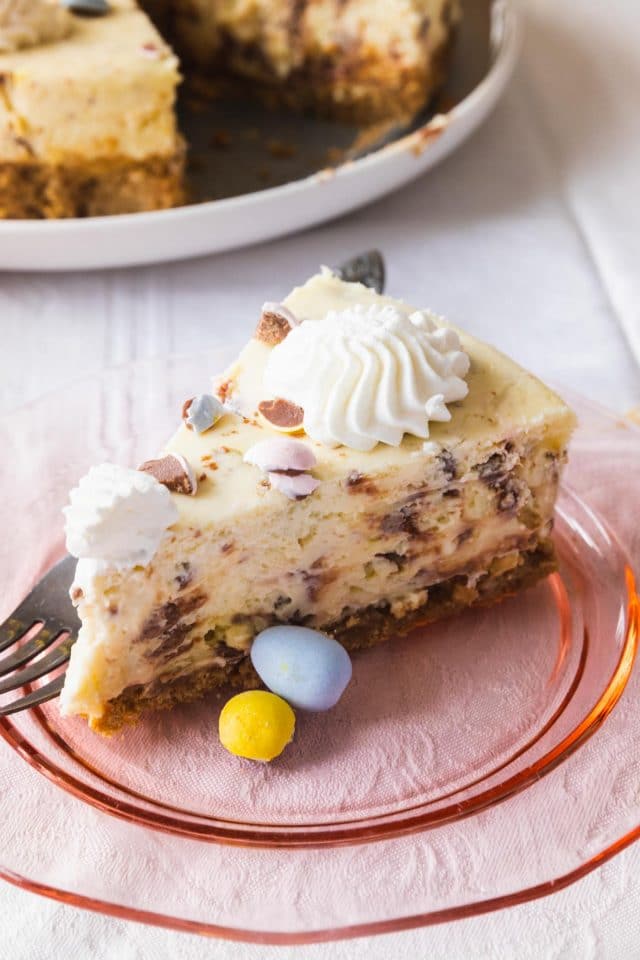
Step 5 – Roughly chop 2 cups of mini Cadbury eggs. They will roll when you try to chop them. So I recommend cutting them in half, then chopping them roughly.

Don’t powderize them, but try to avoid huge pieces of chocolate eggs, as these can make the mini egg cheesecake hard to slice neatly. You can also place the Cadbury eggs in a plastic bag, seal them, and use a smooth-sided mallet to smash them.
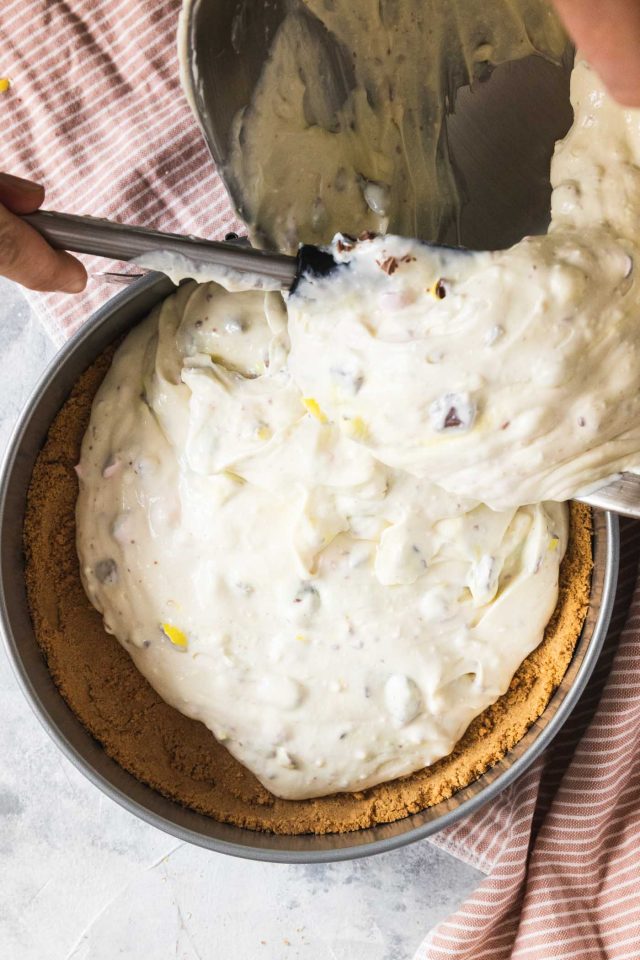
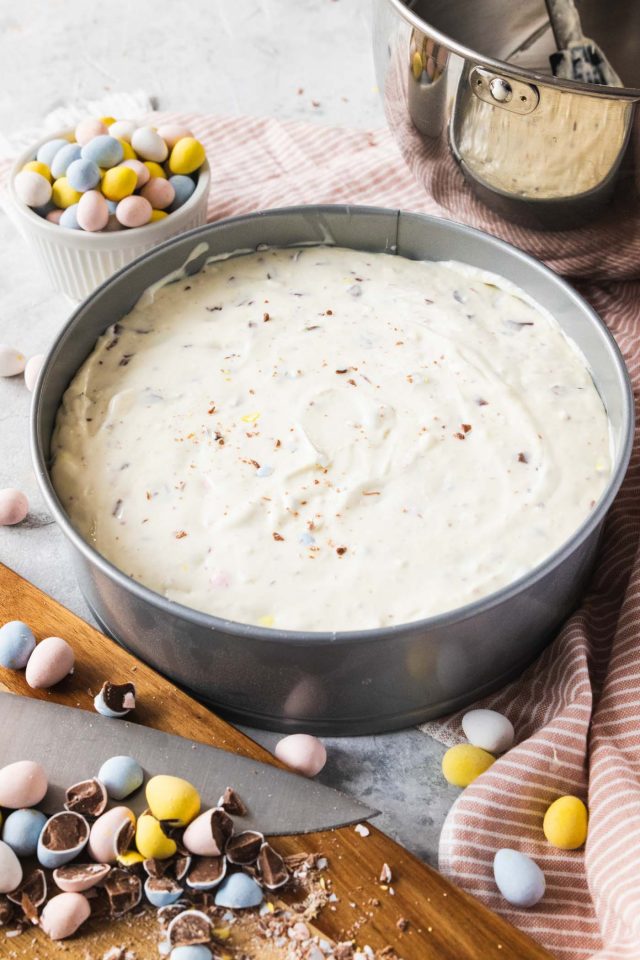
Step 6 — Fold the chopped Cadbury mini eggs into the cream cheese mixture. Then, pour it over the graham cracker crust.
How to bake the cheesecake:
Step 1 – Wrap the bottom of the cake or springform pan well with aluminum foil so that it comes up several inches around the bottom of the pan. This prevents water from getting into the cheesecake when you bake it in a water bath.
Step 2 – Place the foil-wrapped cheesecake pan in a large baking or roasting dish.
Step 3 – Put the dish with the cheesecake in it on the center rack of the oven heated to 350°.
Step 4 – Then, pour a few cups of water into the baking dish until there are between 1 and 2 inches of water up the side of the cheesecake pan.
Step 5 – Bake the mini egg cheesecake for 50 minutes to an hour. To check if it is done, shake the pan very gently. The cheesecake should be mostly firm with a slight jiggle in the center, and the top should look dry. There may be a few browned spots, but you don’t want the top to be burnt. You also may need more baking time if using a 9-inch springform pan.
Step 6 – Turn off the oven and open the door, leaving the cheesecake in for about an hour to cool slowly.
Step 7 – Remove it from the oven after the hour is up. Let it sit at room temperature for another hour before covering it well and refrigerating the Easter egg cheesecake overnight. It won’t be completely set up and solid until it has been chilled. Do try not to cut into it too soon! Also, don’t decorate it too soon or you’ll end up with melted chocolate.
Decorating and Serving Your Cadbury Egg Cheesecake
To make the whipped cream topping:
Step 1 – Use the whisk attachment on your mixer, and combine 1 cup of whipping cream with two tablespoons of powdered sugar in a mixing bowl.
Step 2 – Beat until it is thick, fluffy, and holds its shape on a spoon.
To decorate the top:
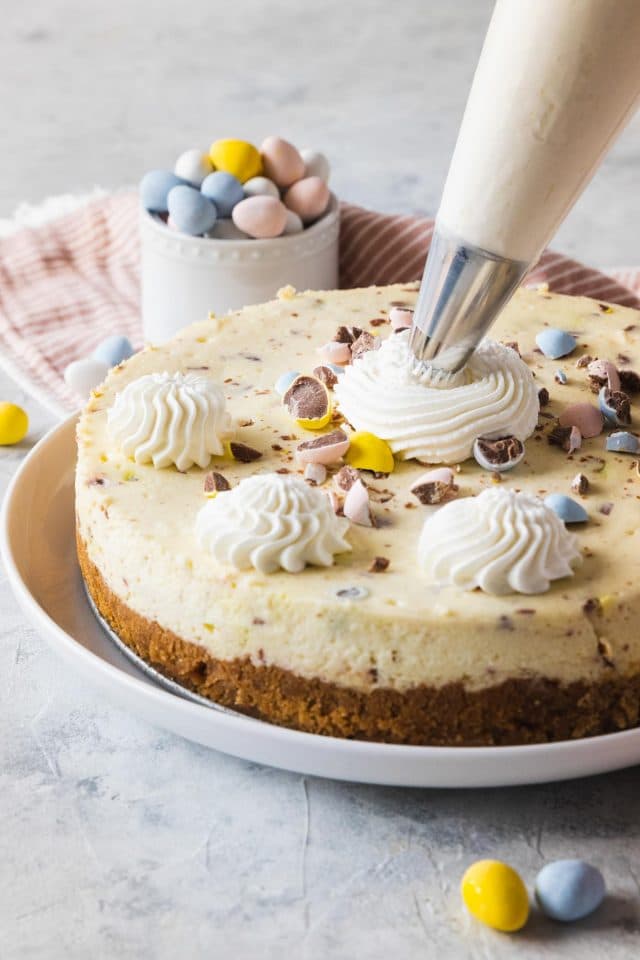
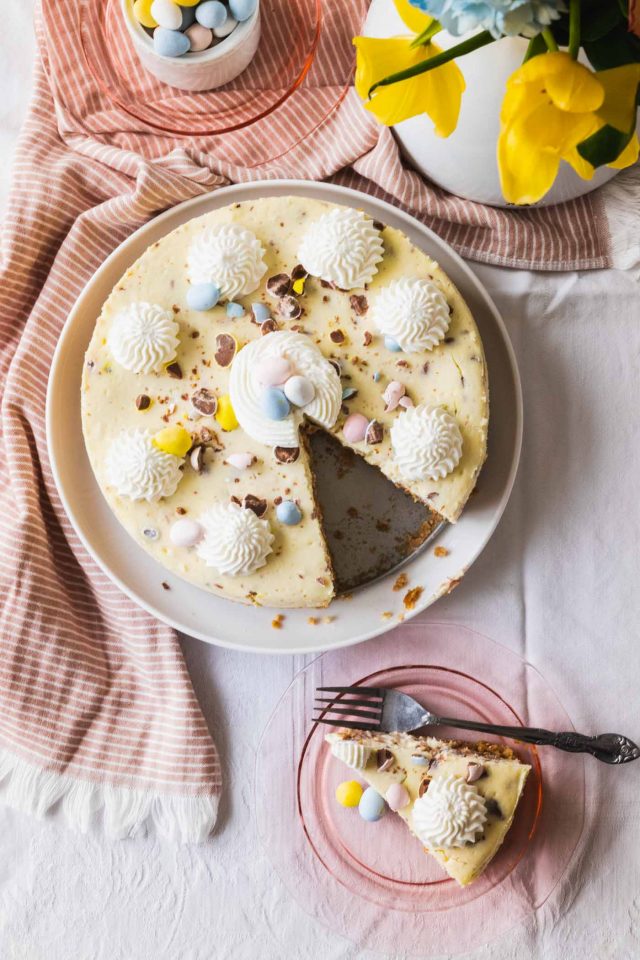
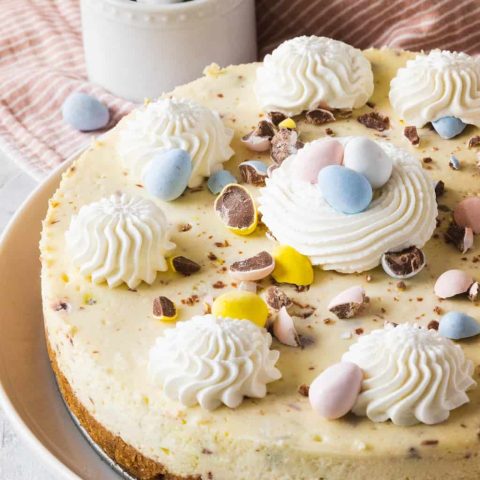
Step 1 – I used a piping bag and a large star tip to create a nest in the center of the cheesecake and nestled a few eggs in it.
Step 2 – I added a few more whipping cream stars and sprinkled a few extra crushed mini eggs and whole eggs over the top. But you can make it pretty however you want to! You could pile the whipped cream and eggs high or spread it in a smooth layer (like icing sugar frosting!) and add eggs to the top of your mini egg cheesecake.
Recipe Notes and Tips
- Only use full-fat cream cheese and sour cream: The reduced-fat version of those ingredients may cause texture issues and a thinner runnier filling consistency.
- To make your graham cracker crumbs for the crust: Pulse whole graham crackers in a blender or food processor until they are a sandy texture. Don’t over-grind, as this will make your crust too powdery.
- How to avoid cheesecake from cracking: Cheesecakes are prone to large cracks in the top. To avoid cracks, bake your cheesecake in a water bath, and don’t submit it to any extreme or quick temperature changes. That’s why it should be left in the open, turned-off oven for an hour, then allowed to come to room temperature before chilling.
- How to easily remove your cheesecake from the pan: Set the springform pan on a flat jar or glass and carefully push down the side of the cake pan. Before removing your cheesecake from the pan, carefully run a sharp knife around the edge to release parts of the cake that may be stuck. If a bit is stuck, it could tear and leave a hole in the side of your cheesecake when you remove it.
- Best tools to use when making cheesecake: Use a straight-edged knife or spatula to smooth the sides of your cheesecake.
How to Store Cheesecake?
For food safety reasons, always store in the refrigerator. If you want to store it in the pan, you can cover the top with a sheet of aluminum foil or plastic wrap. Otherwise, keep it in an airtight container. Rather than storing your leftover Cadbury eggs, you can add them to your Easter baskets for kids or even Easter baskets for adults!
Can I Freeze Cheesecake?
Freezing is an excellent option for making an Easter dessert ahead of time! First, chill the Cadbury egg cheesecake overnight and then freeze it just until solid. Wrap it well, first in plastic wrap, then in foil to protect it well from ice and freezer burn. Set the cheesecake flat on a shelf in your freezer.
It will keep for up to six months if properly wrapped. But I would recommend only leaving it in for 1-2 for the best flavor and texture. To thaw your frozen Easter Egg Cheesecake, place it in the refrigerator at least 24 hours before serving it. Unwrap it, and decorate it with the remaining mini eggs.
More Easter Desserts, Cheesecakes, & DIYs To Try
For more recipes and DIY’s, check out a few of our favorites from the archives —
- Spiked Easter Peeps
- Chocolate Haystacks Bird Nests
- 24 Carrot Cocktail
- Our cheesecake stuffed apples are perfect for cozy weather.
- DIY Bunny Ear Macarons for the kids
- DIY Speckled Eggs & Glasses
Equipment
- 8-inch or 9-inch springform pan or cake pan with removable bottom
- Mixer
- Rubber spatula
- Aluminum foil
- Large baking or roasting dish
- Piping bag
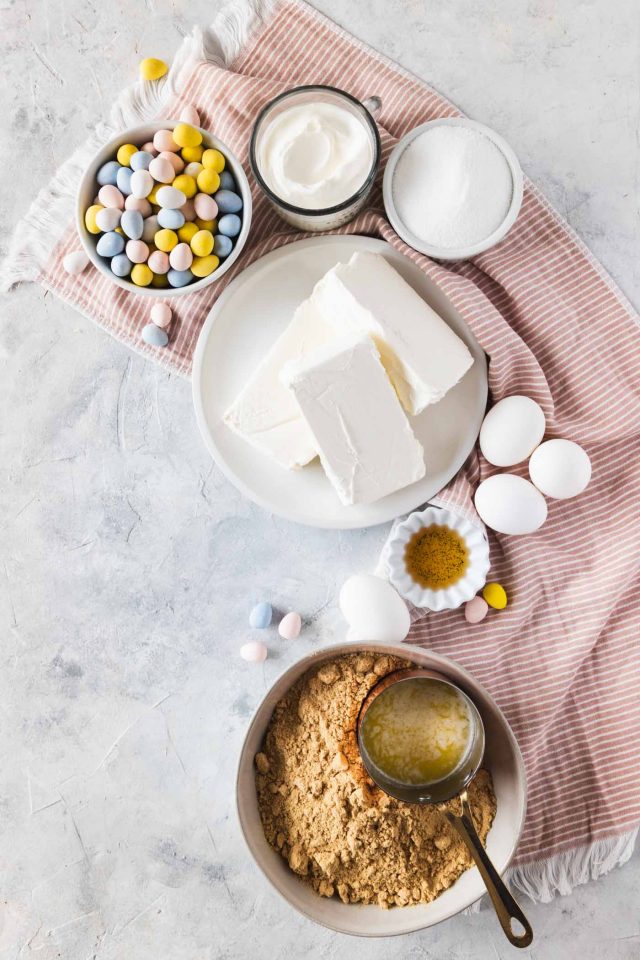
Ingredients
For the crust:
- 2 cup graham cracker crumbs
- 2 tbsp white granulated sugar
- 6 tbsp melted butter
For the filling:
- 24 oz full-fat cream cheese 3 – 8 oz. blocks
- 1 cup white granulated sugar
- 1 cup full fat sour cream
- 3 large eggs
- 1 tbsp vanilla extract
- 2 cup mini Cadburry eggs chopped roughly, plus more for decorating
For the topping:
- 1 cup whipping cream
- 2 tbsp powdered sugar
Instructions
- Bring all of the refrigerated ingredients (cream cheese, eggs, and sour cream) to room temperature.
To make the crust:
- Stir together 2 cups of graham cracker crumbs, 6 tablespoons of melted butter, and 2 tablespoons of white sugar. The mixture should be crumbly and clumpy, but not very wet.
- Grease a 9” or 8” springform pan or a cake pan with a removable bottom. Then, press the graham cracker crust mix into the bottom of it. Create even layer (about one inch) of crust across, making sure to press the sides of the pan.
- Bake the graham cracker crust at 350° for 10 minutes. Then, allow it to cool.
To make the filling:
- Use the paddle attachment on a stand mixer and beat the 3 blocks of cream cheese in a large mixing bowl until they are smooth and creamy.
- Add in 1 cup of white sugar and 1 cup of sour cream.
- Beat the mixture again for a couple of minutes until the mixture is thoroughly combined. Scrape the sides of the bowl with a rubber spatula to be sure that all of the ingredients are getting mixed together.
- With the mixer still running, add 3 eggs one at a time until they are thoroughly mixed in. Add 1 tbsp. of vanilla extract with the last egg.
- Roughly chop 2 cups of mini Cadburry eggs. They will roll when you try to chop them. So I recommend cutting them in half, then chop them roughly.Don’t powderize them. But try to avoid very large pieces of chocolate eggs as these can make the mini egg cheesecake hard to slice neatly. You can also place the Cadburry eggs in a plastic bag, seal it, and use a smooth-sided mallet to smash them.
- Fold the chopped Cadbury mini eggs into the cream cheese mixture. Then, pour it over the graham cracker crust.
To bake:
- Wrap the bottom of the cake or springform pan well with aluminum foil so that it comes up several inches around the bottom of the pan. This is to prevent water from getting into the cheesecake when you bake it in a water bath.
- Place the foil-wrapped cheesecake pan in a large baking or roasting dish.
- Put the dish with the cheesecake in it on the center rack of the oven heated to 350°.
- Pour a few cups of water into the baking dish until there are between 1 and 2 inches of water up the side of the cheesecake pan.
- Bake the mini egg cheesecake for 50 minutes to an hour. To check if it is done, shake the pan very gently. The cheesecake should be mostly firm with a slight (barely) jiggle in the center, and the top should look dry. There may be a few browned spots, but you don’t want the top to be burnt.
- Turn off the oven and leave the door open, leaving the cheesecake in for about an hour so that it cools slowly.
- Remove it from the oven after the hour is up and let it sit at room temperature for another hour before covering it well and refrigerating the Easter egg cheesecake overnight. It won’t be completely set up and solid until it has been chilled. Do try not to decorate or cut into it too soon!
To make the topping:
- Use the whisk attachment on your mixer, combine 1 cup of whipping cream with 2 tablespoons of powdered sugar in a mixing bowl. Beat, until it is thick, fluffy, and holds its shape on a spoon.
To decorate:
- Use a piping bag and large star tip to create a nest in the center of the cheesecake and nestle a few eggs in it.
- Add a few more whipping cream stars and sprinkle a few extra crushed mini eggs and whole eggs over the top. You can pile the whipped cream and eggs high. Or spread it in a smooth layer (like frosting) and add eggs to the top of your mini egg cheesecake.
Nutrition
Notes
- Makes one 8” or 9” cheesecake or about 12-16 slices.
- Check out our water bath tutorial for additional tips to baking a cheesecake.
- If baking in an 9-inch springform pan, you may need to increase the bake time to 65–75 minutes. Keep an eye on the cheesecake, and check for doneness by gently jiggling the pan. The edges should be set while the center still has a slight wobble.

Don’t forget to share your mini egg cheesecake with us on Instagram using the hashtag #sugarandclothloves. Looking for more quick and delicious recipes? Find them all right here!
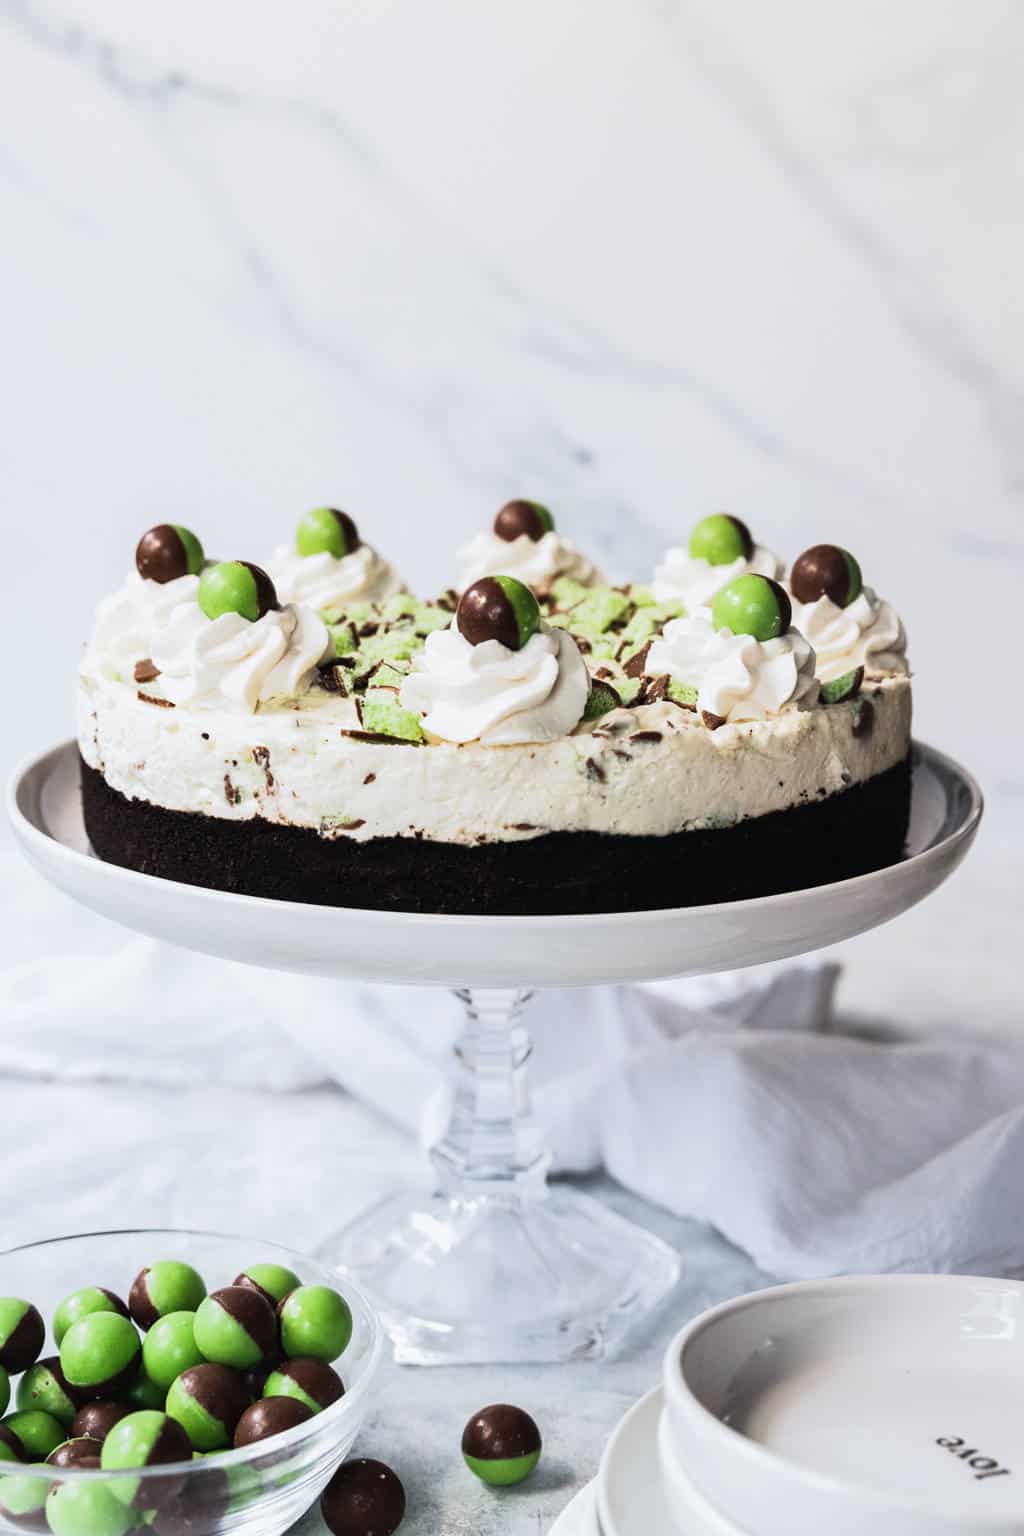
No Bake Mint Aero Cheesecake Recipe
This easy no-bake Mint Aero cheesecake is creamy, light, and…

26 Edible Flowers Recipes
Sharing a collection of edible flowers recipes for you to…
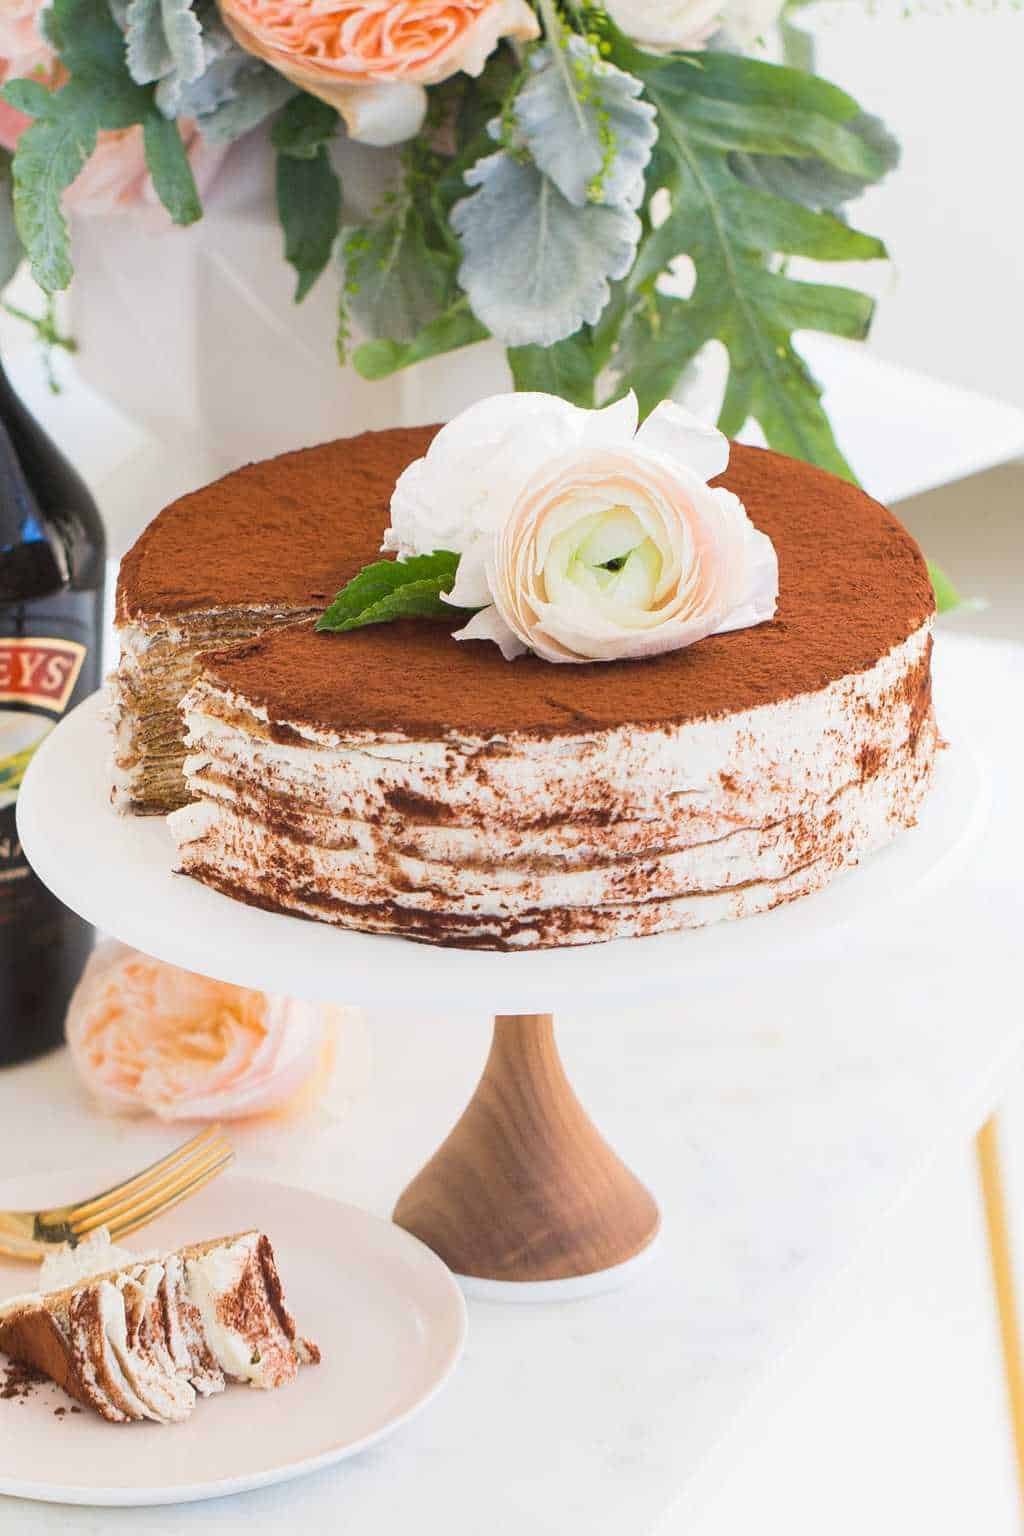
Baileys Tiramisu Crepe Cake Recipe
Infused with Baileys and using crepes as a twist on…
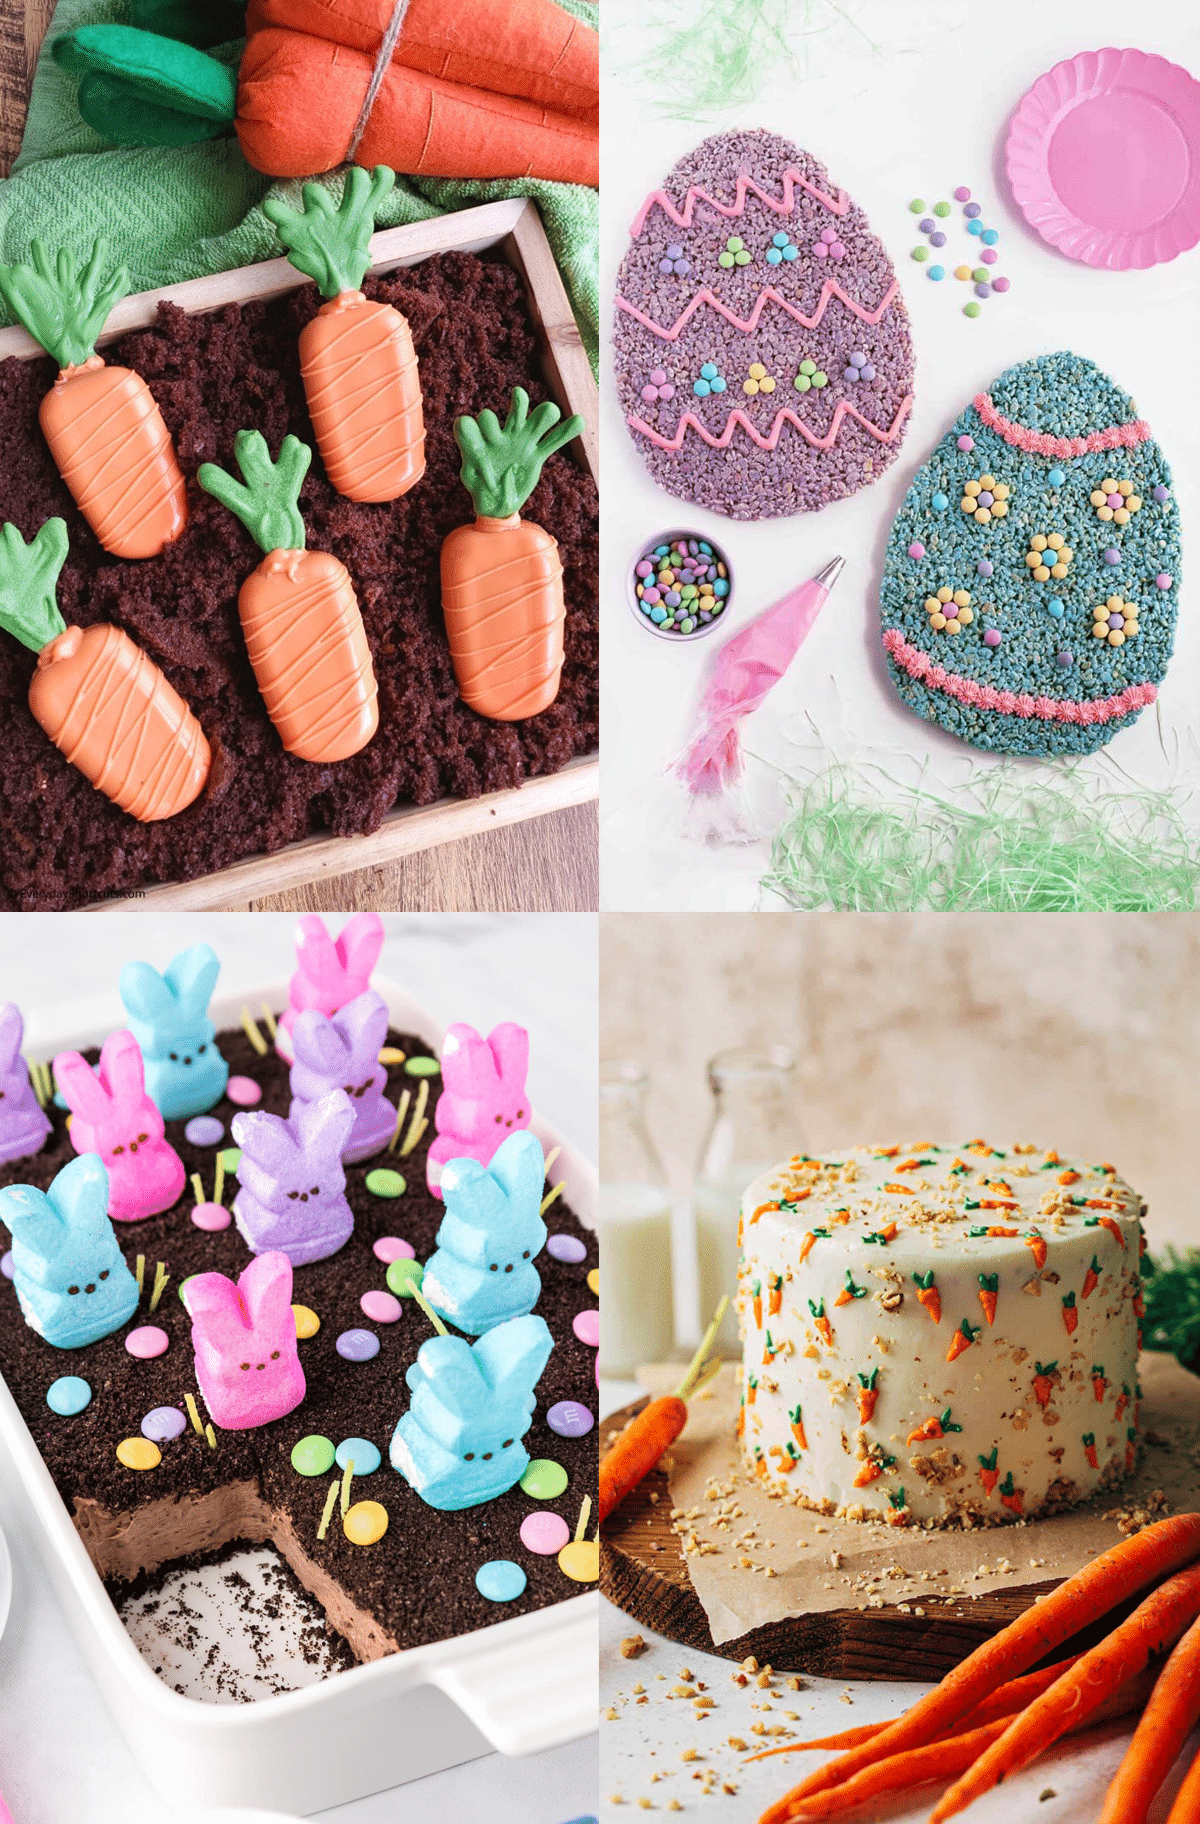
40 Delicious Easter Desserts to Sweeten Your Celebration
Get inspired by these festive and easy-to-make Easter desserts that…
Continue Reading 40 Delicious Easter Desserts to Sweeten Your Celebration
Please note that we may earn a commission for some of the above affiliate links. However, products featured are independently selected and personally well-loved by us!
Great recipe but it took 90 minutes in the oven for me… at 60 minutes it was still raw.
Hi Megan! We are so glad that you liked the recipe! Thanking for giving us feedback on your bake time. It’s so interesting how so many factors can affect the bake time. Thankfully, you were able to see that your cheesecake needed more time. We made a notation in our recipe because it does make a difference when using an 8-inch or 9-inch pan. We hope you had a great Easter!
So happy to hear, Danielle!
I made this cake but I think it’s important to note that you probably need an extra wide/ large aluminum foil if you want to water bath it. Mine got wet :(
Hi Willa! Oh no! Hopefully, it tasted good despite being wet. We actually linked our water bath how to into the post for additional tips on baking cheesecake in a water bath. Yes, you definitely need an extra wide fold pan and should really wrap the cheesecake pan. We typically get one that it 2″-3″ wider than the cheesecake pan. Here is the water bath tutorial that we just included: https://sugarandcloth.com/how-to-make-a-water-bath-for-cheesecake/
Can this recipe be made into cupcakes
Hi Reine! Wonderful question that has never been asked before! And honestly, we have never tried to make them into mini “cupcakes”. We did find a great article on adjusting cheesecake sizes here: https://www.lifeloveandsugar.com/guide-to-adjusting-cheesecake-sizes/. We definitely think it is possible. You may have to really watch the cheesecake closer so that it does not over-bake. Because you will be using this in a cupcake pan with a liner, then you do not need the water bath. The bake time would probably be more than half of the original. The great thing is that there is no filling. Please let us know how it turns out!
Hi Reine! We don’t see why not since there are lot of cheesecake cupcake recipes that call for the same ingredients. The cook time would be less though so you would need to keep an eye on the cupcakes. You also don’t need a water bath as you would for a whole cheesecake. But it is ideal to keep a pan or casserole of hot water underneath the cupcakes as they bake. This way, you still have a humid environment in your oven and you’ll avoid drying out the cheesecake cupcakes. Please let us know how it turns out if you do try!
Very nice recipe
thanks for this information I got a lot of benefits
This is such a fun and adorable Easter egg treat!
I baked this cheesecake at 350 for 50 minutes. The top was perfect. Lightly browned around the edges and slightly jiggly in the center. I have baked many cheesecakes. Followed instructions to cool in oven then on counter then refrigerate. When I cut into the cake for my Easter dinner dessert… it was completely uncooked inside. I had nothing to serve my guests. It went into the garbage. All those ingredients wasted. Very disappointed. Can’t help but think that the cooking time needs to be adjusted.
Hi Susan! We are sorry to hear that your cake turned out undercook! We did notate the bake time to be 50 minutes to an hour. But you did mention that you checked the top and the center (which are the correct verifications). Perhaps the center jiggled a tad too much and just needed a few more minutes in the oven? Because this cake has a filling, it does need to be more firm during the bake test. This is unfortunate since the cook time was perfect for us and we haven’t heard of any issues. Thank you for letting us know and we will keep an eye out if anyone encounters the same! XOXO
Hello! I have a 9inch pan but not another pan bigger to form the water bath to bake it!! Can I skip the water bath? Thanks
Hi Jess! Yes, you can skip the water bath. However, we don’t recommend skipping the water bath when making cheesecake, especially this particular recipe because it does have a filling. The water bath methods helps the cheesecake from over-baking, curdling, cracking and having an imbalanced top. You can buy a large foil pan to hack a water bath. If so, place the pans on top of a cooking sheet so it’s more sturdy in the oven. Hope this helps!
Great post. Thanks for sharing.

Absolutely gorgeous! I love your recipes and this one is a show stopper!
Thanks, Joan! It’s always fun for us to share the “festive” recipes since we tend to up the game and make/decorate them extra pretty.
This is such a fun and adorable Easter egg treat!!
Thanks, Toni! We’ll take any excuse to use chocolate eggs in a recipe!
We love cheesecake here at the house! Definitely a family favorite! Can’t wait to give this cheesecake a try! So excited!
Let us know how it turns out, Beth! XOXO