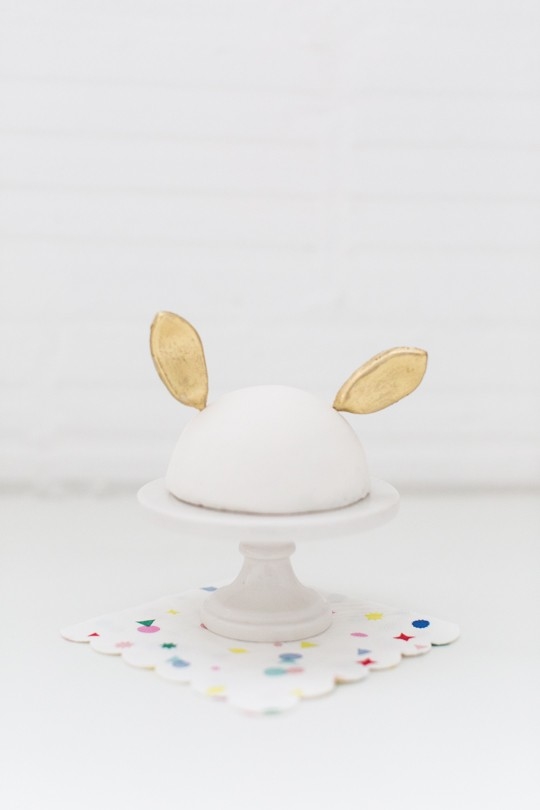
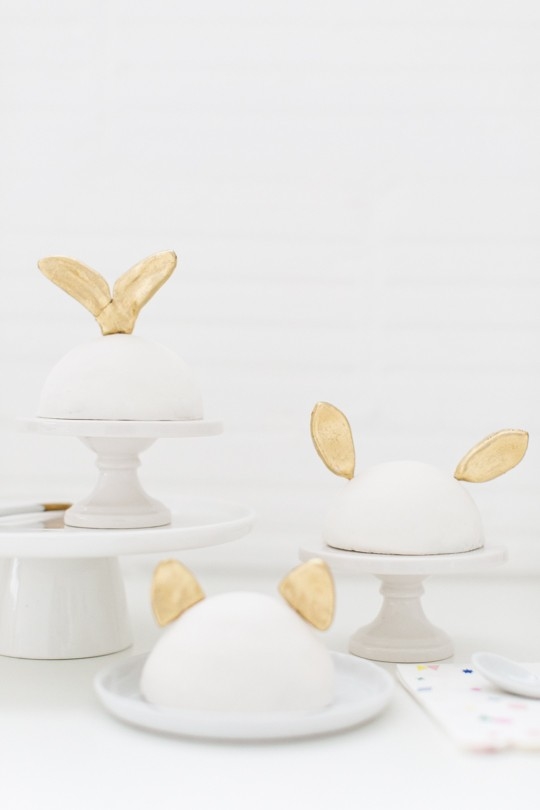
DIY Animal Ears Cake Toppers
Make your cake roar with charm! Learn to create adorable fondant Animal Ears Cake Toppers with this easy DIY tutorial, perfect for animal-themed parties.
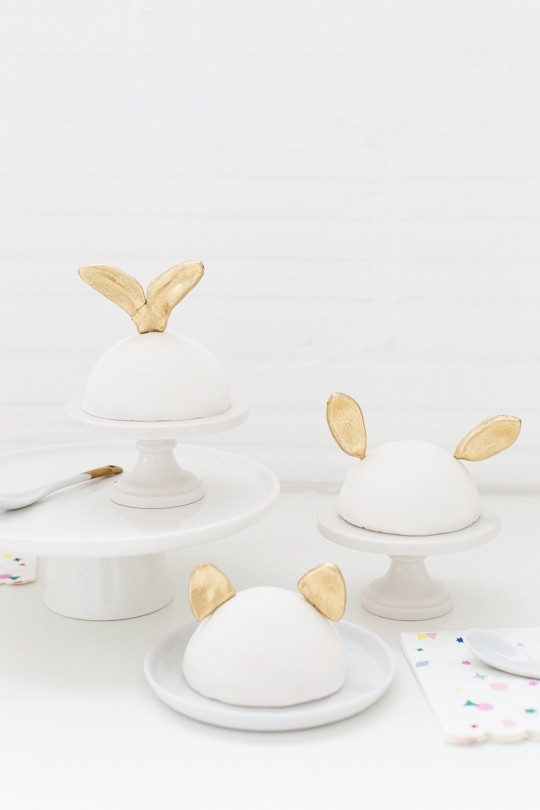
Add a playful twist to your next cake with these adorable fondant DIY Animal Ears Cake Toppers! Perfect for birthday parties, baby showers, or any animal-themed celebration, these fondant toppers bring fun and personality to your dessert.
Once upon a time, my first child was my fur kid, Thomas. We go way back to my college days when I rescued him from the middle of a four-lane road. And he was just big enough to fit in the palm of my hand. I bottled-fed him, made my dad extremely angry for having a pet in our college rental house, and got super attached. And now here we are almost 7 years later, with another birthday just around the corner!
He’s spoiled as all get and refuses to eat any other wet food besides Fancy Feast’s Gravy Lover’s and Broths. He even has his own fancy DIY litter box Cover and DIY pet pillow Being that I’m obsessed with Thomas, I threw him a party for his 7th birthday and created these DIY Animal Ear Cake Toppers.
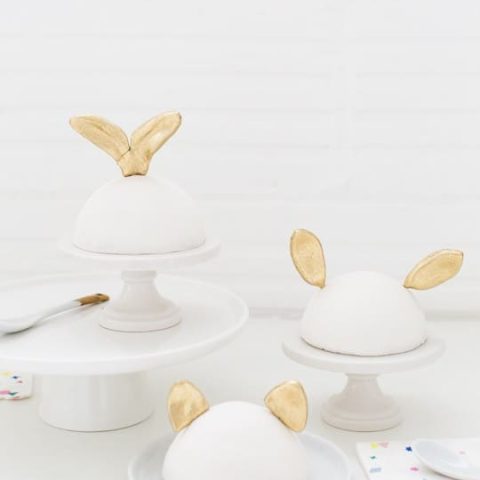
With a few simple tools and easy-to-shape fondant, you can create charming animal ears that stand out beautifully atop any cake. Our tutorial will guide you step-by-step in crafting fondant ears for various animals, from cute cat ears to playful bunny shapes. It’s an easy way to turn an ordinary cake into a memorable, whimsical DIY cake topper centerpiece!

Materials and Tools Needed for DIY Animal Ears Cake Toppers
- Fondant or gum paste — To use for molding the shapes
- Toothpicks or mini wooden dowels
- Mini leaf cookie cutter — To create bunny ears and deer ears
- Cat cookie cutter
- Edible gold dust — Optional to color your ears. You can also opt for gel food color for painting.
- Clear lemon or almond extract — To mix with edible gold dust or gel food color for a smooth and even paint effect. This ensures the color adheres without smudging.
- Food dedicated paint brush
- Rolling pin
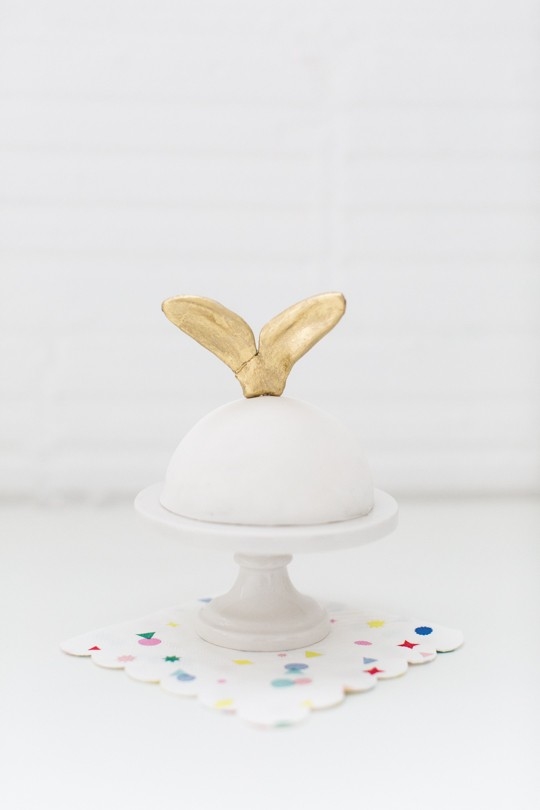
How to Make Bunny Ears
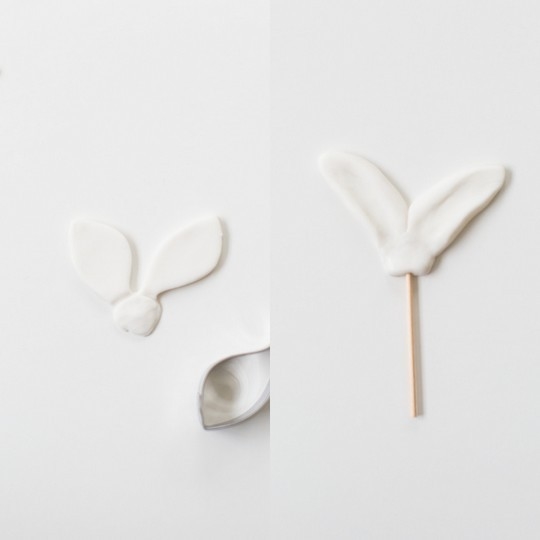
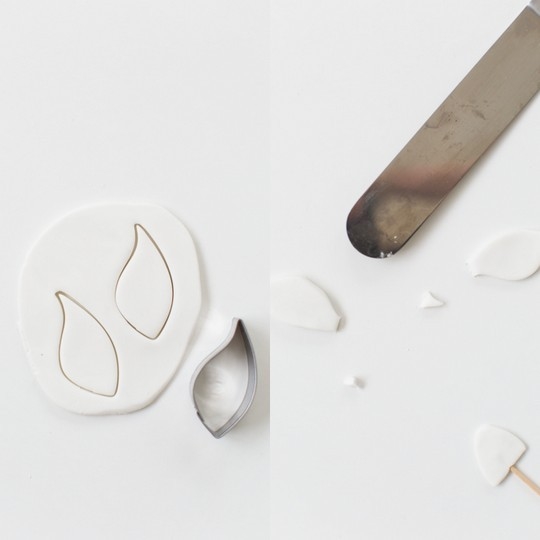
1 — Roll out white fondant to about 1/2-inch thickness. Use a leaf-shaped cookie cutter to cut out two ear shapes for the bunny ears.
2 — Roll a small ball of fondant to serve as the base to attach both ears.
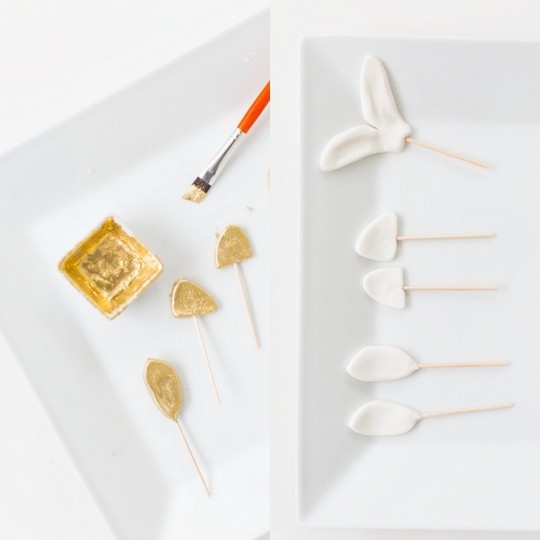
3 — Press the bottom of each ear shape onto the fondant ball, blending the seams gently with your fingers to ensure a smooth connection. Insert a toothpick into the bottom of the fondant ball to secure the ears in place on the cake.
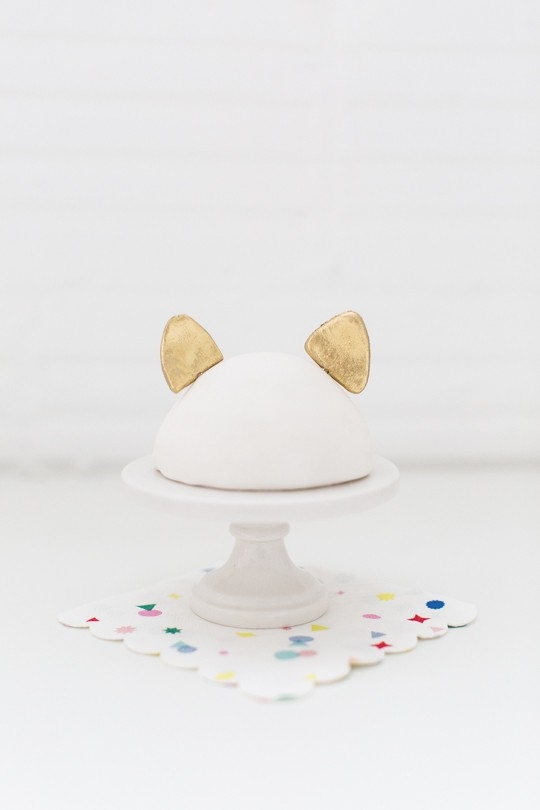
How to Make Cat Ears
1 — Roll out white fondant to about 1/2-inch thickness. Use the pointed edge of a cat silhouette cookie cutter to cut out two small triangle shapes for the ears. If you don’t have a cat-shaped cutter, use a leaf cutter or simply shape small triangles by hand.
2 — Insert a toothpick into the bottom of each triangle to help secure the ears when placing them on the cake.

How to Make Deer Ears
1 — Roll out white fondant to about 1/2-inch thickness. Use a leaf-shaped cutter to cut out the base.
2 — Gently smooth and round the edges of each shape with your fingers, then make a straight cut across the bottom to create a flat edge.
3– Insert a toothpick into the bottom of each shape to secure them for placing on the cake.
Turning Your Ears into Animals Cake Toppers
1 — Now that your shapes have been created, allow the fondant ears to dry for at least 24 hours so they harden and keep their shape. For extra dimension, place them on a curved plate while drying.
2 — Once the ears have fully hardened, mix a small amount of edible gold dust with clear extract and paint it onto each ear for a touch of sparkle. Let the paint dry completely.
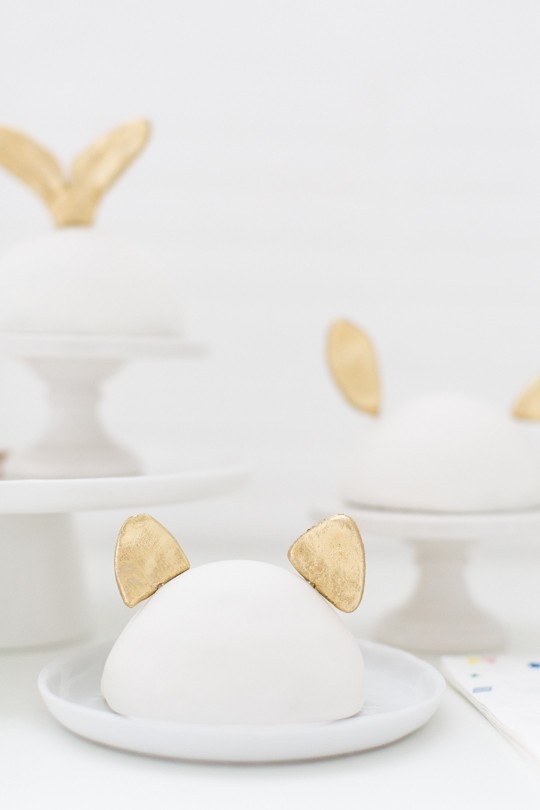
3 — Insert the ears into mini fondant-covered cakes, and your cake toppers are ready to shine at the party!
Animal Cake Toppers Tutorial and Tips
- Use Tylose Powder for Fondant: If you’re using fondant, adding a pinch of Tylose powder can help it dry faster and harden better, making the ears sturdier.
- Work on a Non-Stick Surface: Roll out your fondant on a silicone mat or a lightly greased surface to avoid sticking and tearing.
- Prevent Cracks with Shortening: If the fondant starts to crack while shaping, gently knead in a tiny amount of shortening to make it more pliable.
- Let Toothpicks Dry in Place: After inserting the toothpicks, let the fondant shapes dry with the toothpicks already in place. This prevents damage from trying to insert them later.
- Create Texture for Realism: For added detail, use the back of a knife or a sculpting tool to add subtle texture lines on the ears for a realistic look.
- Experiment with Shape: If you’re aiming for more dimension, try shaping the ears on crumpled paper or an egg carton to create natural curves.
- Plan Ahead for Drying Time: Make the ears at least a day or two in advance to ensure they have enough time to fully harden before adding to the cake.
More DIY Cake Topper Ideas
Wouldn’t these would be so cute for themed animal or Disney parties, vanilla cupcakes, or even bunny ears for Easter? For more fun cake topper projects, check out our related posts from our archive –
- Balloon Garland Cake Toppe
- Paper Flower Cake Topper
- Fringed Love Cake Topper
- Ghost Peeps Dessert Toppers
DIY Animal Ears Cake Toppers
Equipment
- Mini leaf cookie cutter
- Cat cookie cutter
- Rolling pin
- Food safe paintbrush
- Toothpicks or mini wooden dowels
Materials
- Fondant or gum paste to use for molding the shapes
- Edible gold luster dust
- Clear lemon or almond extract
Instructions
To make bunny ears:
- Roll out white fondant to about 1/2-inch thickness. Use a leaf-shaped cookie cutter to cut out two ear shapes for the bunny ears.
- Roll a small ball of fondant to serve as the base to attach both ears.
- Press the bottom of each ear shape onto the fondant ball, blending the seams gently with your fingers to ensure a smooth connection. Insert a toothpick into the bottom of the fondant ball to secure the ears in place on the cake.
To make the cat ears:
- Roll out white fondant to about 1/2-inch thickness. Use the pointed edge of a cat silhouette cookie cutter to cut out two small triangle shapes for the ears. If you don’t have a cat-shaped cutter, use a leaf cutter or simply shape small triangles by hand.
- Insert a toothpick into the bottom of each triangle to help secure the ears when placing them on the cake.
To make the deer ears:
- Roll out white fondant to about 1/2-inch thickness. Use a leaf-shaped cutter to cut out the base.
- Gently smooth and round the edges of each shape with your fingers, then make a straight cut across the bottom to create a flat edge.
- Insert a toothpick into the bottom of each shape to secure them for placing on the cake.
For all toppers:
- Now that your shapes have been created, allow the fondant ears to dry for at least 24 hours so they harden and keep their shape. For extra dimension, place them on a curved plate while drying.
- Once the ears have fully hardened, mix a small amount of edible gold dust with clear extract and paint it onto each ear for a touch of sparkle. Let the paint dry completely.
- Insert the ears into mini fondant-covered cakes, and your cake toppers are ready to shine at the party!

Don’t forget to share your DIY Animal Ear Toppers with us on Instagram using the hashtag #sugarandclothloves. We always love seeing all of your creations!
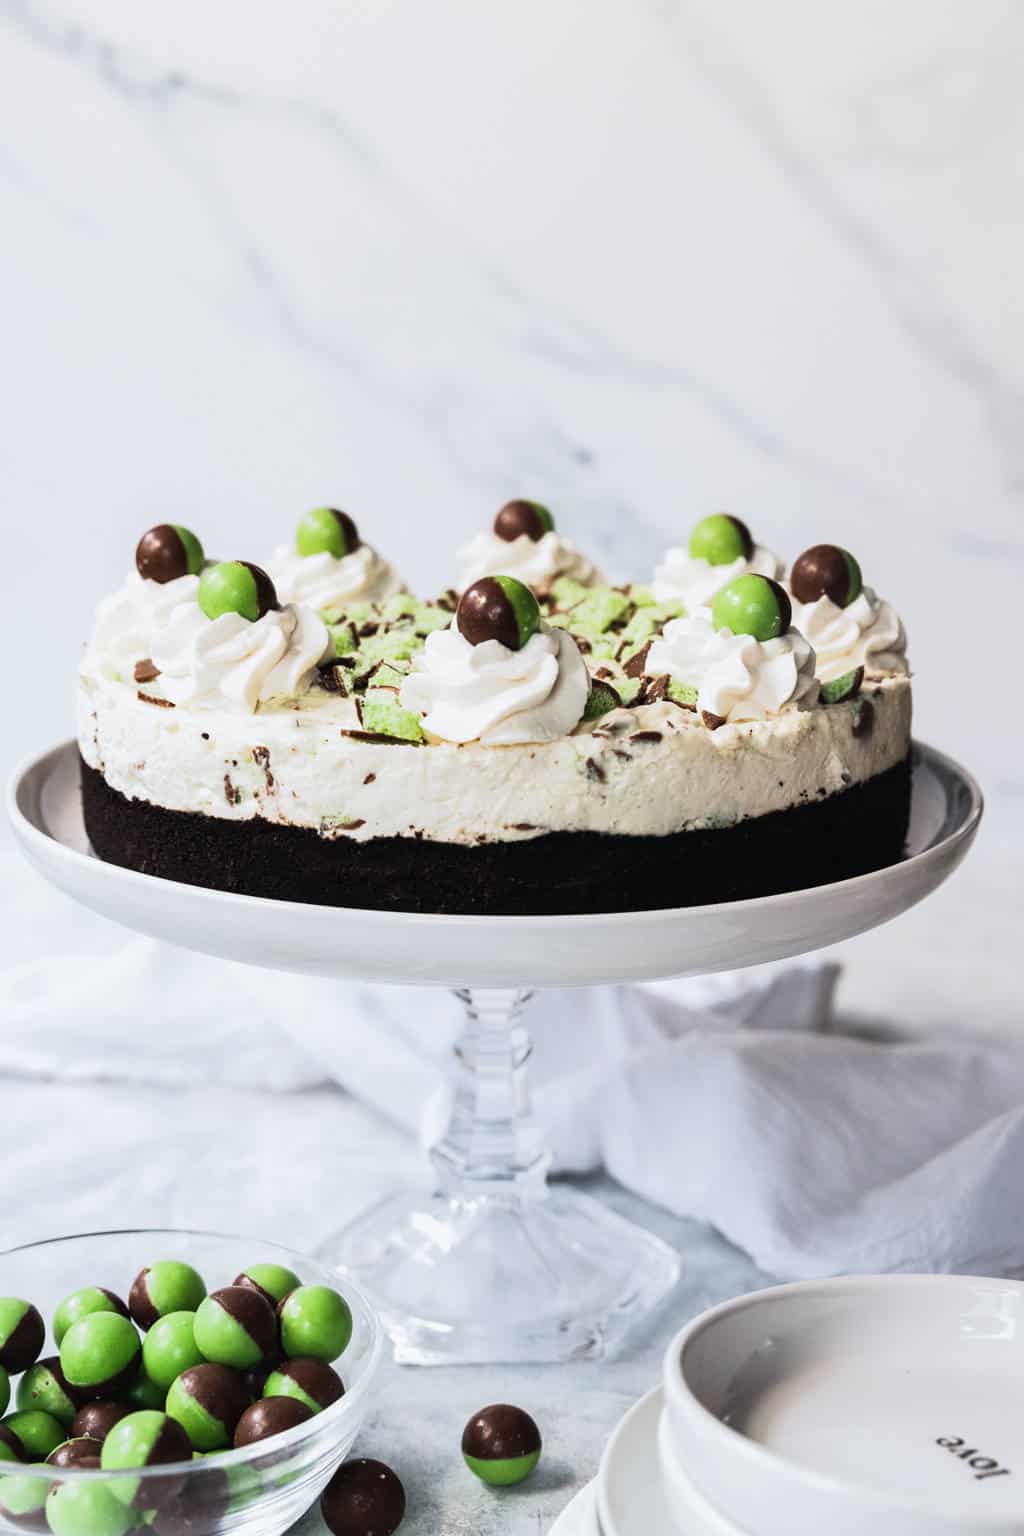
No Bake Mint Aero Cheesecake Recipe
This easy no-bake Mint Aero cheesecake is creamy, light, and…

26 Edible Flowers Recipes
Sharing a collection of edible flowers recipes for you to…
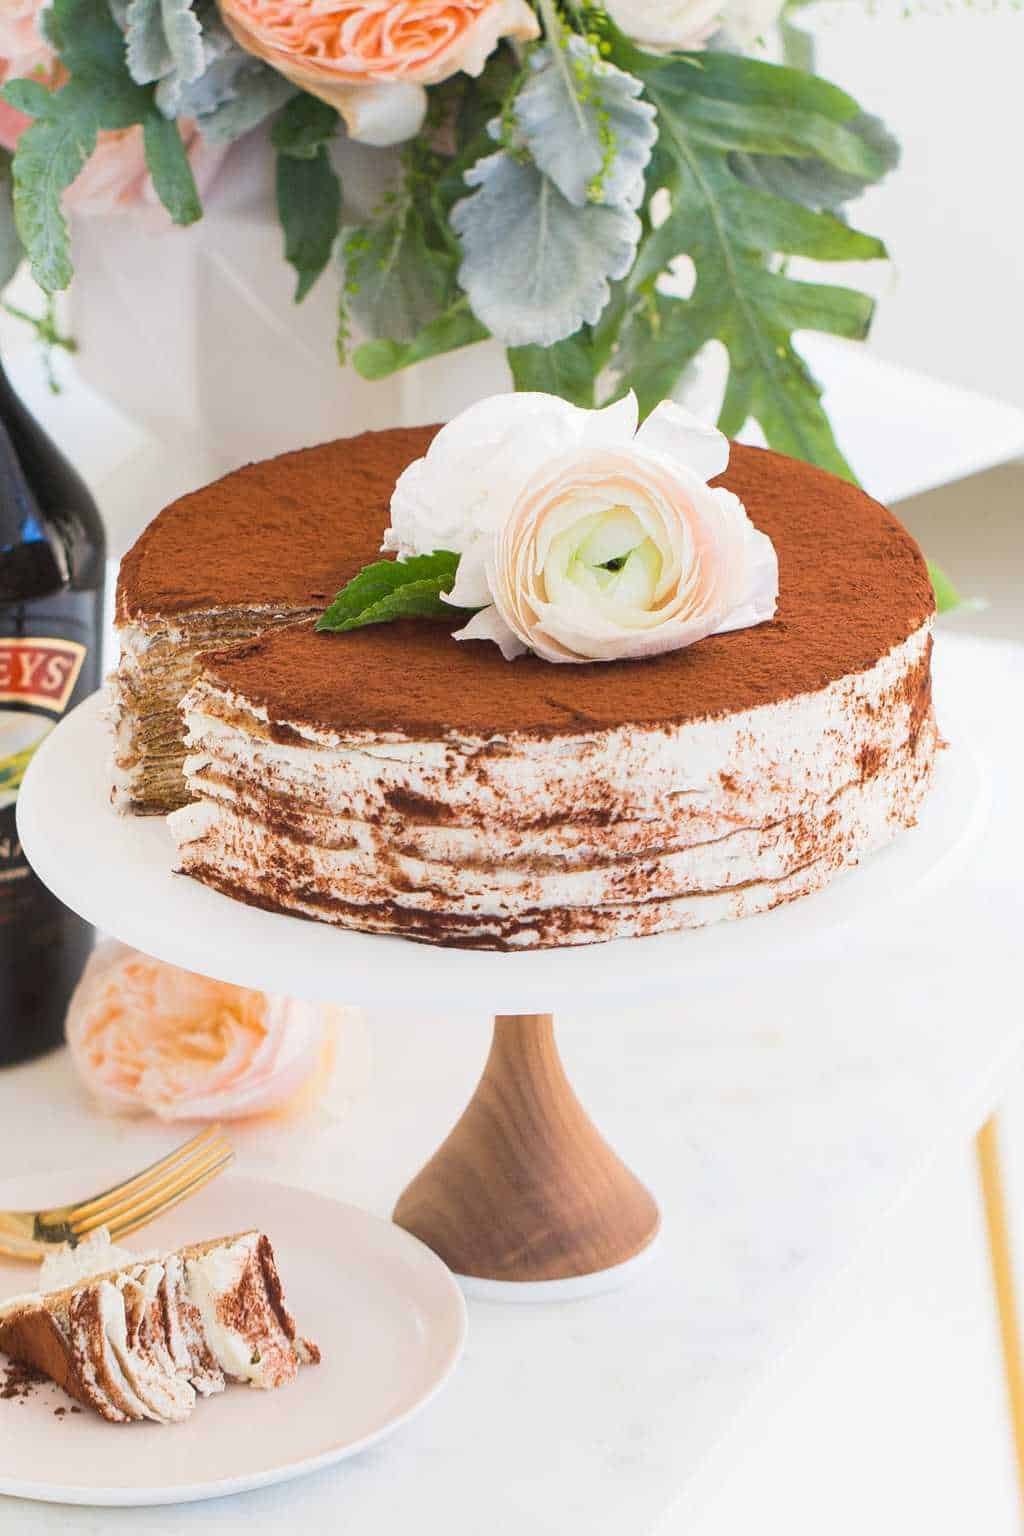
Baileys Tiramisu Crepe Cake Recipe
Infused with Baileys and using crepes as a twist on…
40 Delicious Easter Desserts to Sweeten Your Celebration
Get inspired by these festive and easy-to-make Easter desserts that…
Continue Reading 40 Delicious Easter Desserts to Sweeten Your Celebration
Please note that we may earn a commission for some of the above affiliate links. However, products featured are independently selected and personally well-loved by us!
Breadcrumbs and menus make it simple to return from a single profile back to the main Gurgaon call girls list.
Sections are organized logically, so you never feel lost while reading about Car transport in lucknow.
Nice one
wow nice post
Dazzling DIY creation. Awesome thought and acknowledgment. Much obliged for the instructional exercise. I shared this article on my site. http://www.gurgaoncompanion.com
Hi, I like your all post. You have done awesome execute. Thank you for everything you can provide, it reduced the problem a lot. I want many more details or so from you.
Most of the posts are now not unique, , I sincerely thank you for the things you have done, sure your blog will help more people, but your article is really unique and very helpful. Thanks.
Respected sir/madam,
I have found your article so useful and I have bookemarked your website for further visit. Thanks for
Really So cute !! I like it very much. http://www.shilpamalhotra.com/
So happy to hear that! Thank you! :)
Ashley Ashley Ashley! I think we know what I’ll be making for Vita’s two year birthday cake! Better start now!
Lovely DIY creation. Great idea and realisation. Thanks for the tutorial.
I shared this article on my site.
Super cute idea!!! Love them :)
How cute are these? I love them! Perfect for Easter too!
x Motte
http://mottesblog.blogspot.com/
Ahhh! These are so adorable!! :)
GOSH these are cute!! The bunny ones are perfect for Easter!
Super cute. Love these little cake toppers, Ash.