DIY Color Block Trivets
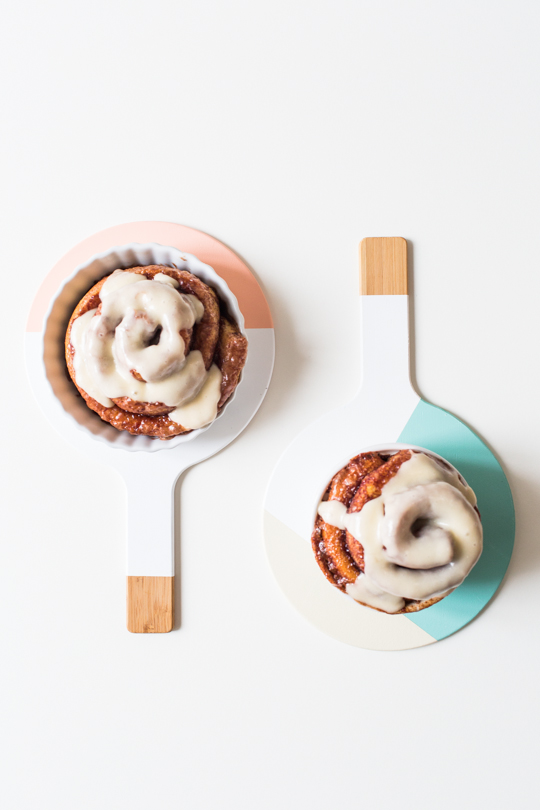
Add a pop of color to the everyday dinner table or holiday settings with the DIY color block trivets! They really solidify that you are, in fact, the hostess with the mostest.
I’m back from West Texas and slowly getting back in touch with reality again. I figured after my “woe is me” posts lately that I should reward you for sticking with me with dessert and bright colors!
So with the holidays coming up, it only means one thing… well, two… endless food and crafting. It’s basically what I live for every year.
To combine my two loves, I made these DIY color block trivets to help you spice up the dining room table or kitchen. They really solidify that you are, in fact, the hostess with the mostest.
Also, this is a perfect pair for DIY Paper Color Block Table Covering.
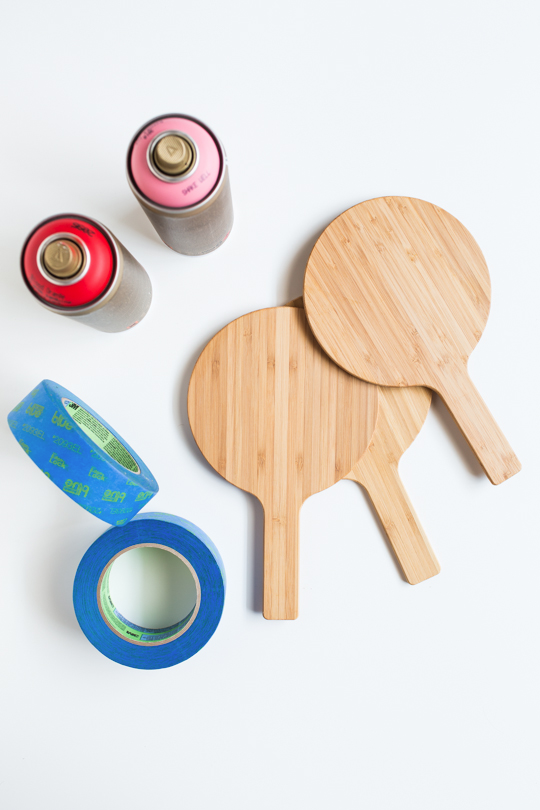
You can make these little guys in whatever colors or shapes you’d like, all you need is a blank slate trivet and your trusty ScotchBlue™ Painter’s Tape.
Pair it with these cute and unique DIY Geometric Coasters and your guests will be blown away.
Materials and Tools Need to Make DIY Color Block Trivets
ScotchBlue™ Painter’s Tape Multi-Surface with Advanced Edge-LockTM Paint Line Protector 2093EL
Heat tolerant paint or spray — I used Montana Gold Acrylic Spray Paints. Make sure that the paint you select is heat resistant up to 120 degrees.
How To Make DIY Color Block Trivets
Step 1 – If you’d like to leave a little of the bamboo showing, first tape off a small section of the end of the handles. And then, paint the trivets with a white base coat.
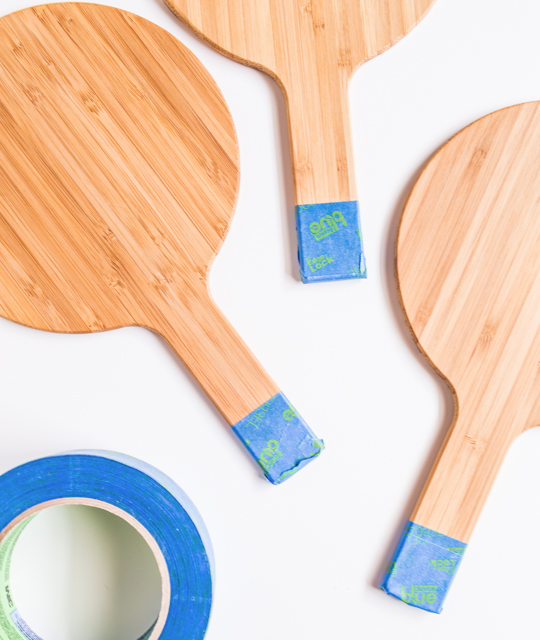
I used Multi-Surface and had great results. But Delicate Surfaces would provide even better results for taping & painting over freshly painted surfaces (24 hours old).
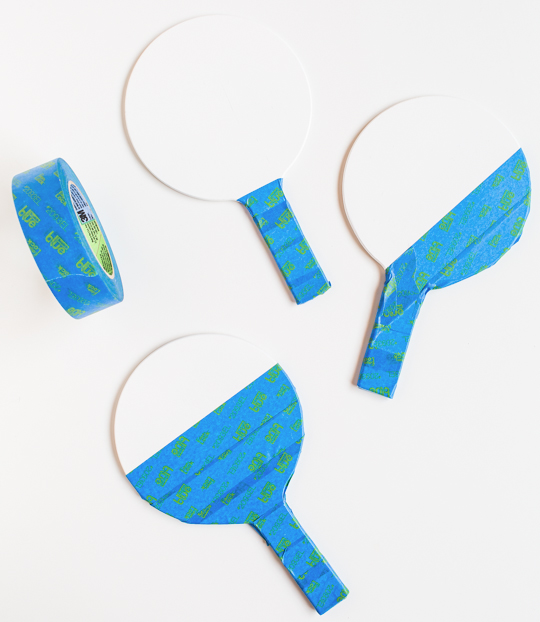
Step 2 – Next, tape off the other remaining sections, leaving only the part you’d like to paint with your next color showing.
Step 3 – Paint your next color on and let dry.
Step 4 – Remove the tape and let that layer dry for an hour or so until completely sealed to the touch.
Step 5 –And then, re-tape and move on to your next layer.
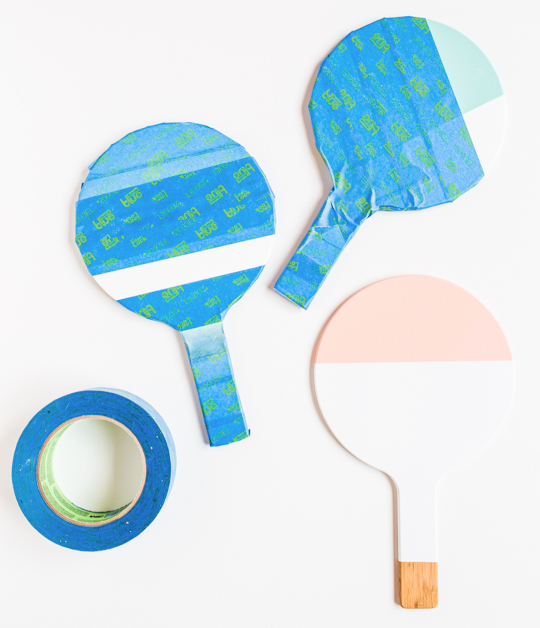
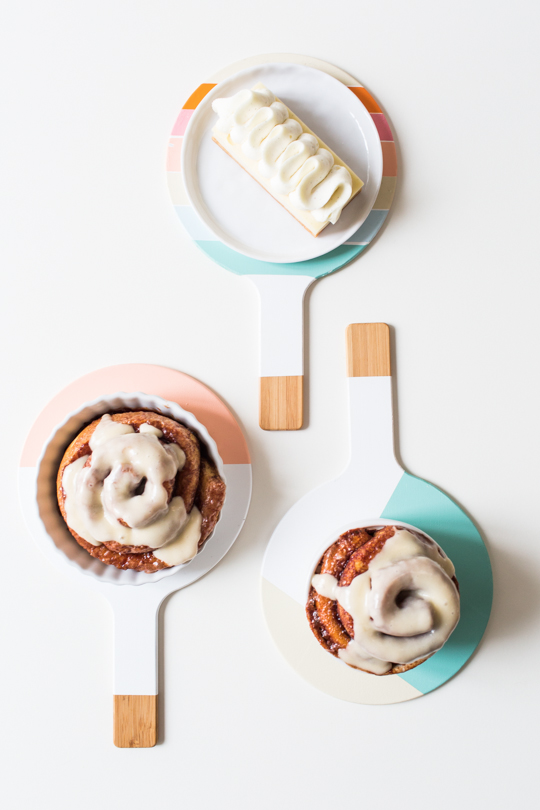
You can create a single color block tip, one or two overlapping colors, or even create stripes one by one across the whole surface.
Once you’re finished, remove the tape and let seal for 24 hours before using.
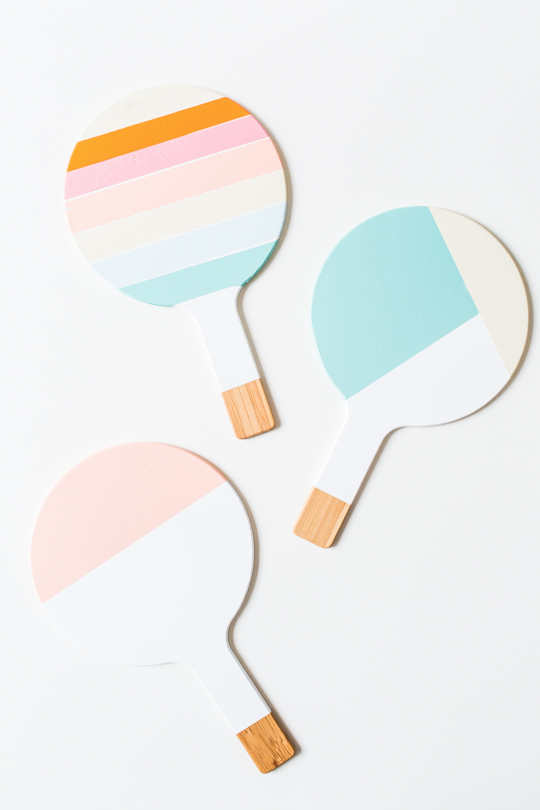

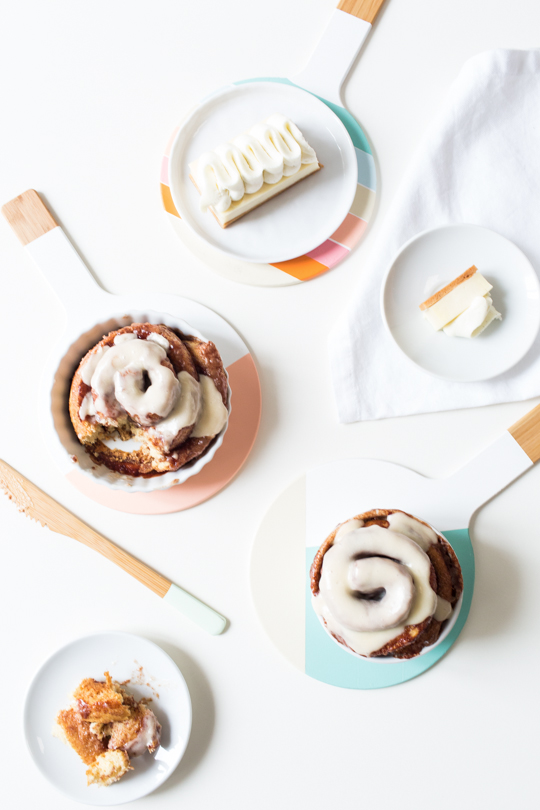
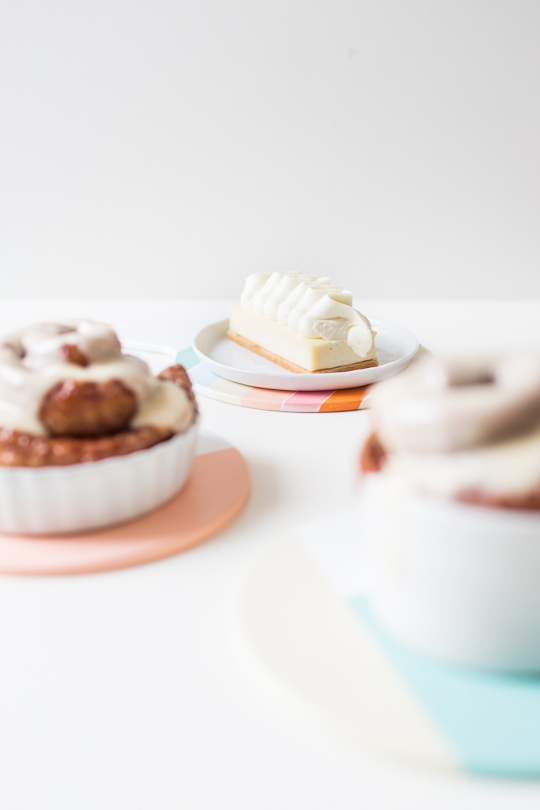
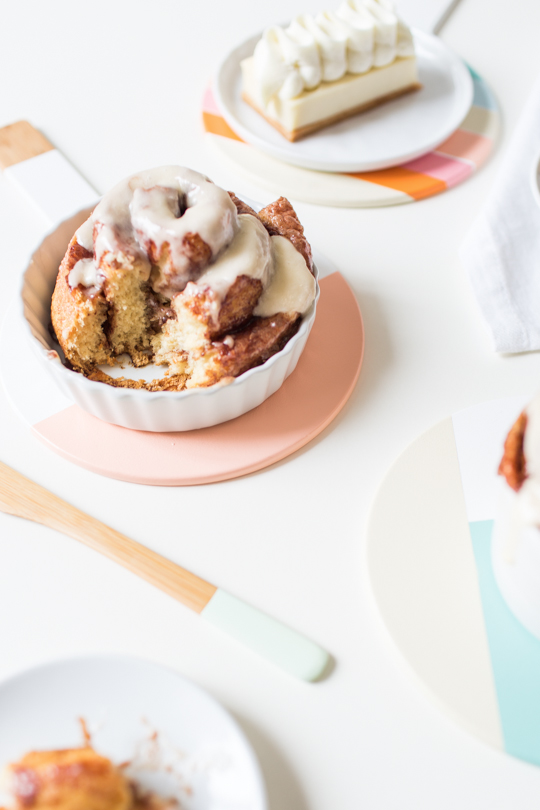
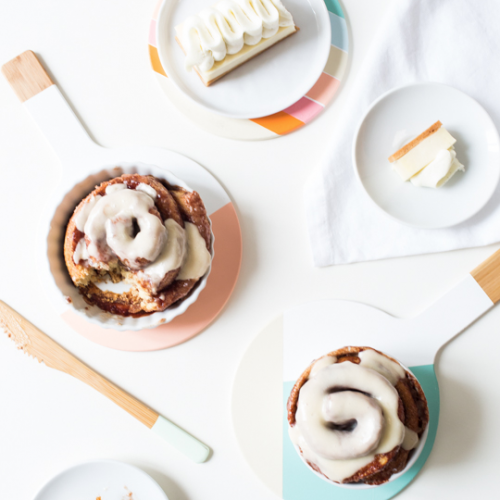
Once your baked goods or casseroles are ready to be served, place them on top of your colorful trivets to keep the table safe and add interest to your holiday tabletops!
Now can we talk about how delicious these desserts were? I think I had a sugar high this entire afternoon, but it was worth it!
I love DIY projects that double as dessert, haha!
Pro Tips in Making DIY Trivets
When it comes to DIY trivets, there are a few key things to keep in mind in order to get the best results.
First, make sure to use the right material.
Second, be precise in your measurements.
And third, take your time in creating the design.
By following these simple tips, you’ll be well on your way to creating beautiful, unique DIY trivets that will add a touch of personality to your home.
More DIY Projects and Ideas
- DIY Hanging Marble Serving Board For Under $5
- DIY Basket Pendant Light – How To Make A Basket Light Fixture
- DIY Mini Wooden Serving Boards
- DIY Footed Display Bowls
This post is sponsored by ScotchBlue™ Painter’s Tape. All opinions are my own and additional products used in the project were selected by me. Thanks for supporting the brands that allow us to bring you bigger and better content!
Pinterest page // Twitter page // Facebook page
DIY Color Block Trivets
Equipment
- ScotchBlue™ Painter’s Tape Multi-Surface with Advanced Edge-LockTM Paint Line Protector 2093EL
- Heat tolerant paint or spray I used Montana Gold Acrylic Spray Paints. Make sure that the paint you select is heat resistant up to 120 degrees.
Materials
Instructions
- If you’d like to leave a little of the bamboo showing, first tape off a small section of the end of the handles. And then, paint the trivets with a white base coat. I used Multi-Surface and had great results. But Delicate Surfaces would provide even better results for taping & painting over freshly painted surfaces (24 hours old).
- Tape off the other remaining sections, leaving only the part you’d like to paint with your next color showing.
- Paint your next color on and let dry.
- Remove the tape and let that layer dry for an hour or so until completely sealed to the touch.
- Re-tape and move on to your next layer. And then, re-tape and move on to your next layer. Once you’re finished, remove the tape and let seal for 24 hours before using.

Don’t forget to share your DIY color block trivets with us on Instagram using the hashtag #sugarandclothloves. We always love seeing all of your creations! Looking for more interior design inspiration? You can find all of our home decor tutorials and ideas right here!


Please note that we may earn a commission for some of the above affiliate links. However, products featured are independently selected and personally well-loved by us!
I’ve read several excellent stuff here. Certainly worth bookmarking for revisiting.
I surprise how so much attempt you place to make any such wonderful informative website.
So glad you stopped by! xo
I had a thought…How about using those cute decorative tapes you see in all the DIY stores, instead of paints? I think maybe they are just colored duct tape, so they would be resistant to heat, right?
The colors are wonderful! Which ones did you use??
This is such a great idea!
thanks for sharing!
preppyandfunny.wordrpress.Com
these are super cute! not to mention the cinnamon rolls!
x Stephanie
SundayswithStephanie.blogspot.com
Cute :)
http://www.milicakrstic.com/milicas/happiness/
This is gorgeous, start to finish! I love the DIY, and the photography and styling makes me swoon. So good!!
They are so pretty, it’s a real challenge.
Love them… gonna pin ’em ;-) Enjoy the weekend!
These are great, love the colours you chose.
These are gorgeous! I love them.
These are so stinking cute! Thanks for sharing!
You are way too clever. Love it!
These are so cute!! Per usual ;)
Holy cannoli, Ash! These are so gorgeous. I agree with Brittni, the shape is amazing and those colors! Hittin’ it out of the park.
These are amazing, Ash! I love the colors and I love, love, love the shape. Also…those cinnamon rolls look seriously delicious. Hope you have a good weekend.