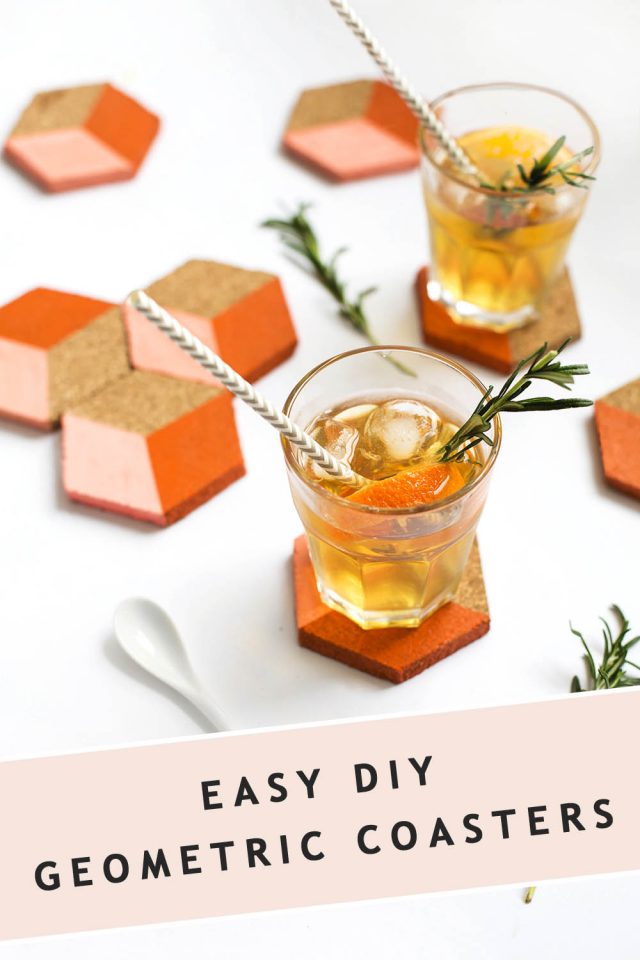
Geometric DIY Cork Coasters
These Geometric DIY Cork Coasters are one of our most popular home decor posts of all-time, so you’re in the right place for a quick weekend craft project or gift idea!
Hello, fellow DIY enthusiasts! Teri of the Lovely Drawer here!
Today’s project is oh so simple but has maximum impact for entertaining or just a casual rendezvous over tea for that matter.
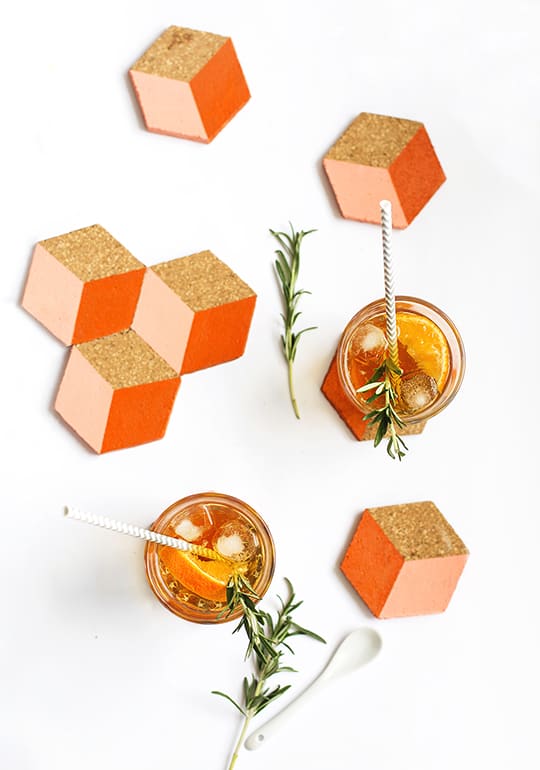
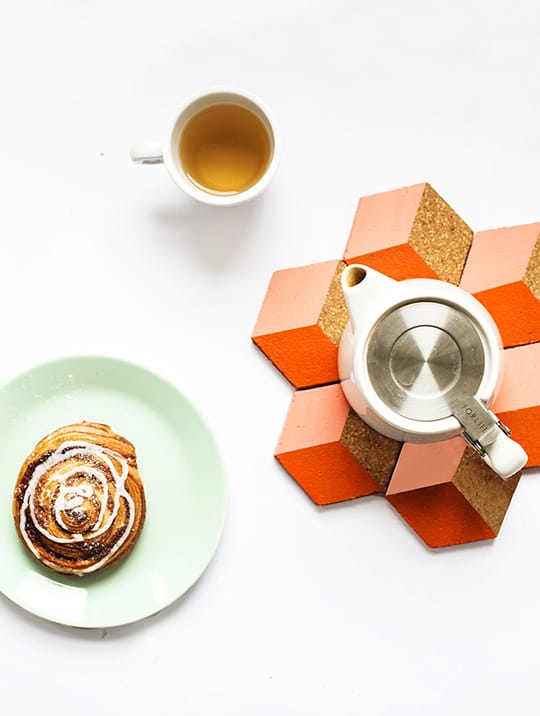
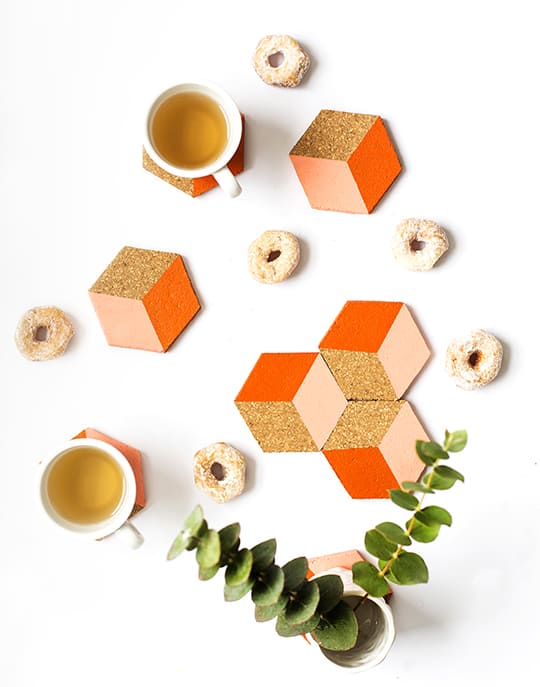
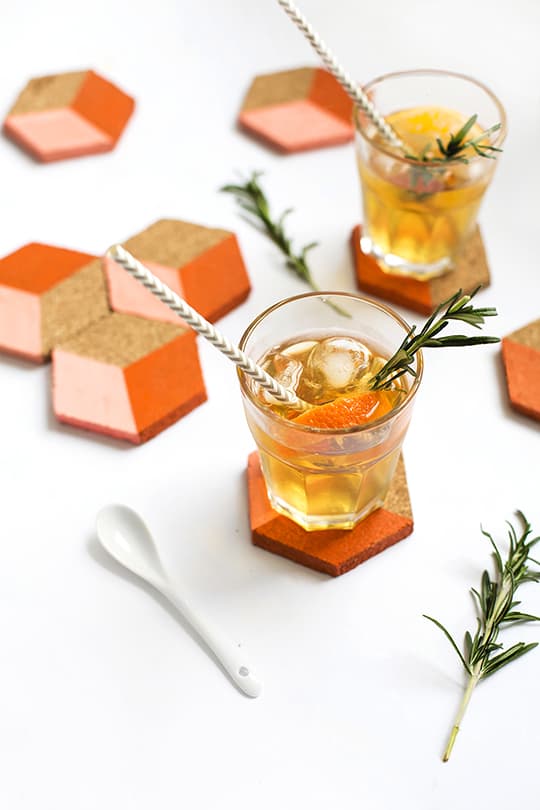
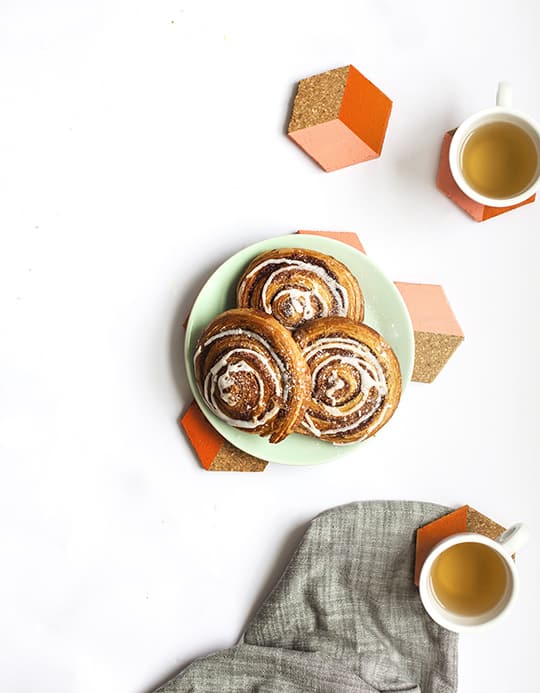
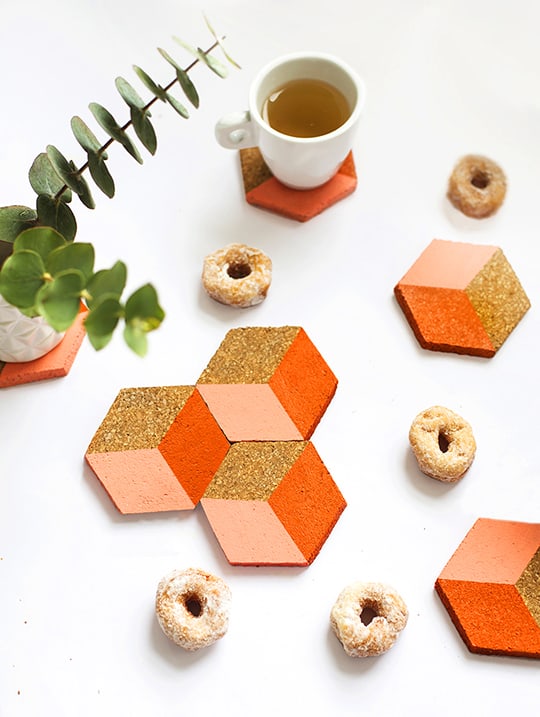
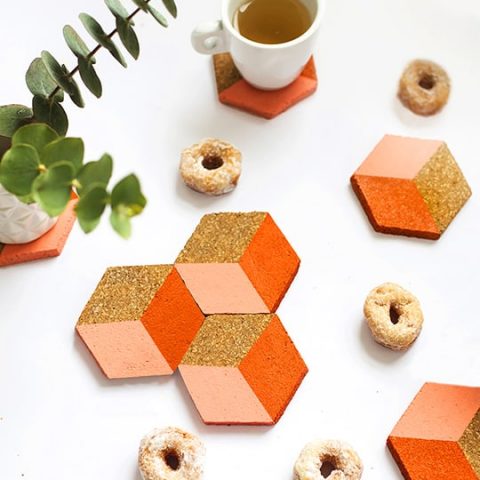
These Geometric DIY Cork Coasters pack a punch and can be used individually or slotted together to create a patterned trivet for serving.
It’s basically the cutest (and easiest) puzzle you’ll ever see!
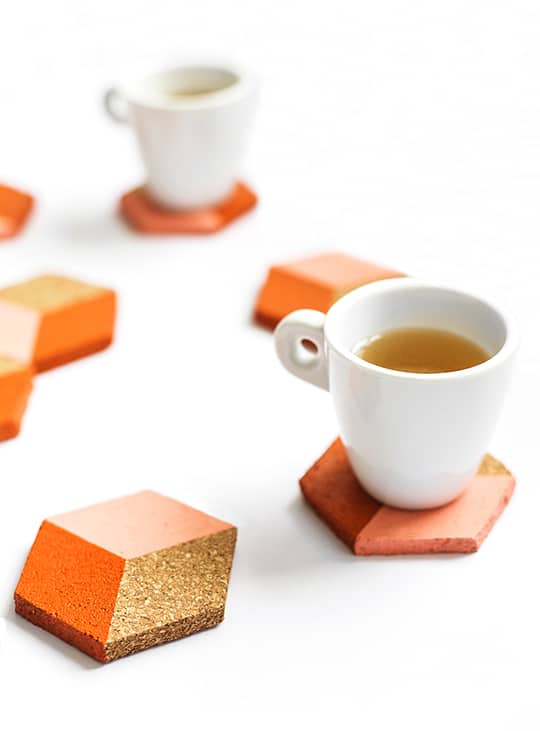
Coasters can be dull, but these will add a pop of custom color to your table. And I can vouch that once you’ve made one, it’s absolutely addictive!
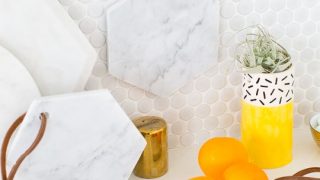
Plus, these are extra unique with its hexagon shape. And of course, judging from our previous DIY’s, we have a thing for hexagons like with our Hexagon DIY Leather Vanity Trays and Hexagon DIY Marble Serving Boards.
They also make great gifts for the holiday season too.
Why not package up a stack with a matching ribbon and spread some patterned cheer?
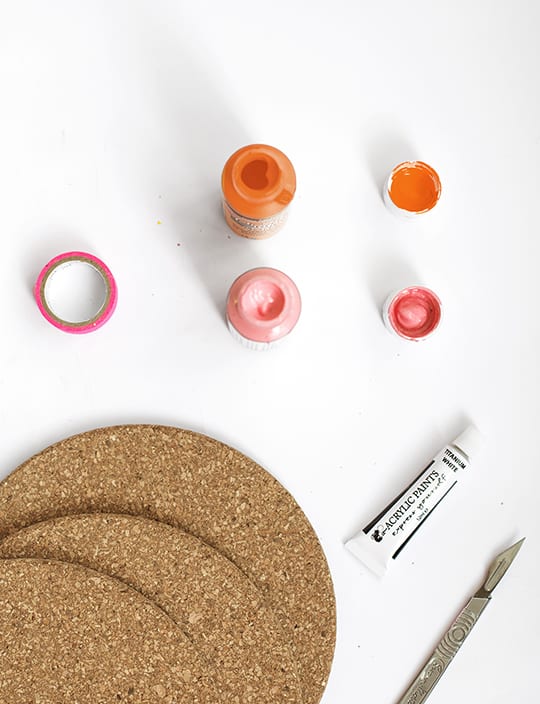
Materials and Tools Needed to Make DIY Geometric Coasters
PDF template — To make the whole tutorial even more straightforward, I made a downloadable scaled template for you to use.
Craft paint – In 2 colors or mix your own.
Cork tiles 1/4″ thick — I used cork tiles that are 1/3″ inch thick as a base to make sure the coasters didn’t curl up at the edges. But anything above 1/4 of an inch thick should be fine.
Paint brush
Cardstock
Pen
Optional: Mod Podge in matte — Or any other water based sealer to protect your coasters
Home Decor DIY Idea | How to Make Easy DIY Geometric Coasters
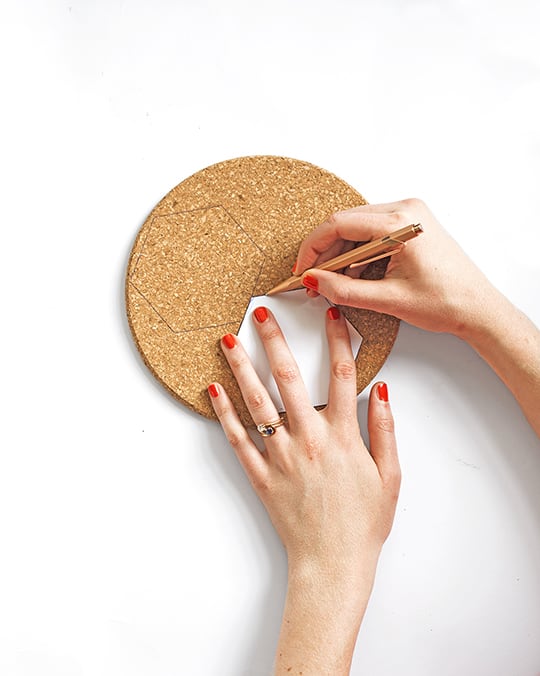
1 — Start by printing out the hexagon template onto card and then cut around the outside with a scalpel/craft knife.
Use this to draw around with the pen, onto your cork sheets.
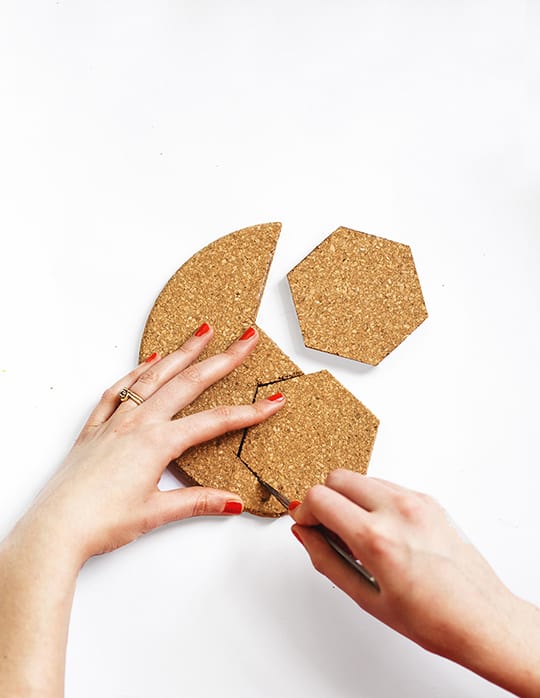
2 — Cut the hexagons out using the scalpel/craft knife. Repeat this step for each coaster. Make sure the blade is sharp otherwise you’ll get rough edges.
3 — Now mask off an area that’s equivalent to a third of the hexagon with the washi tape.
Follow the photo, taking the tape from the outer points to the inner point. You can measure where the middle is to start with if you’d prefer.
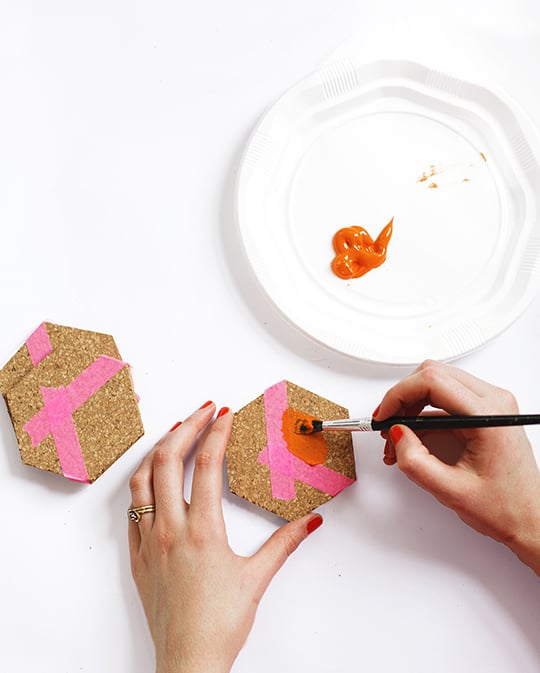
4 — With this shape taped out you can get painting the third of the hexagon that’s exposed.
You will more than likely need two coats to get a vibrant color but make sure you leave each coat to dry before applying the next.
5 — Remove the the tape once dry and then mask out another third with some more tape.
If you make sure that each color stays on the same side of the shape then the colors will fit together perfectly.
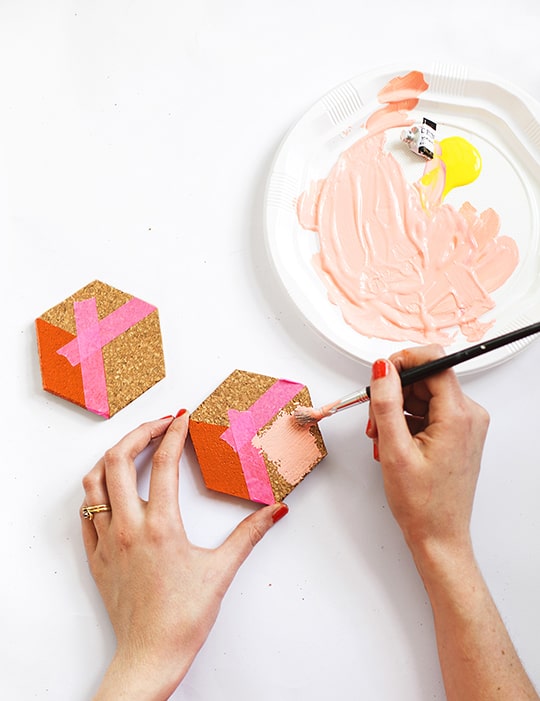
I kept the peach on the left and the orange on the right. You’ll need two coats of paint to fill in this second shape on each too.
5 — Once totally dry peel away the second lot of tape and there you have a new set of geometric tessellating coasters!
6 — Optional: For extra protection, you could apply a coat of clear matte Mod Podge.
Now that you’re swimming in colorful coasters, get them out on the table and dotted around your home to save your surfaces.
More Easy Home Decor Projects
Nearly every surface in my apartment is white so I’m looking forward to putting these to good use and no longer having rim marks glaring back at me.
The perils of a love affair with white!
Pre-warning: your kids may well steal coasters if they get ahold of them as thinking about it, they look like a pretty fun game through the eyes of a 3 year old.
If these DIY Geometric Coasters go missing you know where to look first. That advice is for free ;)
Also read: DIY Brushstroke Coasters
What is your go-to homemade hostess gift? Let me know in the comments!
For more of our favorite DIY projects, check out a few favorites from the archives —
- Essential Oil Candles – DIY Rosemary Grapefruit Candle
- Bundt Pan Planter – How To Make Hanging Bundt With Cake Pans
- DIY Cute Infusible Ink Coasters Ideas You Can Try!
- Football Party: DIY Football Coasters & Football Placemats
- DIY Waterproof Paper Coasters
Geometric DIY Cork Coasters
Equipment
- Paintbrush
- Pen
- Rotary cutter or craft knife
- Washi tape
- Cutting mat
Materials
- 2 craft paint in 2 colors or mix your own
- Cork tiles at least 1/4" thick
- Cardstock
- PDF template download the link for a free template
- Mod Podge or any water base sealer optional
Instructions
- Print out the hexagon template PDF onto the yardstick and cut out the shape. Then, trace the hexagon onto the cork sheeets.
- Using the scalpel/craft knife, cut out the hexagons. Repeat this step for each coaster. Make sure the blade is sharp or otherwise you’ll get rough edges.
- With the washi tape, mask off an area that’s equivalent to a third of the hexagon, taking the tape from the outer points to the inner point. If you prefer, measure where the middle is to start. Refer to the how-to photos for reference.
- Once you've taped out your shape, start painting the third of the hexagon that’s exposed. You will more than likely need two coats of paint to get a vibrant color. Just make sure you leave each coat to dry before applying the next.
- Once the paint is dry, remove the the tape. Then, mask out another third with some more tape. Make sure that each color stays on the same side of the shape so that the colors fit together perfectly when you have the coasters all together. We painted the left peach and the right side orange. Again, you’ll probably need 2 coats of paint.
- Once the paint is dry, peel away the second lot of tape. Repeat for each coaster. And now you have a set of new coasters!
- Optional: For extra protection, apply a coat of clear matte Mod Podge.


Please note that we may earn a commission for some of the above affiliate links. However, products featured are independently selected and personally well-loved by us!
I just found your blog. I love these coasters. Great Job!
Thank you, Rebecca!
What size is the round cork board. I’m looking at 16″
Hi Maribel! Apologies, we don’t remember how big the round cork board is and it’s not available anymore to reference the measurements. However, we did like some cork tiles from Amazon that are 12″x12″. The coasters are 3.5″ across if that helps. You can make them bigger too.
Yep, I think this whole DIY coaster thing is going to be addictive. Super cute. Thanks for the tutorial and template, Teri!
You’re welcome, Mimi! XOXO
I like the 3dimensionsl look.
Thank you, Jenna! XOXO
howdy
they say thank you for the love and they wish u a happy christmas. one of my tables is getting aggresive he wants more coasters
they say thank you for the love and they wish u a happy christmas. one of my tables is getting aggresive he wants more coasters
My tables are enjoying these coasters quite well as well. I can also say that my glasses are fond of this invention too.
Also,
YEET
best thing i’ve ever witnessed on this earth my wooden tables say hi
Haha sending your wooden tables some love !
I love a good DIY!! Thank you so much for sharing. This is such a creative idea.
I really hope you get a chance to make this one ! Its simple but gives great look !
I love a good DIY!! Thank you so much for sharing. This is such a creative idea.
simplemente delicioso <3
So cute and so simple. Just my kind DIY.
Oh, I love this! It really inspired me to do some cork coasters! Maybe for Christmas!
—
Sofia | Seventeen Seconds
Most recent post: How to Create Bilingual Posts on Blogger
These look so simple, yet they are adorable! I want to make them asap!
♥ Heather
Wow, that’s nice!。◕ ‿ ◕。 – IVA
http://cosyhippie.blogspot.com/
These coasters are so cute! I love how you painted them gives them a three dimensional look!
Paige
http:/thehappyflammily.com
So so so good. My heart colors. And now I need a set pronto!
These are awesome! Totally love ’em.
Great design and so simple to make.
I want to make these immediately!
Such a creative idea!