DIY Floor Seating Table
This is a super easy DIY Floor Table that’s a perfectly simple yet functional floor seating idea. Plus, no need to worry about chairs!
Who’s ready for a dinner party?! We’re always down for unique entertaining ideas. And this DIY Floor Table is the perfect project for floor seating that’s surprisingly simple to make!
In fact, your local home improvement store will be doing all of the major work anyways. Shout out to Lowe’s for always cutting down our wood selections for us!
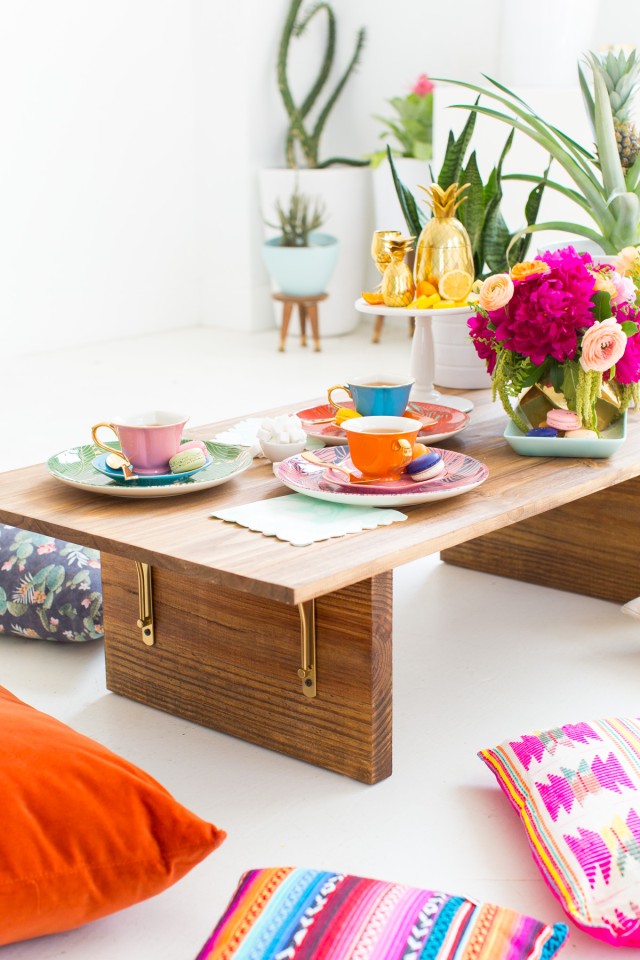
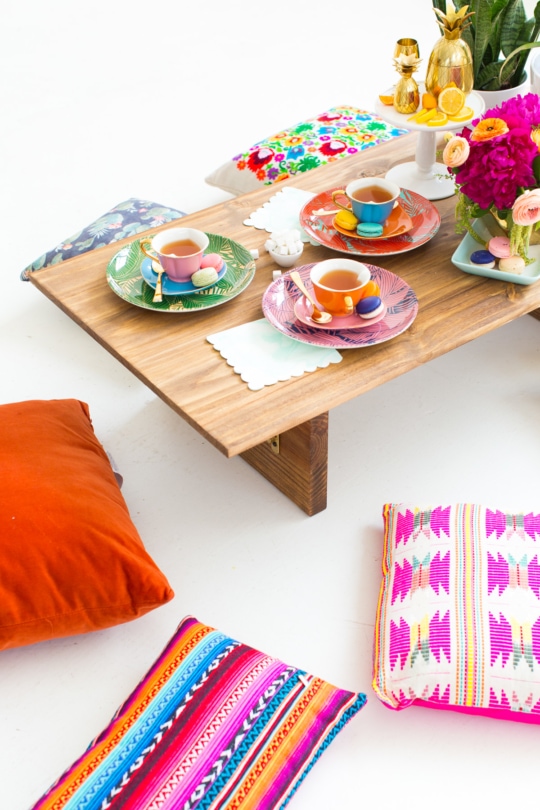
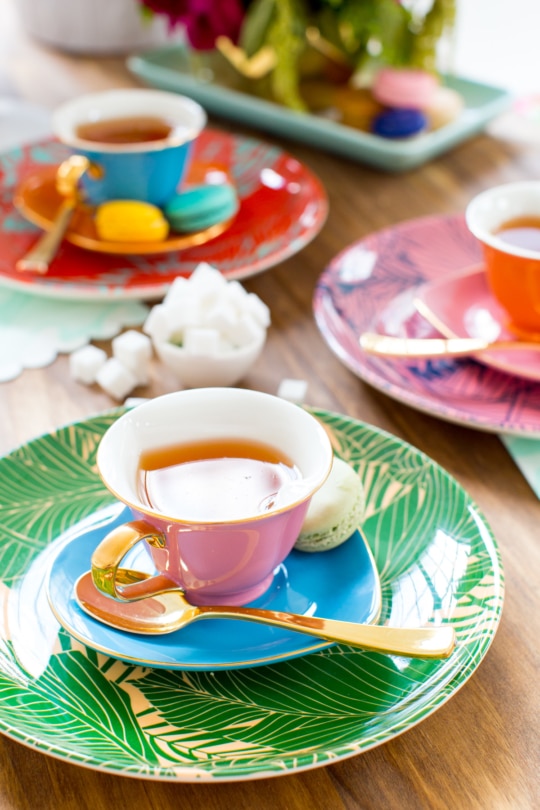
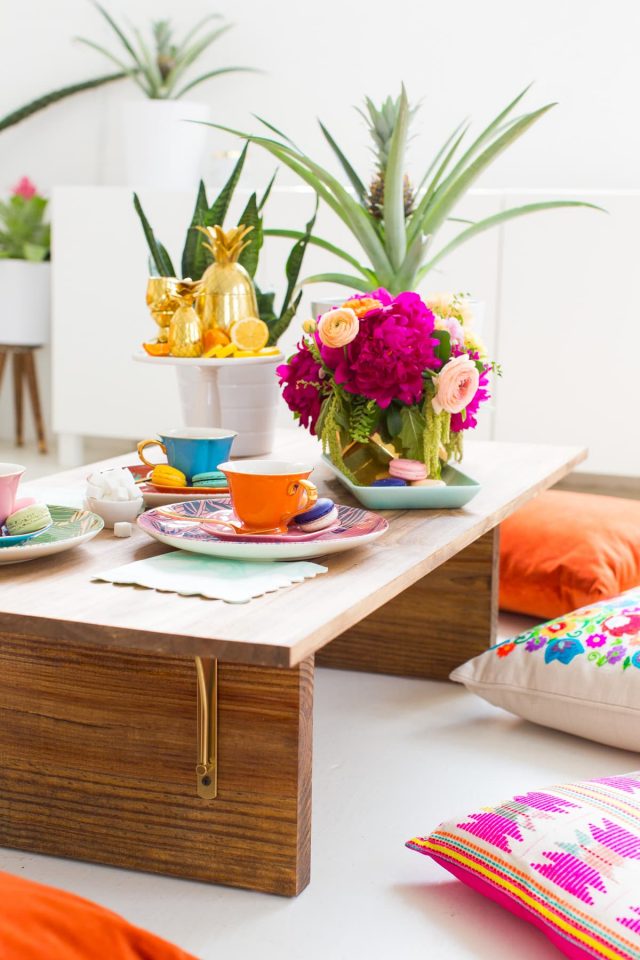
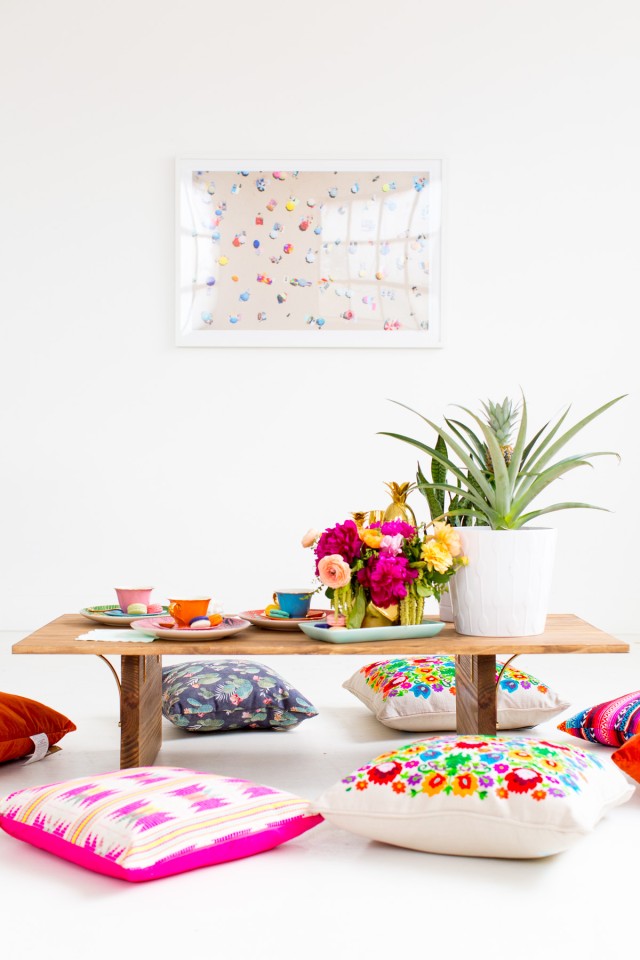
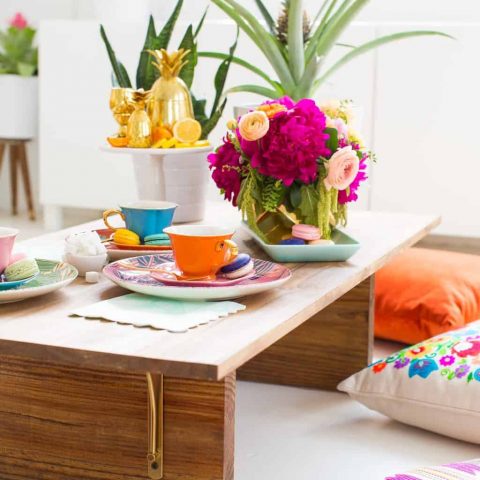
We wanted to keep the boho low dining table feeling by adding some quirky dinnerware pieces along with mismatched pillows. We love the unexpected color combinations in this low dining table scene, don’t you?
It would definitely make for the perfect cool-weather dinner al fresco with lots of DIY knot pillows and blankets around for floor seating.
We’re never one to shy away from a good DIY project. The easier the project, the better, in my opinion, especially when you’re pairing it with a full dinner menu! Not to worry, you can whip up this customizable DIY dinner table in no time.
Materials and Tools Needed
- 24″ x 48″finished wood — Pre-cut and pre-sanded in the finished lumber section. We used plywood to keep the cost down.
- 18″x 2″ x 12″wood — If you buy one long piece, the home improvement store will cut it down to size for you.
- Wood stain and brush — We purchased a half pint of Minwax Interior Stain in Ebony.
- Arched brackets
- Metallic gold spray paint — Optional for gold brackets
- Heavy duty construction adhesive glue
- Drill and screws
- Ruler or measuring tape
- Felt pads — For table legs
- Sandpaper — Optional for unfinished wood
- 4 right angle 90 degree brackets with screws
If you’re having the wood custom cut for you at the hardware store, be sure to sand down the edges to be rounded so that anyone bumping into the table and resting their legs underneath won’t get scratched.
Floor Seating Ideas | How to Make a DIY Floor Seating Table
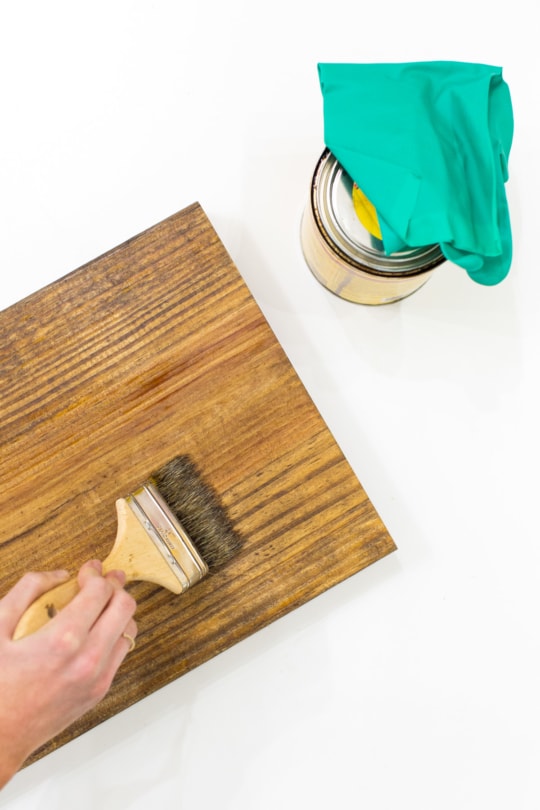
1 — Once the wood is prepped and ready, use a wood stain with polyurethane to stain the wood the color of your choice.
The polyurethane will help coat the wood to make it water-resistant and easier to wipe clean. Let it dry completely.
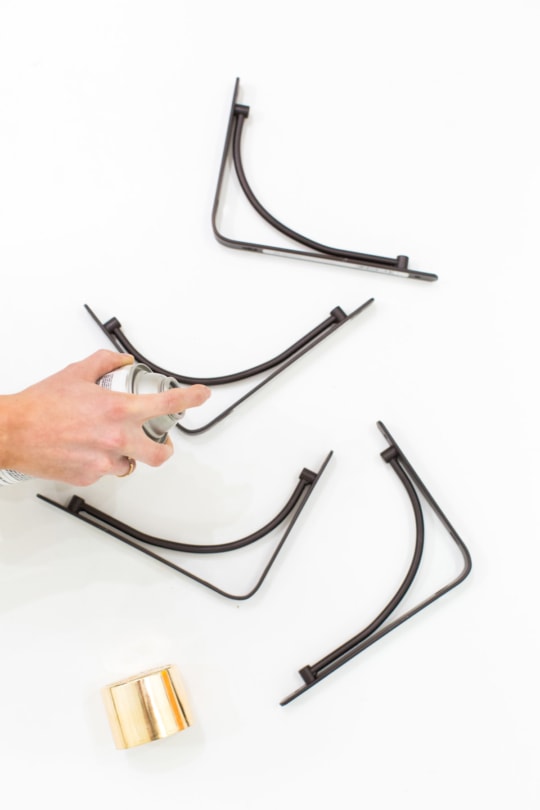
2 — While that’s drying, spray paint the brackets gold. Let those dry completely.
Going back to the wooden pieces:
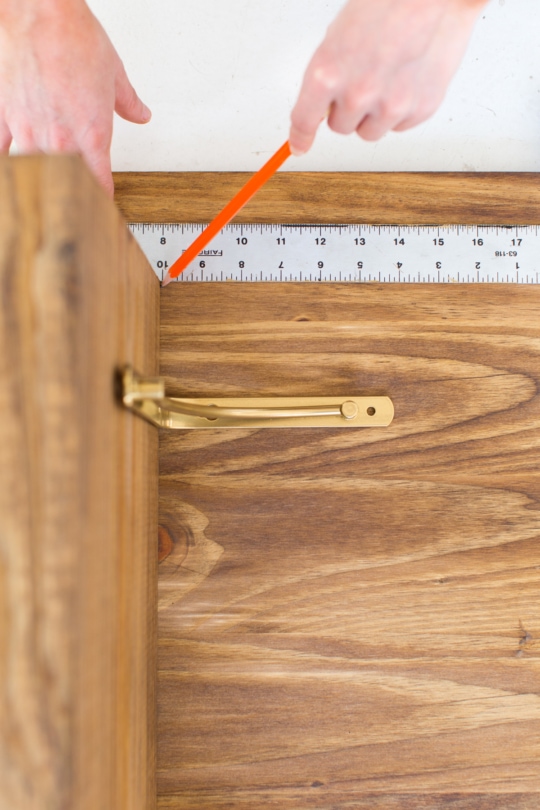
3 — Measure and mark from each end of the tabletop where you want the legs to rest underneath based on how much space is needed for your brackets.
In our case, we marked 10 inches from each end of the table to where the leg would meet the bracket, and 3 inches on either side of the leg to be centered.
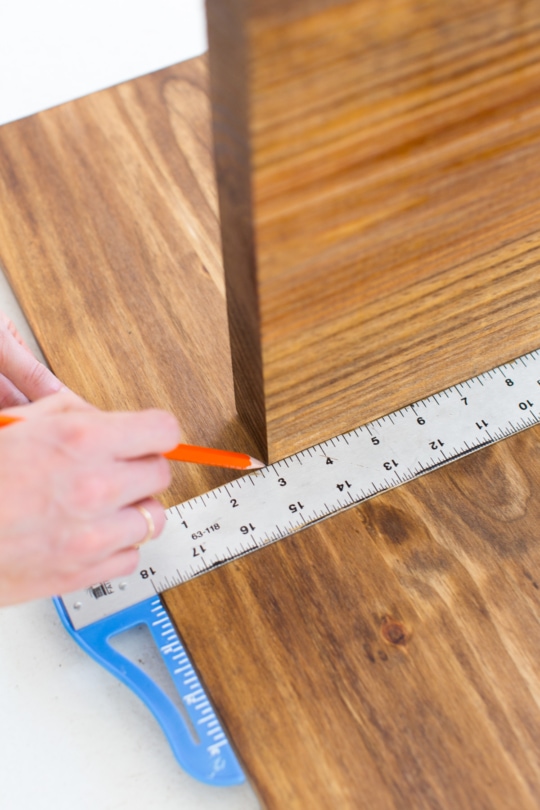
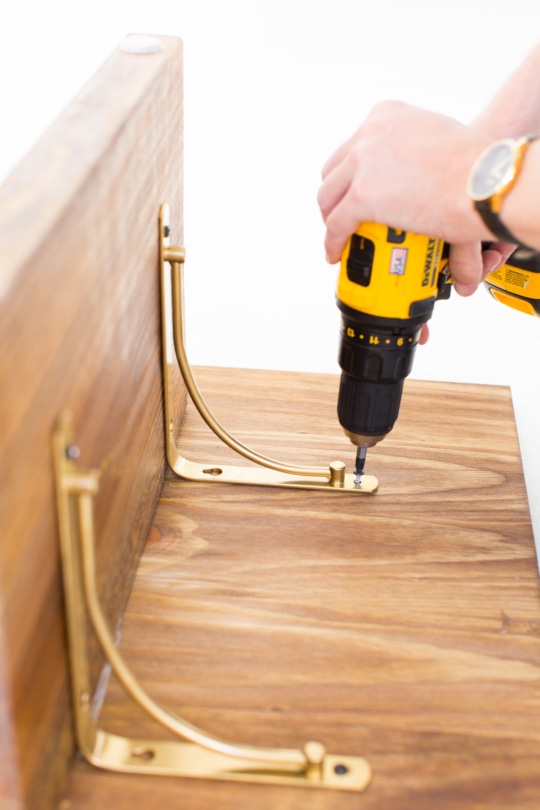
4 — Now measure 3 inches in from each end of the leg closest to the outside edge on both ends. This is where the brackets will be drilled in.
Once everything is measured, trace the entire leg in place because you’re going to be removing it to apply the glue and then putting it back in place.
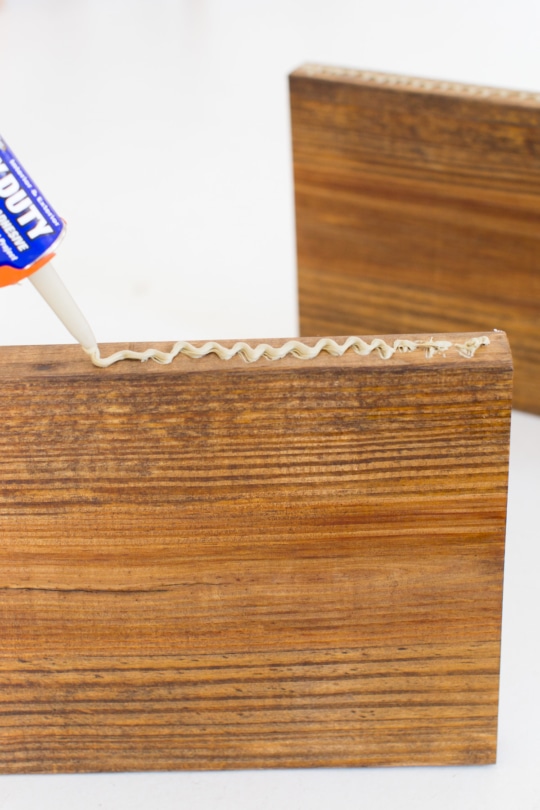
5 — Squeeze a generous amount of liquid nails onto one edge of the legs. Make sure that there’s not so much glue that it will overflow on either edge once it’s pressed down onto the table. Let it set completely before installing the brackets on either edge.
6 — While you’re waiting, apply felt pads to the bottom of the table legs for easy maneuvering when it’s complete.
7 — Once set, place the brackets on your measurement marks, and screw to the tabletop first. This will make drilling into the legs easier after that.
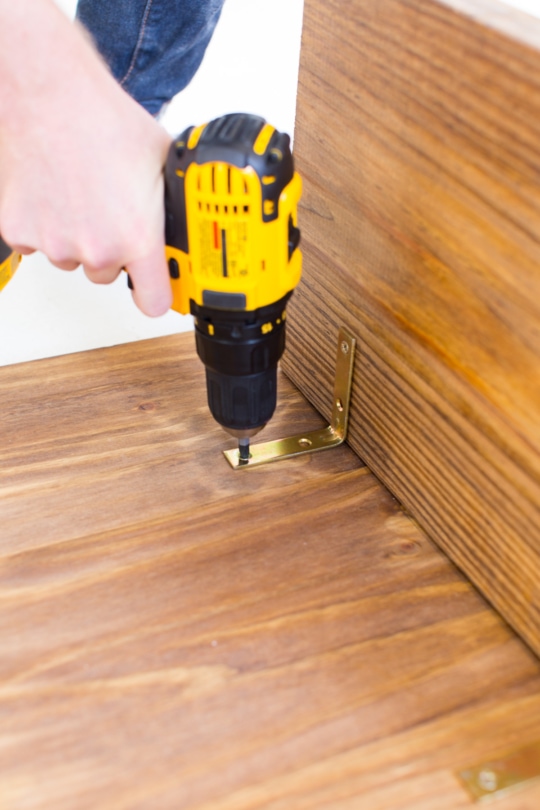
8 — When all the brackets are screwed in place, place the four 90 degree angle brackets on the opposite side of the legs lining up with each curved bracket, and screw those in place.

DIY Low Floor Table Tutorial | DIY Dining Table Ideas
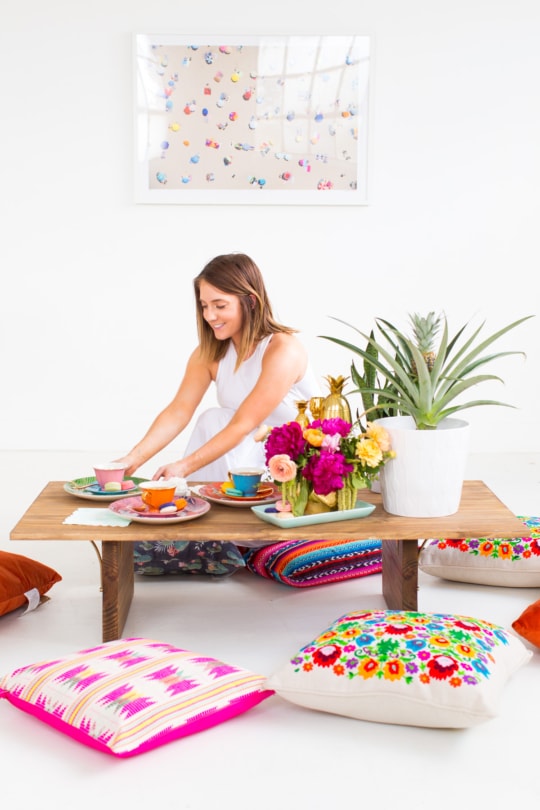
We usually don’t gravitate towards the bohemian look for styling. But we do always love how it makes a space feel really well-loved and lived in.
Not to mention it’s substantially more inviting than the old school bean bag chair floor seating, right?! Not every guest will appreciate a low table or floor dining table. So make sure you get really comfy floor cushions to pair with it will go a long way!
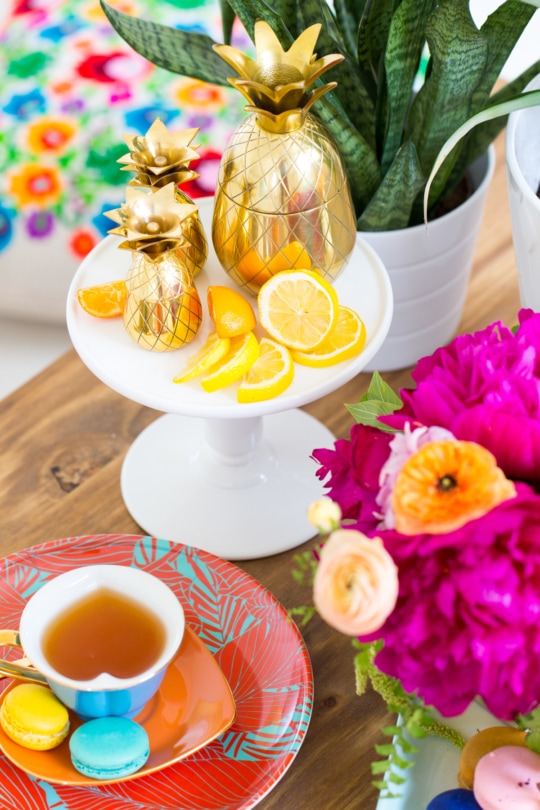
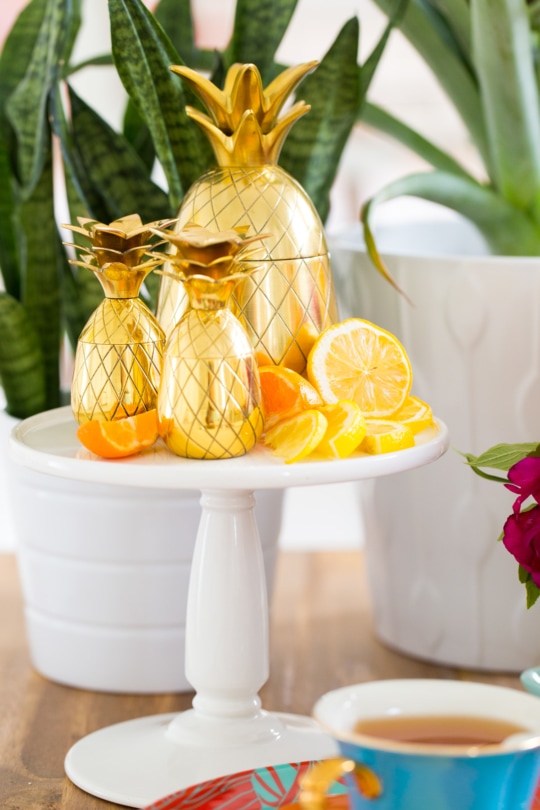
We styled this bohemian-inspired setting with these colorful teacups, a gold pineapple tumbler, mini shot glass set, palm fronds patterned plates and a plethora of colorful floor pillows. You could also repurpose this DIY table as a floor desk too.
Recipe Ideas for Your Dinner Party
In case you’re looking for a few easy dinner or recipe pairing ideas for your table top DIY, we’ve got you covered!
- Make our zero carb bread recipe and save your calories on a yummy Aperol spritz, gluten-free donuts, or snickerdoodle cookies.
- Or skip the big dinner altogether and whip up our easy popcorn recipes or root beer float recipe for a quick snack.
While you can easily customize this floor table in any color combination or wood finish that you’d like, we definitely recommend sticking with the gold brackets for a pop of glam!
More DIY Projects To Try
Pretty simple, right? All you have to do is a little painting, gluing, and measuring and you’re good to go! Let us know if you try out this DIY Floor Table tutorial as a twist on the classic dining table for a unique floor seating idea! For more DIY ideas, here are a few more of our favorites —
- Kids Play Table: An Easy DIY Kids Activity Table
- Abstract DIY Modern Low Bench
- Handmade DIY Gift Ideas
- How to make an Ikea floating cabinet from a DIY Ikea Credenza
- How to make a DIY Ikea TV Stand Hack
DIY Floor Table
Equipment
- Ruler or measuring tape
- Drill with screws
- Sandpaper optional for unfinished wood
- Brush
Materials
- 1 24"x48" finished wood pre-cut and pre-sanded in the finished lumber section
- 2 18"x 2"x12" wood if you buy one long piece, the home improvement store will cut it down to size for you
- Wood stain
- Metallic gold spray paint optional for gold brackets
- Heavy duty construction adhesive glue
- Felt pads for table legs
- 4 right angle 90 degree brackets with screws
Instructions
- If you're having the wood custom cut for you at the hardware store, be sure to sand down the edges to be rounded so that anyone bumping into the table and resting their legs underneath won't get scratched.
- Once the wood is prepped and ready, use a wood stain with polyurethane to stain the wood the color of your choice.The polyurethane will help coat the wood to make it water-resistant and easier to wipe clean. Let it dry completely.
- While that's drying, spray paint the brackets gold. Let those dry completely.
- Going back to the wooden pieces, measure and mark from each end of the table top where you want the legs to rest underneath based on how much space is needed for your brackets.In our case, we marked 10 inches from each end of the table to where the leg would meet the bracket, and 3 inches on either side of the leg to be centered.
- Now measure 3 inches in from each end of the leg closest to the outside edge on both ends. This is where the brackets will be drilled in.
- Once everything is measured, trace the entire leg in place because you're going to be removing it to apply the glue and then putting it back in place.
- Squeeze a generous amount of glue onto one edge of the legs, making sure that it's not so much that it will overflow on either edge once it's pressed down onto the table.Let it set completely before installing the brackets on either edge.
- While you're waiting, apply felt pads to the bottom of the table legs for easy maneuvering when it's complete.
- Once set, place the brackets on your measurement marks, and screw to the tabletop first. This will make drilling into the legs easier after that.
- When all the brackets are screwed in place, place the four 90 degree angle brackets on the opposite side of the legs lining up with each curved bracket, and screw those in place.

Tiled Backyard Patio Before & After
Patio before and after inspiration! See how we transformed a…
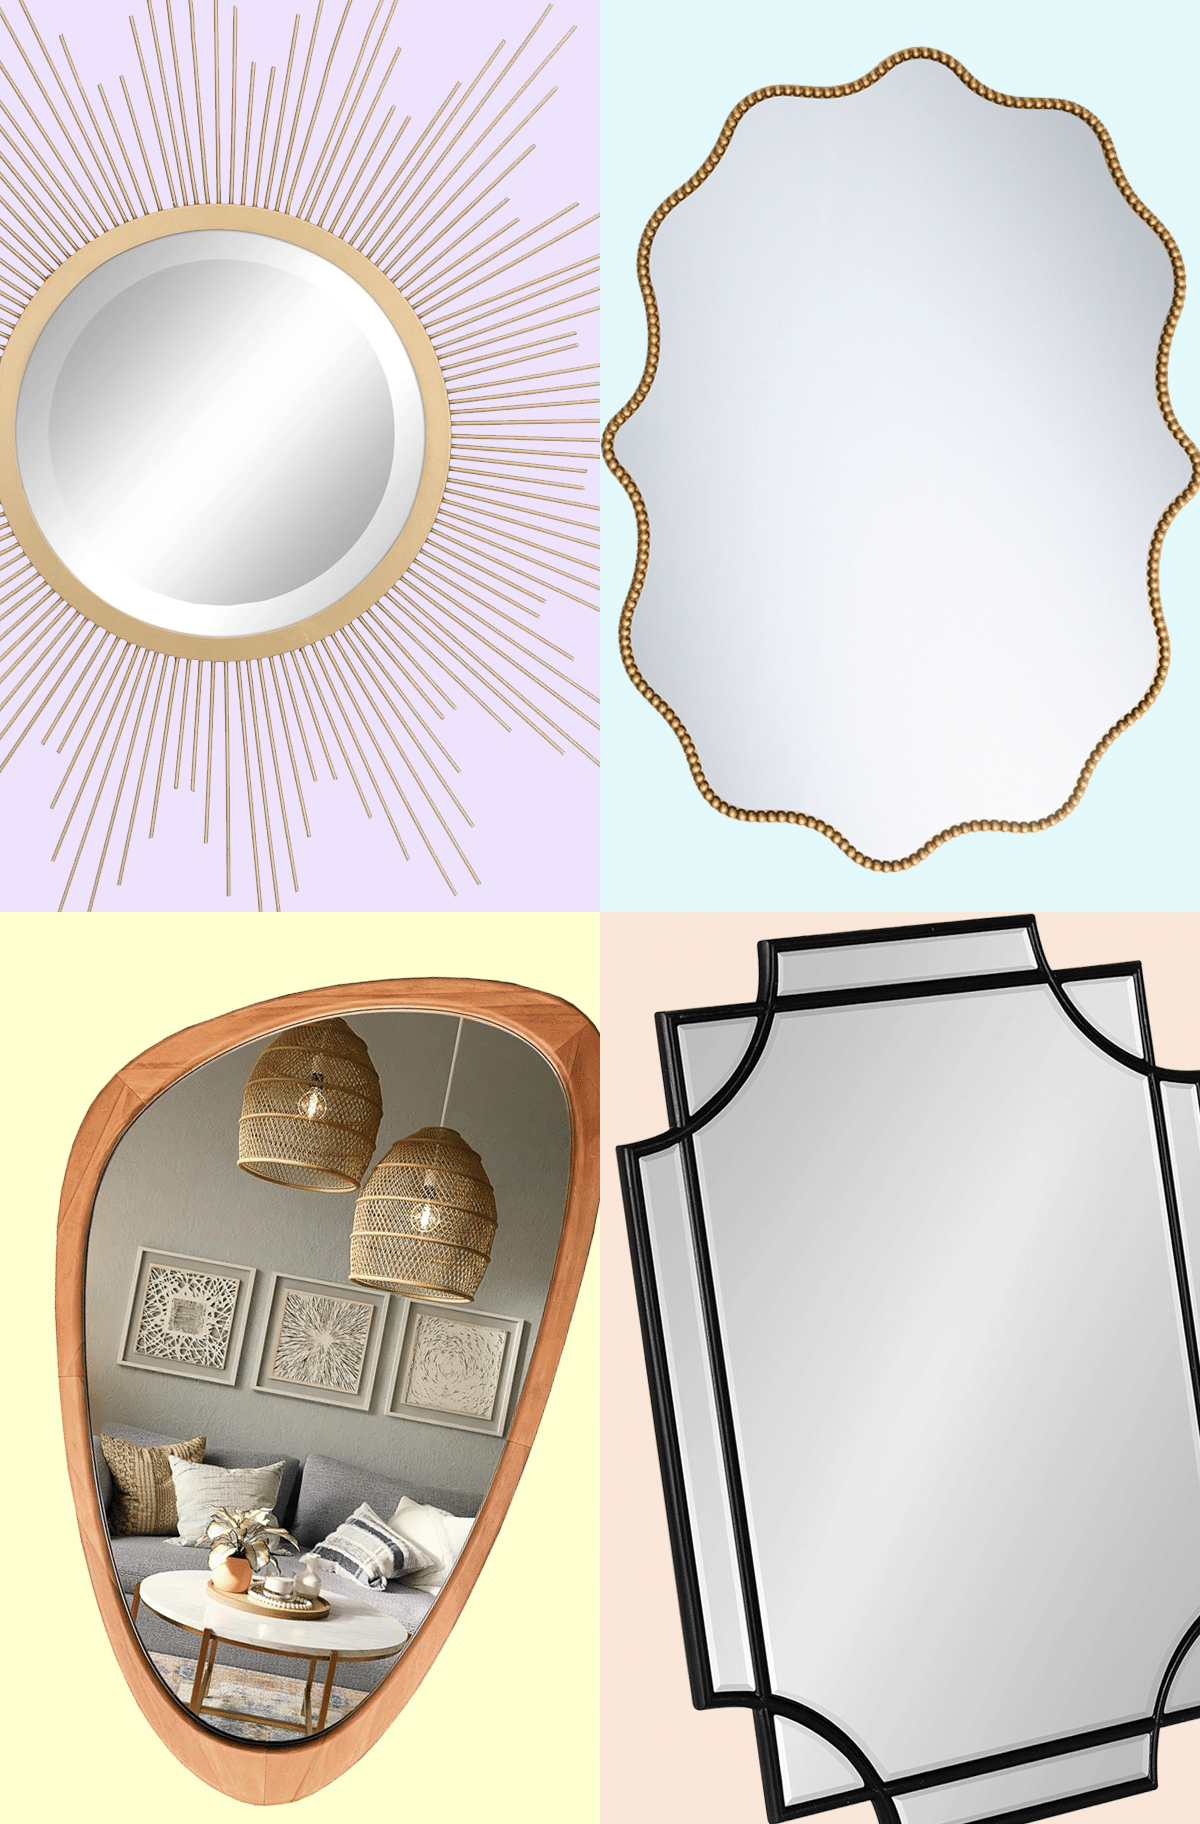
28 Decorative Wall Mirrors You’ll Wish You Bought Sooner
Looking for the perfect wall mirror? Explore our roundup of…
Continue Reading 28 Decorative Wall Mirrors You’ll Wish You Bought Sooner
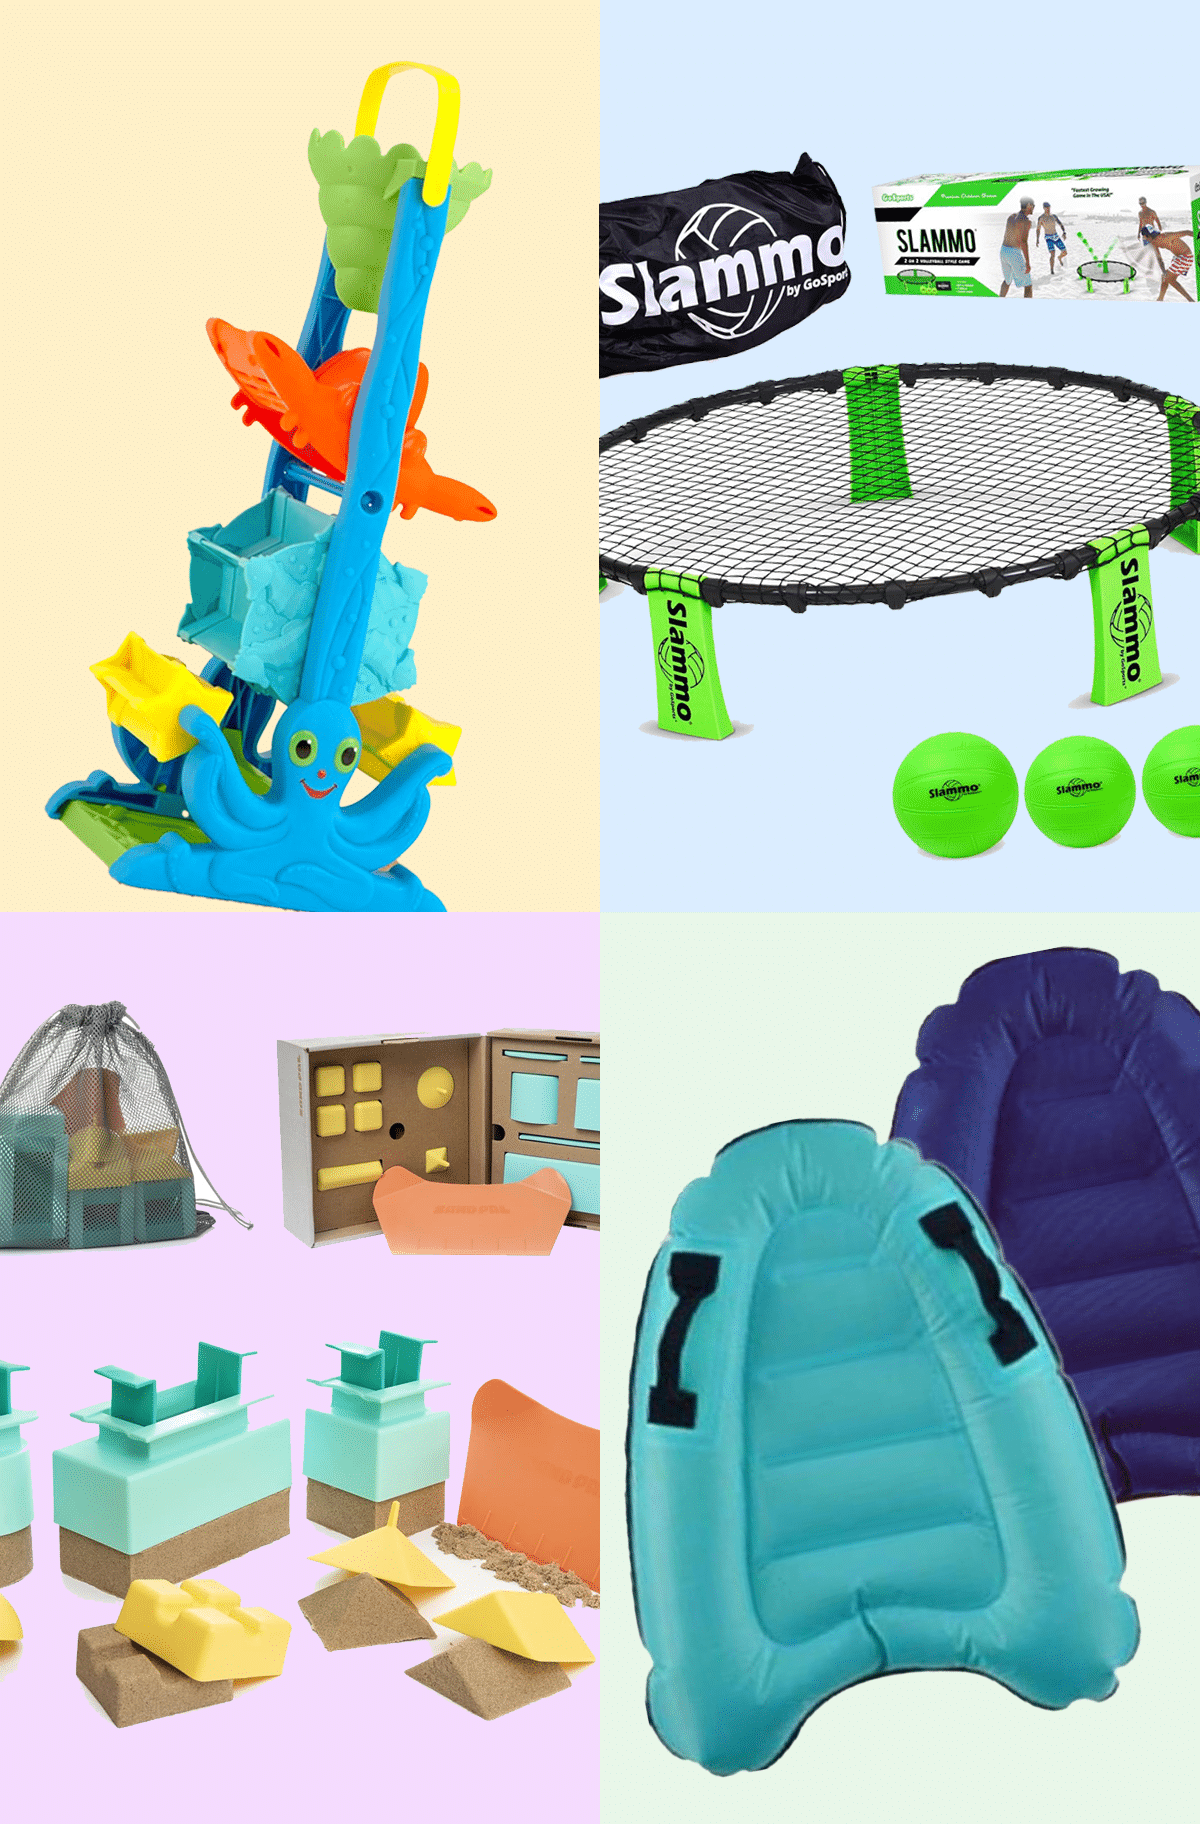
38 Best Beach Toys for Vacation Fun
Discover the best beach toys for kids, toddlers, and families…
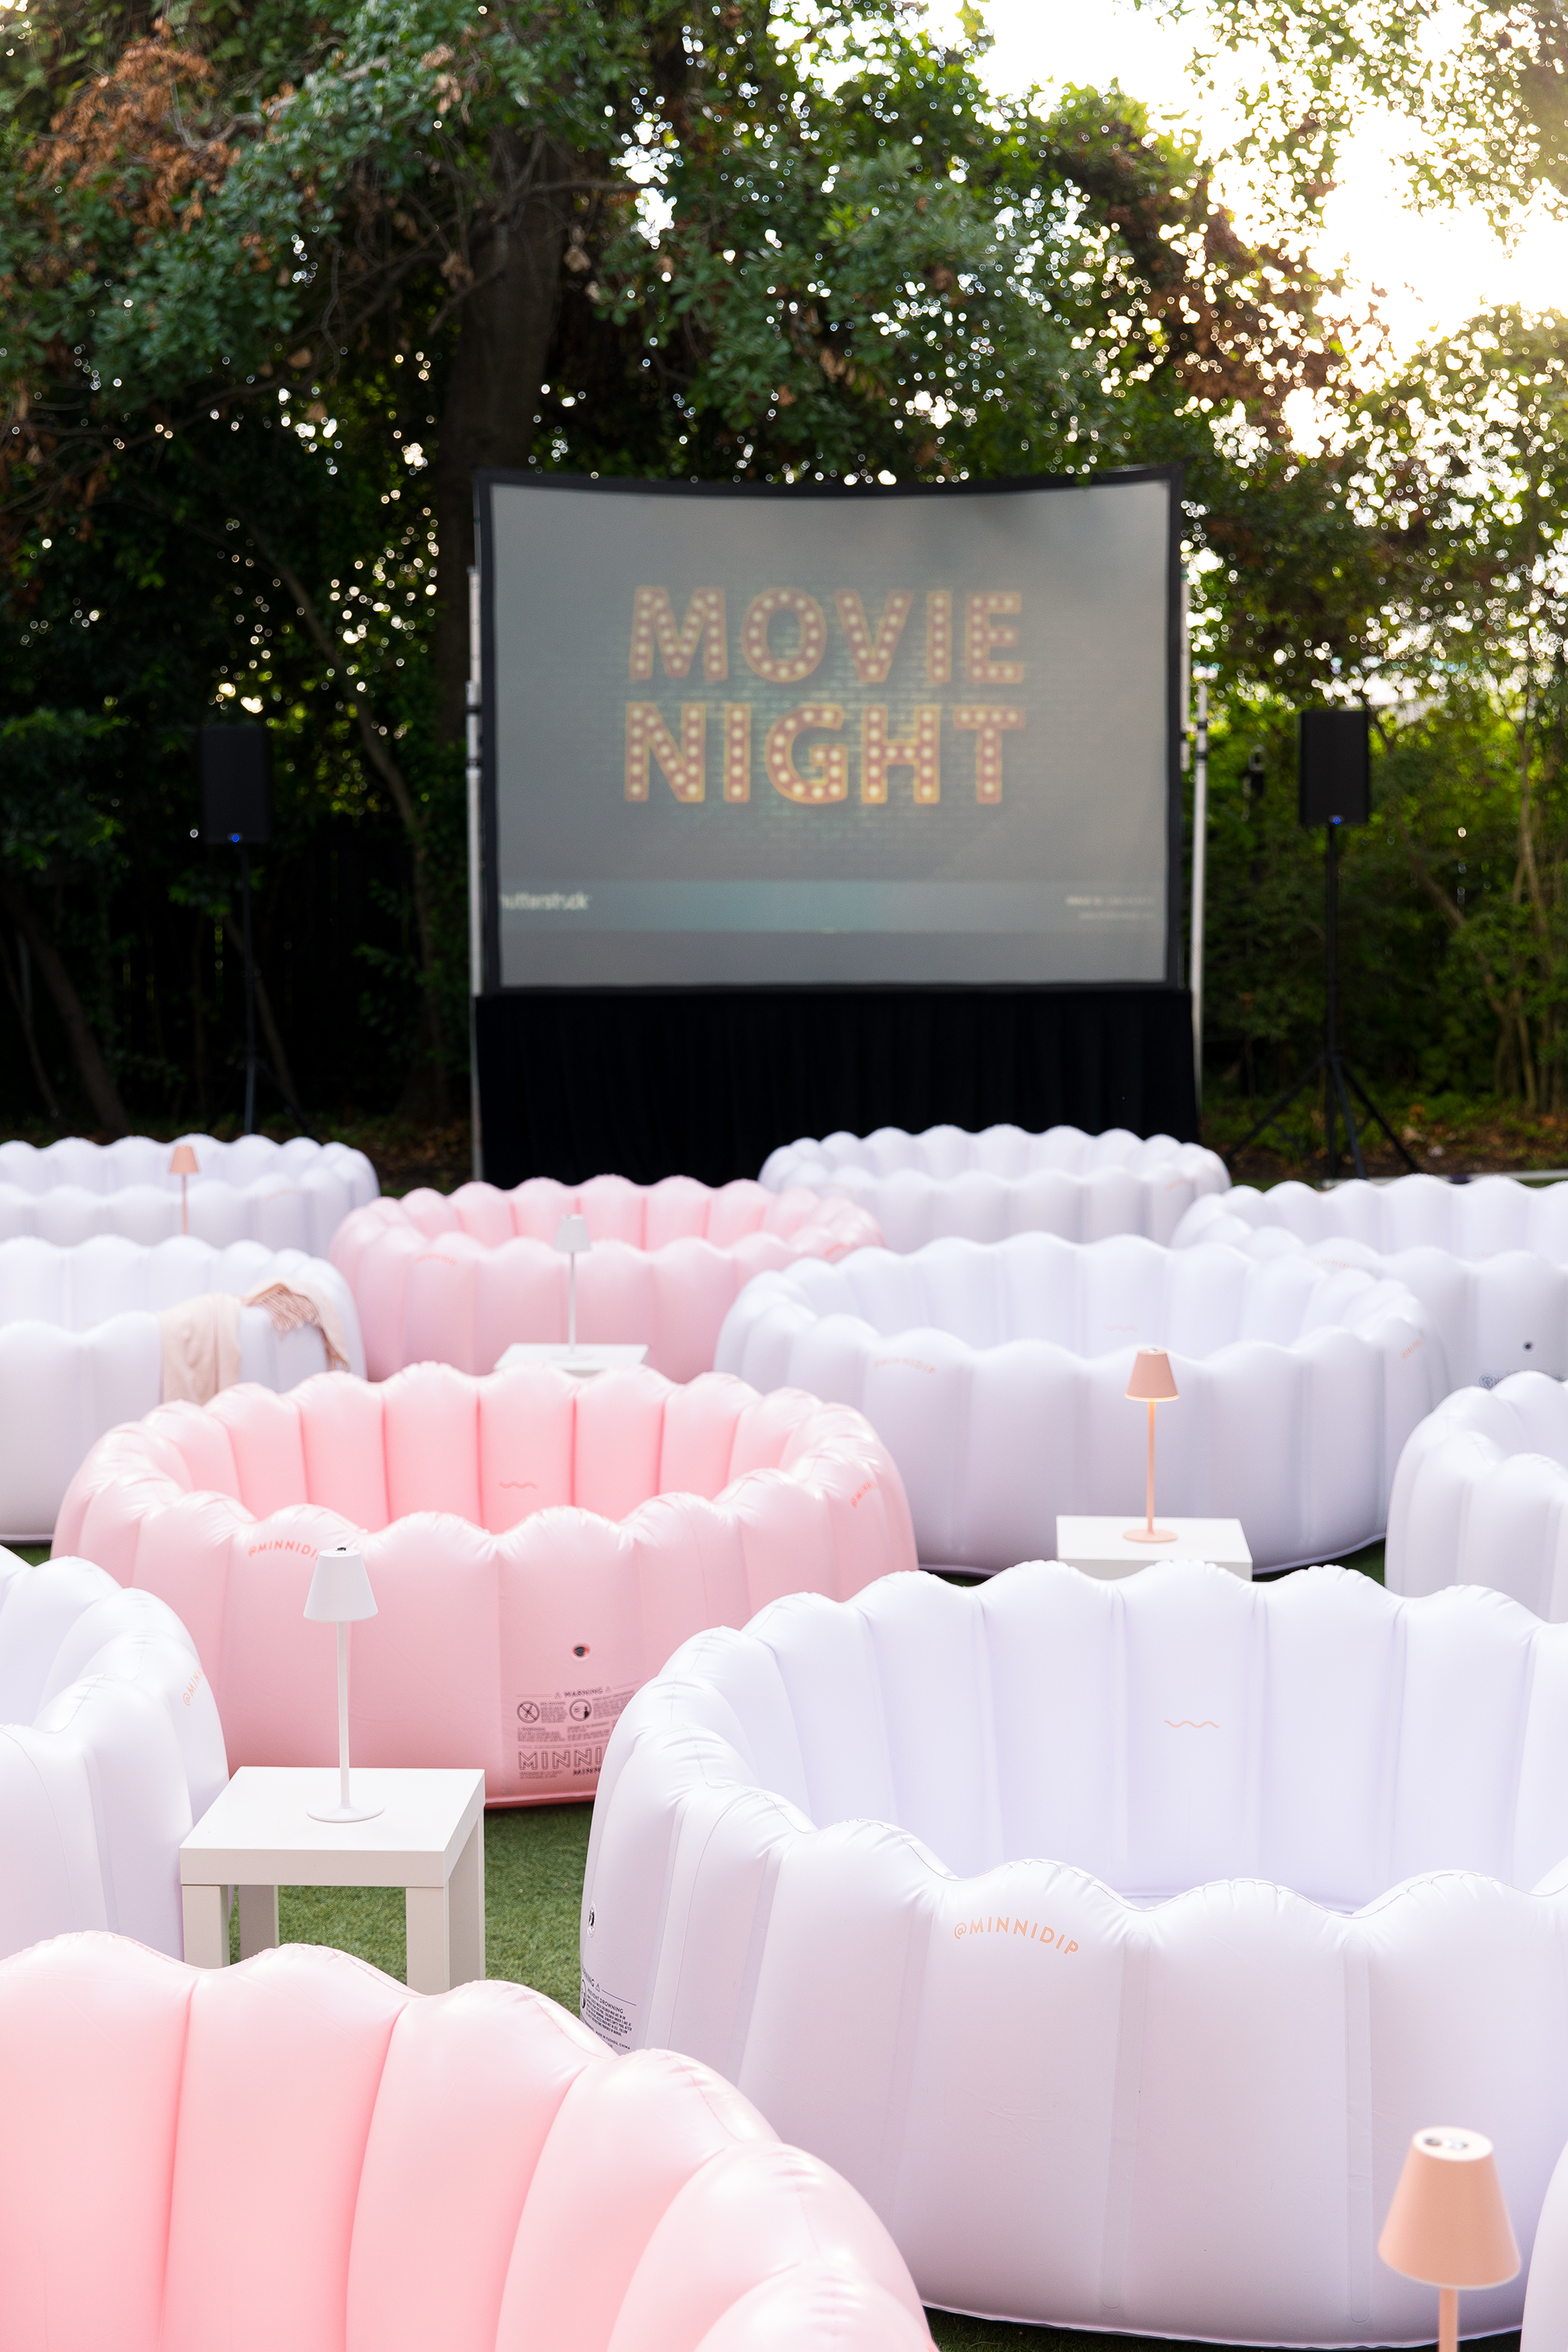
Your Guide to Hosting the Perfect Outdoor Movie Night
From DIY projectors to cozy seating arrangements, explore the best…
Continue Reading Your Guide to Hosting the Perfect Outdoor Movie Night
Please note that we may earn a commission for some of the above affiliate links. However, products featured are independently selected and personally well-loved by us!
Would I be able to use foldable brackets so I can tuck this away when I’m not using it? I love this idea, but I don’t plan on using it that often and would like it to be portable as well
Hi Jo! We don’t see why not! That’s a great idea. We would recommend using heavy duty brackets (depending on the size of the table) to take into account that people will be leaning on the table.
I made four of these tables for a BoHo inspired bridal shower. They turned out great! The instructions were easy to follow for someone who has never built a table before.
Yay! We are so glad to hear they worked out for the bridal shower. XOXO
Hi! What stain did you use? Your link lead to minwax but I don’t believe a color was selected :)
Hi, Leah! We used it in Ebony. The link has the name of the color in the title and color ID number too for more info. Hope this helps!
Literally have been searching for a table like this for my event planning business. Can’t wait to make this! Thanks for the great details.
So glad to help, Angel! Let us know how it turns out! XOXO
I want to build this this weekend for a holiday party. How thick should the wood be for the table? What kind of wood was it?
Hi! The thickness is up to you and depends on the “look” you want. We recommend at least an 7/8-one inch thick. The legs that we used are pretty big so it would be sturdy enough. We just used regular plywood. The reason it looks more intricate and a lot more “expensive” is because of the wood stain. Hope this helps!
This is so cute! I love it!
Paige
http://thehappyflammily.com
Thank you, Paige!
This is amazing! The table with those pillows is so fun!
Thanks, girl!
Adorable! Love the colors.
thanks Sonya, glad you love it!