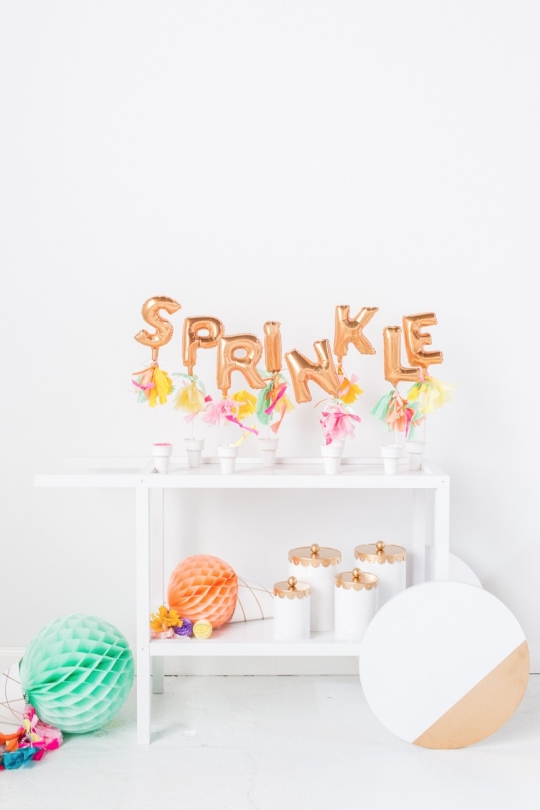
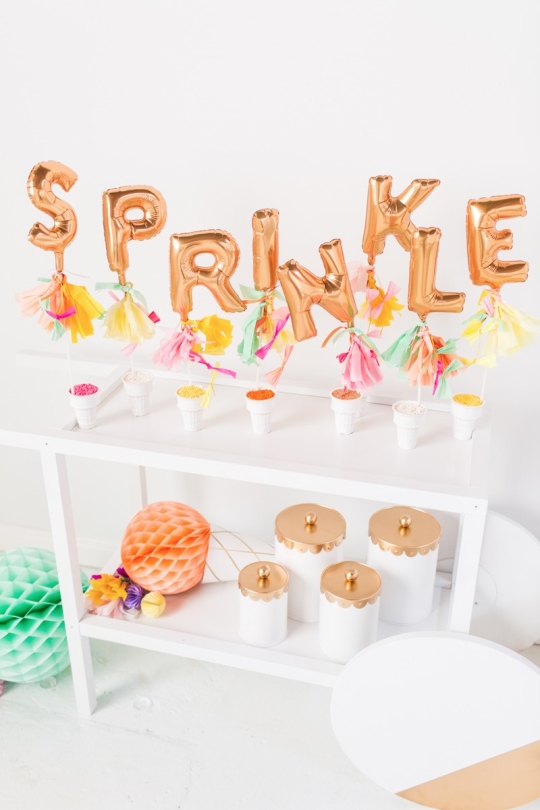
Ikea Hack DIY Ice Cream Cart & Sprinkles Bar
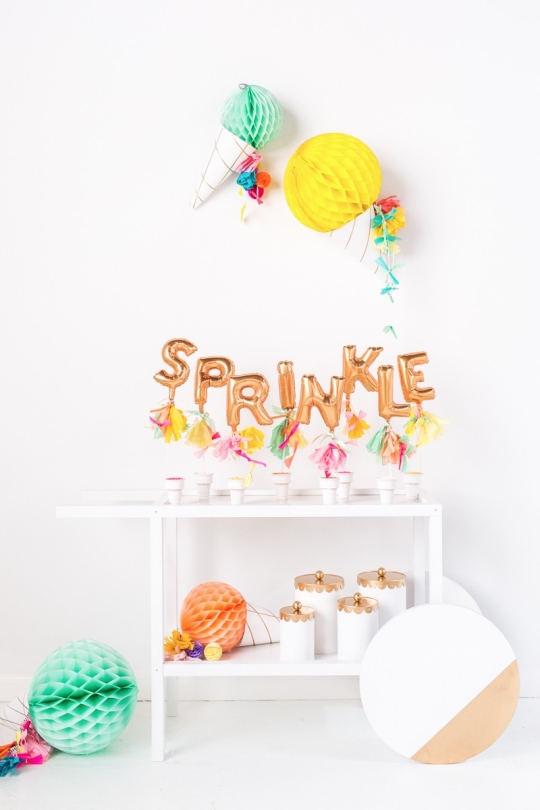
A clean and modern DIY Ikea hack ice cream cart (and sprinkle bar) perfect for summer socials, weddings, parties, and even a spot in the living room!
Well, my friends, I present to you today the Holy Grail of DIY’s.
It combines two of my favorite things: ice cream and Ikea hacks.
There are also sprinkles involved, but I don’t want to make anyone unexpectedly burst with excitement, so we’ll move on.
This DIY Ikea Cart Hack is about as simple as it gets (keeping in mind it does involve a teeny bit of Ikea style assembling) and just about every kid in the neighborhood will want one, myself included.
I also teamed up with the ladies over at Poppies for Grace who supplied a lot of the paper and balloon goodies for the project.
And I’m in love with how it all turned out!
I wanted to keep up with the ice cream theme since it’s National Ice Cream Month.
And from Strawberry Ice Cream Bons Bons and Cotton Candy Ice Cream Shots, you probably already know how much we are obsessed with this frozen treat
But since the studio doesn’t actually contain a freezer (just yet), I stuck with the kind of ice cream that doesn’t melt…
DIY Ikea Cart Hack | Materials and Tools Needed to Make an Ikea Bar Cart Hack
How to Make a DIY Ikea Cart and Sprinkle Bar
1 — First, assemble the Trendig cart according to the instructions leaving the wheels off at the end.
Spray paint the partially built cart and wheels separately, covering all sides.
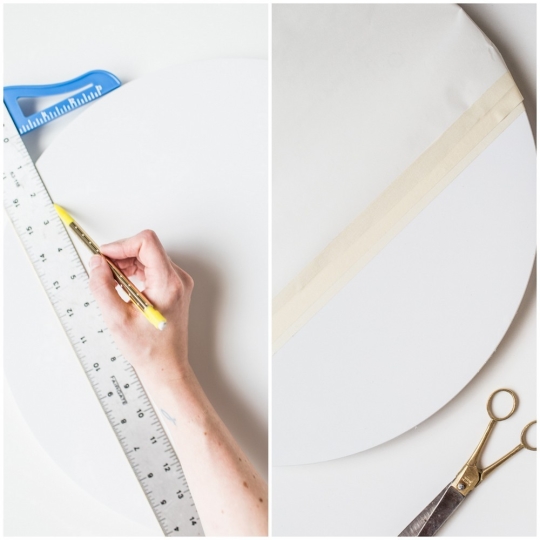
2 — Next, use a straight edge and pencil to make a line across each wheel to mark where you want the gold metallic block to be.
Then tape off the line with painter’s tape.
Using plain construction paper, cover the remaining part of the wheel that will be left white so that no spray paint residue will bleed.
Then spray paints the rest with metallic gold.
3 — Once everything is dry, finish assembling the wheels and style!
You can make your ice cream cart a fully functioning serving area, or just leave it as a topping bar.

Styling your Ice Cream Bar
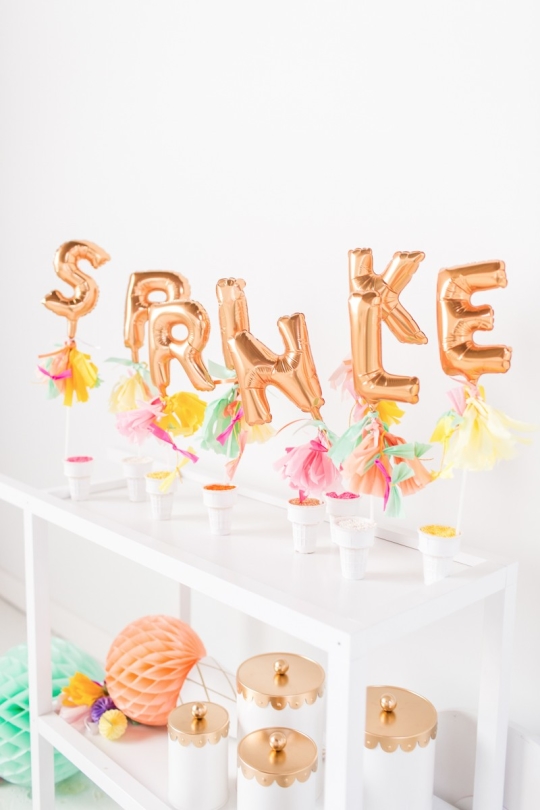
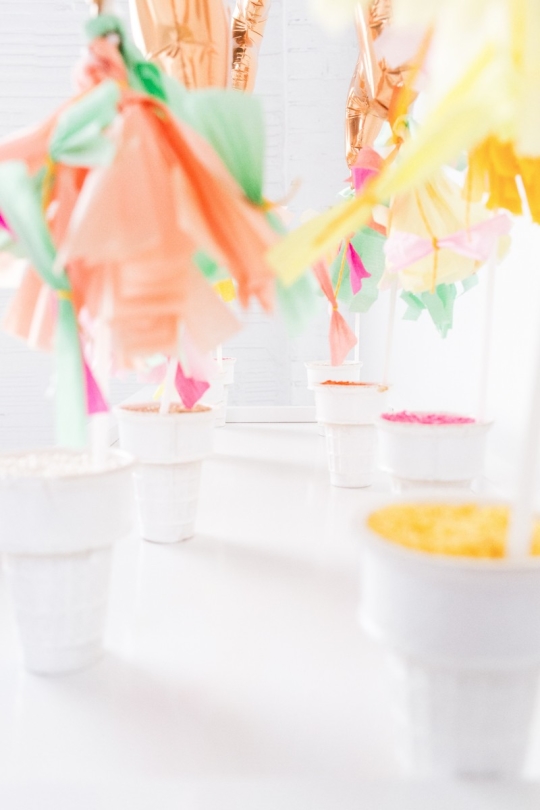
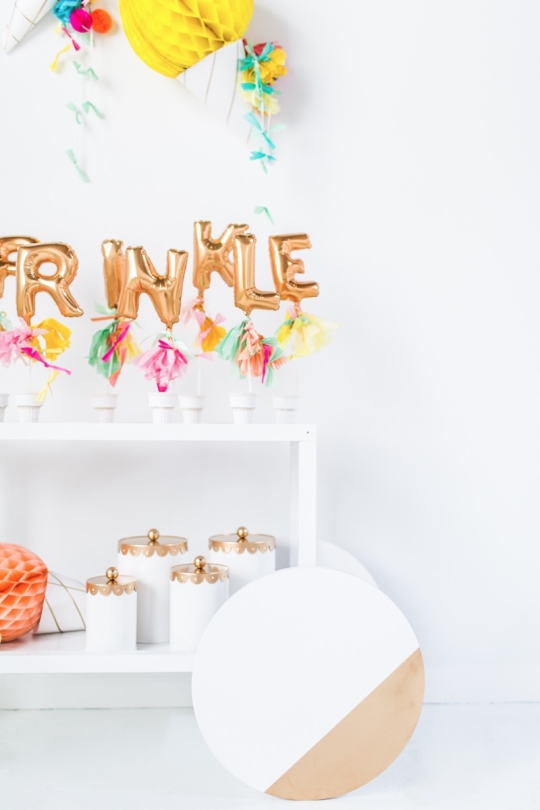
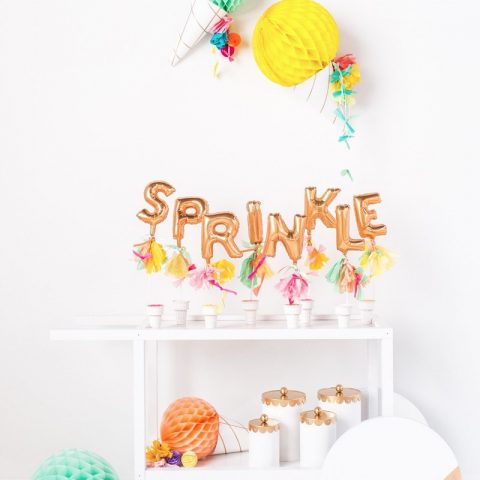
For the topping bar, I decided to spray paint ice cream cones white and fill them each with different types of sprinkles, then use them as balloon weights for each of the metallic letters.
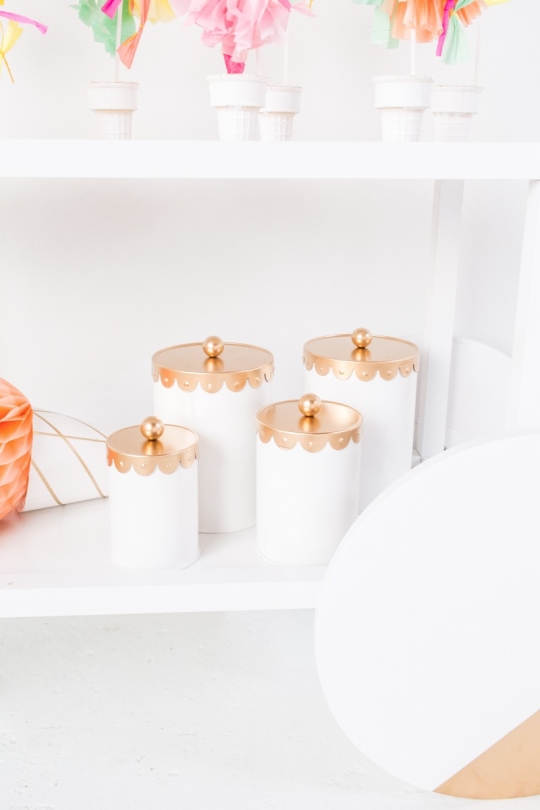
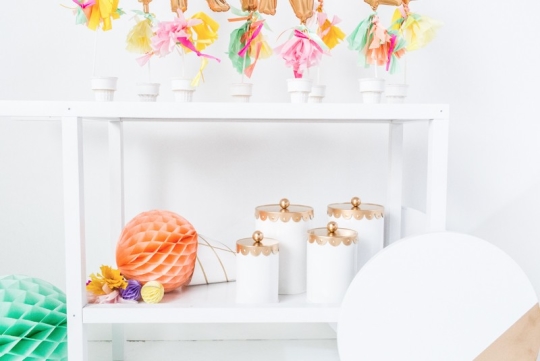
I actually bought some really hideous-looking rooster canisters at World Market a few weeks ago strictly because they had cute scalloped lids on them.
Obviously, the rooster was never going to be redeemable, so I spray painted the canister bodies white and the lids a matching gold for the cart.
I think these would be so cute to hold different types of flatware and utensils or even ice cream.
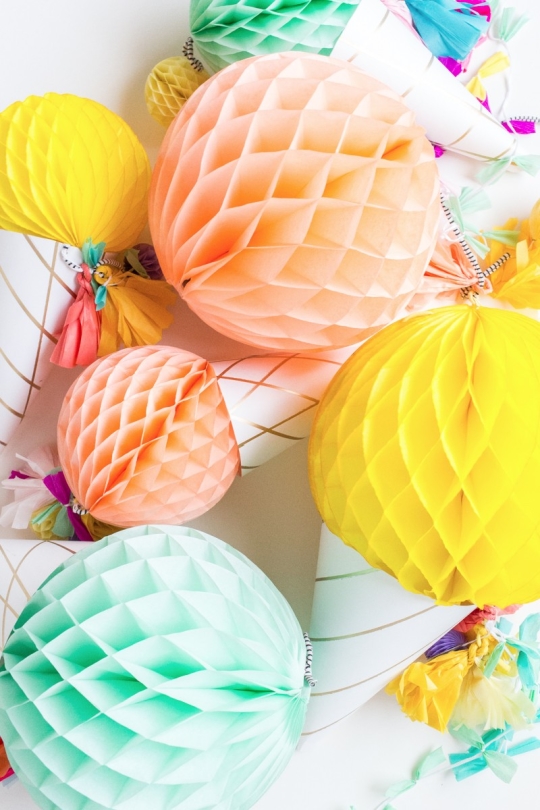
Since I had to stick with ice cream that can’t melt in a studio with no freezer that’s full of sunlight, I decided to recreate these adorable honeycomb ice cream cones which you can see here on Alana’s blog (just a side-note that she might be the single most creative person I’ve ever met), and here on Oh Happy Day as a garland.
(Just a side-note, she might be the single most creative person I’ve ever met).
To switch mine up a little bit, we used the fancy fringed honeycombs from Poppies for Grace to make them look like melting ice cream.
Actually, I’ll admit that that’s a slightly arguable outcome looking back on it, but it’s a cute concept anyways (in theory).
I also think it would be really cute to make the honeycombs with these jumbo confetti balloons.
I think I might be officially in love with this table.
Now I just need to come up with other reasons to use it, or I can sell it and move on to a new DIY addiction. How would you use your DIY cart?
If you are throwing an ice cream party, serve some easy no-churn ice cream in a cone or in chocolate ice cream liners.
How would you use your DIY cart?
Sources: fancy fringed honeycombs // fancy letter balloons // and the perfect crepe paper from Poppies for Grace // previously hideous rooster tins turned cute from World Market // Trendig occasional table from Ikea
If you’re looking for more DIY Ikea hack projects, see some of my favorites below!
- DIY Ikea Hack Floating Credenza
- DIY Ikea Hack Side Table
- DIY Ikea Hack Dresser And Prepping For Guests
- Ikea Besta Door Colors – DIY Color Block Storage Ideas
DIY Ikea Cart Hack
Equipment
- Straight edge/ruler and pencil
Materials
Instructions
- Assemble the Trendig cart according to the instructions leaving the wheels off at the end.Spray paint the partially built cart and wheels separately, covering all sides.
- Use a straight edge and pencil to make a line across each wheel to mark where you want the gold metallic block to be.Then tape off the line with painter’s tape.Using plain construction paper, cover the remaining part of the wheel that will be left white so that no spray paint residue will bleed.Then spray paints the rest with metallic gold.
- Once everything is dry, finish assembling the wheels and style!You can make your ice cream cart a fully functioning serving area, or just leave it as a topping bar.

Be sure to share your DIY Ikea Cart Hack with us on Instagram using the hashtag #sugarandclothloves, so we can follow along, too! We always love seeing all of your creations!
Please note that we may earn a commission for some of the above affiliate links. However, products featured are independently selected and personally well-loved by us!
I love your ideas and think this os great design!
Thanks, Lori! We love doing Ikea hacks!
How did you make those little metallic balloons???
Unfortunately, those are DIY balloons! We posted a link but it looks like they’re sold out on the site BUT you can easily find letter balloons at any party store and even some grocery stores.
Love this! It doesn’t seem like Ikea has the trendig anymore – any other suggestions?
Ahhhhh Ashley! This is the best thing. I need one in my life!! Awesome!
haha, we can arrange that!
Love love love. Your blog is so beautiful!
http://www.iolablog.com/
Thank you Stephanie! totally makes my day :)
OMG! I just died from cuteness!
haha! xox
so CUTE!!!!!!!
thanks boo!
I love everything about this…absolutely BRILLIANT!!!!!! The cart…the canisters…the balloons…the painted ice cream cones… SWOONING!!!
thanks so much Abby!
AH-mazing, Ash! Seriously, you knocked it out of the park. This is my favorite DIY of yours yet! I hope you carry this with you on the plane to my wedding, and to everywhere else you go for the rest of your life. *BRAVO!*
ha! well I think it would just be easier to make one for you upon arrival ;)
I look at these pictures and think I am in a fairy tale…you and your partners did such a fabulous job on every little detail and design. Im in awwww of the beauty of this ice cream hack and any child/adult would love this. The creativity is beyond my imagination with the hanging metallic letters and the ice cream cones…really? Talent, talent, talent…
BEST DIY!!!!!!!!!!!!!!!!!!!!!!!!!!!!!!!!!!!
thank you, thank you!