How to Make an Easy DIY Marbled Macarons
Beautify your macarons with a simple ingredient! We used a whip cream trick to create these DIY Marbled Macarons!
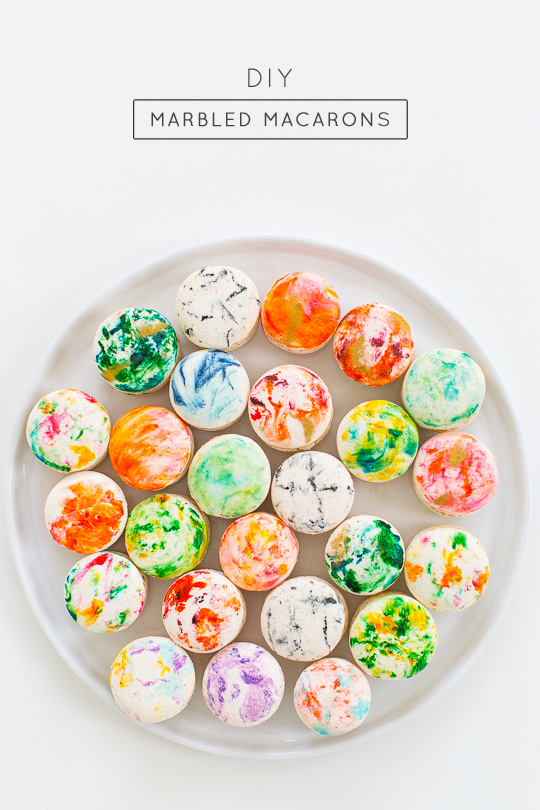
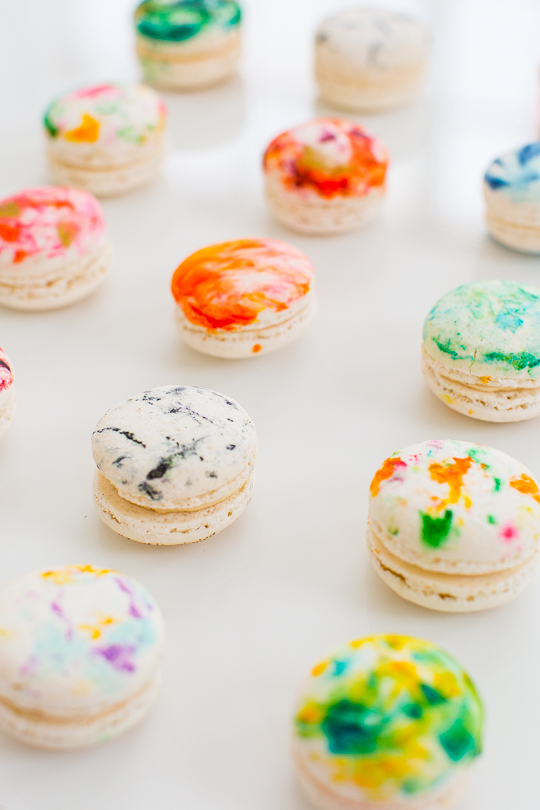
I may have just discovered my new favorite #glossaryofmacs project with these DIY marbled macarons!
I’ve been meaning to attempt this project forever.
But I just wasn’t quite sure how to make it work without baking the colors into the macarons themselves.
Not only does that cancel out a ton of people that wouldn’t want the struggle of making their own macs, but the colors aren’t nearly as vibrant or marbled that way.
We discovered this genius shaving cream marbling tutorial and then I finally figured out the perfect edible equivalent to make DIY marbled macarons with!
Now, my French die-hard fans will roll over in their graves for treating precious macarons with this technique.
But for those of you in this for the look and taste, these are just as good as any! Any guesses on what we used?!
Materials and Tools Needed to Make DIY Marbled Macarons
Almond or vanilla macarons – Store-bought or use homemade French macarons or Italian macarons
Whipped cream or Cool Whip
Edible gold dust (optional)
How to Make DIY Marbled Macarons
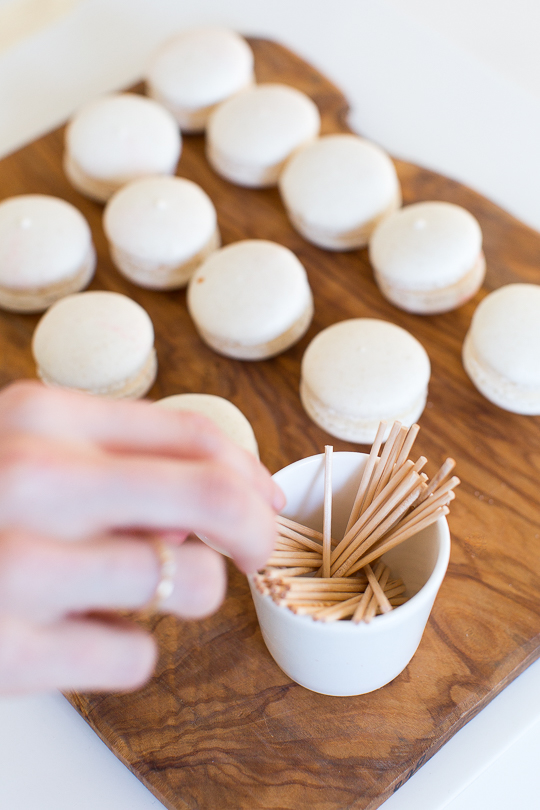
1 — To start, you can tape down a sheet of wax paper to work on or you can just use paper plates if you’re not making that many.
Even better than shaving cream? Whipped cream!
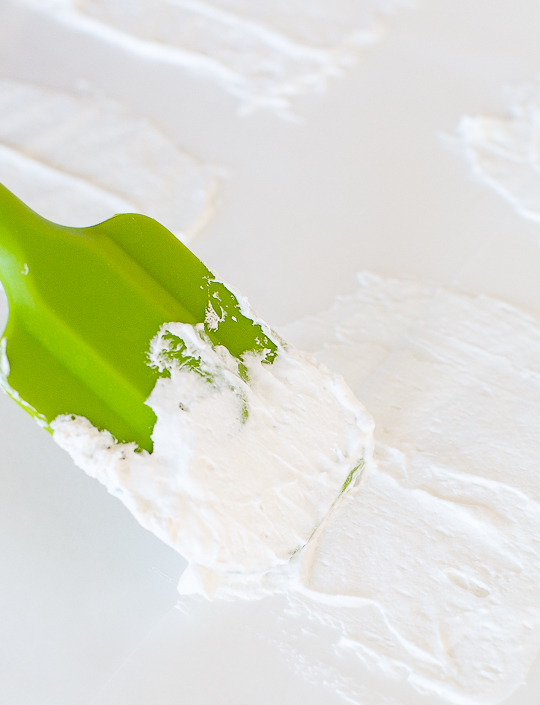
2 —Use a spatula to smear a thin layer of whipped cream or cool whip onto your plate or wax paper. This is what you’ll be dipping the macarons in!
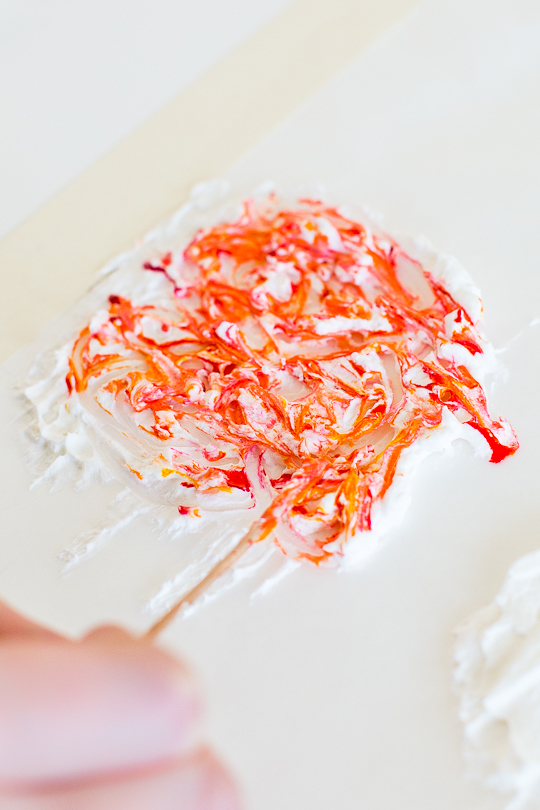
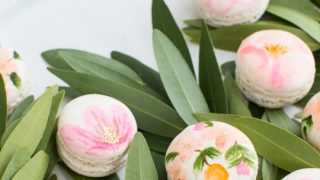
3 — Using toothpicks, create a design in the whipped cream.
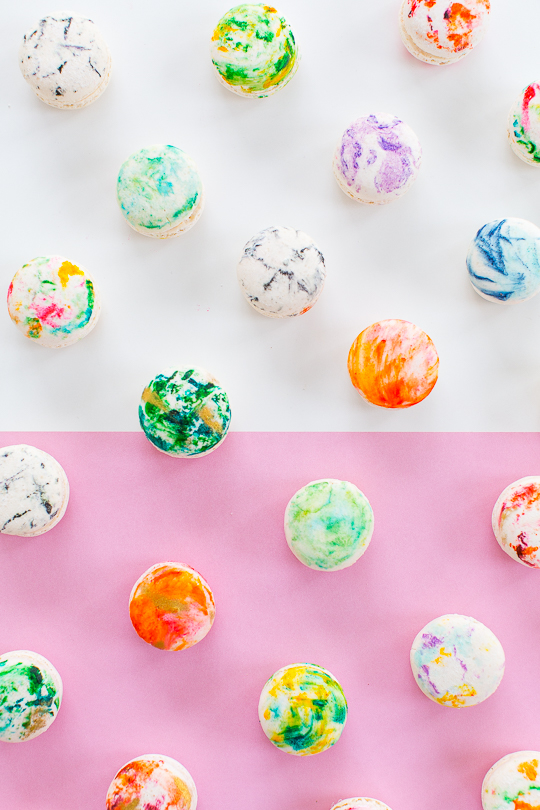
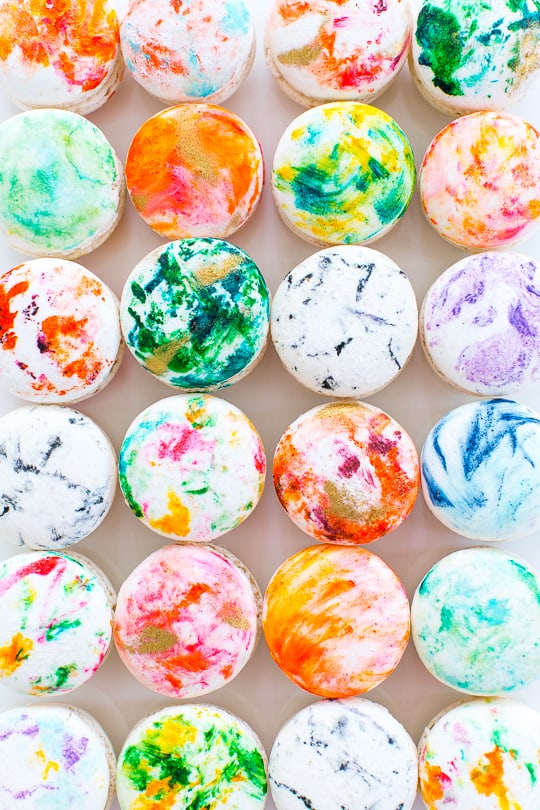
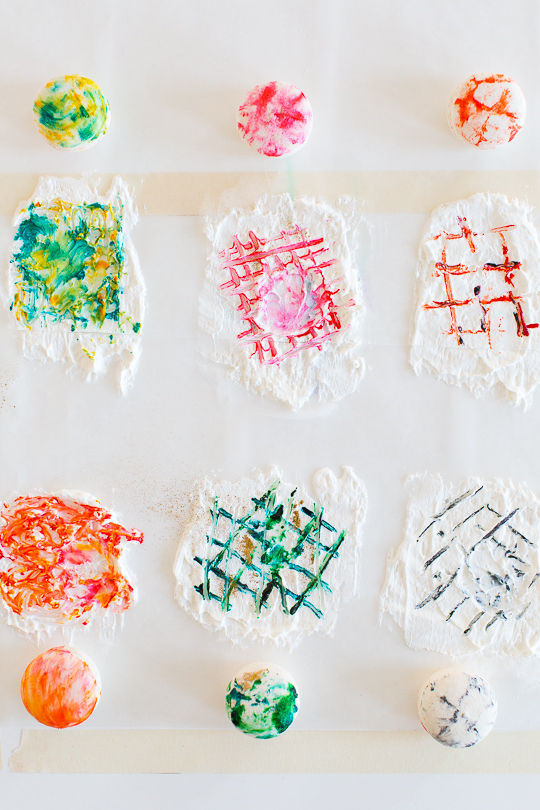
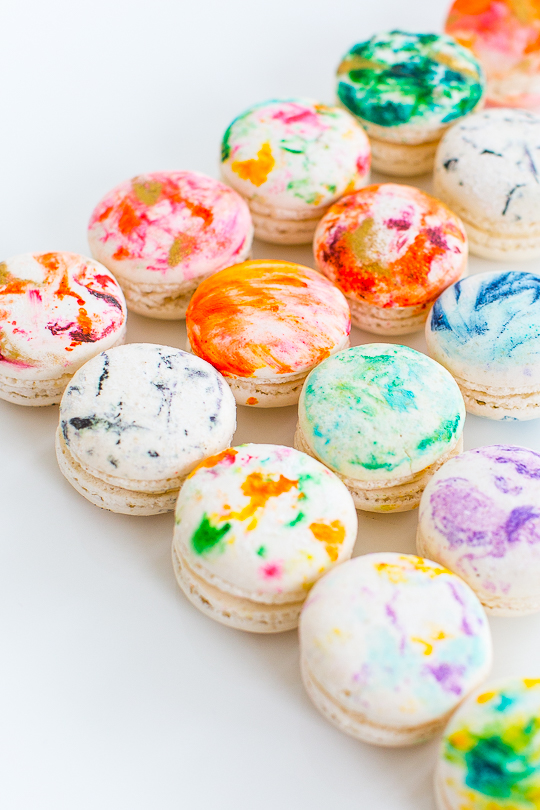
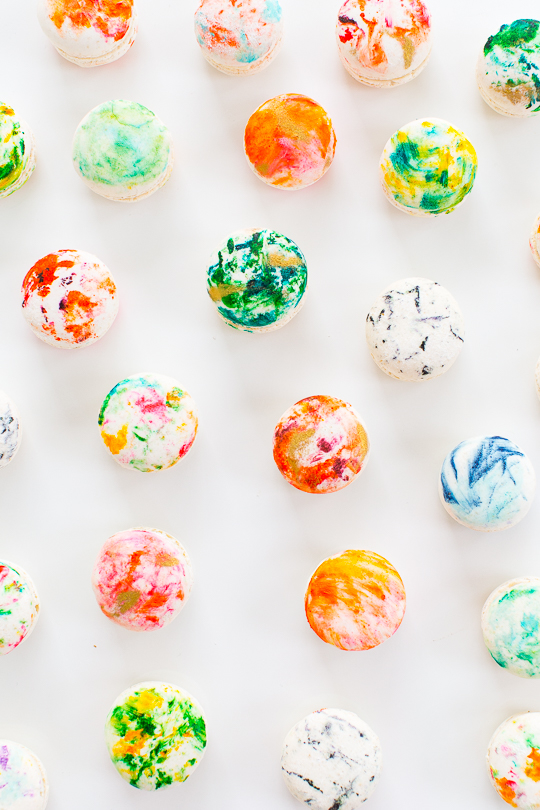
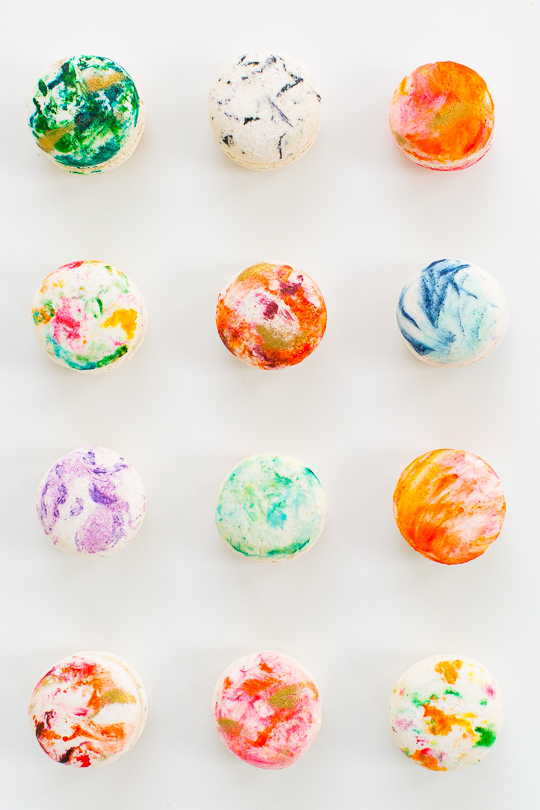
Below is a photo of what our food color patterns looked like to achieve each marbled effect. The more color, the more covered and “watercolor-ish” the macron will look.
If you’re scarce with the color, it will yield a more marbled effect.

4 — Once you have your color pattern, place the macaron on top of the whipped cream. Make sure the sides get covered by VERY gently rolling it in the cream.
5 — Lift the macaron back up and wait about 30 second to let the food color sink into the cookie.
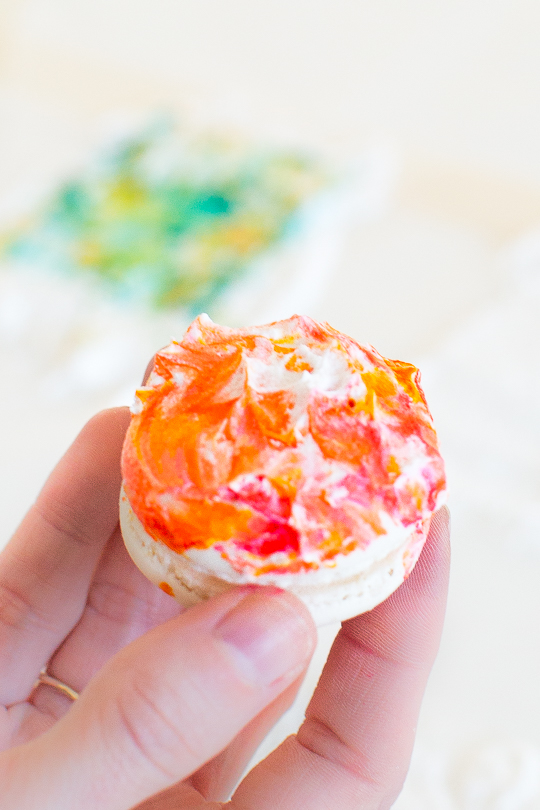
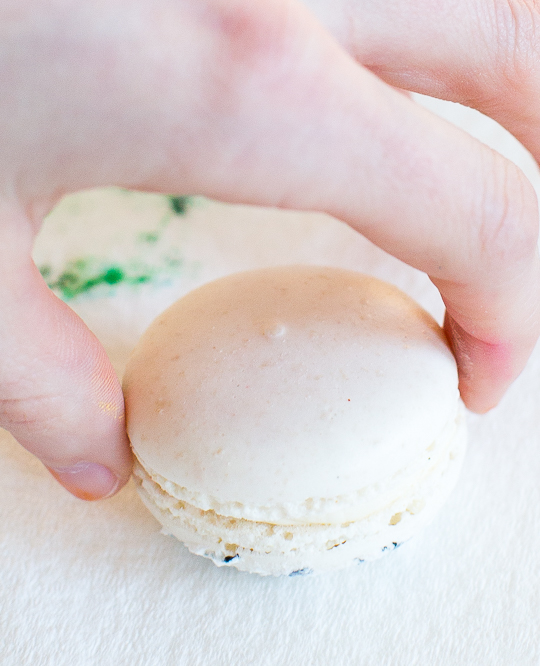
6 — Now dab the whipped cream excess off on un-patterned paper towels.
You can gently wipe the cream off if you’d like a more brushstroke effect.
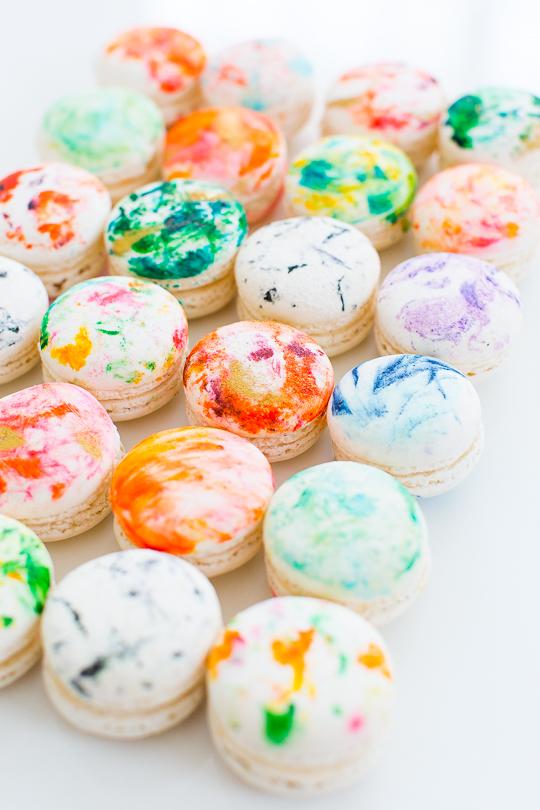
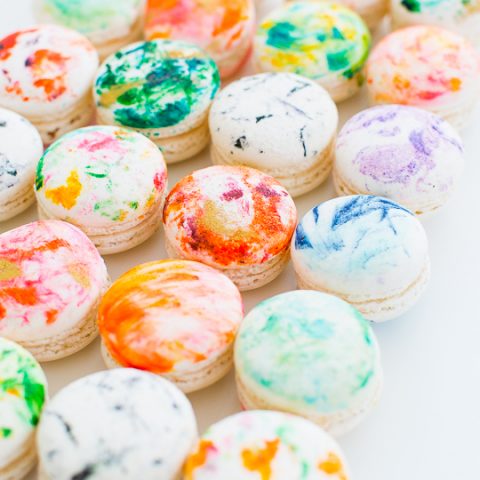
Now you can have a heyday with every color combination you can think of!
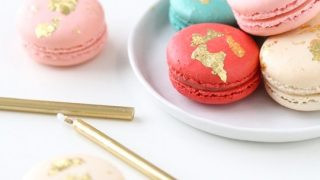
We loved the idea of adding a bit of gold dust to the tops of some, and it’s such a pretty end result!
So what do you think?! Are DIY marbled macarons in your near future? I’m thinking they should be!
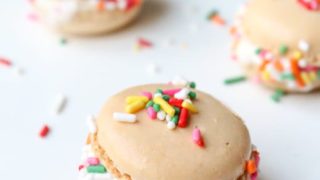
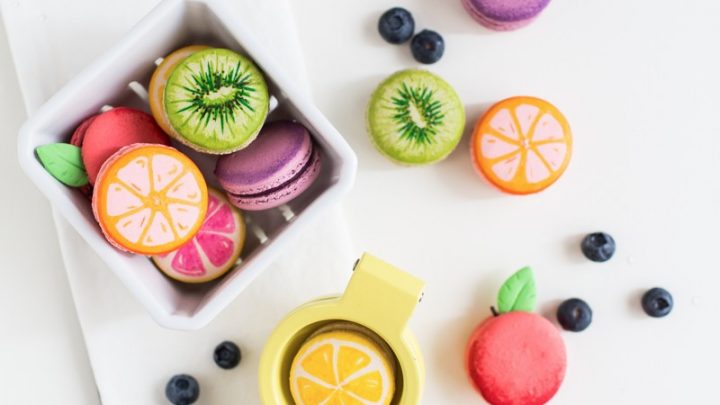
More DIY Macarons
If you’re looking for more colorful macaron projects, see some of my favorites below!
- Easy Halloween Macarons Dessert – Ghost Macarons Recipe
- DIY Easter Macarons & Paintable Royal Icing Recipe
- DIY Abstract Art Macarons
- DIY Gradient Message Macarons
Equipment
- Toothpicks
- Wax paper
Materials
- Almond or vanilla macarons Store-bought or use homemade French macarons or Italian macarons
- Gel food colors
- Whipped cream or Cool Whip
- Edible gold luster dust optional
Instructions
- To start, you can tape down a sheet of wax paper to work on or you can just use paper plates if you’re not making that many. Even better than shaving cream? Whipped cream!
- Use a spatula to smear a thin layer of whipped cream or cool whip onto your plate or wax paper. This is what you’ll be dipping the macarons in!
- Using toothpicks, create a design in the whipped cream.Below is a photo of what our food color patterns looked like to achieve each marbled effect. The more color, the more covered and “watercolor-ish” the macron will look.If you’re scarce with the color, it will yield a more marbled effect.
- Once you have your color pattern, place the macaron on top of the whipped cream. Make sure the sides get covered by VERY gently rolling it in the cream
- Lift the macaron back up and wait about 30 second to let the food color sink into the cookie.
- Now dab the whipped cream excess off on un-patterned paper towels.You can gently wipe the cream off if you’d like a more brushstroke effect.

Be sure to share your creations with #glossaryofmacs on Instagram for us to follow along, plus you can see all of our other macaron creations here!
Please note that we may earn a commission for some of the above affiliate links. However, products featured are independently selected and personally well-loved by us!
Could you please do a video of this? It looks amazing but I’m not sure how exactly to do the marbling!
Hi! Those are so awesome and super cute! I just have one question, can you freeze these macarons after the marbling? And if you can, HOW long time? :-)
What macaron recipe do you use to make all of your macarons?
We usually use store-bought! Making them is a quite a long process, which is why we don’t share recipes, just the how-to’s! We want them to seem do-able for people! :)
What a cool technique! they look awesome!
thanks Eden!
Wow! I’m amazed! this looks absolutely amazing. I can’t wait to try this. Can i use the whipped cream from the bottled one. The one that has already been whipped in a can sprayer. Can i use that one instead?
Does this technique affect the “shelf life” of the macaroons? Can the macaroons still be frozen?
Omg! I need to do this!! They are soooo pretty!!
Rachel x
thehappybits.blogspot.com
Brilliant idea. Sharing in my Pinterest!
These look so cute, what a great idea! :D
http://printedforest.blogspot.co.uk/
These macarons look amazing! You always do an amazing job!
Paige
http://thehappyflammily.com
What an awesome idea! Thanks so much for sharing. I can’t wait to try these!
These look so good! Would love to try this!
ISOSCELLA | isoscella.blogspot.co.uk
Wow…This is macarons on a whole new level! I admire your delicate skill in making macarons! I never can get the cookie part to rise as much as it’s needed! Perhaps I don’t sift the almond flour as much as I need to. The marble effect is beautiful! =) Just beautiful! Orinigial and inventive!
Melanie | Toots + Dill