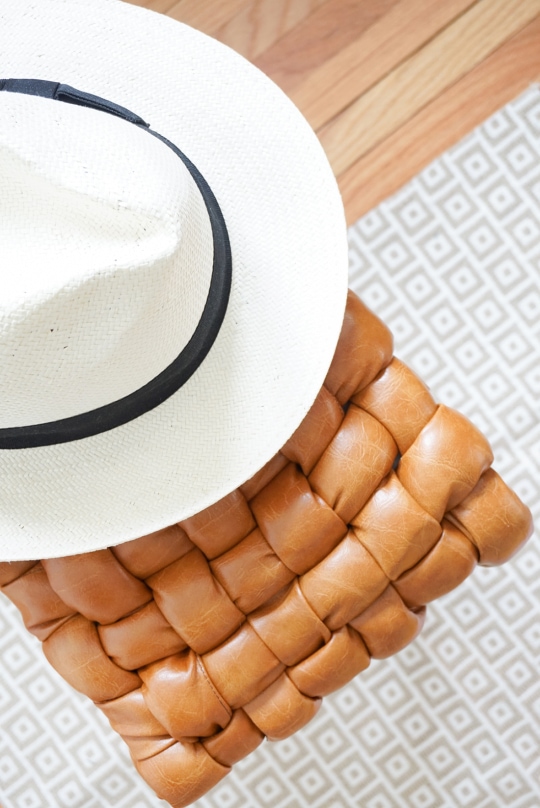
DIY Woven Stool
Sharing our step-by-step Leather DIY Woven Stool tutorial to spruce up your home. Everyone will think it’s store bought!
Elevate your home decor with our step-by-step Leather DIY Woven Stool tutorial. Learn how to create a stylish and functional piece using leather strips, adding a touch of rustic elegance to any room. Explore this hands-on project and craft a unique accent for your living space today!
It seems the design world is cuckoo for cognac-hued leather at the moment (especially when it comes to sofas). And I, Erin am no exception to the craze! Like most of us though, it’s not exactly feasible to run out and buy a new sofa at the drop of a hat. (Although wouldn’t that be amazing?!)
So I’ve decided to satisfy my cognac leather craving with a more affordable sort of furniture piece. One I can actually make myself with a little ingenuity and cleverly wielded materials.
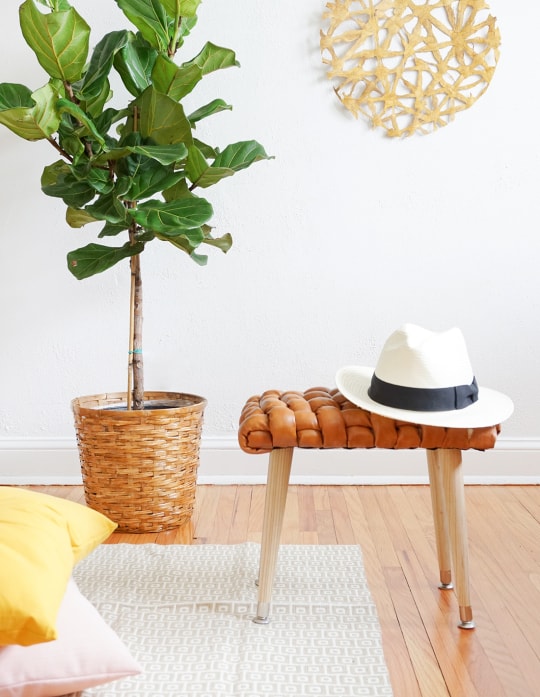
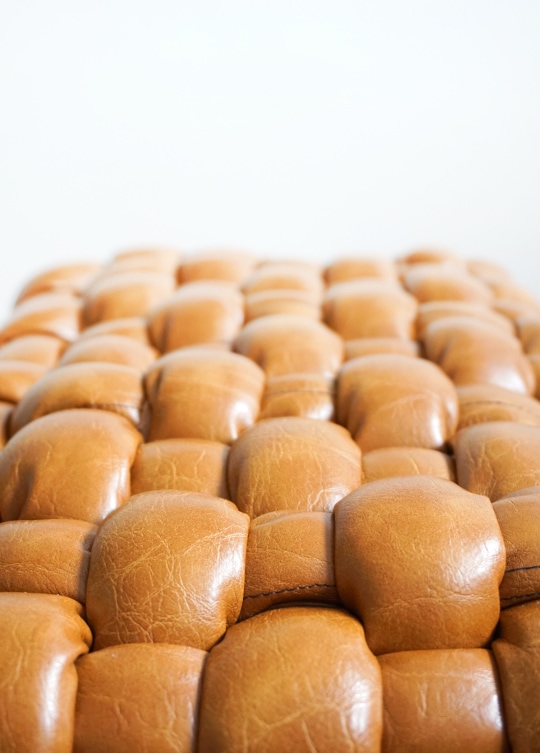
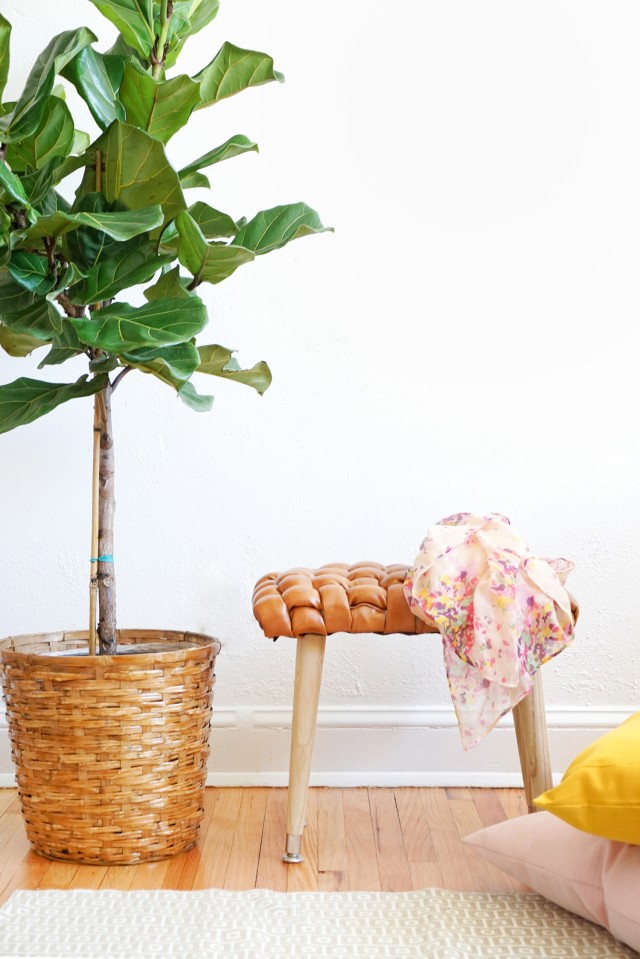
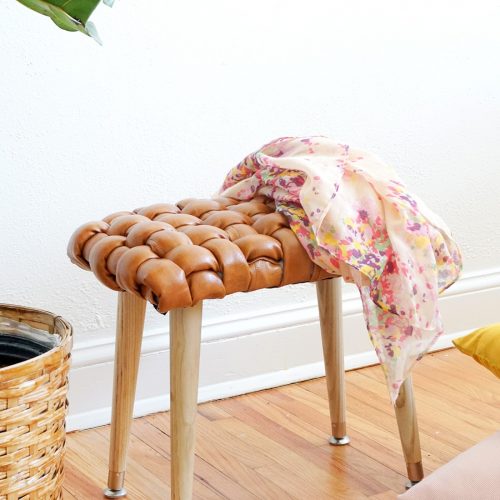
If you too are looking for a way to introduce cognac leather into your home without throwing your savings out the window, this DIY Woven Leather Stool has your name written all over it…
Materials Needed to Make a DIY Woven Leather Stool
1/2”- 1” thick MDF or plywood board — Cut to 9” width x 15” length dimensions
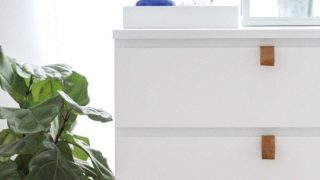
1 yard of faux leather or leather – Specifically, I used this faux leather.
9 yards of 1” diameter piping cord filler — Found at most fabric stores
Synthetic fiber batting
Basic sewing supplies — Pins, scissors, thread, white colored pencil or chalk
4 of these 12”tall tapered wood legs
4 of these Angled leg brackets
Lightweight cotton fabric — Optional
How to Make a DIY Woven Leather Stool
1 – Cut faux leather in 4” wide strips at two length. You’ll need seven strips at 29”L & ten strips at 18”L.
2 – Then, cut cording into seven strips at 26”L & ten strips at 15”L.
3 – Once the faux leather and cording is cut, start encasing the cording in the leather strips.
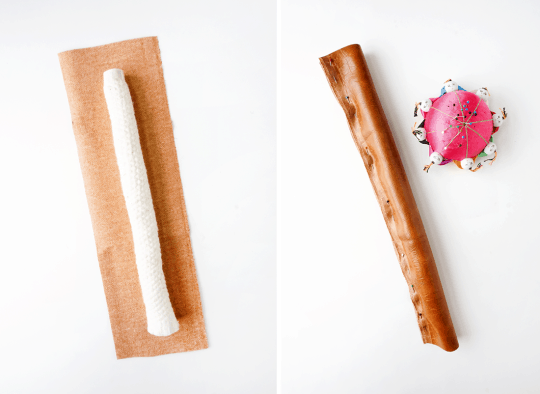
4 – Center the short cording strips on the short faux leather strips and fold the faux leather in half (around the casing).
5 – Pin into place.
6 – Do the same with the longer faux leather & cording.
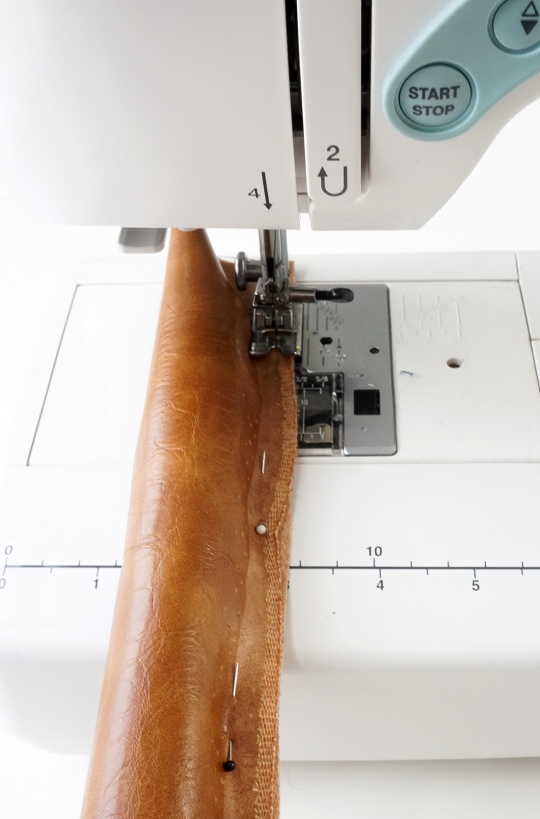
7 – Next, thread your machine (I used contrast thread) and move your needle all the way over so it’s as close to the leather cording as possible.
8 – Sew a straight stitch along the length of the cording, removing pins as you go.
9 – Repeat with all cordings.
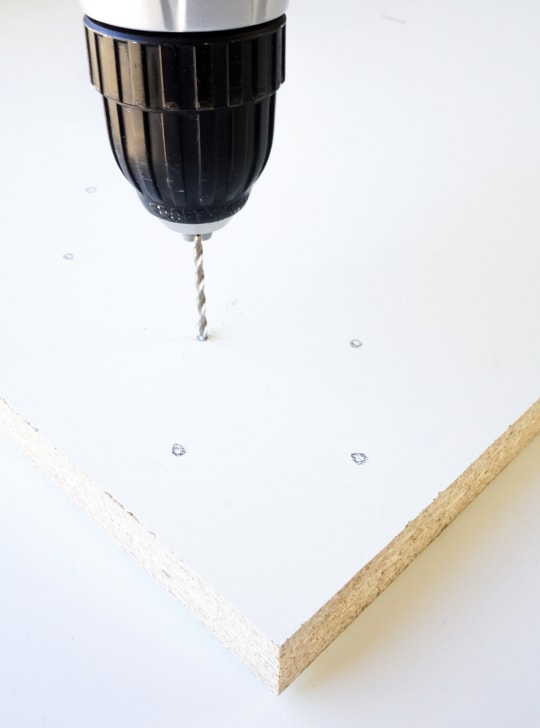
10 – Position the angled leg brackets at each corner of the board.
11 – Mark with a pencil and pre-drill holes.
12 – Flip the board over.
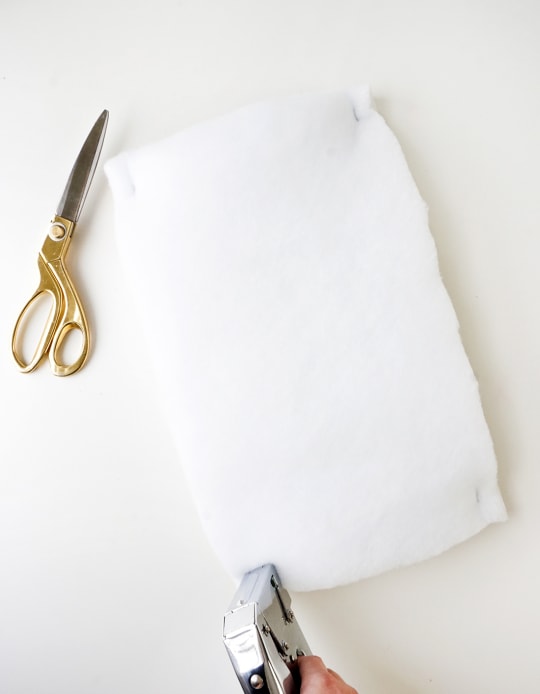
13 – Cut four layers of batting the same size as the board and attach onto the board with a staple in each corner.
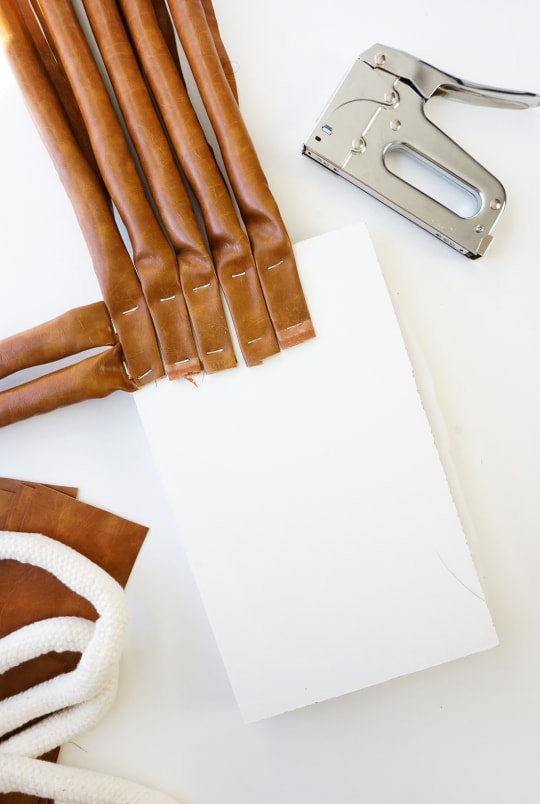
14 – Next, begin stapling the long leather strips along the underside of the shorter edge of the board, and the short leather strips along the underside of the longer edge of the board.
15 – Next, flip the board over and lay the long strips over the length of the board.
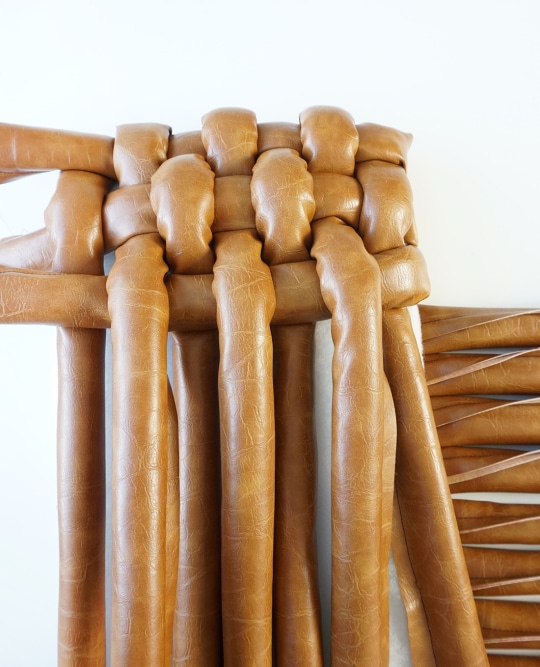
16 – If you’re familiar with weaving, think of the long strips as your warp (running lengthwise) and your shorter strips as your weft (running right to left).
17 – Begin weaving the strips together with a basket type weave comprised of ‘over one, under one.’ Make sure to push the shorter strips back up towards the top, and pull everything very tight as you go.
18 – As soon as you’ve woven in about 3 short strips, staple those 3 weft cords on the bottom side of the board towards the edge.
19 – I didn’t worry too much about the contrast stitching showing, as I liked the handmade quality it added.
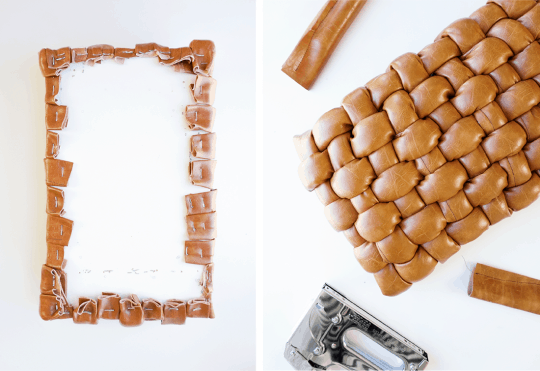
20 – Continue weaving until the entire top of the stool is woven.
21 – Finish by stapling the long warp strips to the bottom side of the board.
22 – Then, cut back any strips (& re-staple, if necessary) any that cover up your pre-drilled bracket holes.
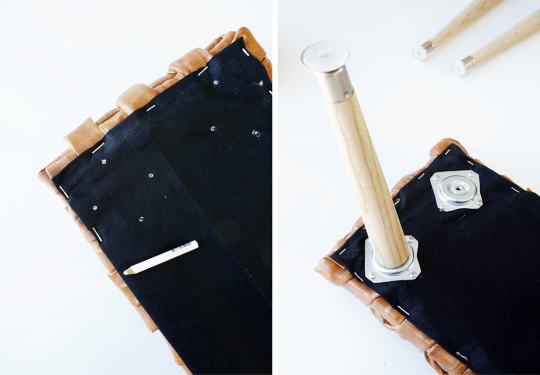
23 – At this point, you may want to conceal the craziness on the bottom of the stool with lightweight cotton fabric.
24 – This step is totally optional, but I think it creates a more finished looking piece.
25 – Cut a piece of lightweight cotton 1-2” larger than the size of the board.
26 –Fold raw edges under so that it’s the size of the board and iron to keep in place.
27 – Lay the fabric over the bottom of the stool and staple one edge into place.
28 – Mark pre-drilled bracket holes on the surface of the fabric with a white colored pencil.
29 – Staple the remaining sides of the fabric into place.
30 – Screw brackets into place and screw in legs.
Can You Stain A Rush Seat?
Yes, you can! You can never go wrong with a bit of stain. It’s the perfect solution for any chair that needs an added touch!
Do Couches Break-In?
The first few days of owning a new couch are always tough. But don’t worry, it gets better with time!
After just one week your new friend’s stuffing will start to soften and become more comfortable as well-you’ll be able to make friends fast at chinwags evening on their soft leather upholstery.”
Should Stool Legs Be Angled?
There are a lot of different stool leg angles, but it seems like the most popular ones are between 0 and 14 degrees.

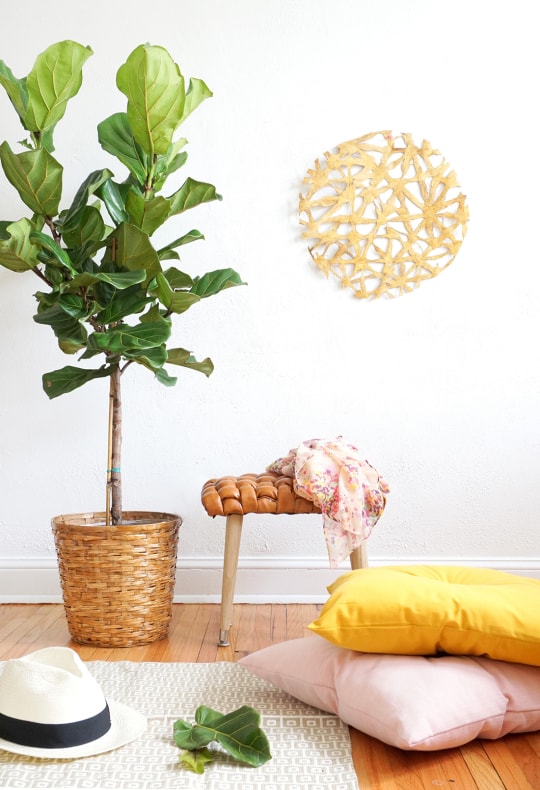
Pair this textural bad boy with your favorite lounge chair, or tuck a pair of them under a console for additional seating when needed. Either way, your space just got an upgrade!
What do you think? Are you into the cognac leather trend?
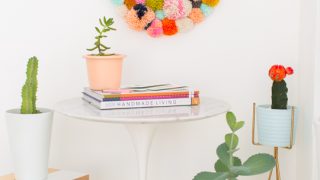
For more of our favorite DIY projects, check out a few favorites from the archives —
- These Great DIY Plant Stand Ideas can provide you with both a fashionable and functional look!
- Gorgeous DIY Coffee Table Ideas To Try At Home: from modern to farmhouse and everything in between.
- DIY Playroom Idea: full of easy ideas, playroom storage hacks
- A Trendy DIY Ikea TV Stand with a super-easy tutorial!
- DIY Woven Room Divider: up your home decor game on a budget
DIY Woven Stool
Equipment
- Sewing machine
- Staple gun
- 1/2" staples
- Basic sewing supplies pins, scissors, thread, white colored pencil or chalk, etc
Materials
- 1 MDF or plywood board 1/2"-1" thick
- 1 yd faux leather or leather
- 9 yd piping cord filler 1" diameter
- Synthetic fiber batting
- 4 tapered wood leg 12" tall
- 4 angled leg bracket
- Lightweight cotton fabric optional
Instructions
How to to make your leather cording strips:
- Cut the faux leather in 4” wide strips at 2 different lengths. You’ll need 7 strips at 29” long and 10 strips at 18” long.
- Cut cording into 7 strips at 26” length and 10 strips at 15” length.
- Once the faux leather and cording is cut, start encasing the cording in the leather strips.
- Center the short cording strips on the short faux leather strips and fold the faux leather in half (around the casing).
- Pin into place.
- Do the same with the longer faux leather & cording.
- Next, thread your machine, and move your needle all the way over so it’s as close to the leather cording as possible. (We used a contrasting thread.)
- Sew a straight stitch along the length of the cording, removing pins as you go.
- Repeat with all cordings.
How to make your woven stool:
- Position the angled leg brackets at each corner of the board.
- Mark with a pencil and the pre-drill holes for where the legs will sit.
- Flip the board over.
- Cut 4 layers of batting the same size as the board and attach onto the board with a staple in each corner.
- Next, begin stapling the long leather strips along the underside of the shorter edge of the board, and the short leather strips along the underside of the longer edge of the board.
- Next, flip the board over and lay the long strips over the length of the board. If you’re familiar with weaving, think of the long strips as your warp (running lengthwise) and your shorter strips as your weft (running right to left).
- If you’re familiar with weaving, think of the long strips as your warp (running lengthwise) and your shorter strips as your weft (running right to left).
- Begin weaving the strips together with a basket type weave comprised of ‘over one, under one.’ Make sure to push the shorter strips back up towards the top, and pull everything very tight as you go.
- As soon as you’ve woven in about 3 short strips, staple those 3 weft cords on the bottom side of the board towards the edge. x
- I didn’t worry too much about the contrast stitching showing, as I liked the handmade quality it added.
- Continue weaving until the entire top of the stool is woven.
- Finish by stapling the long warp strips to the bottom side of the board.
- Then, cut back any strips (& re-staple, if necessary) any that cover up your pre-drilled bracket holes.
- At this point, you may want to conceal the craziness on the bottom of the stool with lightweight cotton fabric.
- This step is totally optional, but we think it creates a more finished looking piece.
- Cut a piece of lightweight cotton 1-2” larger than the size of the board.
- Fold raw edges under so that it’s the size of the board and iron to keep in place.
- Lay the fabric over the bottom of the stool and staple one edge into place.
- Mark pre-drilled bracket holes on the surface of the fabric with a white colored pencil.
- Staple the remaining sides of the fabric into place
- Screw brackets into place and screw in legs.


Please note that we may earn a commission for some of the above affiliate links. However, products featured are independently selected and personally well-loved by us!
I Like this .The diy tutorial is easy to do.
Holy guacamole this is GREAT! I’ve just finished making a footstool myself – I went down the traditional route by covering some foam with a heavy-duty woven fabric. But this idea is so much cooler, I want to make a second one now! Thanks for the inspiration. :)
LOL thanks Mike! What a compliment! I mean, you can never have too many stools in my opinion, haha! Let us know if you try it out!
Thanks for using our T50 staple gun on this project! #MadeWithArrow
It’s a staple item! ;)
I love this project! Thank you so much for that wonderful idea.
May I ask what’s hanging on the wall for decoration? It looks like amate (bark paper).
If i were to alter the size of the stool to 12″ x 24″ do you have any suggestions on sizing of the lengths of vinyl and piping (when cut)? I noticed your lengths of vinyl are roughly doubled the length or width of the MDF. Thank you!
Love the seat thanks for sharing. What is the fillaGree round object on the wall?
Great project! It looks like something from a high-end store. The only thing I can add is that when you are making piping, use a zipper foot to get your piping as tight as you can. I know, I’ve made thousands of yards of it!
Thanks for the insiders tip, Mary ;)
I love working with leather! Im excited to make this unique stool! Great idea!
Can’t wait to see the finished result, Patricia!
I just love this piece , i am going to have to add this link so i maY do some what simular as i do not have as handy a hand,,,but willing to go for it . Thank you for sharing.
You got this!
I’d never be able to make this myself, but i’m happy to admire from afar. beautiful work!
Well I’m glad you like it PJ!
It looks so easy to do. And it looks amazing. I love the result.
Glad you like the DIY, Miriam!
This Stool completely blows my mind. It’s so stunning! Great work, Erin!
Right?! Erin always kills it.
Love this stool IT TURNED OUT SO PERFECT AND PROFESSIONAL. IT HAS INSPIRED ME TO TRY THIS TECHNIQUE. CHEERS, MICHELE
It doesn’t get better than a comment that says it looks professional, haha ;) xoxo
This is the stool of my dreams. You make it seem so easy to have.
yay, so glad you love it!
Wowza, are you kidding me?! this is so awesomely cool. great work!
xx Hannah // http://www.homemadebanana.com
I know, Erin totally killed it with this project!!
Oh My! This is so awesome!
Thank you, Monique! xo
This stool is gorgeous! You did an amazing job!
Paige
http://thehappyflammily.com
Thanks Paige! xo
I dont knoW if its just me but none of the materials link are clickablE for the urls. They’re shoWing up as UNLINKED texts
So strange, it’s working for us and we haven’t been told about the issue from others yet! Can you let us know what browser you’re using so we can look into? thanks Mary!