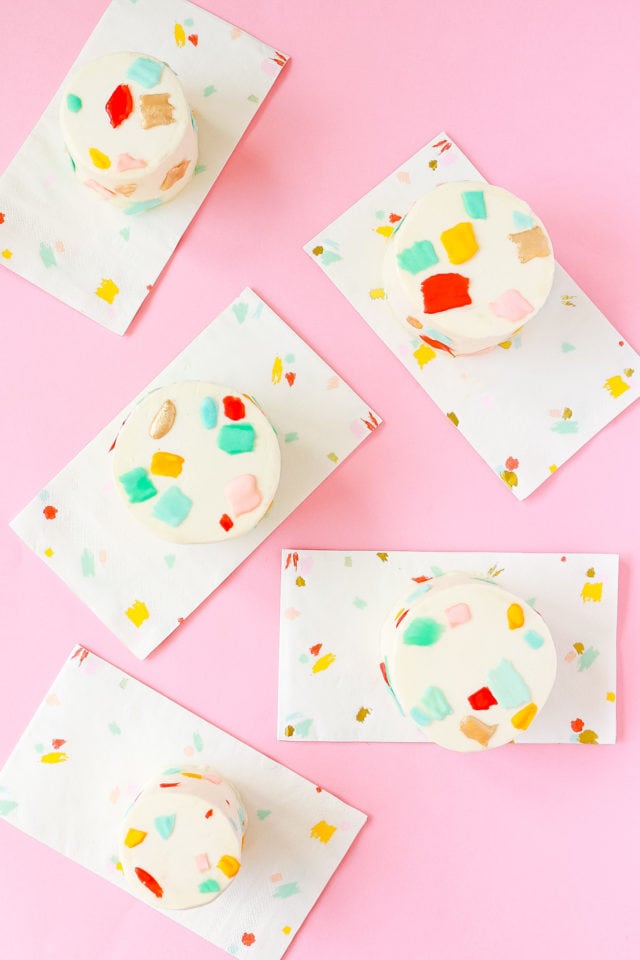
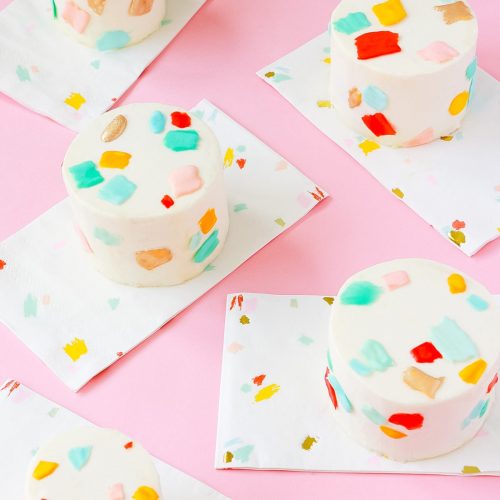
Mini Brushstrokes Confetti Cake Recipe
Unleash your inner artist in the kitchen with our Mini Brushstrokes Confetti Cakes, featuring layers of moist funfetti cake adorned with vibrant brushstroke-inspired designs and a burst of colorful confetti.
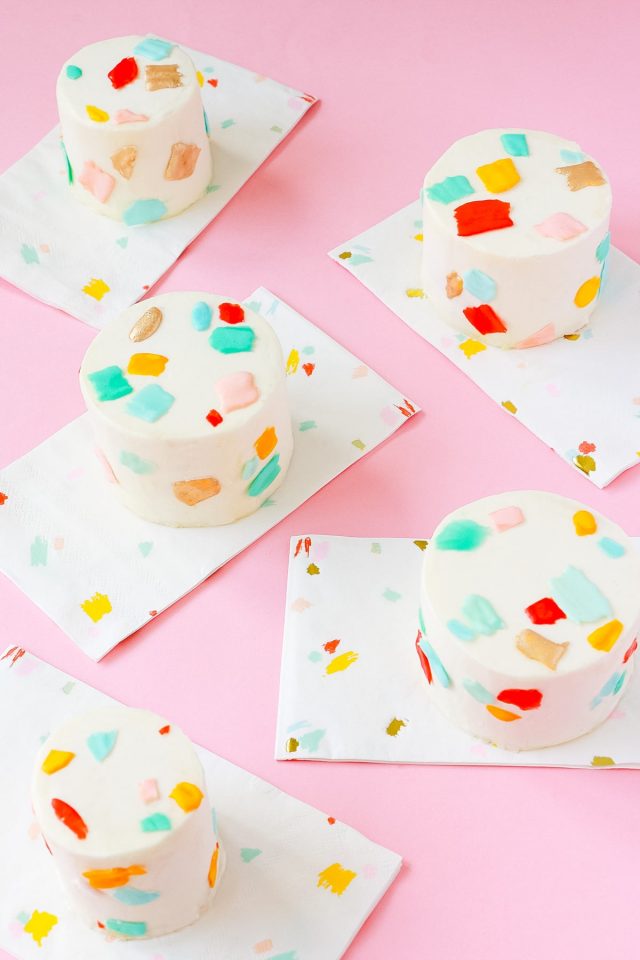
Picture this: layers of moist, delectable cake adorned with a playful confetti design and a touch of edible gold elegance.
The result? A dessert that’s as visually stunning as it is irresistibly delicious. If you’re familiar with my work, you may already know that I, Alana love little details.
And if you are familiar with Sugar & Cloth, then you know that we are obsessed with all things colors and confetti. Case in point: our homemade confetti and DIY confetti placemats.
So this cake literally has confetti in the inside and the outside!
Get ready to don your apron because we’re guiding you through the intricacies of crafting these mini delights and offering insights into the artful techniques that transform a simple cake into a canvas of culinary creativity.
Materials and Tools for Mini Cakes
For the brush stroke icing candies:
- Powdered sugar
- Cream of tartar
- 100% liquid egg whites
- Water
- Flavored extract — Optional such as vanilla, almond, or any flavor of your choice
- Gel food coloring — In the assortment of your choice. Our cake design was inspired by our Sugar & Cloth napkins so we made yellow, pink, peach, light blue, teal and red icing candies.
- Edible gold cake paint or edible gold luster dust — Save an extra to make champagne jello shots, a flower pot cake or even to garnish your desserts like pumpkin cream puffs or gemstone popsicles.
- Parchment paper
- Cake decorating brush
For the confetti cakes:
Please note that ingredients will vary based on the box cake mix that you use.
- Vanilla or white cake mix — Because we would be spending a lot of time decorating the cake, we saved time by using a cake box mix, and then adding in our homemade confetti candies. However, feel free to make your own from scratch!
- Milk
- Vegetable oil
- Large eggs
- Vanilla extract
- Frosting of your choice — A classic vanilla buttercream or cream cheese frosting works well.
- Rectangle cake pans
- Cooking spray
- Piping bag or a spatula
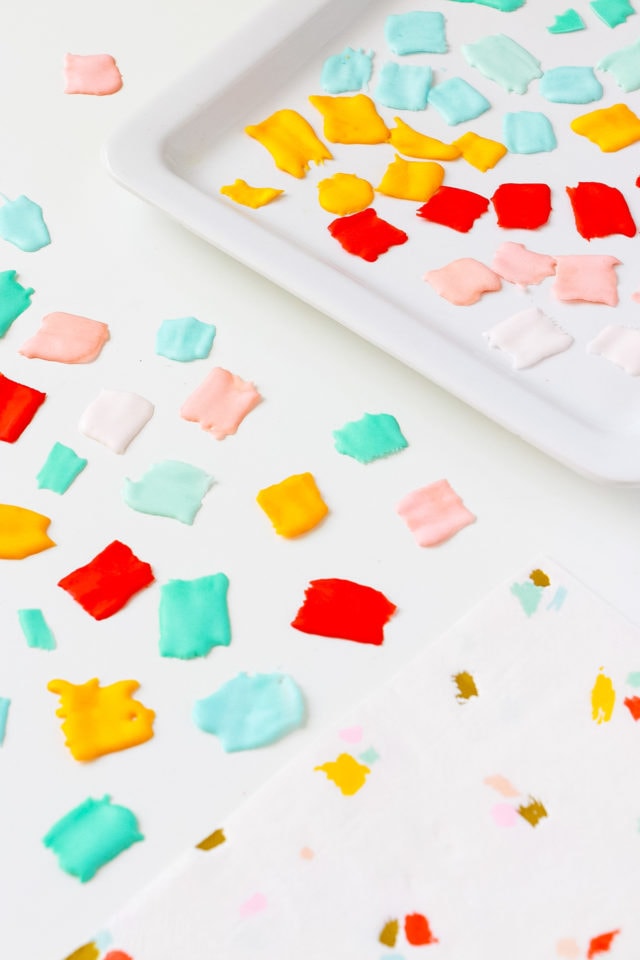
How to Make the Brush Stroke Icing Candies
These colorful icing candies are very easy to make. And thanks to a wide array of food coloring options, the customization of the candy colors are limitless.
If you’ve decorated cookies before, this process will feel familiar, as we’re essentially making royal icing. You’ll need to make decorating candies first because they will go inside your cake mix.
Instructions:
1 — In a mixing bowl, combine the powdered sugar and cream of tartar. Mix well to ensure an even distribution of the cream of tartar.
2 — Slowly, add the liquid egg whites to the powdered sugar mixture. Stir on low speed until the ingredients are well combined. The consistency should be thick, smooth, and easy to work with. Once combined, turn the speed to medium and whisk for 1-2 minutes, until the icing forms soft peaks.
3 — Add in 1 teaspoon of warm water and flavored extract (optional). Mix until combined.
4 — Distribute the icing into separate bowls, designating one bowl per the desired color. Add in 1-2 drops of food coloring to each bowl. Then, mix with until you achieve the desired hues.

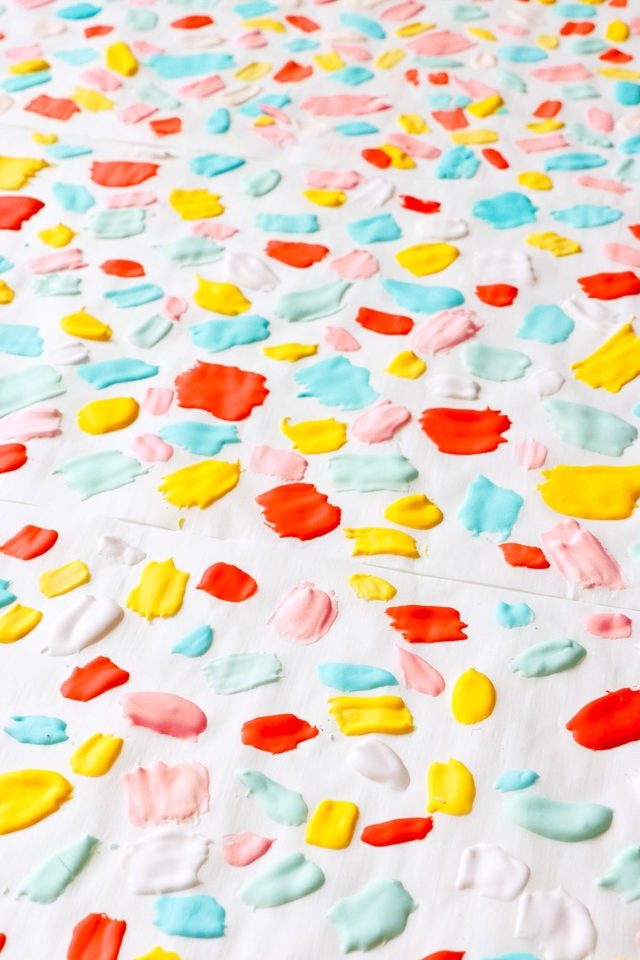
5 — With a swift motion, “paint” brushstrokes onto the parchment paper over a baking sheet. Experiment with different lengths, widths, and patterns. Allow the strokes to overlap for a more dynamic look.
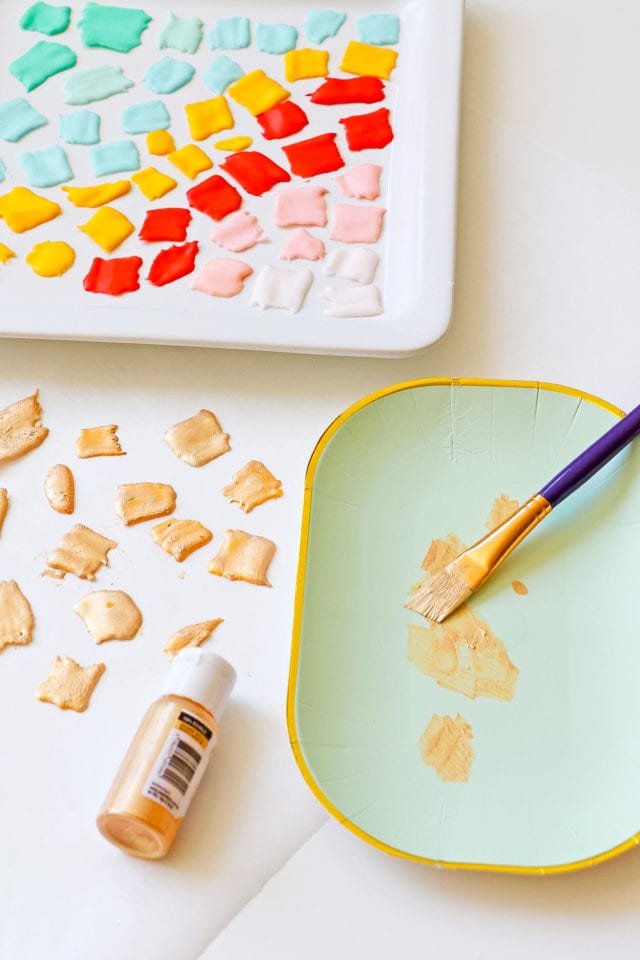
If you would like gold icing candy, leave some icing candy plain since you’ll need to paint them gold later. completely dry.
6 — Allow the icing candies to set on the parchment paper. This can take a few hours, depending on the humidity of your environment. We set ours aside to dry overnight.
For the gold pieces, brush the reserved icing candies with gold cake paint or luster dust after the icing candies are dry.
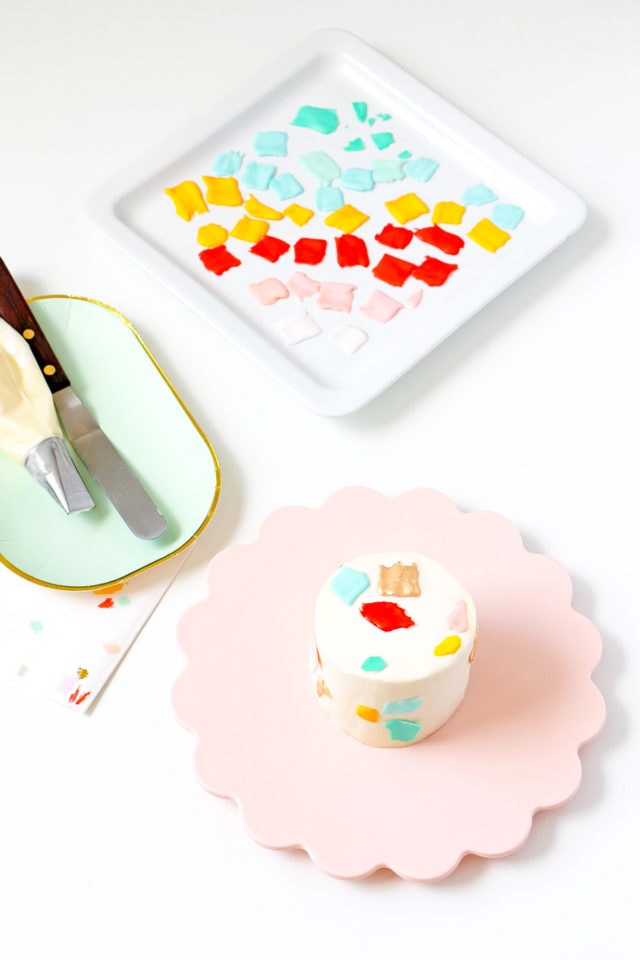
7 — Once fully set, carefully peel the icing candies off the parchment paper.
How to Make Funfetti Cake with White Cake Mix
1 — Preheat your oven according to the instructions on the cake mix box, typically 350°F (175°C). Grease and 2 rectangle cake pans or line them with parchment paper.
2 — In a large mixing bowl, combine the white cake mix, whole milk, vegetable oil, eggs, and vanilla extract. Mix well until the batter is smooth and all ingredients are fully incorporated. Or prepare your cake mix as directed.
3 — Add a handful of the dried icing candies into the cake batter. Use a spatula or spoon, break the candies down to small (¼-inch or smaller) pieces. Gently fold in the icing candies. Ensure even distribution, but be careful not to overmix.

4 — Divide the funfetti cake batter evenly between the 2 prepared cake pans.
5 — Bake the cakes in the preheated oven according to the package instructions, usually around 15-20 minutes, or until a toothpick inserted into the center comes out clean. Allow the cakes to cool in the pans for about 10 minutes. Then, transfer them out to cool completely.
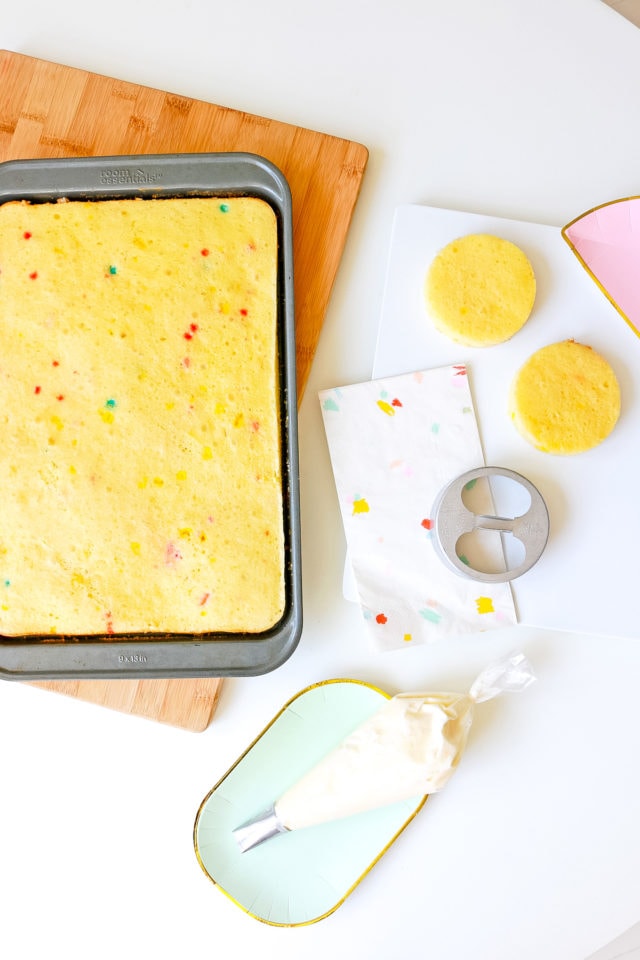
6 — Once cakes are completely cool, use a circular cookie cutter to cut out circles of cake.
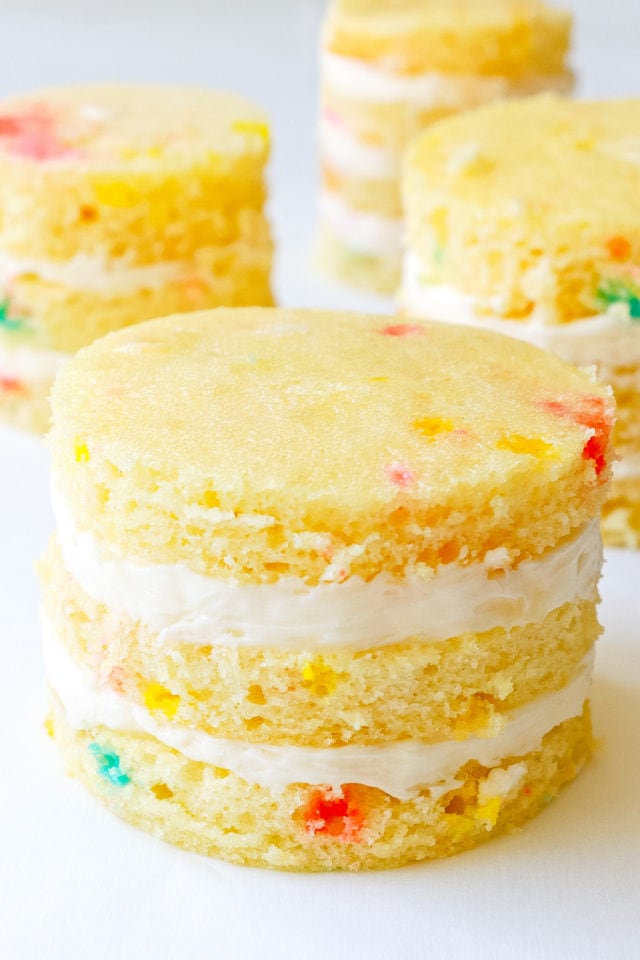
7 — Assemble cakes 3 layers high with frosting in between each layer.
Frosting and Decorating the Mini Confetti Cakes
1 — With a piping bag or spatula, spread a thin layer of frosting over the entire cake and let it set for about 10-15 minutes in the refrigerator. This is your crumb coat, a thin layer of frosting that helps seal in any loose crumbs.
2 — Apply your second layer with a generous amount of frosting. Smooth out the surface.
3 — Apply your icing candies around the cake exterior.
Recipe Notes and Tips
- Use the brushstroke icing candy to decorate cakes, cupcakes, cookies, or any other desserts. They add a touch of elegance and creativity to your sweet creations.
- Ensure that your cake is completely cooled before starting the frosting process. A warm cake can cause the frosting to melt.
- Placing the cake on a rotating cake stand (turntable) makes it easier to achieve a smooth and even frosting application.
- When frosting, apply frosting to the top first and then, the sides. Start in the center and work your way outward.
More Cake Decorating Projects
- Watercolor Cake
- DIY Balloon Cake Topper & Cake Painting Tips
- Sugar Flower Cake
- Paper Flower Cake Topper
Equipment
- Mixer
- Large mixing bowl
- Small mixing bowl
- Parchment paper
- Food safe paintbrush
- Baking sheet
- Rectangle cake pans
- Spatula
- Cookie cutter
- Cooking spray
Ingredients
For the icing candies:
- 16 oz powdered sugar
- 1 tsp cream of tartar
- 5-6 tbsp 100% liquid egg whites
- 1 tsp flavored extract optional
- Edible gold paint or edible gold luster dust
- Gel food coloring assortment of your choice
For the funfetti cake:
- 1 box cake mix white or vanilla (15.25 ounces)
- 1 cup whole milk
- ½ cup vegetable oil
- 3 large eggs
- 1 tsp vanilla extract
- Frosting of your choice
Instructions
To make the brushstrokes icing candies:
- In a mixing bowl, combine the powdered sugar and cream of tartar. Stir well.
- Slowly, add the liquid egg whites to the powdered sugar mixture. Stir on low speed. Once combined, turn the speed to medium and whisk for 1-2 minutes, until the icing forms soft peaks.
- Add in 1 teaspoon of warm water and flavored extract (optional). Mix until combined.
- Distribute the icing into separate bowls, designating one bowl per the desired color. Add in 1-2 drops of food coloring to each bowl. Then, mix with until you achieve the desired hues.
- With a swift motion, “paint” brushstrokes onto the parchment paper over a baking sheet. Experiment with different lengths, widths, and patterns. Allow the strokes to overlap for a more dynamic look. If you would like gold icing candy, leave some icing candy plain since you’ll need to paint them gold later. completely dry.
- Set aside to dry on the parchment paper. This can take a few hours or overnight, depending on the humidity of your environment. For the gold pieces, brush the reserved icing candies with gold cake paint or luster dust after the icing candies are dry.
- Once fully set, carefully peel the icing candies off the parchment paper.
To make the mini confetti cakes:
- Preheat your oven according to the instructions on the cake mix box, typically 350°F (175°C). Grease and 2 rectangle cake pans or line them with parchment paper.
- In a large mixing bowl, combine the white cake mix, whole milk, vegetable oil, eggs, and vanilla extract. Mix well until the batter is smooth and all ingredients are fully incorporated. Or prepare your cake mix as directed.
- Add a handful of the dried icing candies into the cake batter. Use a spatula or spoon, break the candies down to small (¼-inch or smaller) pieces. Gently fold in the icing candies. Ensure even distribution, but be careful not to overmix.
- Divide the funfetti cake batter evenly between the 2 prepared cake pans.
- Bake the cakes in the preheated oven according to the package instructions, usually around 15-20 minutes, or until a toothpick inserted into the center comes out clean. Allow the cakes to cool in the pans for about 10 minutes. Then, transfer them out to cool completely.
- Once cakes are completely cool, use a circular cookie cutter to cut out circles of cake.
- Assemble cakes 3 layers high with frosting in between each layer.
To decorate the cake:
- With a piping bag or spatula, spread a thin layer of frosting over the entire cake and let the crumb coat set for about 10-15 minutes in the refrigerator.
- Apply your second layer with a generous amount of frosting. Smooth out the surface.
- Apply your icing candies around the cake exterior.
Nutrition
Notes
- Cake ingredients vary on what ingredients your box cake calls for.
- Depending on your cookie cutter, this recipes makes 4 mini layer cakes.

Don’t forget to share your confetti cake with us on Instagram using the hashtag #sugarandclothloves. We always love seeing all of your creations! Looking for more quick and delicious recipes? Find them all right here!
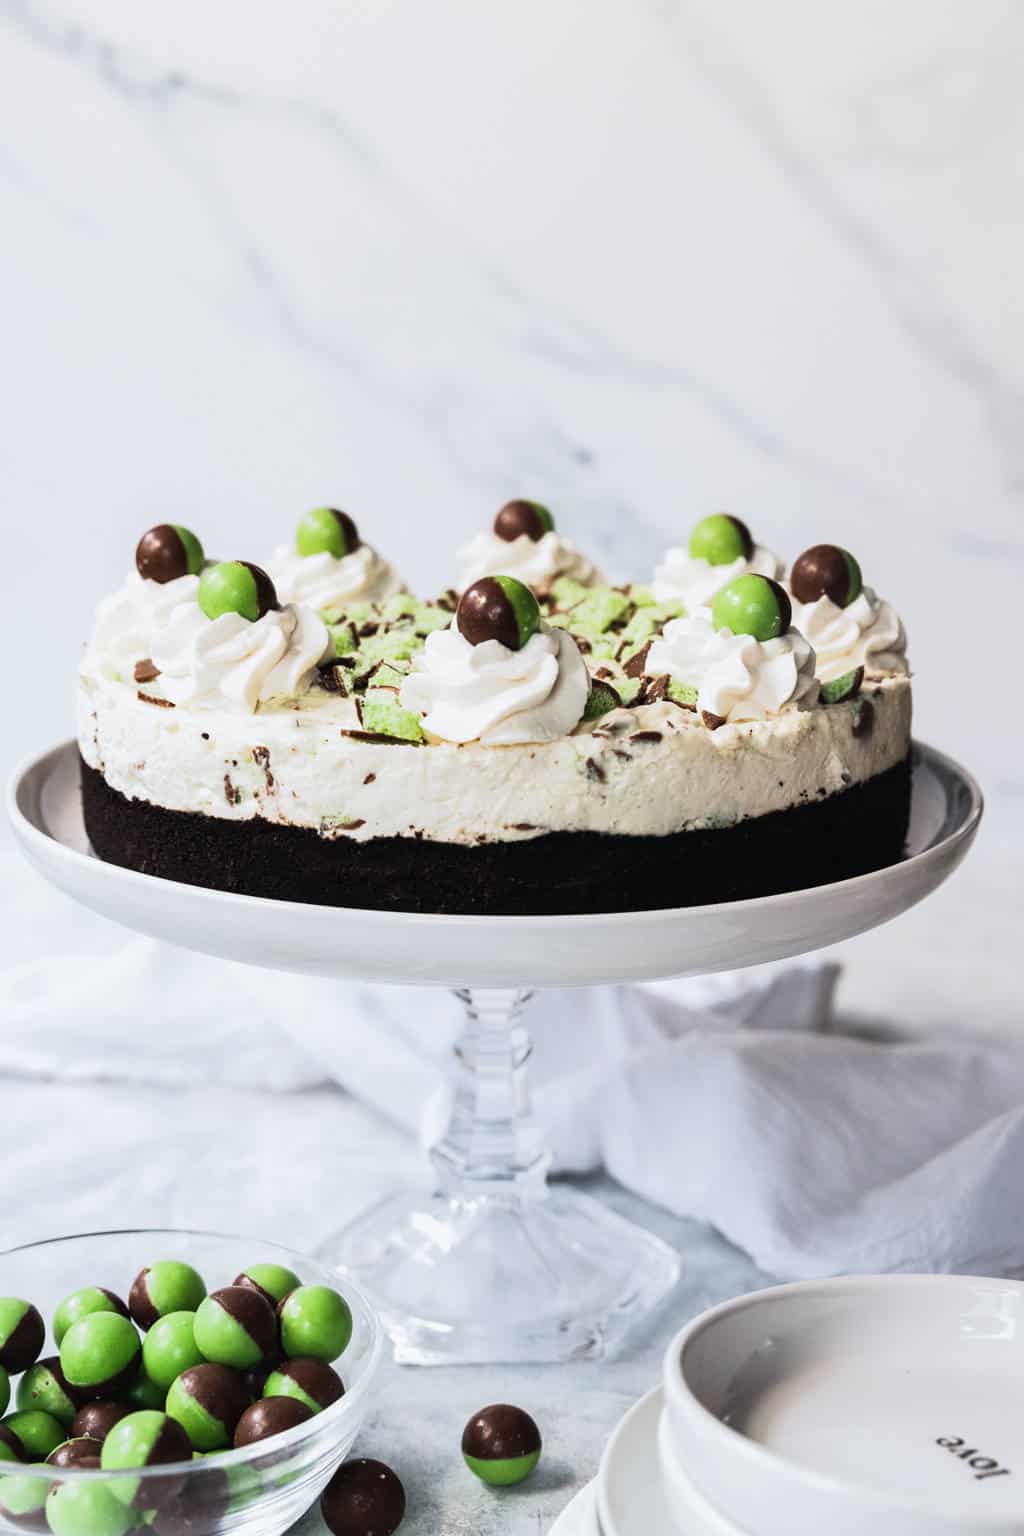
No Bake Mint Aero Cheesecake Recipe
This easy no-bake Mint Aero cheesecake is creamy, light, and…

26 Edible Flowers Recipes
Sharing a collection of edible flowers recipes for you to…
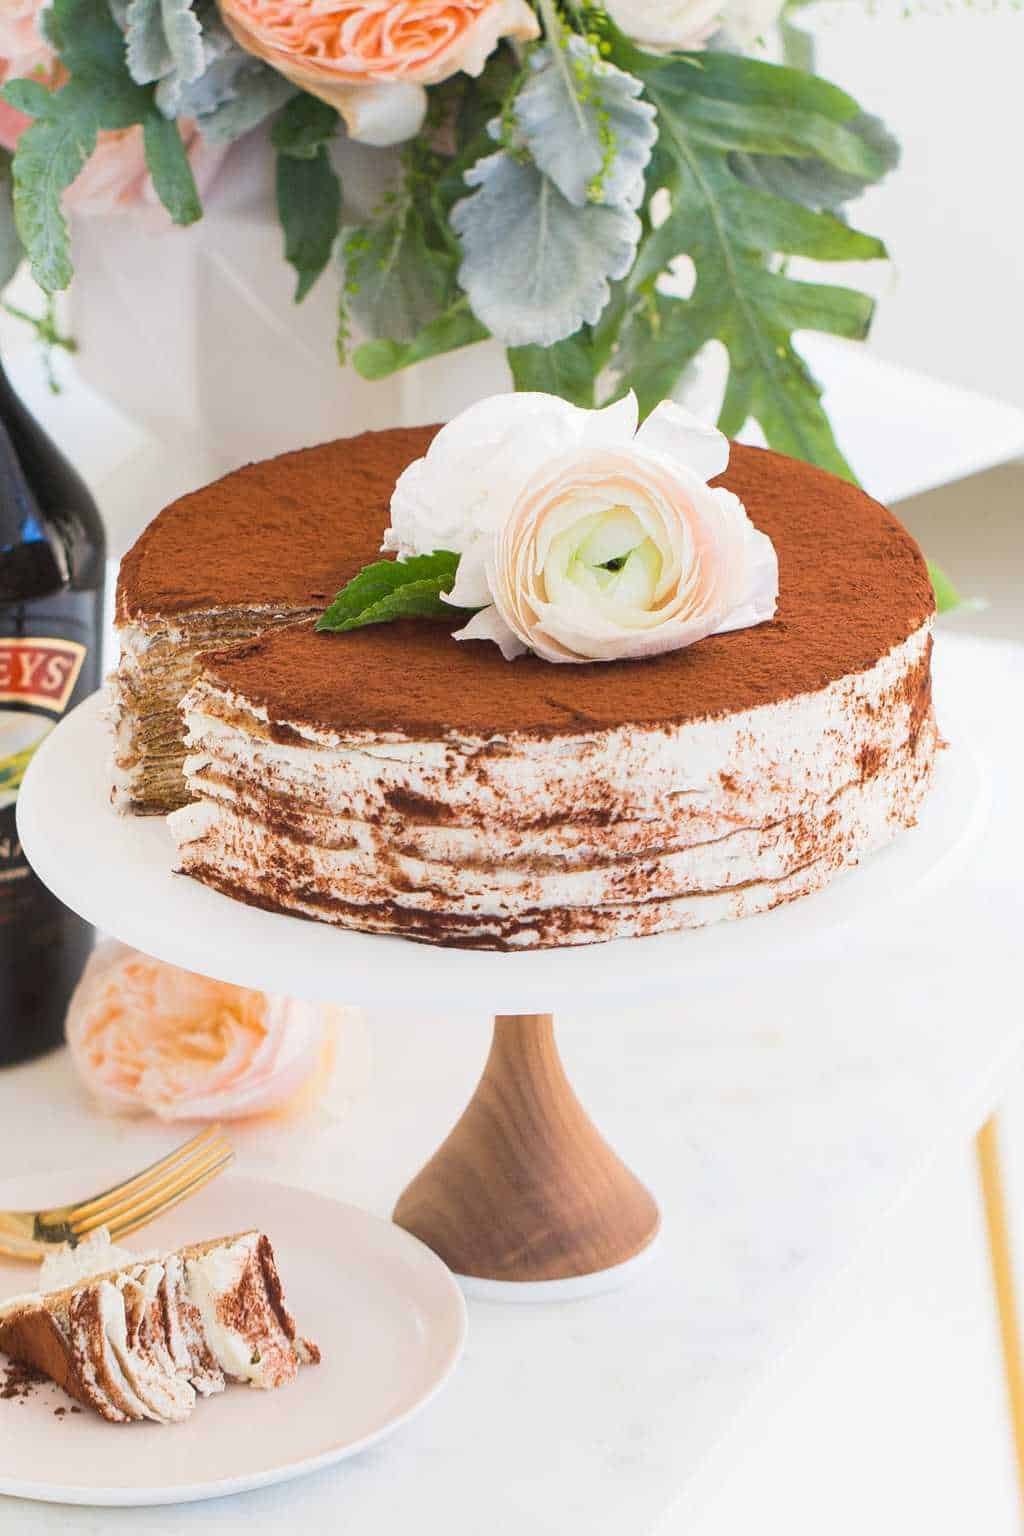
Baileys Tiramisu Crepe Cake Recipe
Infused with Baileys and using crepes as a twist on…
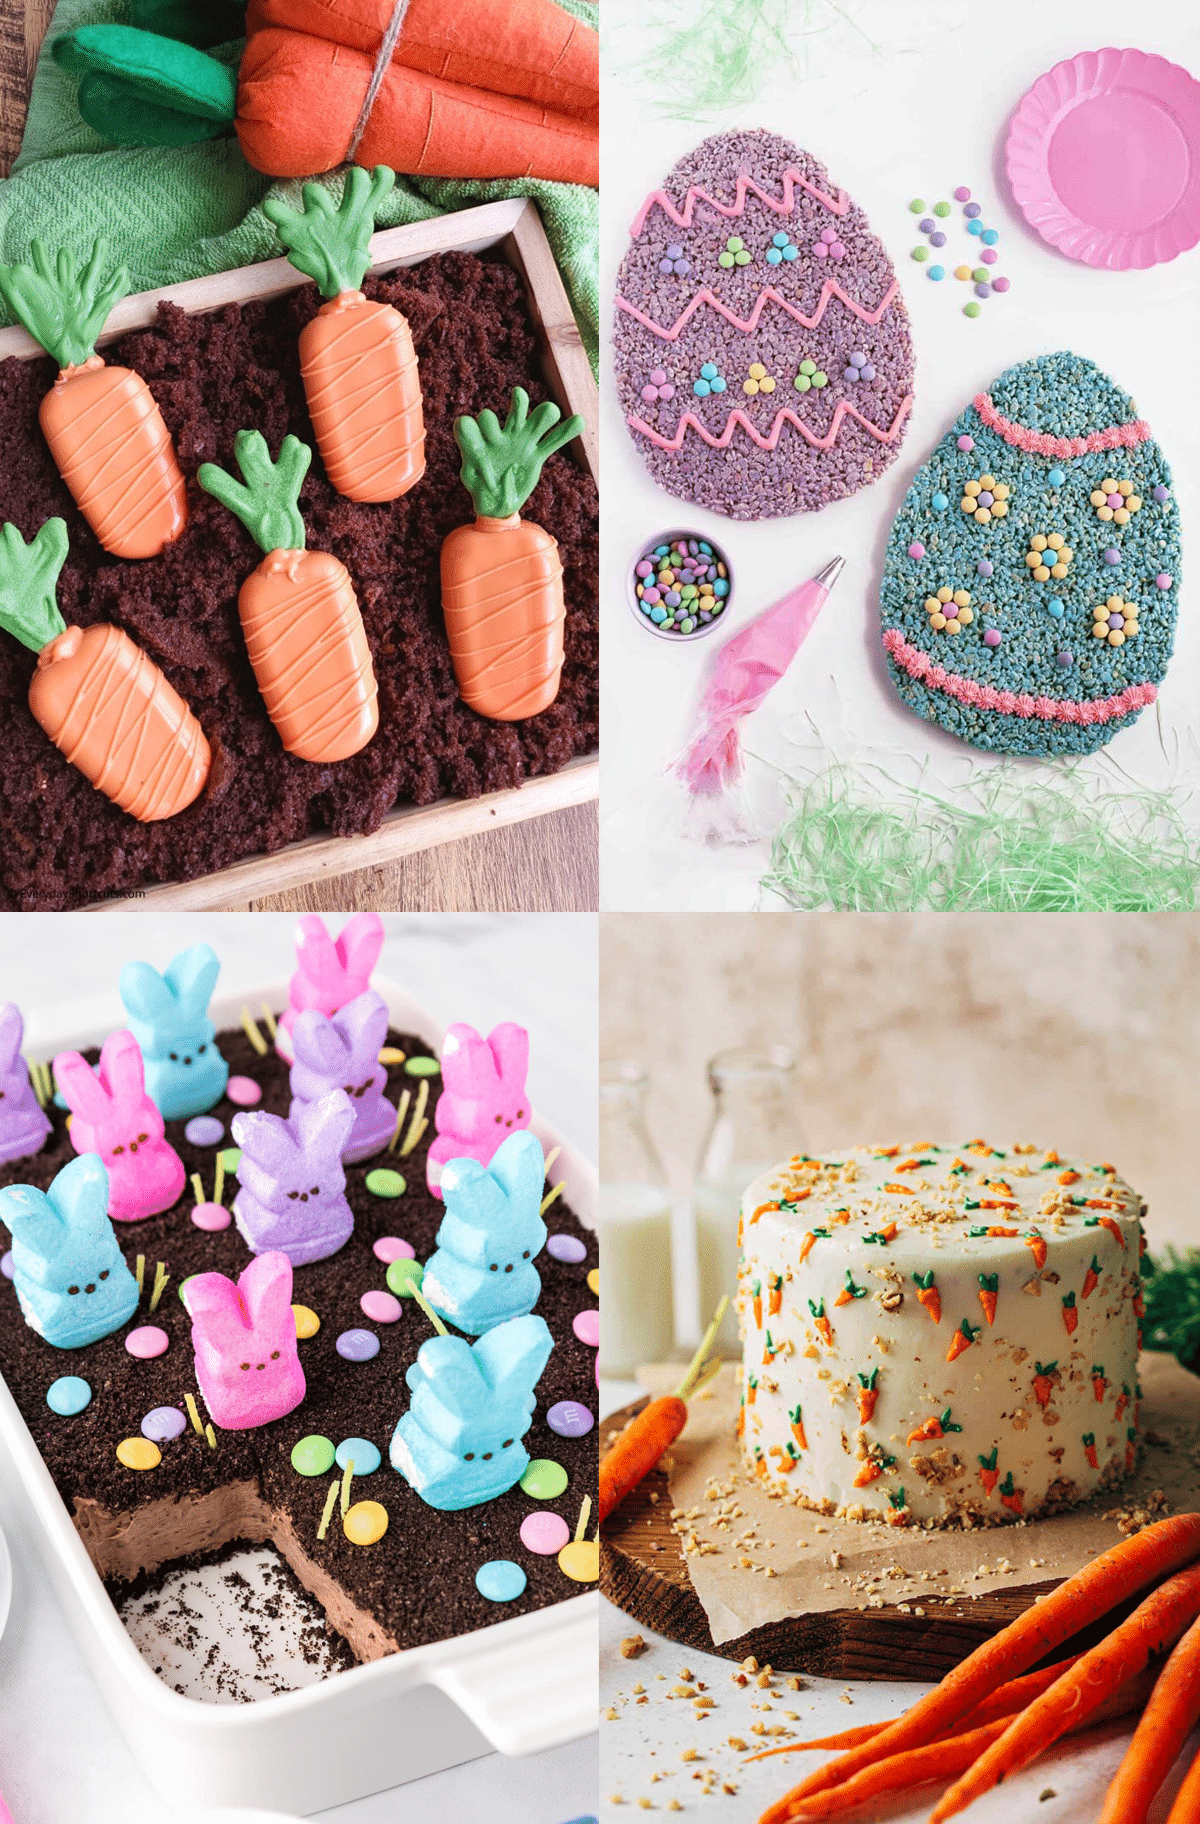
40 Delicious Easter Desserts to Sweeten Your Celebration
Get inspired by these festive and easy-to-make Easter desserts that…
Continue Reading 40 Delicious Easter Desserts to Sweeten Your Celebration
Please note that we may earn a commission for some of the above affiliate links. However, products featured are independently selected and personally well-loved by us!
Very nice recipe
So adorable! And so delicious! I can’t wait to make a bunch more of these!
Wow , thank you Sean! Let us know how it goes !
Hi – these are so cute! One question, when using the egg whites to make the paint chips is it safe to eat them? Thank you!
Hi Darby! Yes, it is safe because liquid egg whites are pasteurized. :) Let us know if you try it out!