Cute Halloween Candy & Ghost Decorations for Front Door Decor
Get into the Halloween spirit with this easy front door decor idea that uses candy and fake ghosts.
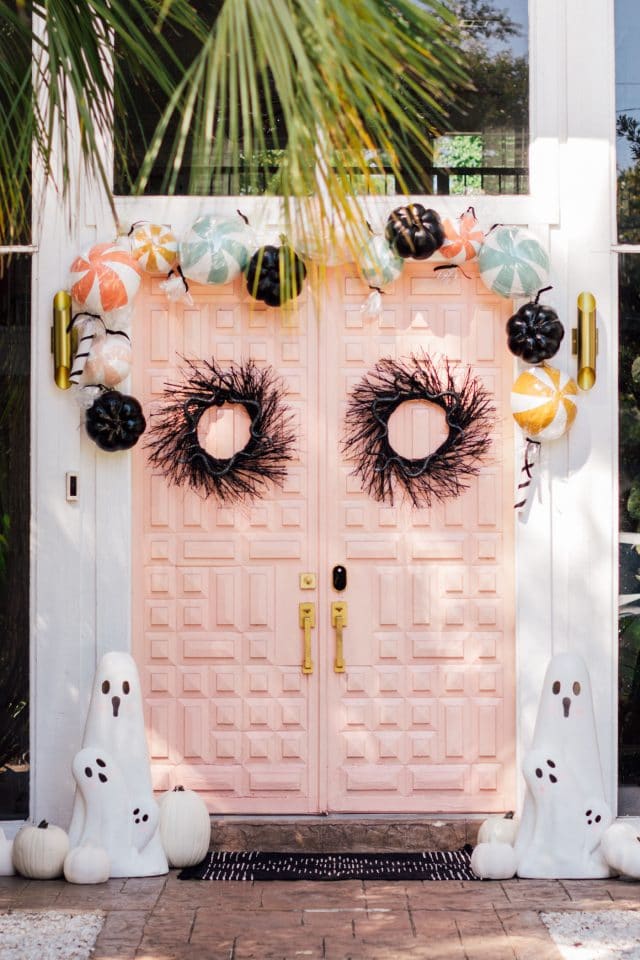
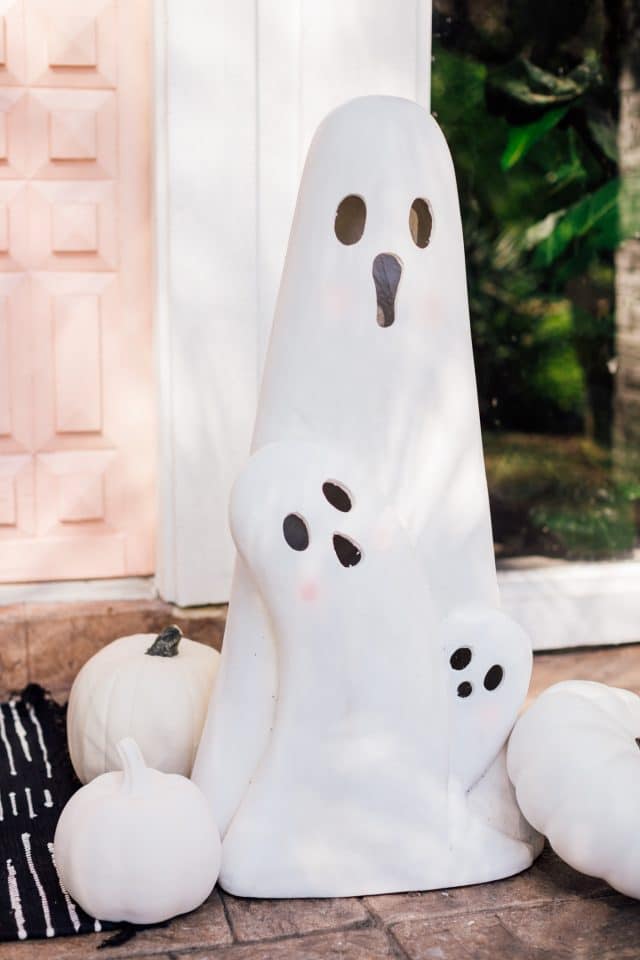
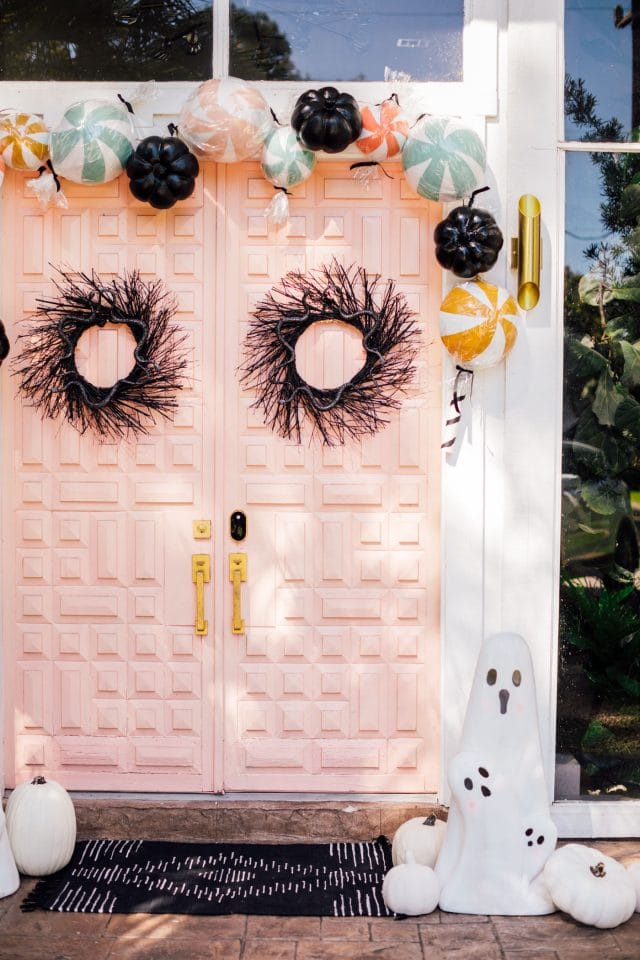
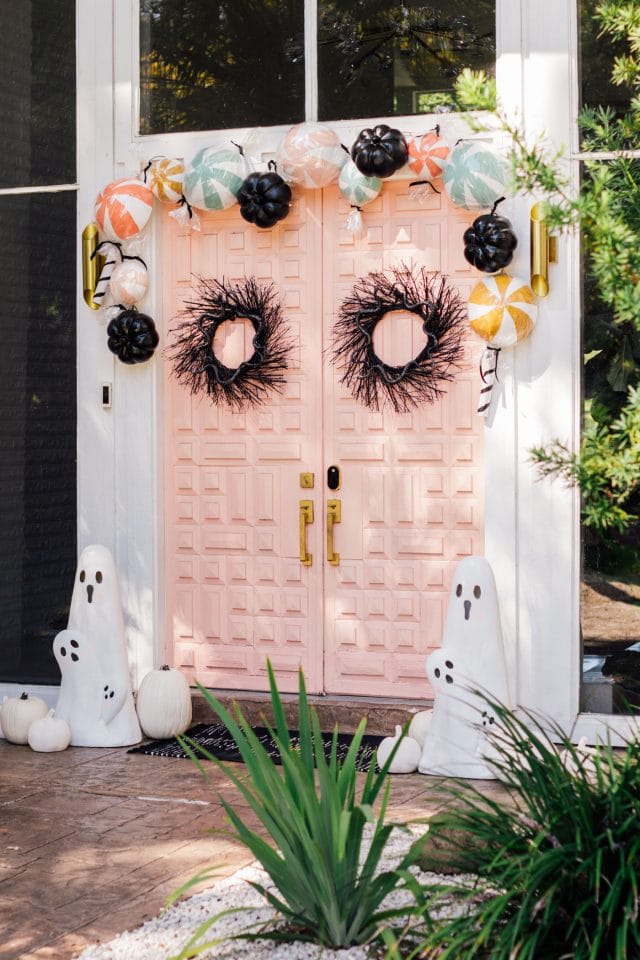
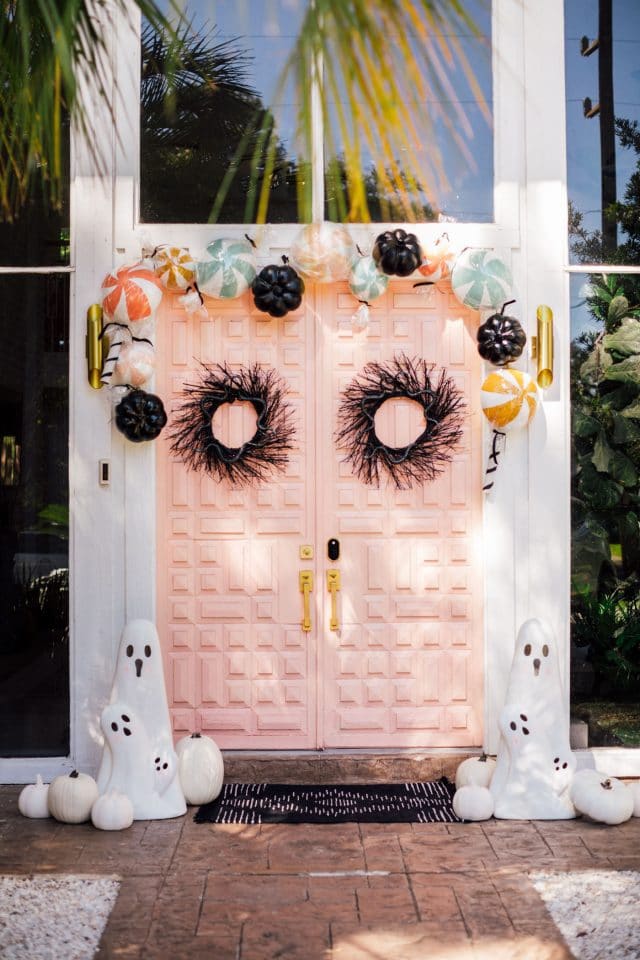
Every year we dream up new Halloween decorations for the front door. This year’s theme was sweet candy and not-so-scary ghost decorations!
Last year we went with classic Halloween front door decor, so this year I wanted to shake things up!
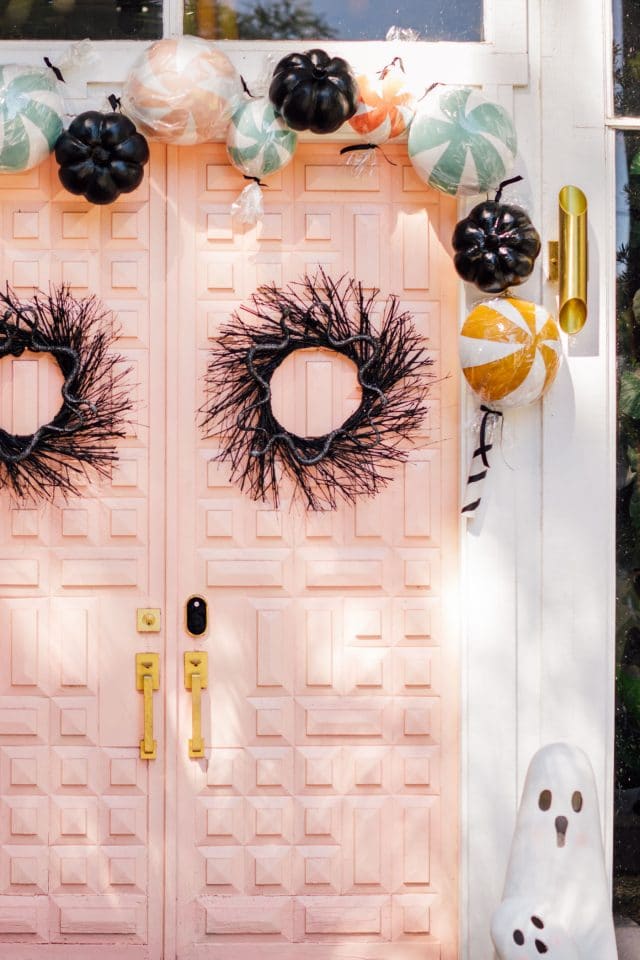
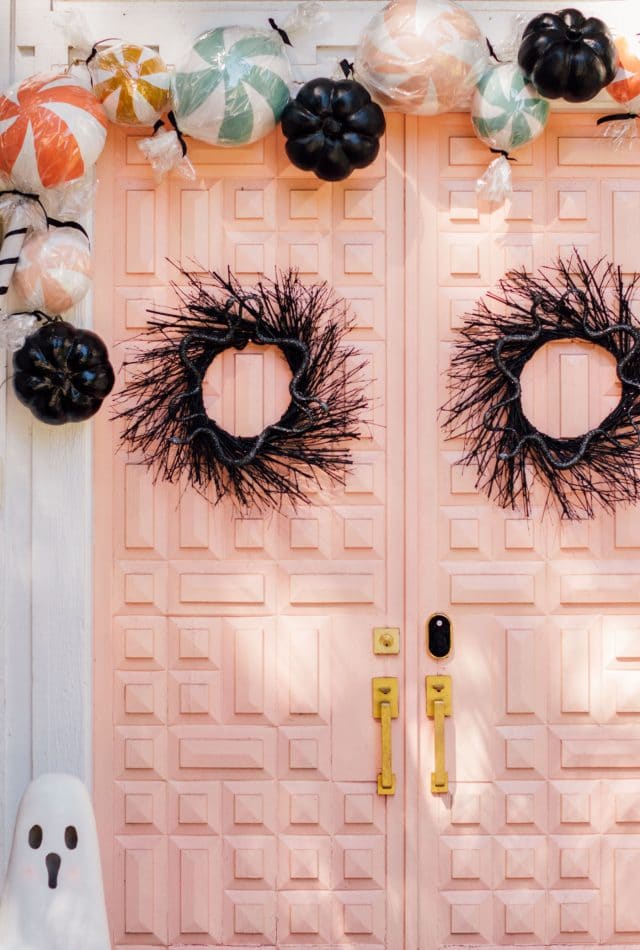
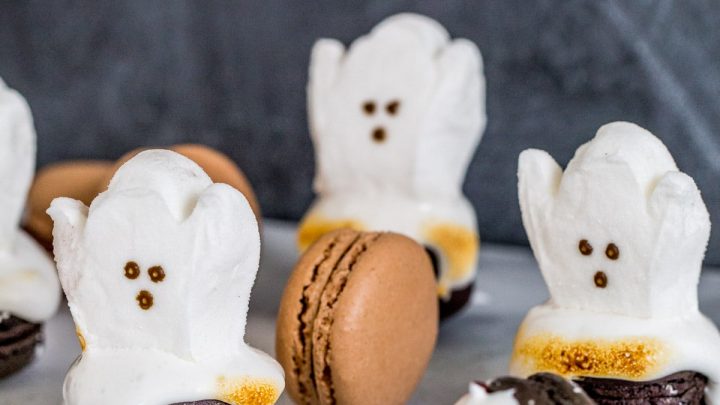
Rather than your typical color scheme, I had fun making giant pastel candy decor with hints of black accents. Basically, I’m recreating my love for these cute ghost macarons but in decor form!
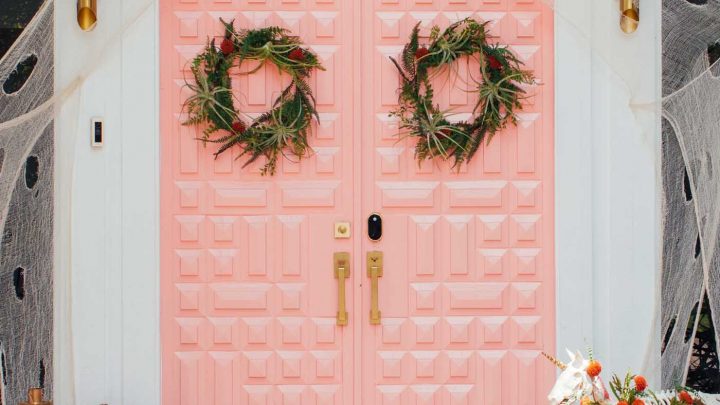
If we’re being honest, a pink front door doesn’t really scream “scary” anyways. So rather than scary ghosts, I went with some cute, pink-cheeked ghosts instead!
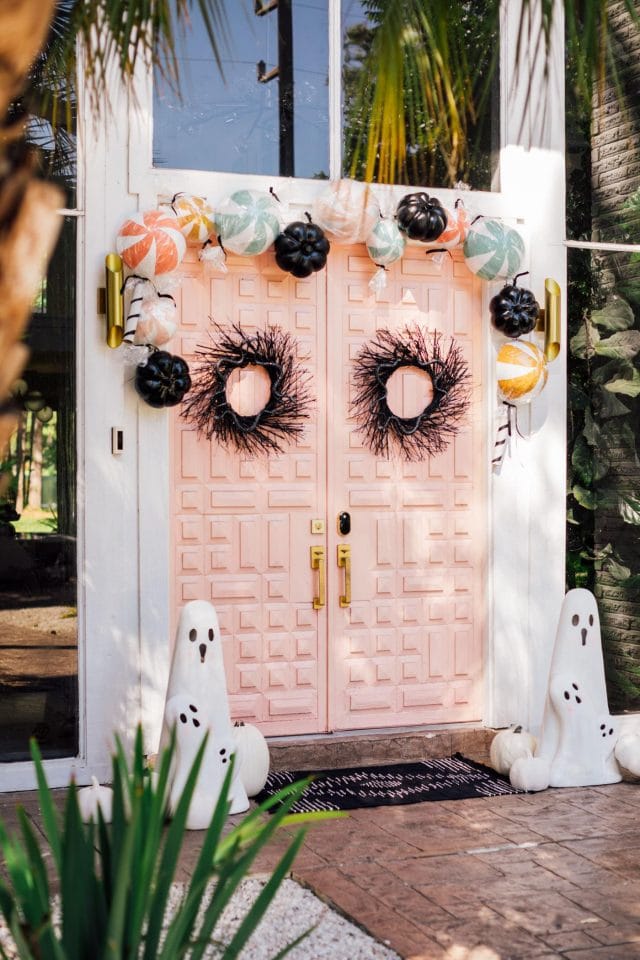
DIY Jumbo Candy and Halloween Ghost Decorations
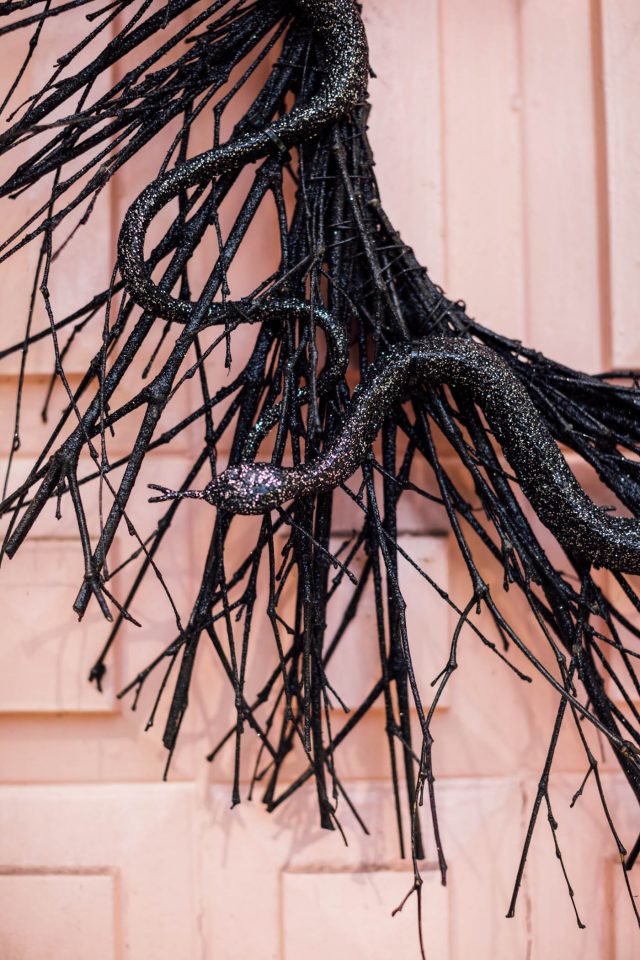
I immediately fell in love with these black glitter wreaths and resin ghosts from At Home stores a few weeks ago!
After having them up for a bit, I decided to add more color with the DIY jumbo candies for our upcoming family Halloween party.
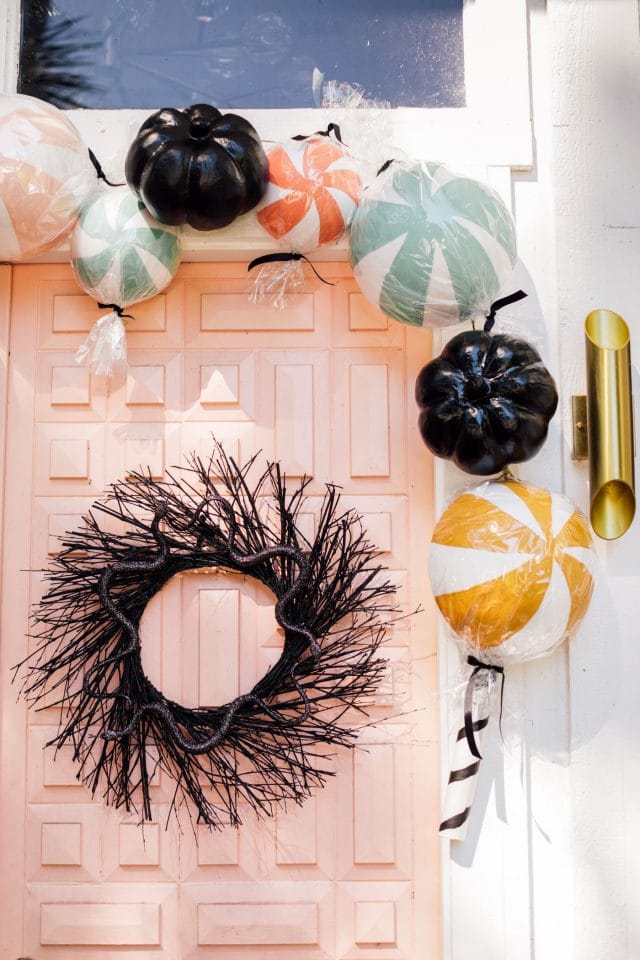
Here’s What You’ll Need to Create Your Own Jumbo Candy
Foam half-spheres in various sizes
Clear packing tape or hot glue
Paint in the colors of your choice
Scissors
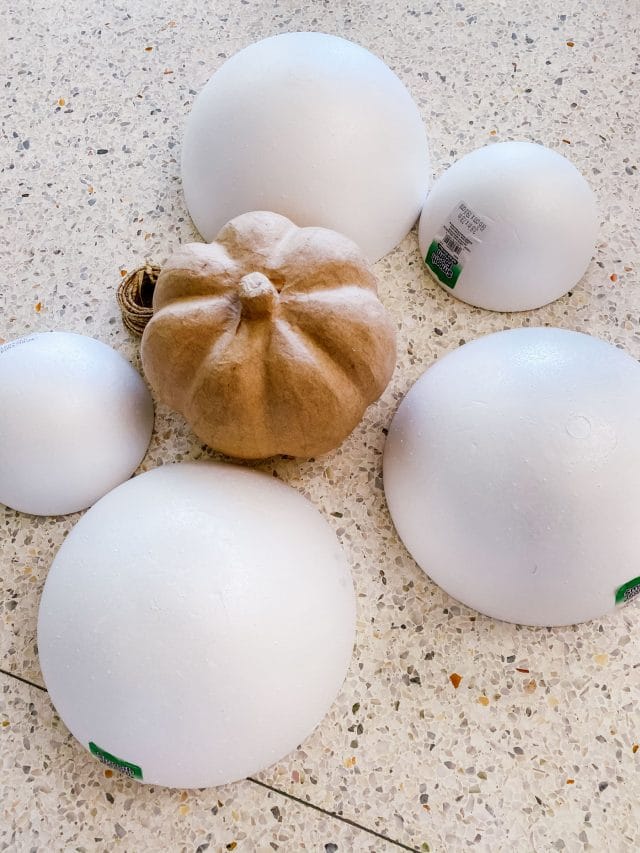
How to Make a Pink Front Door With Two Black Wreaths and Ghost
Step 1 – Depending on your color scheme, paint your pumpkins and foam spheres first.
I chose to make striped candies in various colors with black pumpkins.
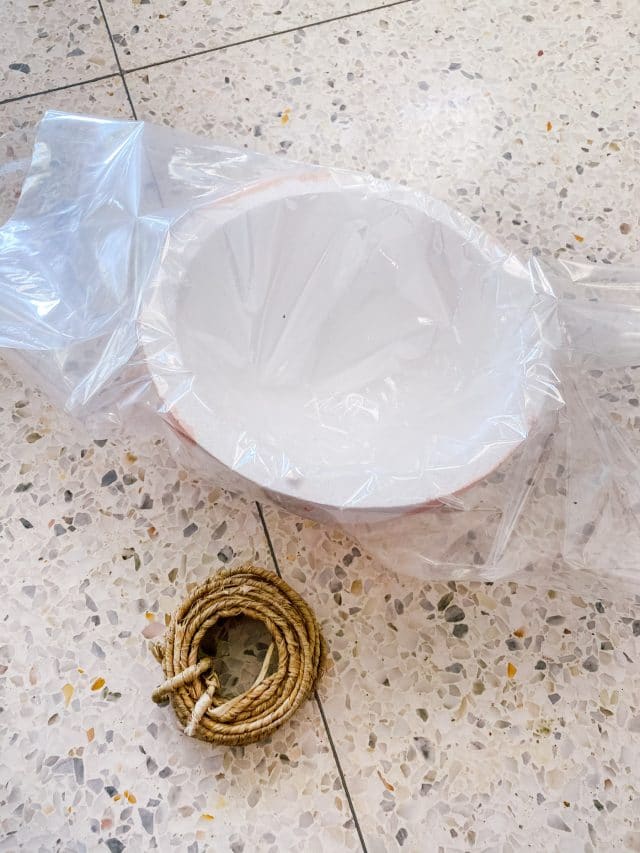
Once you’ve painted the spheres and let them dry.
Step 2 – Wrap them in a piece of cellophane and tape or glue the cellophane to the inside of the back of the foam ball.
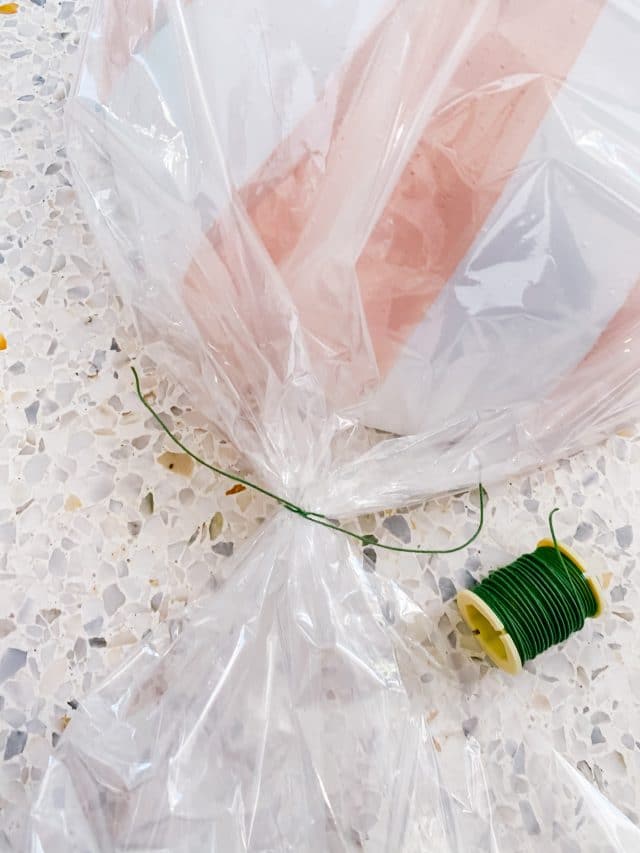
Step 3 – Leaving the excess cellophane hanging off the ends to look like candy wrappers, twist a piece of floral wire around the end to hold the gift wrap tight.
Be sure to leave the excess floral wire on the end of the candy, because that’s what you’ll be using to attach the candy to the rustic wire on your front door.
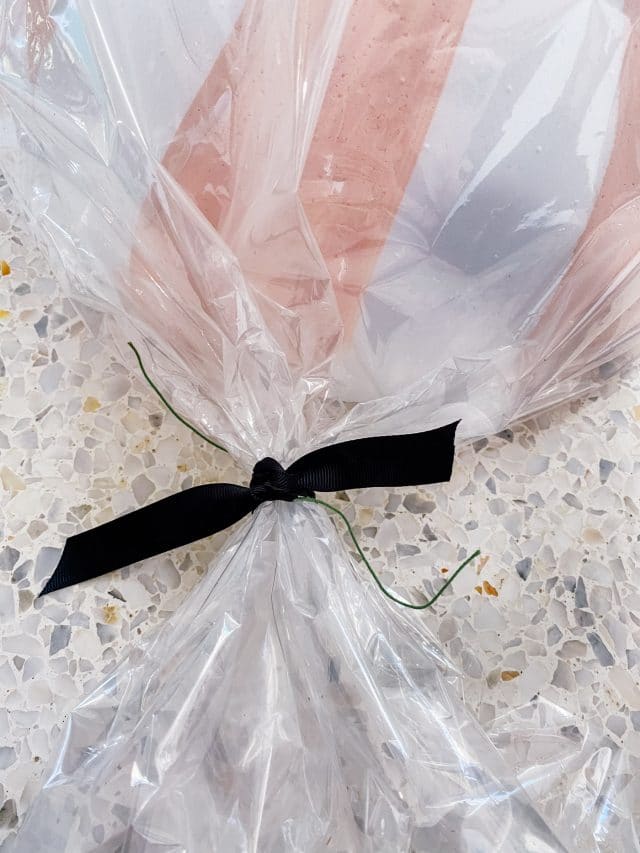
Step 4 – String a piece of black ribbon around the wire to conceal it and make it look more like a wrapped piece of candy.
Step 5 – Once your candies are complete, hang the wrapped rusting wire around small nails above your front door.
Step 6 – Use the excess floral wire on the ends of the wrapped candy to attach each piece to the large rustic wire hanging above the door.
Then pair it with your pumpkins and not-so-spooky ghosts, and you’re all set!
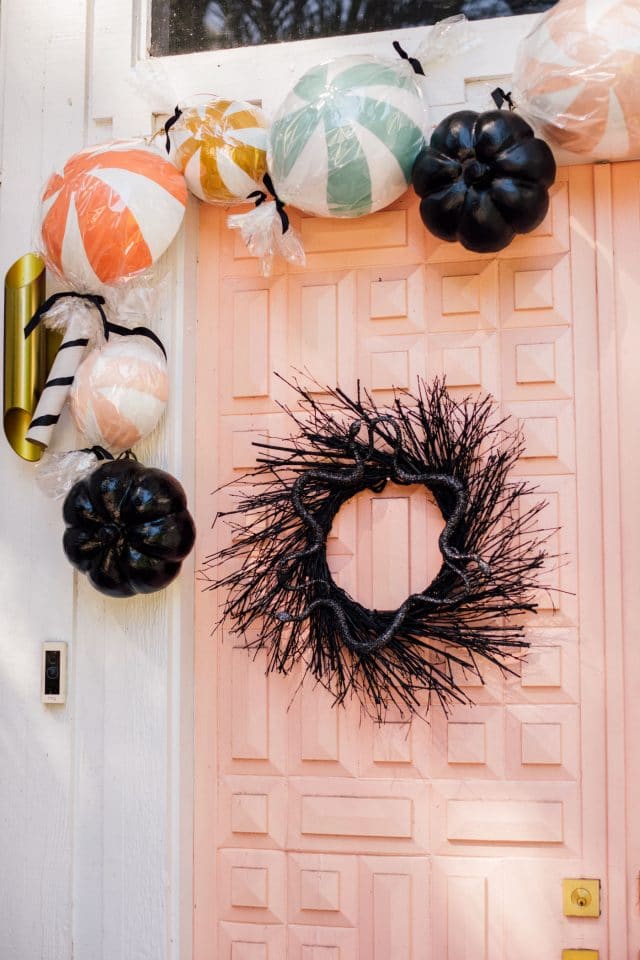
If you’re feeling extra crafty, you can also use the leftover gift wrap cardboard roll to make “lollipop” sticks for some of your pieces of candy, too.
To stick with the black and white theme, I painted the cardboard roll white and added simple black stripes with a black ribbon.
More Halloween Ideas
I’m hoping we’ll get to photograph our family costume for this year soon, too! Last year our family costume idea was pretty unique.
This year we’re going with something a little more well-known thanks to requests from a two-year-old, haha!
Until then, here is some more Halloween inspiration to get your ideas flowing…
- Family Costume Ideas: 38 Ideas for Family Halloween Costumes
- DIY Halloween Wigs & Lashes
- 36 DIY Halloween Costumes for Kids
- Family Group Costume Idea: DIY Fruit Snacks Food Costume
- Easy Couples Halloween Costumes
- Thanksgiving Punch: An Easy Pumpkin Punch recipe
Cute Halloween Candy & Ghost Decorations
Equipment
- Clear packing tape or hot glue
- Scissors
Materials
- Foam half-spheres in various sizes
- Clear cellophane gift wrap
- Black ribbon
- Crafting wire
- Wrapped wire
- Paint in the colors of your choice
Instructions
- Depending on your color scheme, paint your pumpkins and foam spheres first.I chose to make striped candies in various colors with black pumpkins. Once you’ve painted the spheres and let them dry.
- Wrap them in a piece of cellophane and tape or glue the cellophane to the inside of the back of the foam ball.
- Leaving the excess cellophane hanging off the ends to look like candy wrappers, twist a piece of floral wire around the end to hold the gift wrap tight. Be sure to leave the excess floral wire on the end of the candy, because that’s what you’ll be using to attach the candy to the rustic wire on your front door.
- String a piece of black ribbon around the wire to conceal it and make it look more like a wrapped piece of candy.
- Once your candies are complete, hang the wrapped rusting wire around small nails above your front door
- Use the excess floral wire on the ends of the wrapped candy to attach each piece to the large rustic wire hanging above the door. Then pair it with your pumpkins and not-so-spooky ghosts, and you’re all set!

Don’t forget to share your Halloween Decor with us on Instagram using the hashtag #sugarandclothloves. We always love seeing all of your creations! Looking for more interior design inspiration? You can find all of our home decor tutorials and ideas right here!
More Halloween DIY's & Recipes
Please note that we may earn a commission for some of the above affiliate links. However, products featured are independently selected and personally well-loved by us!







Do you by chance remember the shade of blue you used on the candy pieces?
where did you find your two ghost in front of your door. 2020 halloween decor.
Hi Debbie! We got them from At Home!
These Halloween decorations are so awesome, Looks like a fun activity to do as a family. It is nice to see something different than the usual. :)
Thanks, Matt! We always try to do something different every year!
Wow this decor is SOOOO cute! I love the festiveness!
Thank you, Allyson! XOXO
Wow, your front door decor is just wonderful! I love the mix of cute/traditional elements mixed with the sophisticated wreaths. Thanks for sharing.
Thank you, Michelle! XOXO
What is the color of your front door please and what brand of paint…It is Gorgeous!
Hi Kylee! We used Behr’s Pink Mimosa paint (code P180-3). Hope this helps! XOXO