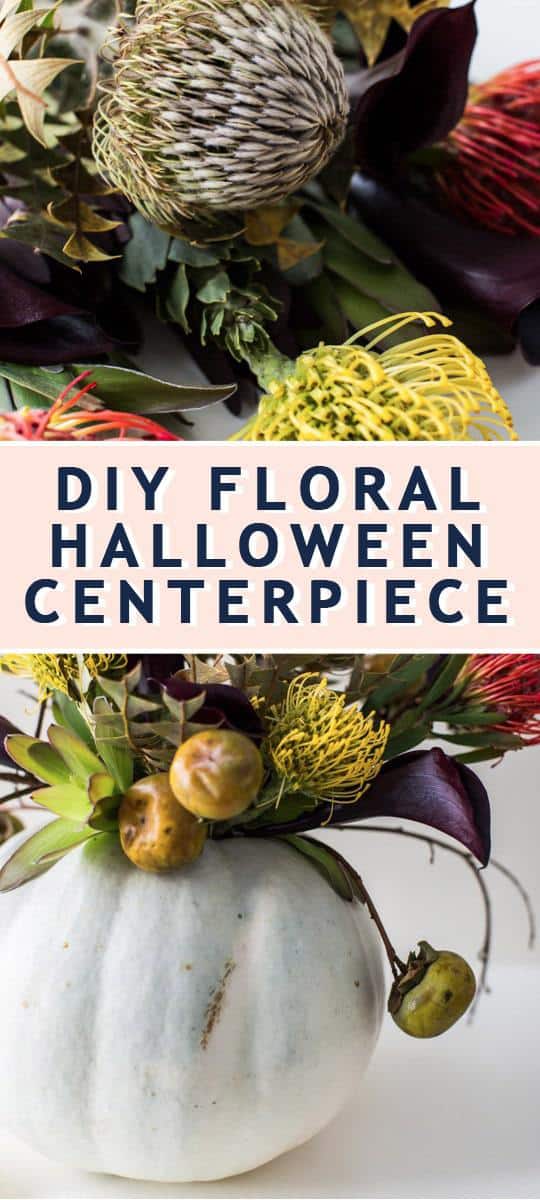
DIY Floral Halloween Centerpiece
A perfectly creepy DIY Floral Halloween Centerpiece idea that’s cheery with just a touch of eerie. It’s also a great excuse to expand the lifespan of your dried flowers.
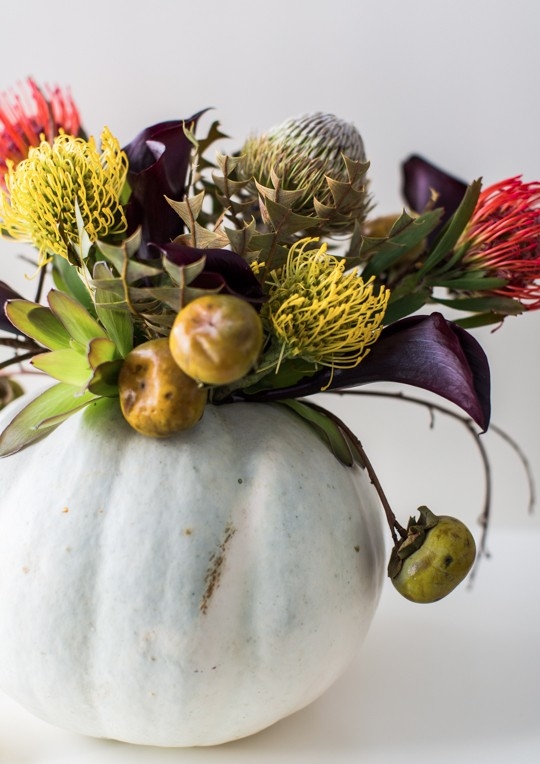
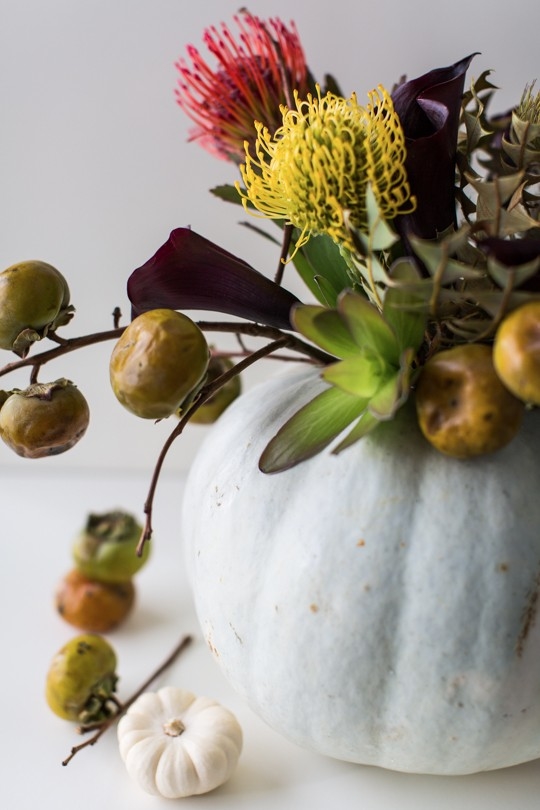
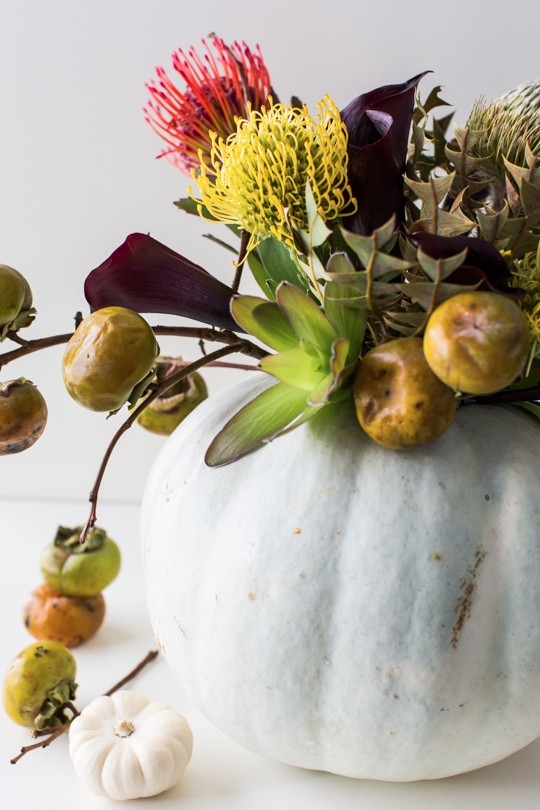
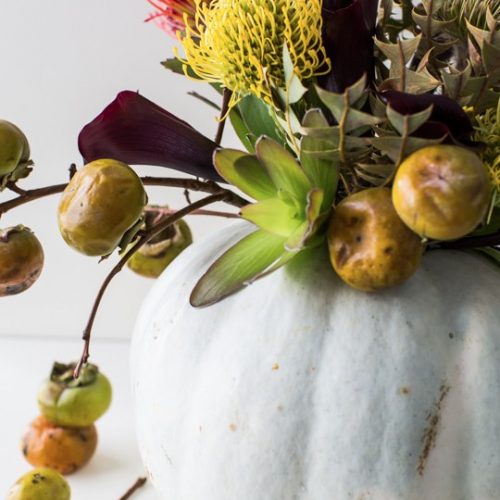
We never thought our knack for killing plants would finally come in handy. But here we are, proudly showing off our dead persimmons and wilted blooms like they’re works of art. When we stumbled upon these moody, twisted stems at the market, we couldn’t resist. Their muted tones and dried textures had the perfect haunted charm, and pairing them with a small white pumpkin gave the arrangement just enough brightness to balance the eeriness. The result? A DIY Floral Halloween Centerpiece that’s part spooky, part chic, and totally unexpected.
There’s something satisfying about leaning into the darker side of fall decor, especially when it doesn’t require perfectly fresh flowers or expensive arrangements. This centerpiece celebrates imperfection and decay in the most stylish way possible, making it ideal for anyone who wants a Halloween table that’s elegant but still a little creepy.
And if you’re feeling like adding a bit of glam to your ghostly tablescape, pair it with a DIY sequin pumpkin for a touch of sparkle. Because even the undead deserve a little shimmer.
Materials and Tools Needed
- White pumpkin: Choose a pumpkin with a long stem as this is an indicator that it is “younger” and will keep longer. Also, select a pumpkin with fewer blemishes and soft spots. We love the brightness of a white pumpkin but orange pumpkins or painted pumpkins work too.
- Waterproof floral tape: We used clear waterproof tape but the color does not matter.
- Drinking glass: To hold your flowers
- Knife: To carve the pumpkin centerpiece.
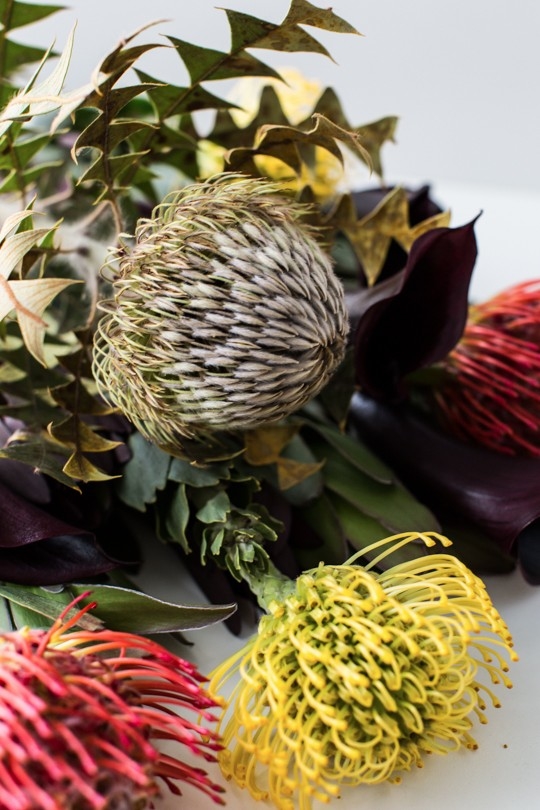
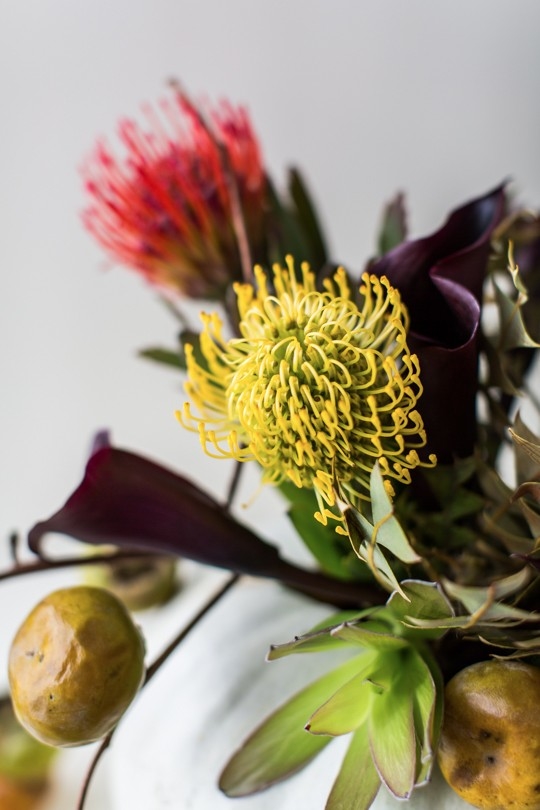
- Florals of your choice: We used Banksia Speciosa Protea, Protea Pincushions, Black Calla Lily (sleek and sculptural, with deep purple-black spathes), and Persimmon branches. For some dark, moody, and dramatic flowers that work beautifully in a Halloween centerpiece, check out some of other of our favorite deep and dark florals below.
Halloween Flowers
- Black Dahlias: Velvety petals in deep burgundy or nearly black; perfect statement bloom.
- Chocolate Cosmos: Small, dark maroon blooms that smell faintly like chocolate.
- Scabiosa ‘Black Knight’: Rich purple-black blooms with delicate textures.
- Burgundy Ranunculus: Lush layers and old-world romance in moody tones.
- Dark Hellebores (Lenten Roses): Dusky plum or blackish blooms that feel mysterious.
- Smoke Bush (Cotinus): Airy plum-toned foliage that feels like mist.
- Amaranthus (Red or Bronze): Draping tendrils that look almost blood-red.
- Black Ti Leaves: Glossy, dark foliage for structure.
- Berries or Pods: Like privet berries, hypericum berries, or lotus pods for eerie texture.
- White Anemones with black centers: Striking and slightly ghostly.
- Dusty Miller: Silvery soft foliage that feels almost frosted..
How to Make a DIY Floral Halloween Centerpiece
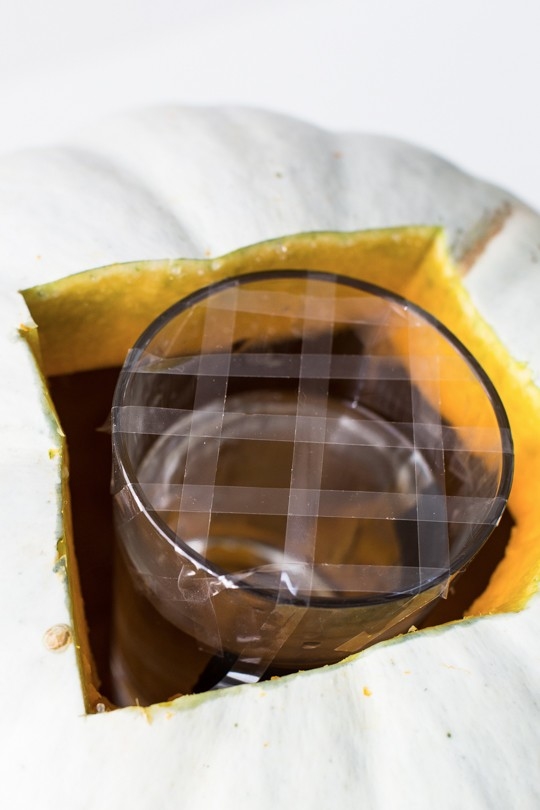
1 — Carve out an opening on top of the pumpkin that’s just big enough to fit and insert the drinking glass. Then, scoop out all of the pumpkin guts, just like you would when carving one.
2 — Tape a grid along the glass rim with the waterproof floral tape. The grid allows you to easily manipulate the placement of your flowers and branches and ensures that they do not bundle up.
3 — Fill the glass with water 3/4 of the way up. Insert the glass into the pumpkin.
4 — Start inserting stems randomly as you see fit. They don’t need to be perfectly placed because it’s supposed to look a little rough around the edges.
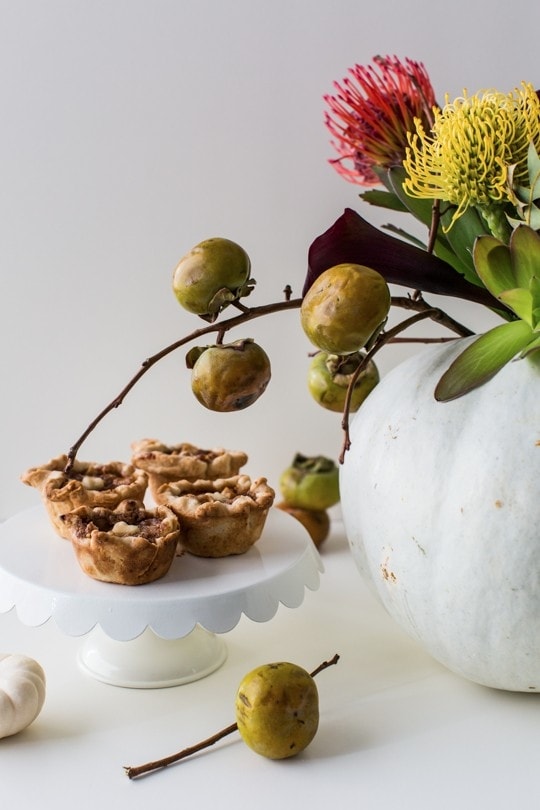
5 — Once you have all of the florals placed where you want them, insert persimmon branches into the gap between the glass and the pumpkin. You do not need to place them inside the glass because branches do not need water. This way, you’ll also be able to get the cool hanging effect around the edges.
How to Make a Pumpkin Last Longer
A pumpkin will stay fresh for months. But a slightly carved pumpkin will last about 12-14 days indoors. To make your pumpkin vase last longer:
- Wash your pumpkin with bleach beforehand to kill any bacteria or fungus.
- If you want to prep it a more natural way, spray your pumpkin with diluted lemon juice or vinegar.
- Apply petroleum jelly around the carved edges to seal in moisture.
- Soak it in cold water or refrigerate it overnight to rehydrate the pumpkin.
- You can also use a craft pumpkin that requires no maintenance but still can be carved.
More Halloween Ideas
This table centerpiece makes for a great Halloween table. Add a few mini pumpkins around it (or even another black and white skull centerpiece or haunted house skeleton hand). String lights. Hang up that spider web and Halloween props. Plus, this simple DIY pumpkin place card holder can also be made five minutes before a party. And you’ve got yourself some festive table decorations!
For more Halloween-inspired DIYs, indoor and outdoor Halloween decoration ideas, and recipes for your Halloween dinner party, check out a few of our favorites from the archives —
- Not So Spooky Halloween Front Door Ideas: They’re HOA-approved classy and pretty Halloween decorations. Words you wouldn’t describe Halloween, right?!?
- Easy Pumpkin Decal : A 5-minute temporary DIY glassware decal
- Spooky DIY Floral Bar Cart
- DIY Ghost Macarons : Create a spooky scene on your macarons or even cookie and cupcakes with this dessert topper.
- Ghoul’s Guts Ice Cream Cake Shots Recipe: Just omit the alcohol to make them kid friendly.
DIY Halloween Floral Centerpiece
Equipment
- Knife
Materials
- 1 white pumpkin
- 1 waterproof floral tape
- 1 drinking glass to hold flowers
- Flowers of your choice
Instructions
- Carve an opening on top of the pumpkin that’s just big enough to fit and insert the drinking glass. Scoop out all of the pumpkin guts, just like you would when carving one.
- Tape a grid along the glass rim with the waterproof floral tape. The grid allows you to easily manipulate the placement of your flowers and branches and ensures that they do not bundle up.
- Fill the glass with water 3/4 of the way up. Insert the glass into the pumpkin.
- Start inserting stems randomly as you see fit. They don’t need to be perfectly placed because it’s supposed to look a little rough around the edges.
- Once you have all of the florals placed where you want them, insert persimmon branches into the gap between the glass and the pumpkin. You will not need to place them inside the glass because branches do not need water. This way, you’ll also be able to get the cool hanging effect around the edges.
Notes


Please note that we may earn a commission for some of the above affiliate links. However, products featured are independently selected and personally well-loved by us!
Thank you so much !
Whoa! This is stunning. And even seems like something I could pull off #plantkiller
This really has the fall look to it, loved the way you styled it!