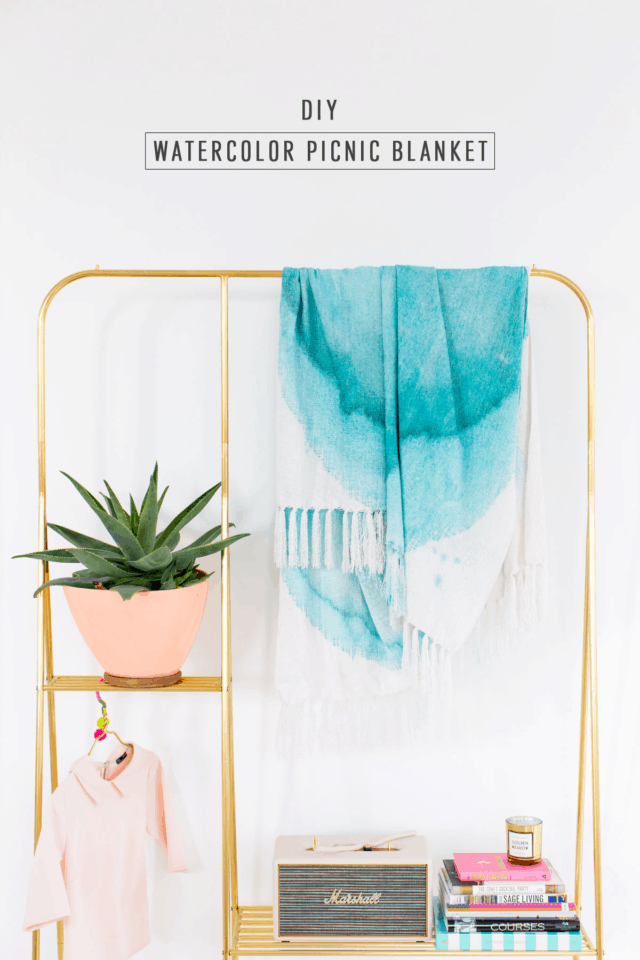
How to Make a DIY Watercolor Throw Blanket
Add a touch of fall to your picnic with this easy-to-follow tutorial for a watercolor throw blanket. You can make this DIY watercolor throw blanket in any color you’d like!
While our northern friends are looking for cute things to keep warm with, we’re just now getting below 90 degrees here in Houston!
It’s a sad truth that I’m finally learning to cope with after about seven years of living here.
But I will say that we get quite the perfect long picnic season during our ” fall ” version.
To keep things fair across the board, you can totally use this DIY Watercolor Throw Blanket for cold weather cozying up or as the perfect fall picnic blanket.
Of course we wouldn’t be the color lovers that we are if we didn’t make the design equally expressive.
So we mimicked the new Kendall-Jackson AVANT wine bottle with a teal watercolor splash motif that’s SUPER simple to recreate.
We’ve been inspired with the watercolor design before so it’s been applied not only on this throw blanket but our DIY Watercolor Wall Art and even our DIY Abstract Watercolor Painted Cake.
If you can spill liquid, you can make this one— so I’d say we all qualify!
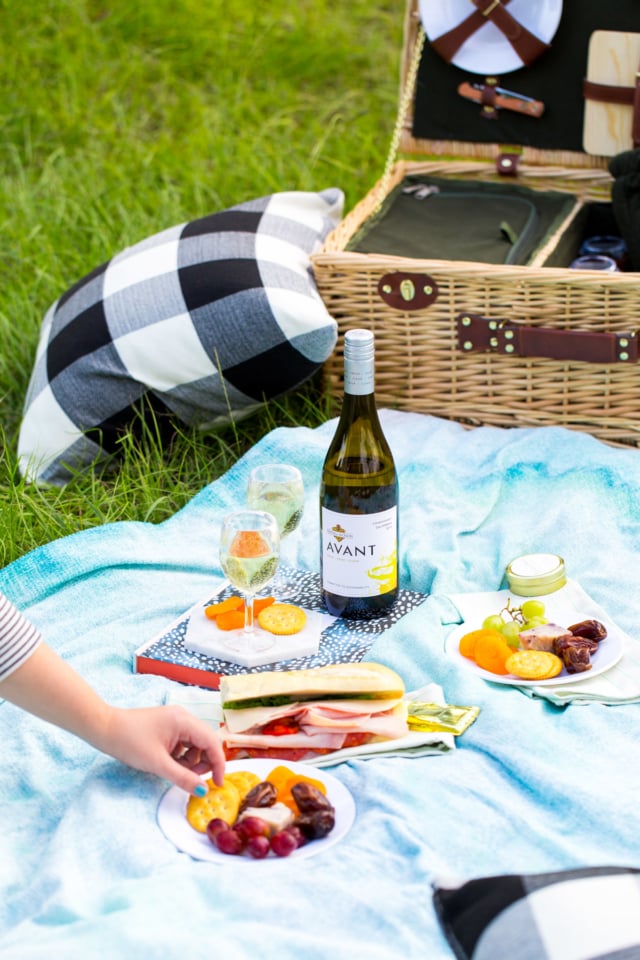
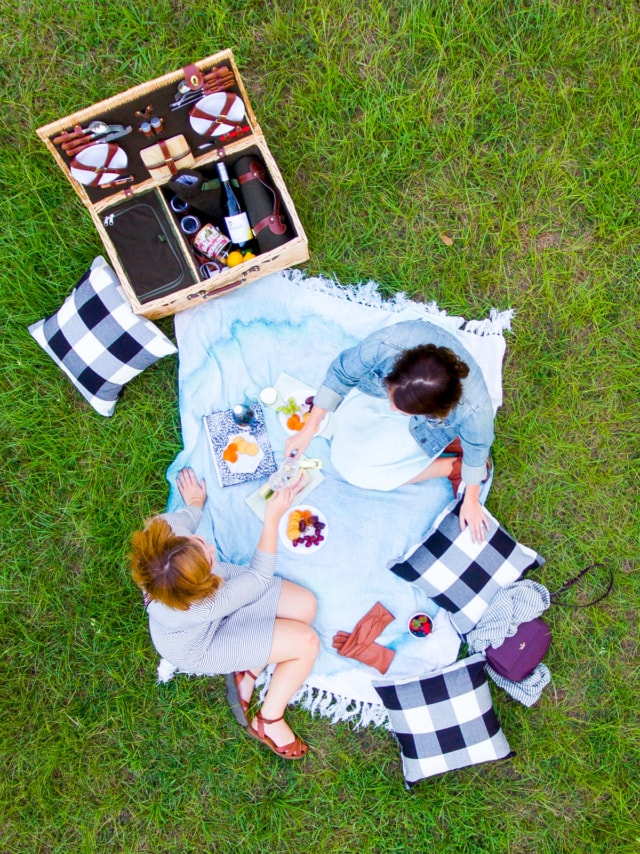
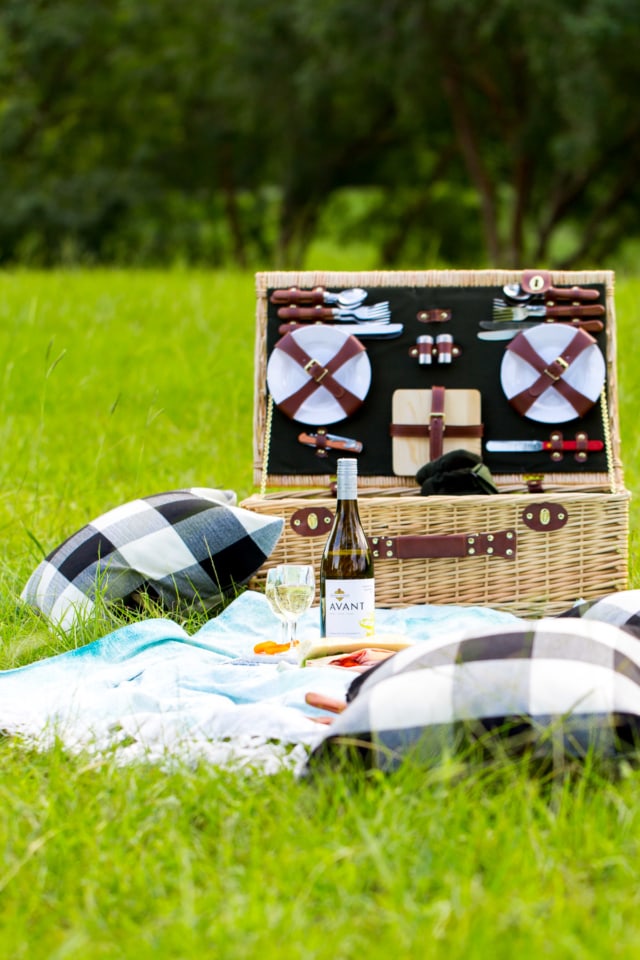
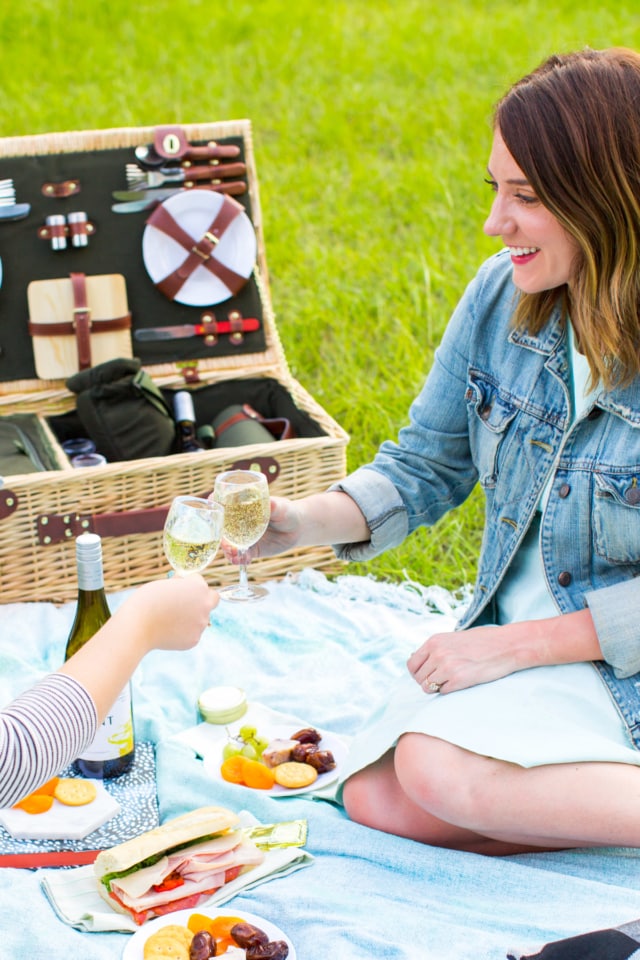
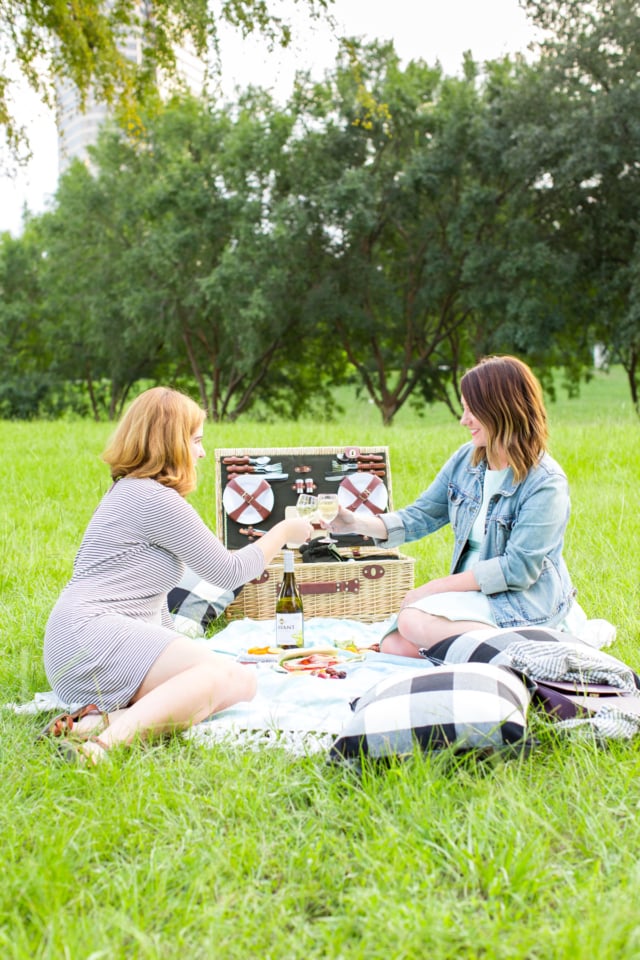
I’m also sharing what we packed up for our ideal fall picnic. Plus, what could quite possibly be the cutest picnic basket of all time…
Seriously, am I just biased on account of it being my own discovery, or is this not the cutest picnic basket ever? I justified it as being an investment piece that we could use forever. It also has a secret built-in cooler, which is what I consider winning!
We also took along the K-J AVANT Chardonnay and Red Blend bottles for a picnic addition that matched our splatter blanket. What can I say? I’m a sucker for a cute design.
Being that I’m not exactly what you’d consider a wine snob, I’m more about the wine is a great addition to any occasion. In this case, the simple screw top is perfect for a spontaneous picnic anywhere/anytime, as you don’t need any tools to open it.
Materials and Tools Needed to Make a DIY Watercolor Throw Blanket
Throw blanket — Cotton is easiest to dye. But we loved the chenille!
Rit Dye in the color of your choice — I used pink and teal. If you have any leftover, then you can use it to make a matching DIY Shibori Throw Pillow..
Pitchers for water
Paintbrush
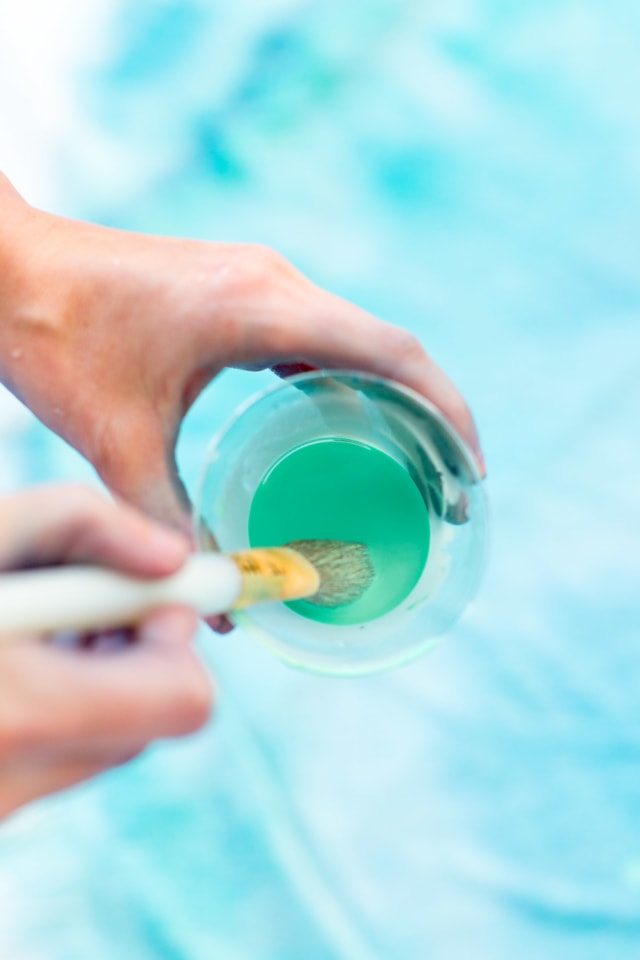
Fabric paint — Optional for added pops of color, like my mint version.
When it comes to choosing which throw blanket to customize, keep in mind that cotton takes to the dye a lot easier than the chenille one that we used.
But I loved the high quality look of chenille and feel of it. They’re both equally do-able though!
If you have access to a grassy area, that’s the easy way to go about the dyeing portion. We only had white studio floors, so I used a large drop cloth under my blanket.
How To Make A DIY Watercolor Throw Blanket
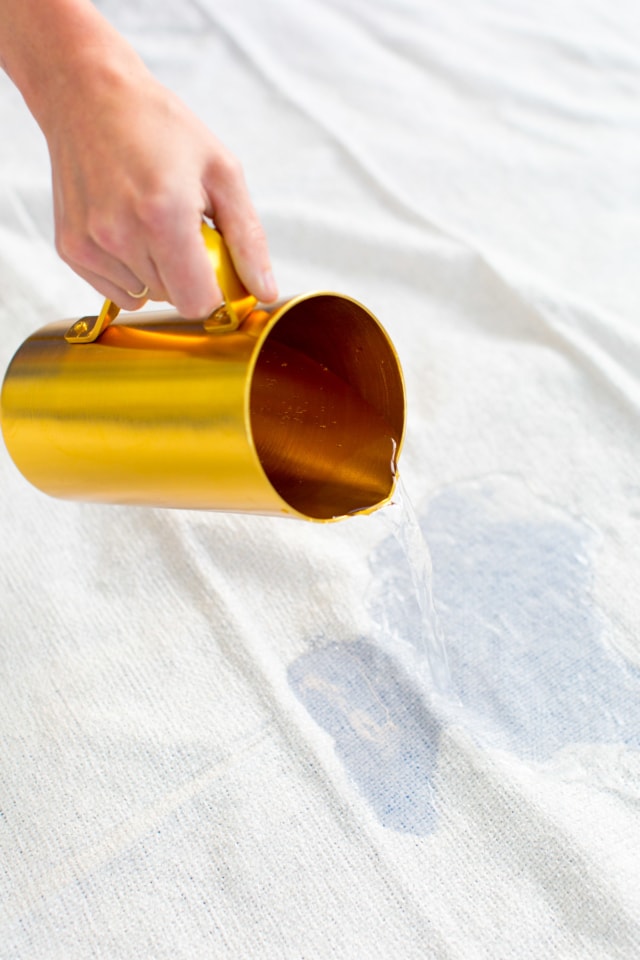
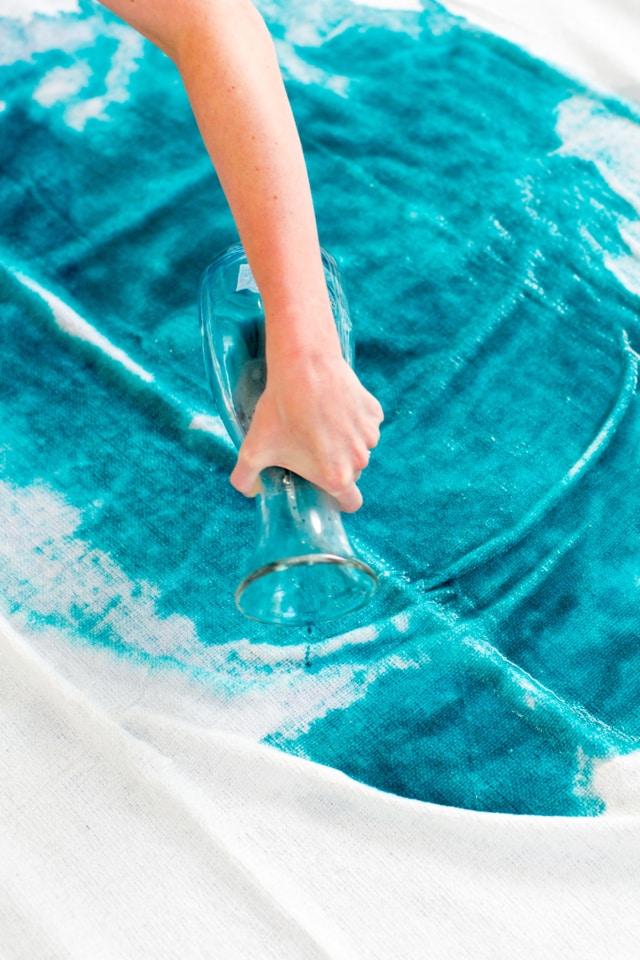
Step 1 — First, pour hot water onto the center of the blanket in whatever size watercolor circle you’re hoping to make.
Less is more because the fabric will absorb water past just where you’ve poured.
Using plain water first will help the fabric take to the color.
To start dyeing, you’re going to prepare three different pitchers of dye, one being lightly saturated with dye, the next being slightly more saturated, and the last being super saturated.
This will give you more of a pronounced watercolor gradient
Step 2 — In a glass or plastic pitcher (that you aren’t worried about accidentally dyeing!)— pour a small amount of dye into it, and then fill the rest with hot water.
Step 3 — This is going to be your least saturated coat, and also the largest coat. Pour the mixture in the center of the blanket and let it spread.

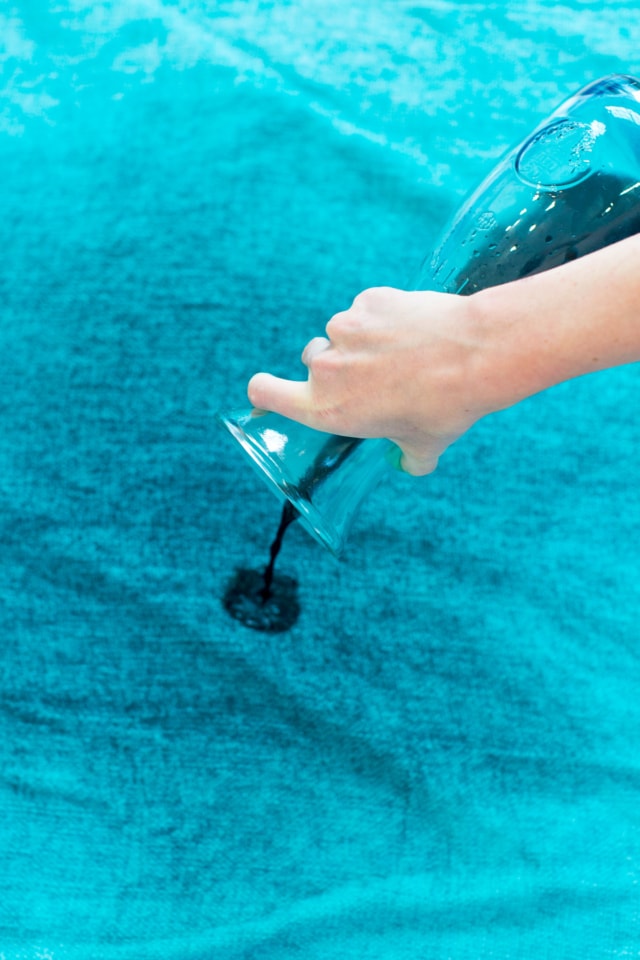
Step 4 — Prepare a second pitcher with slightly less water that’s a bit more saturated, and pour it onto the blanket in splotches.
Step 5 — Lastly, make a small pitcher of highly saturated liquid dye. And use it for fun splatter accents on the blanket by holding the pitcher up higher to create a controlled splatter effect.
I liked the idea of taking it a step further to mix lighter splatters on top of the darker dye. So I mixed mint green fabric paint with a bit of water to create an additional effect on top of the other colors.
Step 6 — Let the blanket with dye dry thoroughly instead of rinsing it with water quickly. The chenille fabric takes quite a bit more time to absorb the color than cotton did.
When it’s fully dried and needs a final rinse from the extra dye, pick the blanket it up from the very center and let it drape.
Instead of fully submerging the entire blanket in water, only rinse the areas in the center with the dye so that the color doesn’t bleed onto the pure white portions.
Once well rinsed, dry it in the dryer or on a clothesline in hot weather to fully set the color.
Wine Pairing Ideas for A Picnic
Instead of packing fussy food items, we went with simple pairings that fit the season and the wines.
You can get more inspiration for yummy pairings for just about any occasion with Chardonnay and Red Blend here.
As for our tastes, we decided on fresh dates, dried apricot, grapes, blueberry marbled cheese, and an assortment of crackers.
Naturally, Jared had to go big by requesting a full on deli sandwich.
We took along our DIY Marble Hexagon Tiles as our servingware and plateware.
But I also learned a long time ago to let him roll with whatever he wants to eat to keep him happy, ha!
Now for the important part: making things comfortable.
I decided to take a long a few checkered throw pillows for lounging, and of course, the watercolor throw blanket.
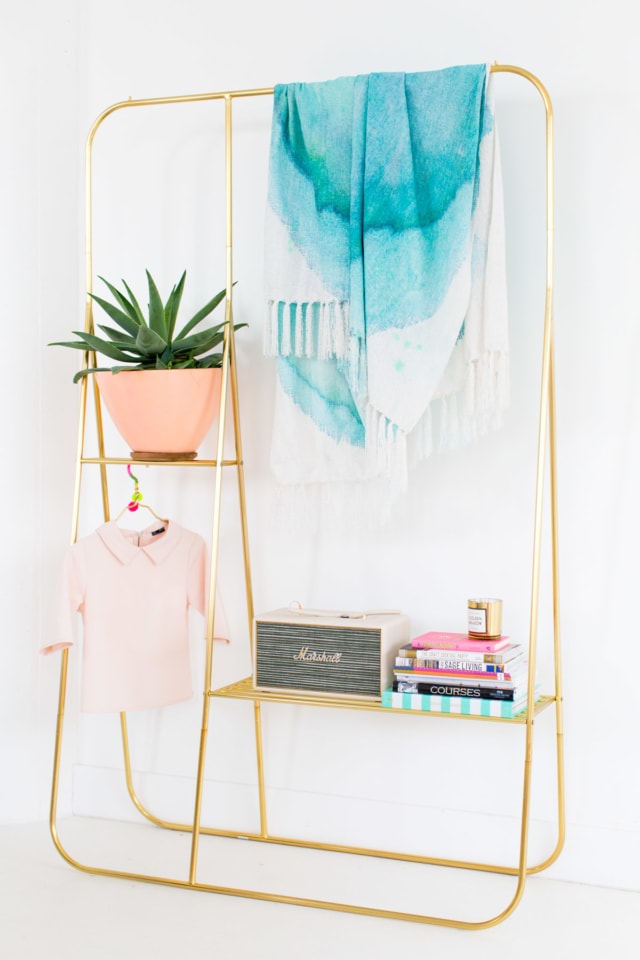
And whenever this blanket isn’t in use, simply display it as a piece of art over the DIY Minimal Beaded Blanket Holder.
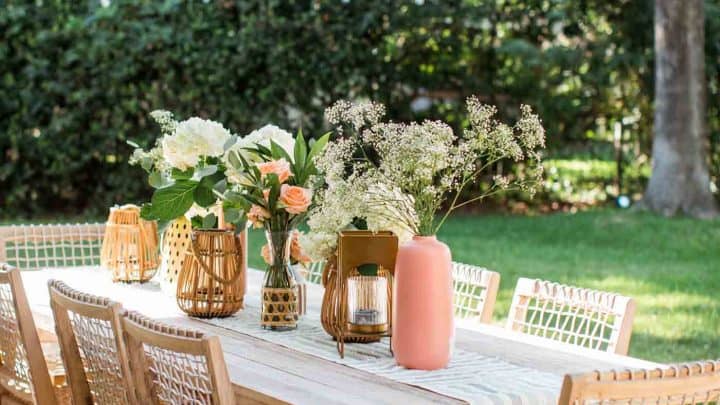
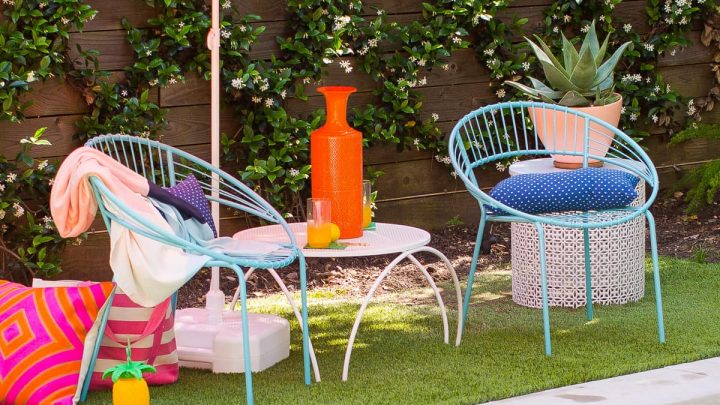
More Outdoor Decor DIY’s
I have to say, I love the way it turned out! What do you guys think? We’d love to know your favorite fall wine pairings!
In case you’re looking for more outdoor decor DIYs, here are a few of my favorites —
- Our Tiled Backyard Patio Before & After
- Why you should use limewash paint on brick
- An Easy Succulent Wall Planter – DIY Vertical Garden
- Garden Stones – DIY Faux Grass Decorative Stepping Stones

DIY Watercolor Throw Blanket
Equipment
- Paintbrush
Materials
- 1 throw blanket cotton is easiest to dye
- 1 Rit Dye in the color of your choice
- 3 pitcher for water
- 1 fabric paint optional for added pops of color
Instructions
- Pour hot water onto the center of the blanket in whatever size watercolor circle you’re hoping to make.Less is more because the fabric will absorb water past just where you’ve poured. Using plain water first will help the fabric take to the color.
- Pitcher 1 - Lightly Saturated: In a glass or plastic pitcherpour a small amount of dye into it. Then, fill the rest with hot water. This is going to be your least saturated coat, and also the largest coat. Pour the mixture in the center of the blanket and let it spread.
- Pitcher 2 - Slightly Saturated: Prepare a second pitcher with slightly less water that’s a bit more saturated, and pour it onto the blanket in splotches.
- Pitcher 3 - Super Saturated: Make a small pitcher of highly saturated liquid dye. And use it for fun splatter accents on the blanket by holding the pitcher up higher to create a controlled splatter effect.
- Let the blanket with dye dry thoroughly instead of rinsing it with water quickly. The chenille fabric takes quite a bit more time to absorb the color than cotton did.
- When it’s fully dried and needs a final rinse from the extra dye, pick the blanket it up from the very center and let it drape.Instead of fully submerging the entire blanket in water, only rinse the areas in the center with the dye so that the color doesn’t bleed onto the pure white portions.
- Once well rinsed, dry it in the dryer or on a clothesline in hot weather to fully set the color.
Notes

Don’t forget to share your DIY Watercolor Throw Blanket with us on Instagram using the hashtag #sugarandclothloves. We always love seeing all of your creations!
More Fun Outdoor DIY's


Please note that we may earn a commission for some of the above affiliate links. However, products featured are independently selected and personally well-loved by us!
This post is amazing, thanks for sharing those great tips with us!
You’re welcome!
very goood
Oh my goodness, this would be so cute for a date with my bf. Thanks so much!
yess, it so would be perfect for a date night! So glad you like it Alessandra! xoxo
Where was the gold rack from?
Hi Martha, the gold rack is from Urban Outfitters a while back. xoxo
Nice picnic arrangement
Wonderful! I like it! I just need a blanket now to try it!
So glad you like the DIY, Miriam!
oo nice I should try this with pink :)
xo,
http://www.saharacouture.com
It would look so cute in pink! Can’t wait to see your version :)
love the blanket and have to know where that gold wardrobe rack is from. my girls room needs one!
Urban Outfitters a while back :) The gold is sold out, but they have a black and white here: http://rstyle.me/n/bzkweznjn6
This is so cute! I will definitely have to give it a go. It’s starting to get really cold where i am and i can think of nothing lovelier than snuggling up under this.
How fun! Still about 90 degrees here in Houston, ha!
Oh my lord, it is freezing here in Missouri. It snowed the other day!
so adorable!
Thank you, Edith!
I’m totally going to make this blanket! Never tried the Avant wines before, but that bottle definitely makes me want to try it out too lol
We’re definitely partial to a pretty bottle, but it was delicious!
Love this shoot!
Thanks, Morgan! xo