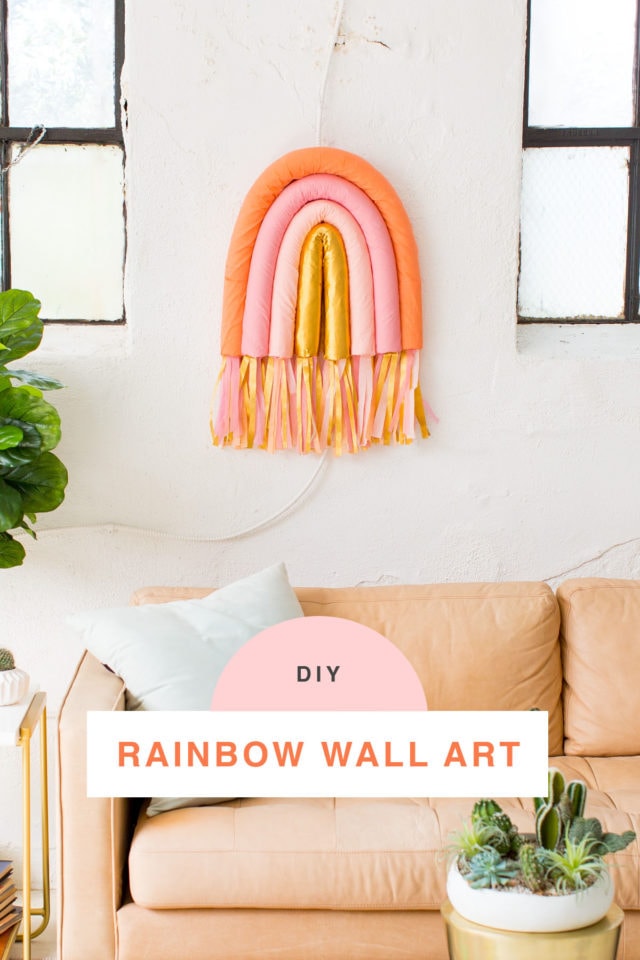
DIY Rainbow Art Wall Hanging
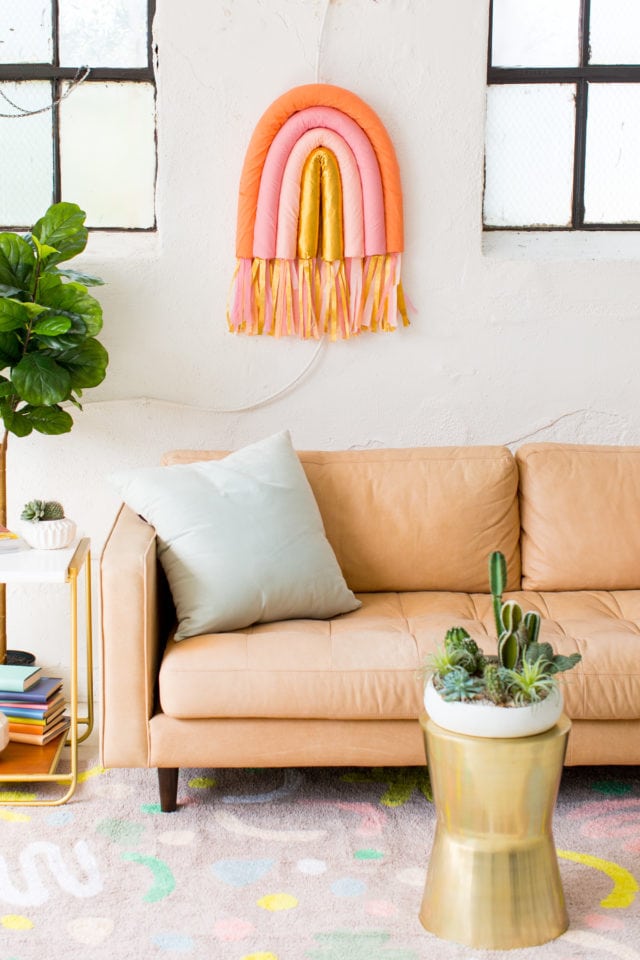
Have a wall that needs some cheer? This DIY Rainbow Art Wall Hanging is perfect for adding a little color.
You may have noticed we have a certain thing for color… and rainbows… and unicorns.
It’s likely you’ve seen our Rainbow DIY Taper Candle Holder idea, so you already know we’re addicted to rainbows.
Okay, so we’ll leave unicorns out of this DIY for now…
But we have combined some surprising DIY supplies to make very budget-friendly DIY Rainbow Art.
Any guesses?!
We bet you wouldn’t have thought that pool noodles would make for chic art in your home.
But we think this proves otherwise.
Don’t you think?
We used colorful crepe paper, a lot of hot glue, and a little bending to create this fun and modern DIY Rainbow Wall Art by adding some colorful crepe paper.
It sounds a little crazy, but we pinky promise you’ll love it!
P.S. Slow and steady wins the race on this one.
It may take a little longer to make sure your rainbow decor looks nice, but all eyes will be on it once it’s complete!
Materials and Tools Needed to Make a DIY Rainbow Wall Art Hanging
Poster board — We used a similar single sheet in blush pink from our local craft store!
Pool noodles — You can find pool noodles anywhere, but we’ve found them the cheapest at the Dollar Store.
Steps on How to Make DIY Rainbow Wall Art Hanging
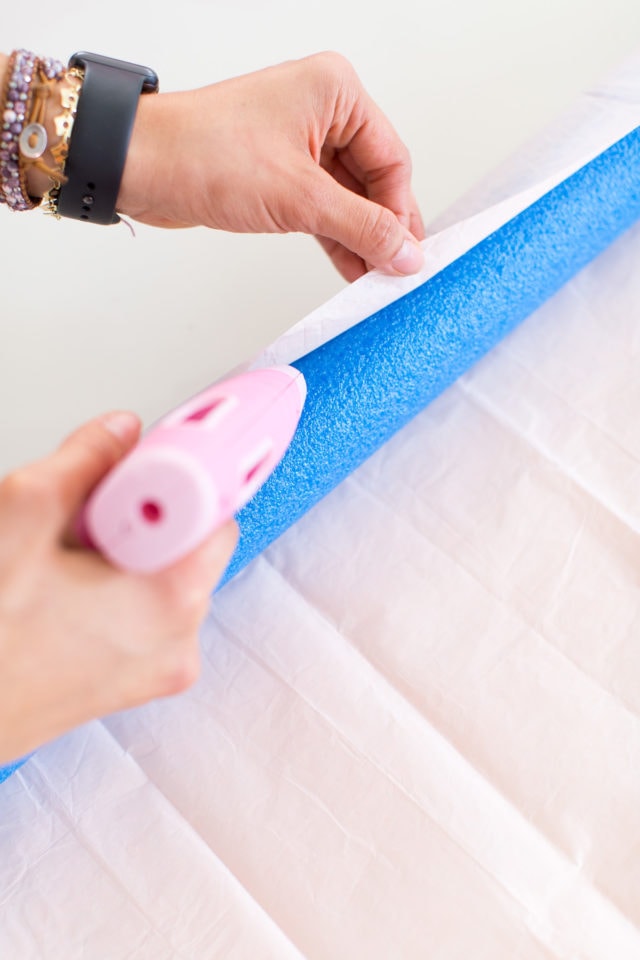
Step 1 — Start off with the biggest pool noodle piece and your desired color of crepe paper.
Take your pool noodle and wrap it in the crepe paper and seal it in place with hot glue little by little.
Make sure to use crepe paper and not regular tissue paper, as crepe paper has a bit of a stretch to it that will be essential when forming your rainbow!
Cover your pool noodle completely with your paper and glue it closed.
Be sure to fold in the sides to cover the bottoms of your noodles.

Step 2 — Now, gently fold your pool noodle in half and create your desired rainbow shape to know how big to cut the cardboard piece as a backing.
Glue the pool noodle down on your poster board to begin shaping your rainbow.
Step 3 — Before you begin wrapping your other noodles; fold your next noodle and nest it inside your first rainbow stripe.
Cut the noodle with scissors to fit into your first rainbow piece.
And repeat with all of your noodles in order to achieve the correct lengths to form your rainbow.
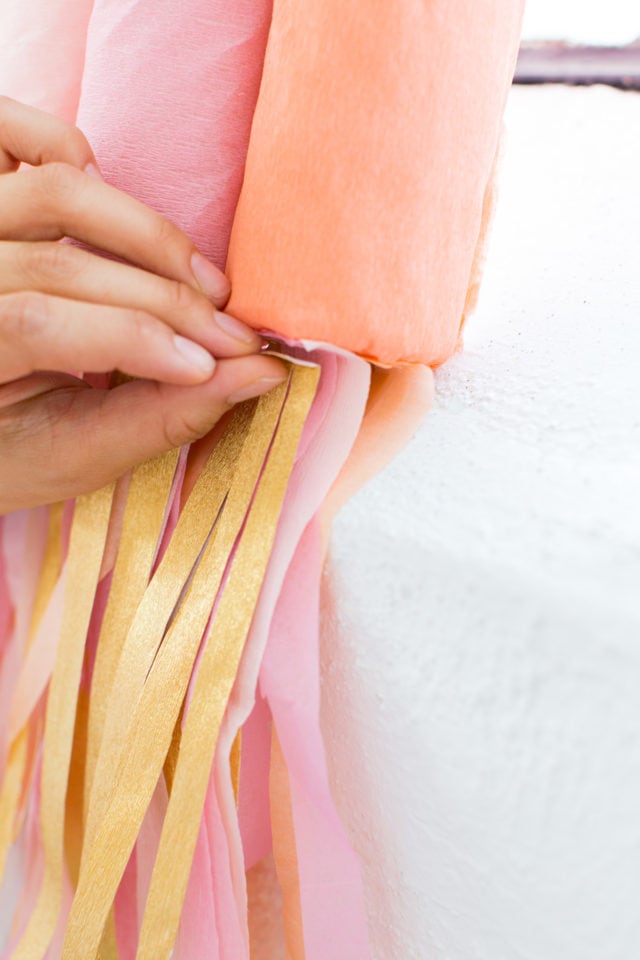
Step 4 — Once all of your pool noodles have been cut to their correct lengths, finish wrapping each in your desired color and hot glue them down one by one until you glue down your final noodle and essentially the middle of your rainbow.
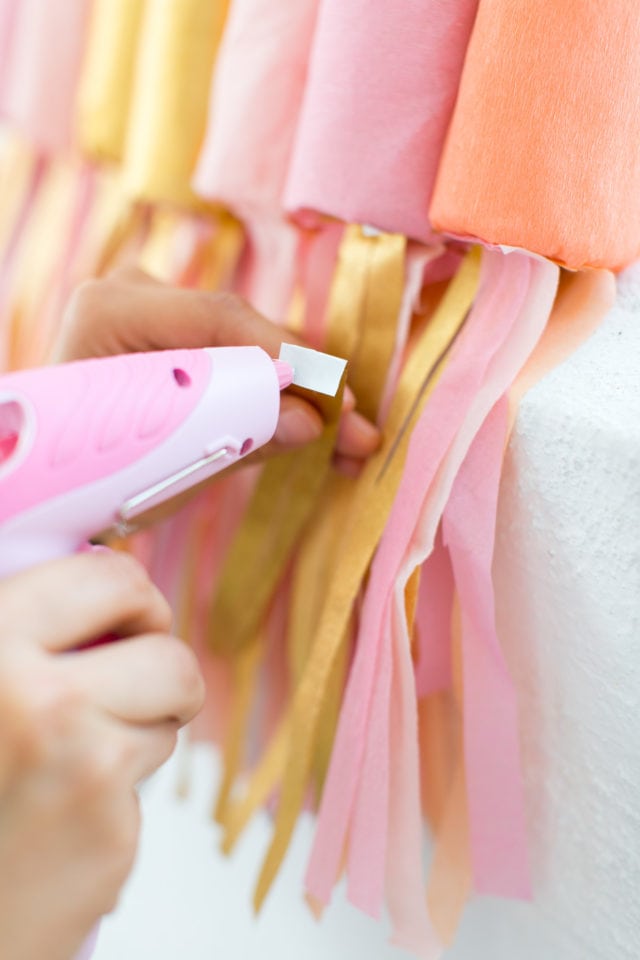
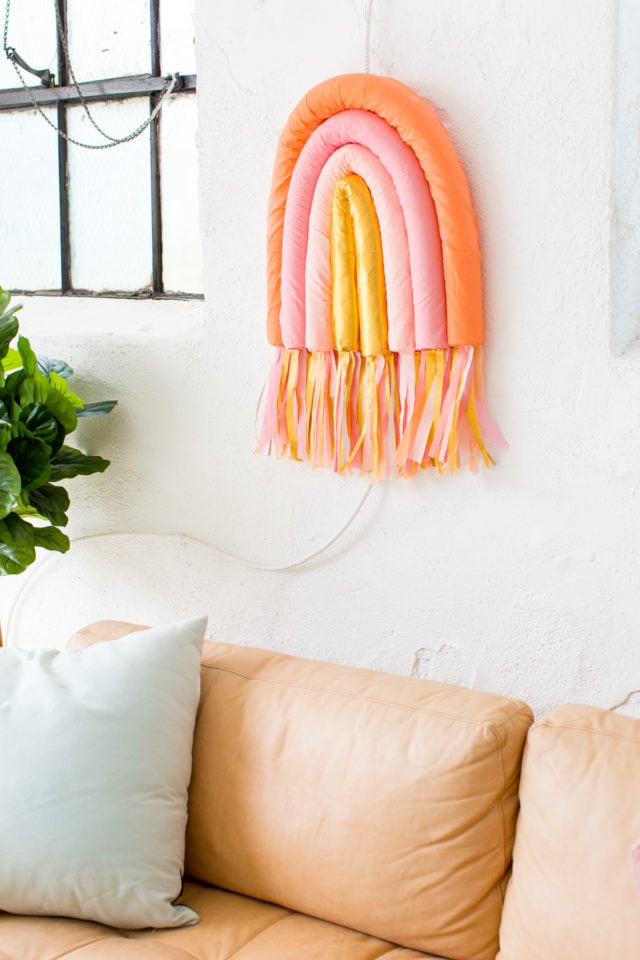
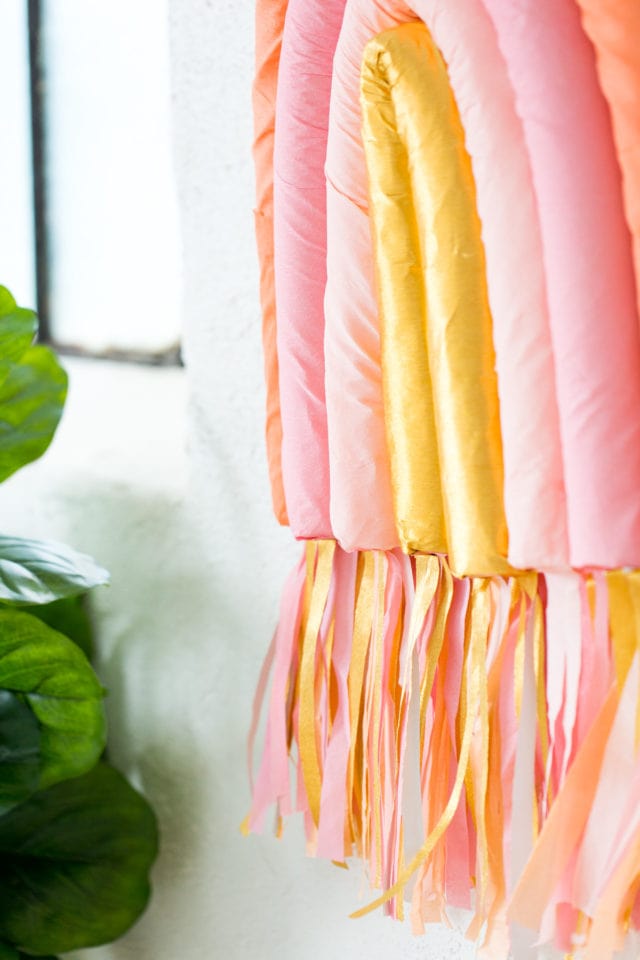
Step 5 — To give the rainbow some life, we added fringe at the bottom because… who doesn’t love fringe?
This DIY fringed mirror wall hanging proves it.
So take the same colors you used to create your rainbow and cut long rectangles.
Step 6 — Once you have the long strips cut out, fold a small piece at the top to use to glue to the bottom of your rainbow.
Stack the pieces of fringe as desired until you have a full-fledged fringed rainbow.
Now say that five times fast… kidding!
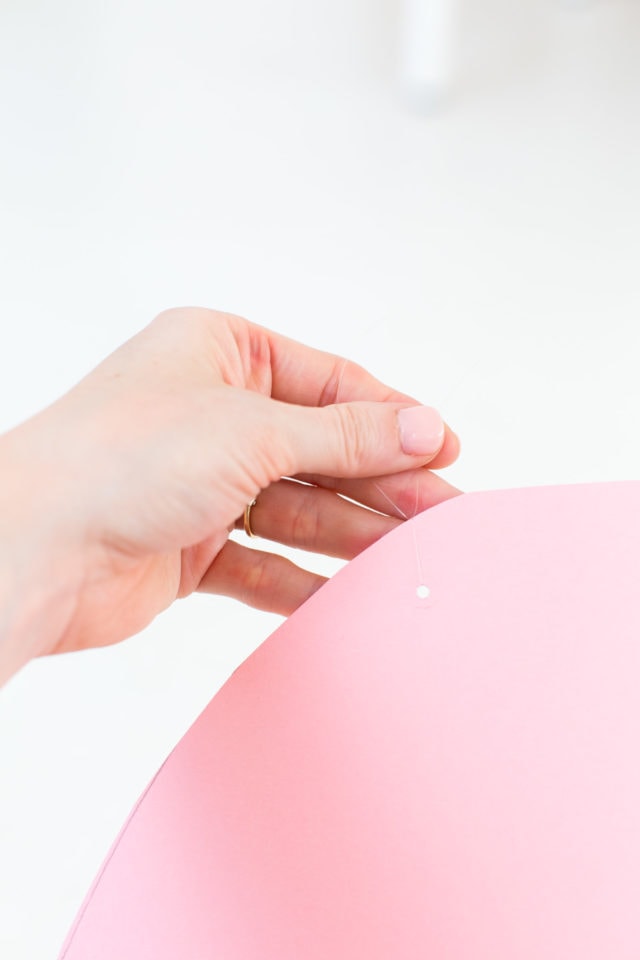
Step 7 — The final step is to add some string to the back of your rainbow to hang it up!
We used fishing wire for a seamless look, but you can use any string you’d like by simply hot gluing in place.
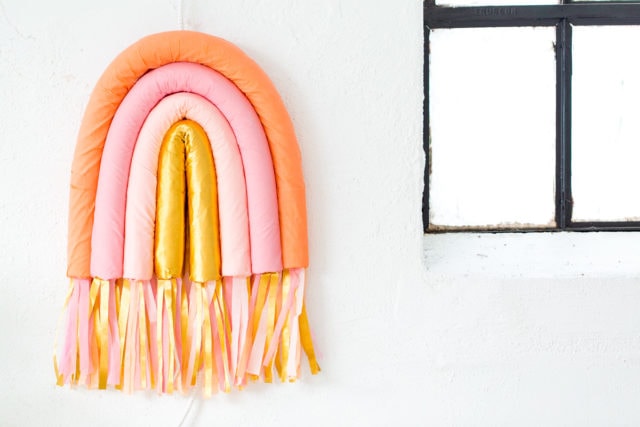
Just like that, you’ve got a masterpiece DIY rainbow to show off!
More DIY Projects You May Like
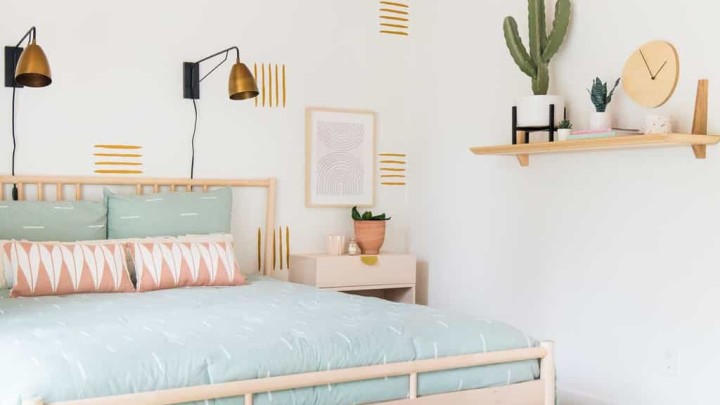
With this project, a few pool noodles and some string are all you need to add a touch of whimsy and color to your blank walls.
It would look great in a rainbow theme nursery or a little girl’s bedroom.
This budget-friendly DIY rainbow art wall hanging is easy to make and sure to bring a smile to your face every time you see it.
So gather up those pool noodles and get ready to add some rainbow cheer to your home décor!
- DIY Minimalist Flower Wall Hang
- Modern DIY Dreamcatcher
- How To Make A DIY Hanging Flower Installation
- How to Make a DIY Watercolor Wall Art – Watercolor Prints

DIY Rainbow Art Wall Hanging
Equipment
- Scissors
- Hot glue gun and glue sticks
Materials
- 4 pool noodle
- 1 poster board
- Colorful crepe paper
- String
Instructions
- Start off with the biggest pool noodle piece and your desired color of crepe paper. Take your pool noodle and wrap it in the crepe paper and seal it in place with hot glue little by little. Make sure to use crepe paper and not regular tissue paper as crepe paper has a bit of a stretch to it that will be essential when forming your rainbow! Cover your pool noodle completely with your paper and glue closed. Be sure to fold in the sides to cover the bottoms of your noodles.
- Gently fold your pool noodle in half and create your desired rainbow shape to know how big to cut the cardboard piece as a backing. Glue the pool noodle down on your poster board to begin shaping your rainbow.
- Before you begin wrapping your other noodles: fold your next noodle and nest it inside your first rainbow stripe. Cut the noodle with scissors to fit into your first rainbow piece and repeat with all of your noodles in order to achieve the correct lengths to form your rainbow
- Once all of your pool noodles have been cut to their correct lengths, finish wrapping each in your desired color and hot glue them down one by one until you glue down your final noodle and essentially the middle of your rainbow.
- To give the rainbow some life we added fringe at the bottom. So take the same colors you used to create your rainbow and cut long rectangles.
- Once you have the long strips cut out, fold a small piece at the top to use to glue to the bottom of your rainbow. Stack the pieces of fringe as desired until you have a full-fledged fringed rainbow.
- The final step is to add some string to the back of your rainbow to hang it up! We used fishing wire for a seamless look but you can use any string you’d like by simply hot gluing in place.

Don’t forget to share your DIY rainbow art wall with us on Instagram using the hashtag #sugarandclothloves. We always love seeing all of your creations! Looking for more interior design inspiration? You can find them all of our home decor tutorials and ideas right here!
Easy Wall Art Projects to Try at Home


Please note that we may earn a commission for some of the above affiliate links. However, products featured are independently selected and personally well-loved by us!
How did you come up with this? I never can do that. It’s such a simple idea but absolutely lovely. Thanks for sharing <3
This is so creative!! Can’t believe that they are made out of pool noodles!!
<3 A N D R E A | THEBEAUTYDOJO.COM
Crafting with pool noodles is the best! Love this rainbow so much.
Thank you so much ! Aren’t they the best? Super inexpensive and so versatile.
This is darling! I could see it as great party decor as well!
Thank you! Absolutely, and it can be any color so it can match any theme !